Showing posts with label ribbon. Show all posts

Friday, September 15, 2023

Jane Inspired Tag!

 Hello, Lyneen here with my first design team post.  I fell in love with the two Words by Jane stamp plates, inspired by the works of Jane Austen. My plan for this and my next few posts is to do a series of Jane projects!


Today I have a Jane Austen inspired tag.


To create the tag, I used the following stamps and stencils from Blank Page Muse:


Visit my Blog HERE for a detailed tutorial!

Sunday, July 10, 2022

Beautiful Daisies to Brighten Your Day

 Hi everyone, Steph Ackerman here!

 Today I am using some amazing stamps from Blank Page Muse.


Stamps: 


Stamp the image on white cardstock and die cut.
Mat with a larger die.
Create and assemble card, adding ribbon between the layers.
Stamp and add the sentiment

Visit my blog for more inspiration!

Thanks for stopping by.

Steph

Looking for more Inspiration? Click the links below!
The Blank Page Muse Shop https://blankpagemuse.com/

Save 15% of your Blank Page Muse orders with discount code:  BPMSteph

Monday, February 29, 2016

Spring Gift Box


Chris here and today I am sharing this cute little gift box from Sin City Stamps. I started of with the gift box. 
I stamped images from Terri Sproul's Wish stamp set and Anime Fairies 2 Stamp Set with Tim Holtz Distress Ink.

I folded the card along the fold lines and folded the gift box, gluing along all the tabs except 1 (to leave room for filling :D) I topped off the gift box with some Sin City Stamps Ribbons and a Flat back embellishment.  You can add any sentiment you would like to finish it off!  Happy Creating!

Monday, January 4, 2016

How to dress up your Die Cuts


Hi Chris here and today I am sharing this tag I created using some these amazing die cuts from Sin City Stamps.


Supplies needed for this project include:
Sin City Stamps Supplies
Anime Fairies 2 Stamp Set
Pattern 2 Stencil 
Around the House Die Cuts
Light Pink Sheer Ribbon
Mixed Flatback Embellishments (little flower)

Other Supplies: Pacon Mixed  Media Paper, Tim Holtz Sizzix #8 Tag, Tim Holtz Distress Ink- Victorian Velvet, Core'dinations Tim Holtz Card Stock, Liquid Pearls, Gesso, Gold Sharpie, Pebbles-accent greeting, ColourArte-Twinkling H2Os - Black Cherry, Beacon Fabric Tac, Toule Netting


After die cutting my tag from the mixed media paper, I gently inked my tag using my Pattern 2 Stencil .


I then stamped over the stencil using my Anime Fairies 2 Stamp Set. I then matted my tag on cardstock and set aside while I dressed up my die cut.


When I started, my background of the die cut was blue like this 


I added Gesso to the blue die cut to make the chair white.  I then added a color wash using ColourArte-Twinkling H2Os - Black Cherry.  After drying,  I  added the overlay.  


To dress up the die cut even more I added some "rivets" on the arm of my chair using a gold sharpie.  I then added some "buttons" to the chair back using liquid pearls.  


I then added my chair to my tag and topped my tag off with a double bow (a smaller bow placed on top of the larger netting bow), and added a Mixed Flatback Embellishments (little flower) on top of the double bow. I added a sticker quick greeting and viola!  all done. 

Monday, July 20, 2015

Love Anniversary Card


Hi!  Chris here sharing this sweet LOVE card.  I LOVE that this card mixes 3 different stamp sets and yet they all look like they belong together!  So let us get started.

Supplies:
Sin City Stamps: Art Journaling 2 (script, love)
                          Natural Beauty (flower)
                          Classic Spark (diamond background)
Paper: Pacon MultiMedia Paper
          Core'dinations Cardstock
Ink: Ranger -  Archival (Jet Black)
                  - Tim Holtz Distress Ink - Old paper, Spiced Marmalade, Rusty Hinge
                  - Tim Holtz Distress Markers - Shabby Shutters, Black Soot, Tea Dye, Iced Spruce,     Wild Honey
Water Brush
Ribbon -  Ranger Tim Holtz Crinkle Ribbon

To start off I stamped my background piece using the Script stamps from the Art Journaling 2 collection and the Old Paper Distress Ink.  The stamp wasn't quite large enough for my background piece so I just overlapped the stamping on the edges.

I then stamped the script using the Classic Spark Diamond background using my Jet Black Archival Ink.  I then matted the stamped background onto black cardstock and set it aside. (sorry I did not take a picture at this stage)

My next stamp was to stamp this amazing flower from the Natural Beauty collection using Archival Ink.  Make sure you use a waterproof ink at this step since we will be coloring this in with a water brush.

I started by coloring in the leaves using the Shabby Shutters Distress marker (see the picture on the left side) I then added some depth to my coloring by adding a darker marker - the Iced Spruce Marker. I gently brushed over the coloring with a water brush to help bend the inks a bit.

 For the Flower I started by coloring in the center with my Tea Dye marker. I then added  some touches of Wild Honey Marker to the flower.  I then stamped my Spiced Marmalade and Rusty Hinge ink pads onto my Craft sheet.


I used my water brush to pick up those colors and shading to my flower. You can see the shading below.


I then matted my completed flower onto card stock and added it to my background piece. 

To create the matching ribbon I started by adding some water to my leftover ink on my Kraft sheet and mixing it all together. 


I then spritzed my white crinkle ribbon with water and then swirled it around in the ink.


This is what my ribbon looked like after dying!  And since I used the same colors I used for stamping it coordinated perfectly!


To add my sentiment I used the Things I Love stamp from the Art Journaling 2 Collection.  Since I only needed the LOVE portion of the stamp I used my Black Soot Distress marker to ink only that word .  


I then matted my sentiment and attached it and the ribbon to my card!  I hope you enjoyed my project and decide to give at least one of the techniques a try!  


Wednesday, May 7, 2014

Handmade Birthday Card by Linda Hess

A friend of mine recently said that the only thing she would like for her birthday was a mailbox full of handmade cards, so that she would receive something besides bills.  Be careful what you wish for (hehe)...off to the studio I go!

First thing I pulled out was Creative PaperClay.  Those who know me realize that this is a "clay" outside my normal realm, but the time I spent on the Creative Paperclay design team was an eye opening experience into what can be done with this product.  For this project, it should be the perfect base for my card.  I conditioned a bit by squeezing it in my hands and then rolled it flat in my pasta machine.  (NOTE:  for those of you  who do not own a pasta machine for clay or might even use your pasta machine for...well, pasta...you may roll the clay flat with a rolling pin or acrylic rod.  An even thickness can be obtained by rolling between 2 pieces of cardboard or a stack of playing cards...you get the idea)

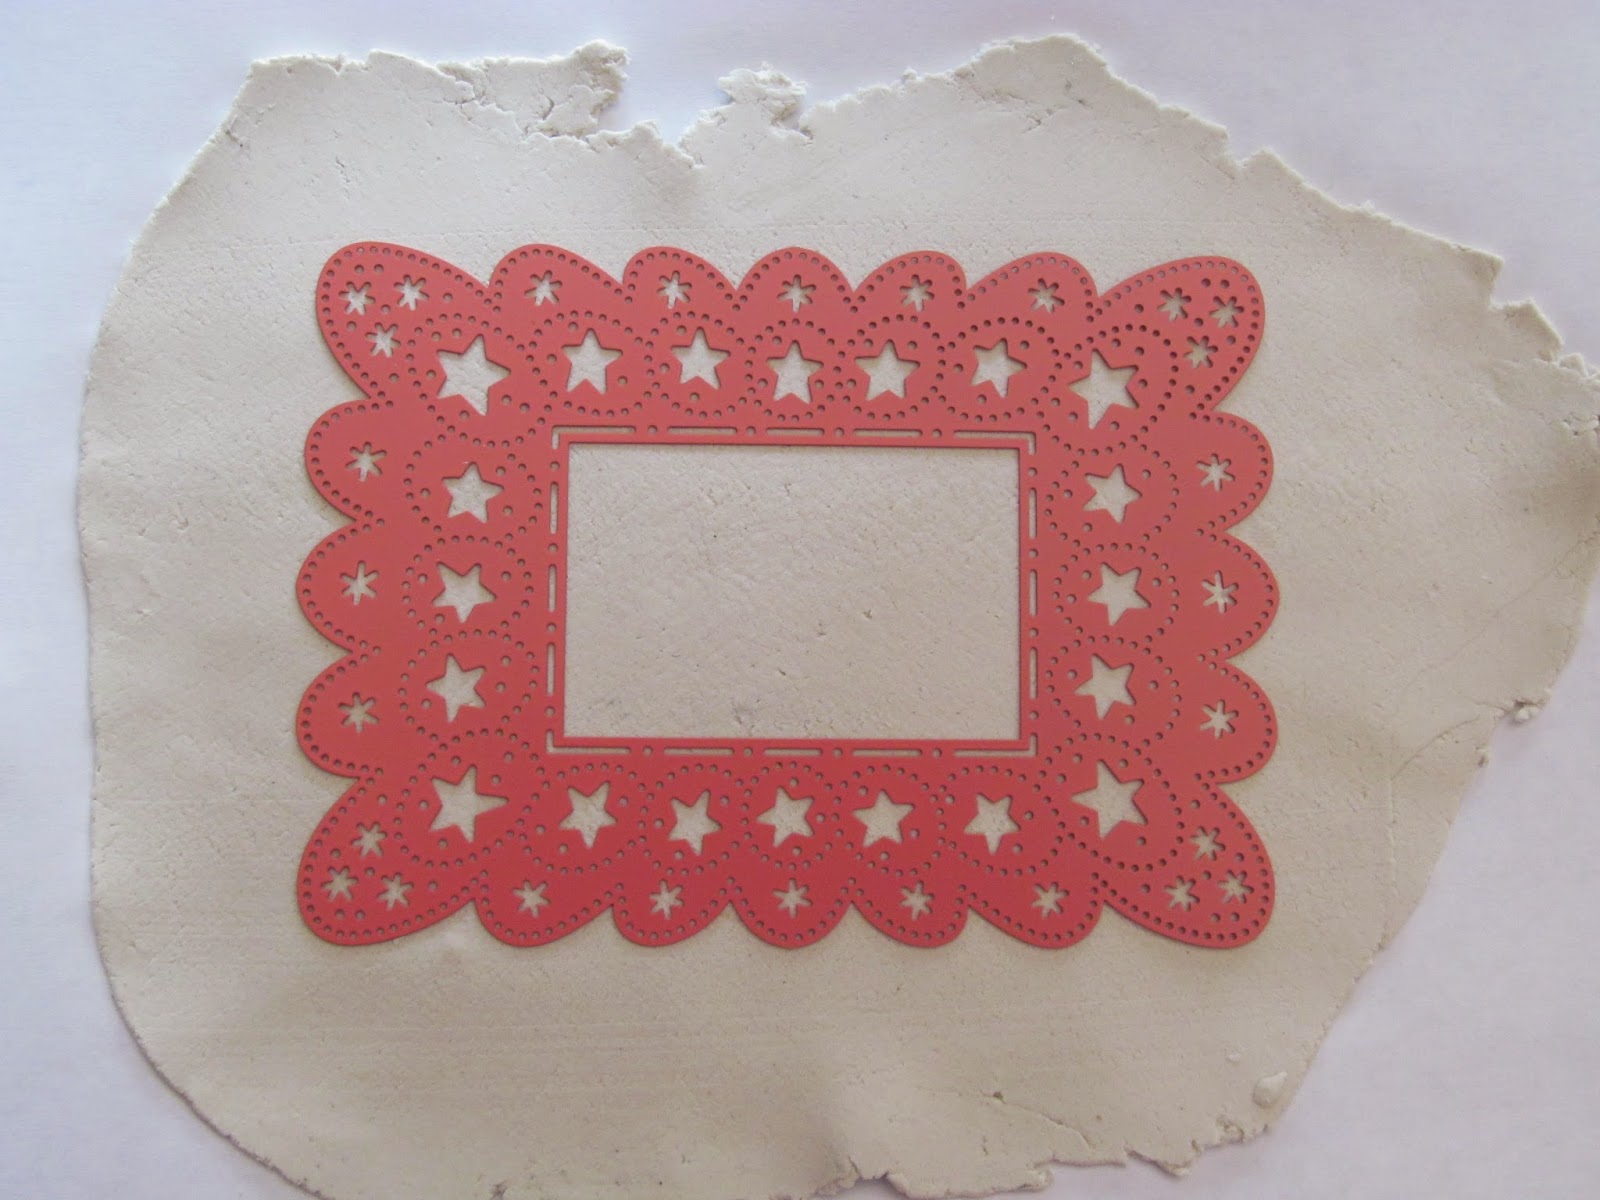
Once rolled flat I placed the clay on a sheet of paper to work on the design.  In our box of goodies for this month we received a metal template (Ornare Vellum) from Ecstacy Crafts (www.ecstacycrafts.com).  I placed it on top of the sheet of clay and then rolled over it with an acrylic roller to press the clay into the openings. 
Once I had the clay impressed with the template design I used an exacto knife to cut around the edges.
I opened the tiny pinholes in the template using a turkey lacer (NOTE: a beading pin or sewing needle will also work).  This will take some time...you may have to give your hand a stretch every so often. 

I brushed over the other openings using Pearl Ex powders in multiple colors.

Then carefully, slowly I peeled the PaperClay away from the template.  At first it came away easily, but then I ran into a glitch.  I started peeling too quickly and of course the clay ripped :-(  They are pretty scraps, but not exactly what I want to send to a friend. 
Back to the drawing board.

This time I powdered the surface with cornstarch before repeating the above steps.  With luck the cornstarch acts as a release and the design peels easily away from the template.

Woohoo!  The template came up nice and clean.  Only "drawback" (if there is one) is that you need to hold the template in place as you go around cutting and detailing.  Otherwise the design will move.

After cutting and piercing, I brushed the surface lightly with rubbing alcohol before applying Pearl Ex powders.  During the process of powdering (with cornstarch) and then detailing, etc. Creative PaperClay will begin to dry out.  The addition of rubbing alcohol re-wets the surface and helps the Pearl Ex to adhere. 

Now to unveil....WHEW! 
Obviously I used a bit too much rubbing alcohol in the one corner, but it can be covered with embellishments :-)  Brush around the edges with rubbing alcohol to clean up any roughness.

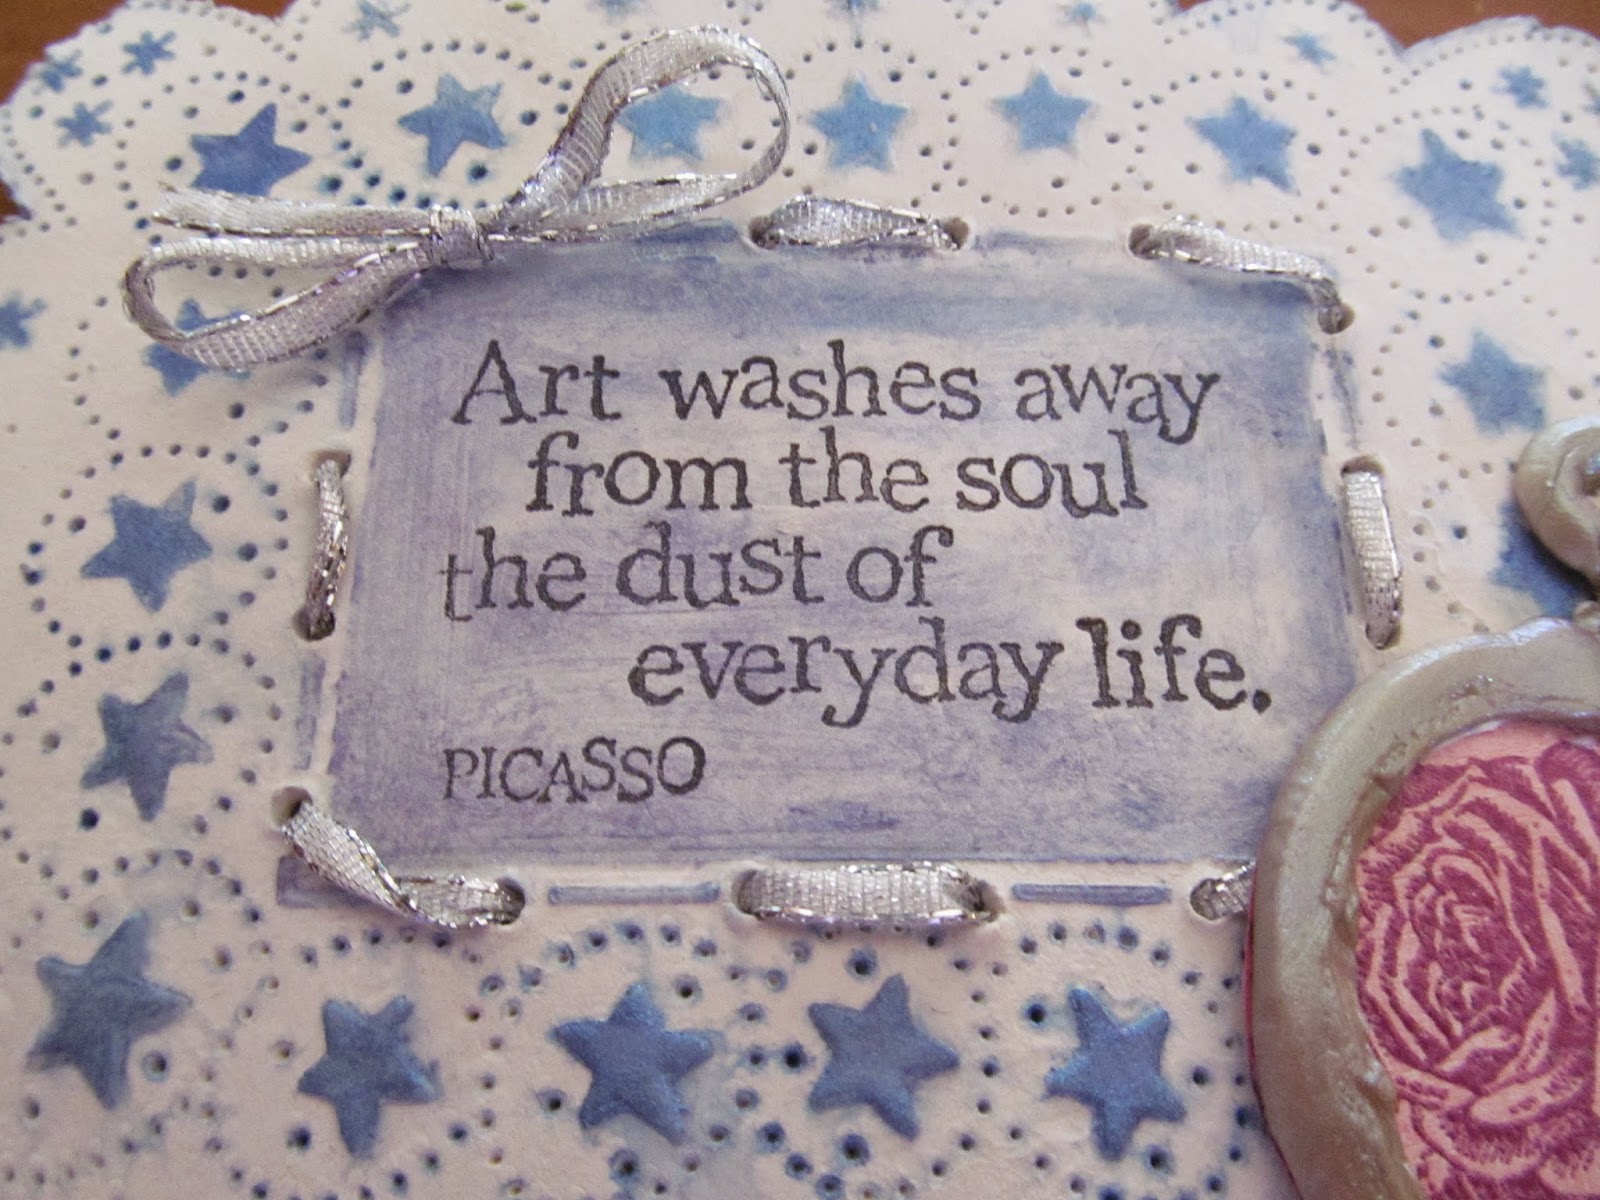
The center is stamped with one of my favorite sayings using ColorBox archival ink in "Wicked Black".  Holes are opened slightly around center image using a turkey lacer.

From my stash of paper I found a soft pink.  It was stamped using the "Romantic Background" unmounted stamp from Sin City Stamps and VersaMark ink, sprinkled with Recollections "plum" embossing powder, and heat to set.  Then I cut out the image.


Roses are placed in corners to cover "boo-boos".  For now they are only placed.  Once the Creative Paperclay dries they will be glued in place using "The Ultimate" glue from Crafter's Pick (my favorite glue).

Being an impatient sort when it comes to projects, I placed the card in the oven and baked at 275 degrees for about 15-20 minutes.  This speeds the drying process, so that I can continue rather than wait (the little kid in me rearing her ugly head!).  (PLEASE NOTE:  Creative PaperClay will draw up and curl slightly if "forced" to dry.  A weight of some sort might be desired on top of the image will keep it flattened).

Now to finish the embellishments.  Looking at the rubber stamped images I realized that something else was needed....maybe a little dimension.  I pulled out the mold that I made a few projects ago ("New Wave "Batik" canvas: Pt 2 [http://sincity-stamps.blogspot.com/2014/04/new-wave-batik-canvas-part-2.html]) and a little bit of polymer clay.  I pressed clay into the mold, shaved off the excess, and unmolded the watch. 
Using an exacto knife I cut out the center of the fob as well as the center of the watch (opening it up).  I brushed it with Pearl ex powder and baked it at 275 degrees for 15 minutes.  Once cooled, the "Romantic Background" image is cut to fit inside and glued in.  Gives the illusion of painted picture in a frame, don't you think??  (Please use your imagination here)
 
A silver ribbon highlights the rubber stamped center.  (Note: I used a wired ribbon to ease the threading process). 


The watch is glued into place (over the boo-boo).  A tiny charm designates this card as "hand made" just as my friend requested :-)

Now to create an envelope....but that will be a demo for another day.  See you soon!


Wednesday, February 5, 2014

Box Full Of Love

I am so excited to be embarking on a new creative journey as a member of the Sin City Stamps Design Team.  I hope you enjoy the projects that I bring to you, a mix of scrapbooking, stamping, claying, and much more.  Come along as I experiment and create with new products from Sin City Stamps (www.sincitystamps.com) & Frog Dog Studios (www.frogdogstudio.com)

I love little treasure boxes.  I found a small cardboard box (3"x3"x2") that I decided to deconstruct to create a new, better version.   With that thought in mind I gathered my materials:
1 sheet  "Music Notes" by Recollections Scrapbook paper
1 sheet textured cardstock
glue stick, pencil, & scissors
GlueDots

Trace the opened box template onto "Music Notes" paper and cut out carefully.  Cover entire back of cutout with glue stick and attach to the back of textured cardstock.  Press together adding more glue as needed.  (Please Note: the music notes should BACK to the texture)  Score fold lines into the textured side of cutout and begin to fold box.  Cuts for flaps can be made using an exacto knife OR the scissors (I find the Exacto knife to make cleaner lines).  Fold box together.  Use GlueDots to adhere flaps. 
Now you are ready to move on...

Frog Dog Studio was gracious enough to supply design team members with the February "Mixed Media Kit".  I choose the VersaMark watermark stamp pad, the Romantic Background stamp(from Sin City Stamps), and the Magenta PanPastel.    The VersaMark ink is wonderful to use with embossing powders, so I tried 2 variations: one stamped directly onto the cardstock and the other colored (first) with Magenta Pan Pastel, then stamped.  I was curious what would happen if I stamped the ink without any embossing powder and was pleased to see a beautiful, delicate image emerge!
(Note: The top image has Marcasite embossing powder applied, the middle has Pearlustre Amestyst [both by Stampendous], and the bottom image is the VersaMark all by itself). 

I used a decorative pair of scissors to cut the bottom image out.  Placed against the music box the image needed a little pop.  A bit of Magenta on a Sofft Art Sponge smudged along the edge was the perfect touch.
 

Now anyone who knows me can see that this is a bit plain for my taste.  Time to add a bit of (what else??) polymer clay and create a little dimension.  I just happened to have the perfect flower on my clay table.  A few GlueDots to the back and it is attached.
Hmmmmm, still needs a little something.  Perhaps some ribbon....punch a few holes, weave the ribbon in and out
Maybe a button...
Final touch, a card is needed.  I chose a simple message from the Romantic/vintage Ephemers Sheet, roughed up the edges a bit with a Faber Castell black Gelatos and tucked it in behind the flower. 


Now to make a treat for inside,but that will have to be a project for another day :-)  Have a beautiful, creative day!

Copyright Text

Blank Page Muse 2018 Sin City Stamps 2013