Saturday, June 30, 2018

Which way to the beach?

Hello all.
It's the last day of June and but you still have time for the Let's go to the beach challenge this month.

 Stamps Used:
Flamingo Standing Face to Face by Pam Bray
Flip-flop Stamp by Pam Bray
Palm Tree from Mountain and Beaches set

Other Supplies Used:
White cardstock
Pattern paper
Markers
Jewel
Word sticker
Black and Pink ink

Find a beachy like  pattern paper and use a deckle frame die to cut out the paper. Attach it to the front of the card. Edge it with pink distress ink.
 Start out by stamping Flamingo stamp on pink pattern paper with black ink. Cut out one of the 2 flamingos from your stamped piece. It's nice you can decide which way you want your flamingo to face on the card and cut the one you want out. Then you have a extra one.
 Next stamp out the Palm tree on a scrap piece of white cardstock . Just color the leaves with  markers.
Cut this out.

Next glue the palm leaves on top of the flamingo's head. So it looks like the flamingo is wearing a headdress. Then of course it needs a jewel on it.


Stamp out the flip-flops and color them with markers the fussy cut them out.


Last,  grab a saying and add it to the front of the card.


Looking for more Inspiration? Click the links below! The Blank Page Muse Shop https://blankpagemuse.com/ FB Fan Page https://www.facebook.com/groups/bla... Instagram - Shop https://www.instagram.com/blankpage... Instagram - Blog https://www.instagram.com/blankpage... Twitter https://twitter.com/BlankPageMuse Pintrest https://www.pinterest.com/blankpage...


Tuesday, June 26, 2018

Soulful Dolls and Art Tags


Hi everyone,
We had our second Facebook Live video in our Fan Group.  This time we featured the new stamps from Cathy and Pam.  Cathy's Soulful Dolls Collection and Pam's Art Journaling and Mixed Media Set 1.  I created a couple projects using the new sets and showed a couple quick techniques too.

These tags were created using Pam's stamps.

There a tutorial on my blog detailing how I created these tags. 


This banner was made using Cathy's stamps.


I have a detailed blog post about how I created this banner too. 

There have been so many projects shared in our Facebook group.  I hope you join and are inspired to create your own pieces.  Don't forget to watch the video.

Jess


Cathy's Soulful dolls stamps can be found HERE in the Blank Page Muse shop.

Pam's Art Journaling and Mixed Media Set 1 stamps can be found HERE


Monday, June 25, 2018

Kick Back, It's Summer

"Hey, Let's go to the Beach!"
Well, that is our theme this month at Blank Page Muse.  So here is what I came up with using the new stamp set called Flamingo Dream   I love those little flip flops.  They are so useful for all things "Summer."  Wouldn't they be perfect on a scrapbook layout???

Here is my card, "Kick Back It's Summer"

 A Closer Look:

 Blank Page Muse Stamps: Tropical Dreams Stamp Set
http://blankpagemuse.com/tropical-dreams-flowers-flamingo-umbrella-beverage-cup-red-rubber-stamp-set-pam-bray-designs-pb008/

Other Supplies:
  • Pattern paper
  • Teal ink pad
  • Watercolor paints
  • Glitter glue
  • Chunky sand glitter
  • Baker's twine
  • Charm
  • 6x6" card base
For more inspiring paper-craft projects from the Design Team, be sure to
Follow us on Facebook.
Join the Blank Page Muse Fan Group. HERE
Find us on Pinterest
To see more of Karen's projects, visit her blog Art & Soul.


Come checkout the Blank Page Muse Creative Challenge.
This month's theme is "Let's go to the Beach." Create a new project following the theme and add it via the Inlinkz linky tool. There will be a random drawing prize for a Blank Page Muse Gift Certificate. You can find all the guidelines HERE.

Saturday, June 23, 2018

Fearless Journal Page


Hello everyone! 
Jenn here today to share with you this fun art journal page using many Blank Page Muse stamps!
This started out as a page that had blue ink spilled on it!

 It is amazing what you can create from an accident with some amazing stamps!


Blank Page Muse Stamps used:
(clicking will direct you to the online store)

Other Supplies:
Spray inks
Patterned stencil
Black Archival Ink pad
Clear embossing powder
Purple Archival Ink
Fuchsia translucent paint
White Gelli Pen
Fuchsia watercolor pencil
Embossing pen

  • Start with a blank journal page or like this one, an oops.. If you do not have an oops page like this just splatter some spray ink, spritz with water and move the page around to get the same result as a spill.
  • Use black archival ink to stamp patterns around. 
  • Add the script stamp randomly across the page.
  • Then stamp the dragonfly and coat with clear embossing powder and set with a heat tool. 
  • Use a watercolor pencil on the wings. This will make the dragonfly image pop!


All of the detail that is achieved from using multiple stamps is great!
  • Use a palette knife dipped into fuchsia acrylic paint to lightly drag on the page on each side. 
  • Use a patterned stencil and dab black ink through it on top of the fuchsia color. 
  • Finally add a few more of the round grunge stamps in purple inks here and there. 
  • As a finishing touch go around the stenciled circles with a white gel pen.
  • For the drips on top of the page use an embossing ink pen to draw them then coat with baked texture embossing powder and heat set with a heat tool.


Thanks so much for visiting the blog and viewing my post today!

Please Follow Blank Page Muse @

Until Next Time, Happy Creating!!
Jenn

Thursday, June 21, 2018

Mannequin, Clocks, & Roses Card

Hello BPM Fans,
Today's card has a stamped background, as well as, stamped embellishments.  The background was done simply in black & white. Black & white plus one additional color is a great choice for this style of genre.

The key to creating a layered effect is to use the technique called masking. Masking enables you to achieve the effect of one image behind another. Stamp the same image a second time on scratch paper and cut out. Place the mask over the first stamped image which serves to protect it and then stamp a design overlapping it. Part of the image will be on the mask and when removed, you reveal that one image appears behind the other creating a layered look. Take the plunge and create your own distressed vintage masterpiece.

Blank Page Muse Stamps:

http://blankpagemuse.com/birds-clocks-rubber-stamp-set/

http://blankpagemuse.com/mannequin-tags-2-rubber-stamp-set/

Other Supplies:
  • black ink pad
  • pink ink pad
  • sponge applicator
  • clear mounting block
  • paper roses
  • gems 
  • liquid adhesive
  • pearl dimensional paint
  • card base 5x7"
Directions:
1. Stamp the mannequin image and the set of wings onto white cardstock using black ink. Stamp the rose image twice onto white cardstock once using black ink and once using pink ink. Carefully, cut out all the images and set aside.


2.  Tear the edges of the rose image and apply pink ink.  Mount the pink rose over the intact black image.  Apply pink ink around the edges of the mannequin using a sponge applicator.

3. Use black ink to stamp 3 different size clocks directly onto the distressed card base. Make masks of the clocks on scratch paper, cut them out, and place them over the clock. Next, stamp the script image overlapping the mask to fill in the open spaces between clocks.

(Practice assembling the cluster of elements but do not adhere them yet.)

4. Tie a faux bow with pink organza ribbon and attach it vertically on the left side of the rose embellishment adhering the tails to the backside.  Add 2 clocks behind the stamped embellishments and assemble the cluster of elements but do not adhere them.  Add small accent words to the background by stamping them with black ink.


5. Adhere all the main elements in the center of the card to create a cluster. All elements should be touching and/or overlapping to create interest and added depth.  Embellish with paper roses (1 large & 3 small) and a selection of small daisies. Adhere gems to the centers of the daisies. Use dimensional paint to create faux pearls and add a generous scattering of random clustered dots.


A Closer Look:


To purchase the stamps to complete this project, visit www.blankpagemuse.com

Apply coupon code
"Summer2018Karen"
during checkout to Save 15%
off each stamp from Blank Page Muse.
Valid until August 31, 2018 (midnight - Pacific Time)

For more inspiring paper-craft projects from the Design Team, be sure to visit us at
The Blank Page Muse Blog

Follow us on Facebook.
Join the Blank Page Muse Fan Group. HERE
Learn more about our designer Karen at Art & Soul.

Join Us in the NEW Monthly Creative Challenge

Come checkout the Blank Page Muse Creative Challenge. This month's theme is the technique "Let's Go to the Beach." Create a new project following the theme and add it via the Inlinkz linky tool. There will be a random drawing prize for a Blank Page Muse Gift Certificate. You can find all the guidelines HERE.

Thanks for visiting!

Tuesday, June 19, 2018

Born to Stand Out


Greetings Chris here and today I am excited to share this cheery card I created for Blank Page Muse Stamps! This card features the brand new Flamingo Row Stamp Set!

Blank Page Muse Supplies

Other Supplies
Ink 
Markers
Circle Punch
Scallop Circle Punch
Card stock - white, pink

Stamp Flamingo Row stamp onto white card stock.

Continue Stamping Flamingo Row to fill card background.

Color Flamingos with your favorite markers.  Color one flamingo in a different color!

Stamp sentiment onto punched circle and mat onto pink scalloped circle. Attach to card.


Stamp flower onto pink card stock. (note: I stamped the stem off to card stock as I only wanted the flower.)


Fussy cut the flowers and add to card to finish! Here is another look at the finished project! 


Be Sure to Follow Blank Page Muse
Come back and enter our Creative Challenge. Tag us using #blankpagemusechallenge if posting on Facebook or Instagram. List the month and theme you are following.

Sunday, June 17, 2018

A Mermaid Living Her Dream

Hi Fans!
Today I am sharing a tutorial on a "Beachy" themed tag using one of the fab mermaid stamps by Rick St Dennis available in store!
Hope you are enjoying the summery theme for this month - it's nice for me to be creating something with a "warm" feel as here in Australia it's Winter and a bit coolish!!
Supplies:
Blank Page Muse Stamps: "Misty"Mermaid, Anchor, Cone Shaped Sea Shell, Coral Reef Sponge, "Texture Strip" from Background Grunge Set
Manilla tag (size for this project is 12cm x 6cm)
Black Archival Ink
Gesso
Distress Inks: Wilted Violet, Lucky Clover, Tea Dye, Old Paper
Coloured Pencils
Sticky Note Pad (to make the mermaid "mask")
Embellishments: coloured fibres, muslin cloth scrap, round silver charm
Tools: scissors, glue, sponge for inks, small paintbrush
Instructions:
To start the tag stamp "Misty" onto your tag using the Black Archival ink - position her so she is "off" the tag at the bottom and one side as shown below.

Using coloured pencils colour the stamped image. I used very basic colours and simple technique for this.


Using a small paintbrush and Gesso paint the tag background and around the image as closely as you can. (I painted 2 coats). Allow to dry.


Using the Wilted Violet and Lucky Clover Distress Inks and a sponge add ink to the gessoed background of the tag. As you can see below the violet was added directly around the stamped image and then the clover was added around that to finish covering the tag with ink. Edge the tag with the Wilted Violet ink pad.


Using a piece of sticky notepad stamp the mermaid stamp with ink and fussy cut to make a "mask" to protect the image for the next step.


Using the Tea Dye and Old Paper Distress ink pads stamp the grunge strip stamp and the shells and sea sponge stamps randomly over the background. The Distress Inks are light enough to leave just a subtle image on the background. Use the Lucky Clover Distress ink to stamp the "Anchor" in the top corner as shown below.


Your tag is now ready to add a few embellishments. Fibre to the top, muslin cloth in the bottom corner and then adhere the charm.


Hope you have enjoyed this process - really it's fairly quick and easy! It would also work with lots of the 
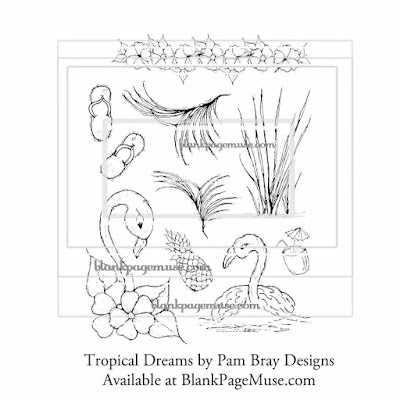
Blank Page Muse Stamps - so why not give it a go!
And remember our "Beach" themed challenge happening at The Blog - still time to enter - we would love to see what you can create!
Plus make sure you are a member of our Facebook Group for all the latest news, new releases and lots of inspiration!

Happy Stamping!!!

Sharon


Copyright Text

Blank Page Muse 2018 Sin City Stamps 2013