Showing posts with label romantic. Show all posts

Thursday, February 18, 2021

Two Romantic Hearts xxx

 Hi BPM Fans!

Here we are approaching the end of another month! I hope you have been enjoying our month of "Romance" and have felt inspired by the DT creations!

Today I am sharing an idea for a romantic card - perfect for lots of occasions depending on what sentiment you use! Always great to have an idea for any occasion cards using the same stamp!


Supplies:
Blank Page Muse Stamp: Vintage Style Dancing Couple
Blank Page Muse Stamp: Heart from Scribble Hearts & Elements Set designed by Pam Bray
Blank Page Muse Stamp: Two Hearts One Love Phrase
Blank Page Muse Stencil: Hearts and Broken Hearts designed by Stephanie Eaton
Base Card
Card front covered with ink stained paper towel OR Patterned Paper
White Paint
Stamp Pad & Scrap Card
Glue or double sided tape, spatula and scissors 
Embellishments


Instructions:
Cover your card front with paper towel. I use the paper towel I have blotted excess ink sprays with. Alternatively use patterned paper or gelli prints cut to slightly smaller than your base card front. Use your stencil, white paint and a spatula to apply the stencil design randomly over the card front. Allow to dry.


Stamp your BPM stamps onto the scrap card using your choice of ink colour and your choice of card stock colour. I have chosen kraft card and a red ink pad to co-ordinate with my paper towel background. Have fun with different coloured inks for your main images no need to stick to just black! Fussy cut your stamped images.


Adhere the hearts, vintage couple and wording along with any embellishments to the card front. 


This card works well with any romantic wording/phrase stamps. Perfect for a wedding or engagement card or for your valentine/special person!


Happy stamping and creating and thank you for joining me again today!

Sharon


Don't forget to check us out at all of our social media sites
The Blank Page Muse- https://blankpagemuse.com/

Wednesday, May 7, 2014

Handmade Birthday Card by Linda Hess

A friend of mine recently said that the only thing she would like for her birthday was a mailbox full of handmade cards, so that she would receive something besides bills.  Be careful what you wish for (hehe)...off to the studio I go!

First thing I pulled out was Creative PaperClay.  Those who know me realize that this is a "clay" outside my normal realm, but the time I spent on the Creative Paperclay design team was an eye opening experience into what can be done with this product.  For this project, it should be the perfect base for my card.  I conditioned a bit by squeezing it in my hands and then rolled it flat in my pasta machine.  (NOTE:  for those of you  who do not own a pasta machine for clay or might even use your pasta machine for...well, pasta...you may roll the clay flat with a rolling pin or acrylic rod.  An even thickness can be obtained by rolling between 2 pieces of cardboard or a stack of playing cards...you get the idea)

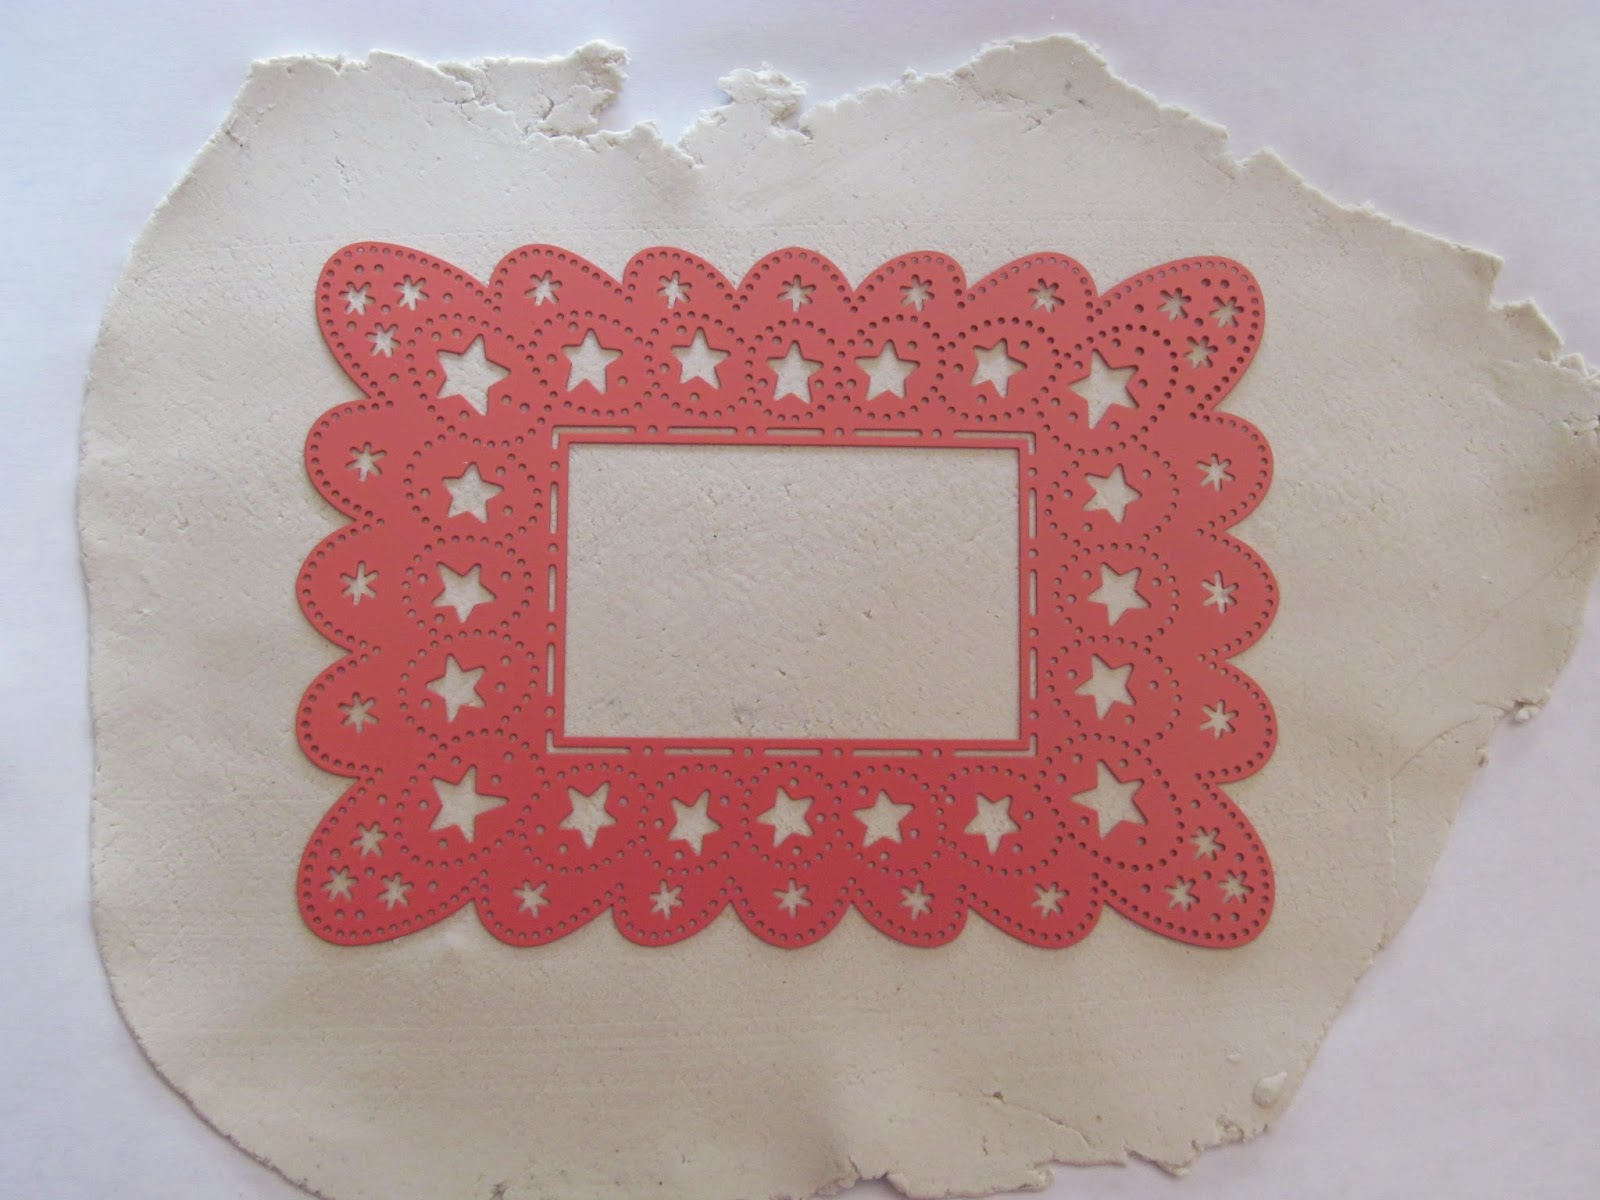
Once rolled flat I placed the clay on a sheet of paper to work on the design.  In our box of goodies for this month we received a metal template (Ornare Vellum) from Ecstacy Crafts (www.ecstacycrafts.com).  I placed it on top of the sheet of clay and then rolled over it with an acrylic roller to press the clay into the openings. 
Once I had the clay impressed with the template design I used an exacto knife to cut around the edges.
I opened the tiny pinholes in the template using a turkey lacer (NOTE: a beading pin or sewing needle will also work).  This will take some time...you may have to give your hand a stretch every so often. 

I brushed over the other openings using Pearl Ex powders in multiple colors.

Then carefully, slowly I peeled the PaperClay away from the template.  At first it came away easily, but then I ran into a glitch.  I started peeling too quickly and of course the clay ripped :-(  They are pretty scraps, but not exactly what I want to send to a friend. 
Back to the drawing board.

This time I powdered the surface with cornstarch before repeating the above steps.  With luck the cornstarch acts as a release and the design peels easily away from the template.

Woohoo!  The template came up nice and clean.  Only "drawback" (if there is one) is that you need to hold the template in place as you go around cutting and detailing.  Otherwise the design will move.

After cutting and piercing, I brushed the surface lightly with rubbing alcohol before applying Pearl Ex powders.  During the process of powdering (with cornstarch) and then detailing, etc. Creative PaperClay will begin to dry out.  The addition of rubbing alcohol re-wets the surface and helps the Pearl Ex to adhere. 

Now to unveil....WHEW! 
Obviously I used a bit too much rubbing alcohol in the one corner, but it can be covered with embellishments :-)  Brush around the edges with rubbing alcohol to clean up any roughness.

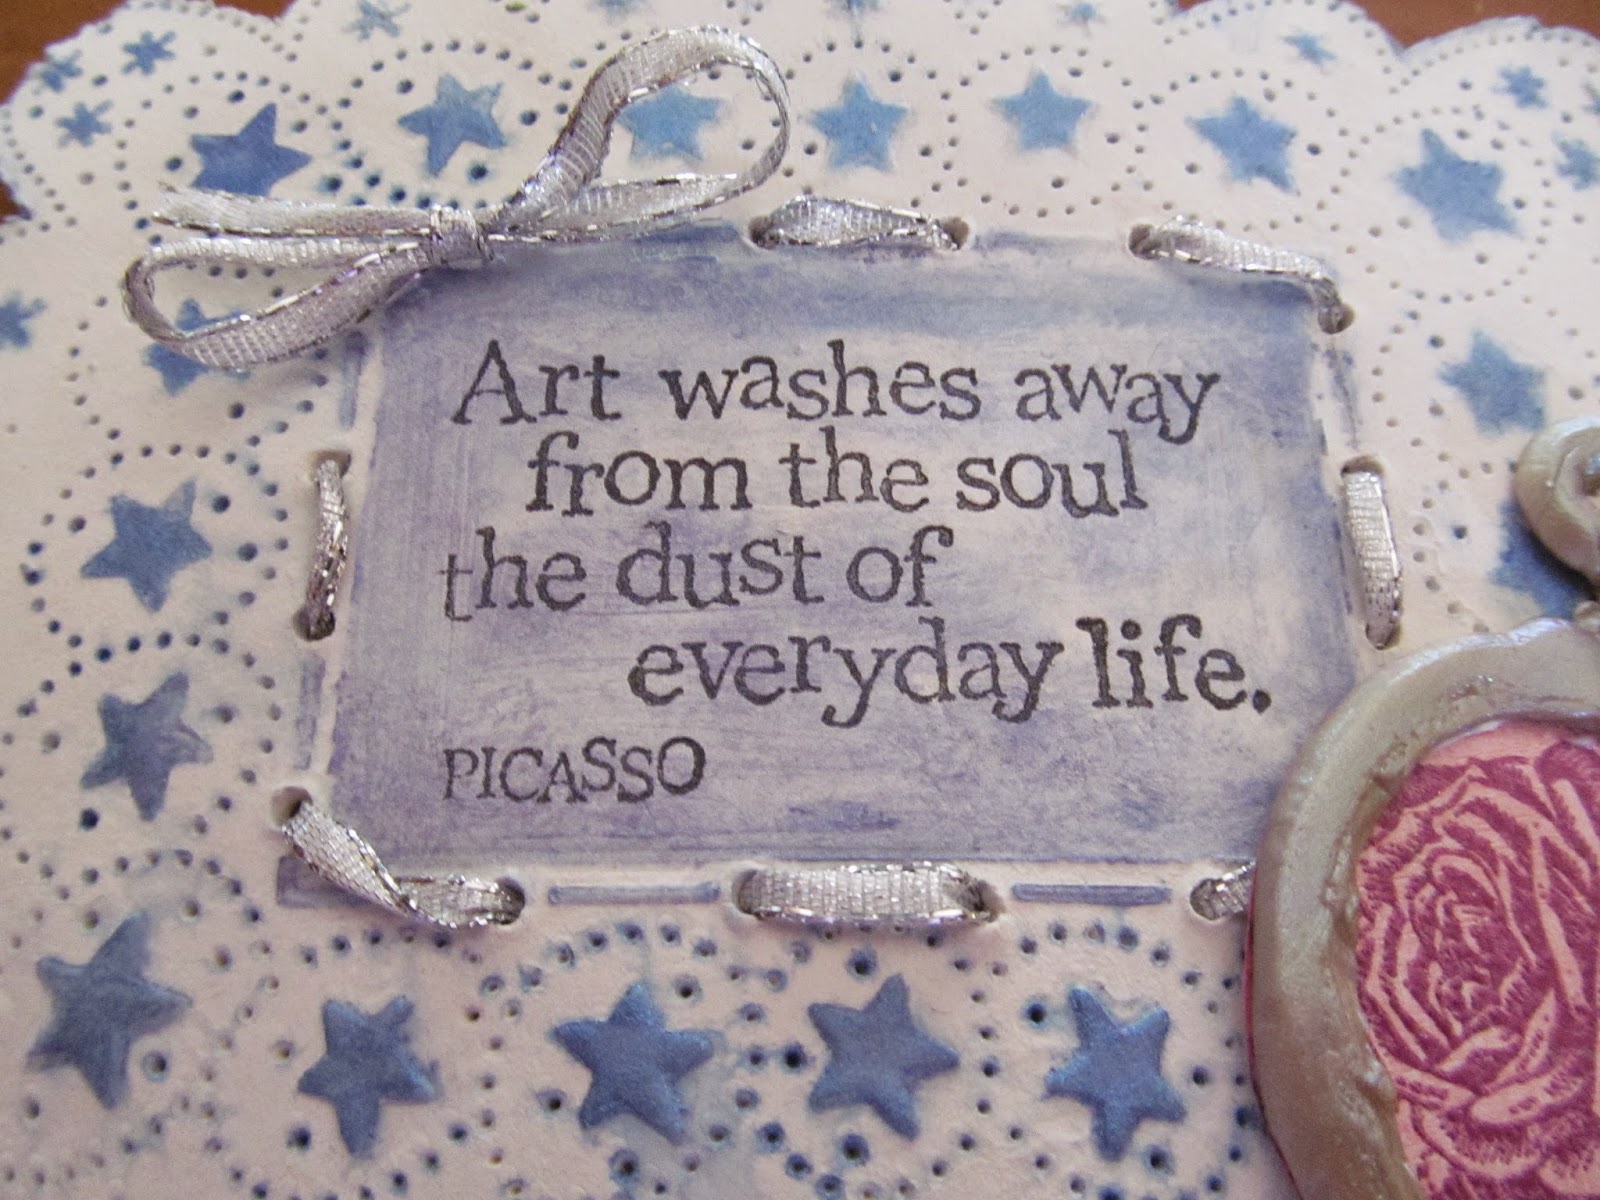
The center is stamped with one of my favorite sayings using ColorBox archival ink in "Wicked Black".  Holes are opened slightly around center image using a turkey lacer.

From my stash of paper I found a soft pink.  It was stamped using the "Romantic Background" unmounted stamp from Sin City Stamps and VersaMark ink, sprinkled with Recollections "plum" embossing powder, and heat to set.  Then I cut out the image.


Roses are placed in corners to cover "boo-boos".  For now they are only placed.  Once the Creative Paperclay dries they will be glued in place using "The Ultimate" glue from Crafter's Pick (my favorite glue).

Being an impatient sort when it comes to projects, I placed the card in the oven and baked at 275 degrees for about 15-20 minutes.  This speeds the drying process, so that I can continue rather than wait (the little kid in me rearing her ugly head!).  (PLEASE NOTE:  Creative PaperClay will draw up and curl slightly if "forced" to dry.  A weight of some sort might be desired on top of the image will keep it flattened).

Now to finish the embellishments.  Looking at the rubber stamped images I realized that something else was needed....maybe a little dimension.  I pulled out the mold that I made a few projects ago ("New Wave "Batik" canvas: Pt 2 [http://sincity-stamps.blogspot.com/2014/04/new-wave-batik-canvas-part-2.html]) and a little bit of polymer clay.  I pressed clay into the mold, shaved off the excess, and unmolded the watch. 
Using an exacto knife I cut out the center of the fob as well as the center of the watch (opening it up).  I brushed it with Pearl ex powder and baked it at 275 degrees for 15 minutes.  Once cooled, the "Romantic Background" image is cut to fit inside and glued in.  Gives the illusion of painted picture in a frame, don't you think??  (Please use your imagination here)
 
A silver ribbon highlights the rubber stamped center.  (Note: I used a wired ribbon to ease the threading process). 


The watch is glued into place (over the boo-boo).  A tiny charm designates this card as "hand made" just as my friend requested :-)

Now to create an envelope....but that will be a demo for another day.  See you soon!


Monday, March 24, 2014

#PetLove


Hey there!  It’s Robin Redd, back with you to show you my second project with Sin City Stamps and Composimold.  I have to tell you, I’ve been having fun playing with my gel plate that I made with Composimold for my previous post.  I have even melted it again and made a new gel plate in a different size!  That’s another thing that makes Composimold so desirable!  If I happen to cut into my plate or gouge it with a sharp edge, all I have to do is make a new one with the same product.  Within MINUTES, a new plate will be ready to go!

Today I made some more collage papers using a lot of pretty colors from Art Anthology 
and some of my fun stencils I have.

Here’s a pretty feather stencil from Julie Balzer and The Crafter’s Workshop.

Look at this pretty Cotton Candy Dimensional Paint from Art Anthology!

Here’s a sampling of the pretty collage papers I made.

Now, to show you how I put some of those pretty, gel-plate, collage, papers to use.  I started by painting a strip of some Cotton Candy paint from Art Anthology down one side of my 12” x 12” ‘canvas’.

I stamped the Romantic Background Stamp a few times on a piece of white sketch paper.

I free-hand cut quite a few scallops out of the stamped images.   
I made these various sizes, heights and widths to give my layout a whimsy look.

Next, I simply applied the scallops along one edge of my layout, 
next to my painted pink strip, using Liquitex Matte Medium.

With some coordinating collage papers I had just made 
I made a few layered, free-hand drawn and cut flowers.
1.        Cut three large circles out.
2.       Adhere a circle on another collage paper.
3.       Draw petals once then twice over the same petals to continue the whimsy look.
4.       Cut around petals.

I hand-drew the title of my page, #Pet and stamped Sin City’s stamp Love next to that.  
 I use that ‘hashtag’ when posting pictures of my pets on Instagram.

I’m pretty sure this ‘hello’ flair is from Recollections.

The scallops at the top were painted on with Limeade Dimensional Paint from Art Anthology.  
 I outlined them with a Scarlet Lime pen with works great when writing over paint.  
 I embellished the scallops with Queen’s Co Candy Stripers.

Be sure to use a permanent ink such as India ink when doodling 
so that the ink does not bleed when applying flowers or anything with matte medium.

This pretty pink bow is from Freckled Fawn.  I believe the enamel dots are from My Minds Eye.

And, here, is my completed layout featuring the loves of my life, Tootsie, Harley and Roxy….ha-ha!

Until next time…

Monday, February 10, 2014

Valentine Mini Album

Hello Sin City Stampers!  My name is Robin Redd and I’m part of the new design team at Sin City Stamps!

 
This month we are collaborating with Frog Dog Studio!  This is the Frog Dog Studio kit for February which includes the beautiful Romantic Background Stamp and a saying “Love Can Hope” stamp that says, “Love can hope where reason would despair”, which is a quote from George, Lord Lyttleto.

I decided to make a minialbum of the first card my boyfriend made.  He made a lovely, detailed, layered Valentine’s Day Card.  The cover shows the Vintage Valentine’s Backgroundstamp which I white embossed portions of in the corners of the cover, over Pan Pastels and chalkboard paint.  I, then, decoupaged the heart ephemera off-centered onto the front of the book.   

Once the book was complete I added a junque-bow ribbon tied with one of the Prima Wood Buttons included in the kit and stuck a metal PrimaStick Pin through the knot.  I tied more ribbons and fibers to the binderrings of the book and attached one of the Prima Love Domino charms so it will dangle.

The first page was covered with Pan Pastels.  I layered the white and black Gelatos through a stencil and stamped the RomanticBackground Stamp in black ink.  I adhered a piece of the ephemera and topped it with a Prima Wood Button tied with the Antique Spooled thread.

 
I used the Pan Pastels to cover the back of the next two pages.  On page 3, I layered a heart stencil with Permanent Green Pan Pastel, outlined it with the Black Gelato and highlighted the heart with the white Gelato.  Again, I layered another piece of the ephemera, outlining it with the White Gelato and spreading the gelato out with my finger.

On page 4, I outlined a picture of the front of the Valentine’s Day card my boyfriend made me with the black Gelato, spreading the Gelato with my finger.

After adhering a picture of the inside of the card to pages 5 & 6, I made a mosaic with the black Gelato and colored each space in with the Magenta and Permanent Green Pan Pastel.

On page 7, my favorite part of the entire book, was ‘making a rock walkway”.
I free-hand cut rock shapes from white cardstock.   
I dabbed black, white and silver Gelato on each ‘rock’.

Next, I smeared the gelatos with my fingers, giving it the look of rocks.

After gluing the ‘rocks’ onto my page, I covered the rocks with Liquid Glass (Close To My Heart).

With a brown water-color pencil I filled the ‘rocks’ in with ‘dirt’, completing the walkway.

Page 8 shows a SinCity Label die-cut painted white.  I stamped the Friends stamp with the VersaMark stamp pad, which is clear.  When I sponge Permanent Green PanPastel over the stamped image, the stamp image pops out!  I doodled over the words on the stamp, “Friends are Forever”.

I really enjoyed making the next two pages in my mini-book.  
 I simply spread the PanPastels over each page using the soft tools.

To show how you can make more colors with the product that comes with the kit, I’m sharing how to tint and shade the Permanent Green PanPastel with the Black and White Gelato.  Color one end of the page with the Black Gelato and the other end of the page with White Gelato.  Using a flat paint brush and water, spread the Gelato, lightening as you move the Gelato toward the center.

This is how each color looks showing the varied colors.


Now, it’s time to watercolor with your Pan Pastels!  
 Simply shake some loose color from your PanPastels onto your page.   
With a mixture of 50% water and 50% rubbing alcohol, 
spray over page then water color your page with a paint brush.


After water coloring with the Magenta Pan Pastel on part of the page, I let it dry.  Then I repeated the process with the Permanent Green Pan Pastel on the other part of the page.  If you spray extra of the water/alcohol mixture onto your page, you can make your Pan Pastel colors drip, for yet another look on your page!

**It’s important to let each layer dry before adding a different color.   
If you add a new color before the first is dry, 
they will mix and possibly make a muddy color on your page 
rather than the distinct colors you intended to show.

I hope you learned at least one thing new, here, for you to change up with product you already have with Sin City Stamps at Frog Dog Studiokit!  I enjoyed sharing with you!

http://robinredd.typepad.com/reddrobinstudios/


Copyright Text

Blank Page Muse 2018 Sin City Stamps 2013