Hello! It's Gracie from Graciellie Design. It's time to show you my last project for this month's collaboration between Sin City Stamps and PanPastel. What an amazing collaboration should I say! In this opportunity I made a card featuring a technique I really enjoy, colored dry embossing.
Main Supplies
Sin City Stamps - Love of Butterflies (sc4) plate of rubber
PanPastel - Violet, Violet Tint and Permanent Green
Other
Blender marker
Embossing Folder
Papers - Beige leather textured cardstock, lilac metallic cardstock
Adhesives - Mounting tape, two sided tape and Uhu all purpose adhesive
Lilac gross grain ribbon
I have a step by step photo tutorial for you. To see how I made my card, please start the guide below.
Welcome to the Blank Page Muse Blog! We hope you love these amazing projects created by our fabulous Creative Stamping Team. At Blank Page Muse, we are proud to offer red rubber stamps, clear stamps and stencils. I Brake for Stamps rubber stamps are available online in the same shop. Art rubber stamps are pressed to order in the USA. We are here to help break that blank page! Visit our sister shop IBRAKEFORSTAMPS.com
Showing posts with label Pan Pastel. Show all posts
Thursday, September 25, 2014
Wednesday, September 10, 2014
Lilac Canvas - Pan Pastel & Sin City Stamps
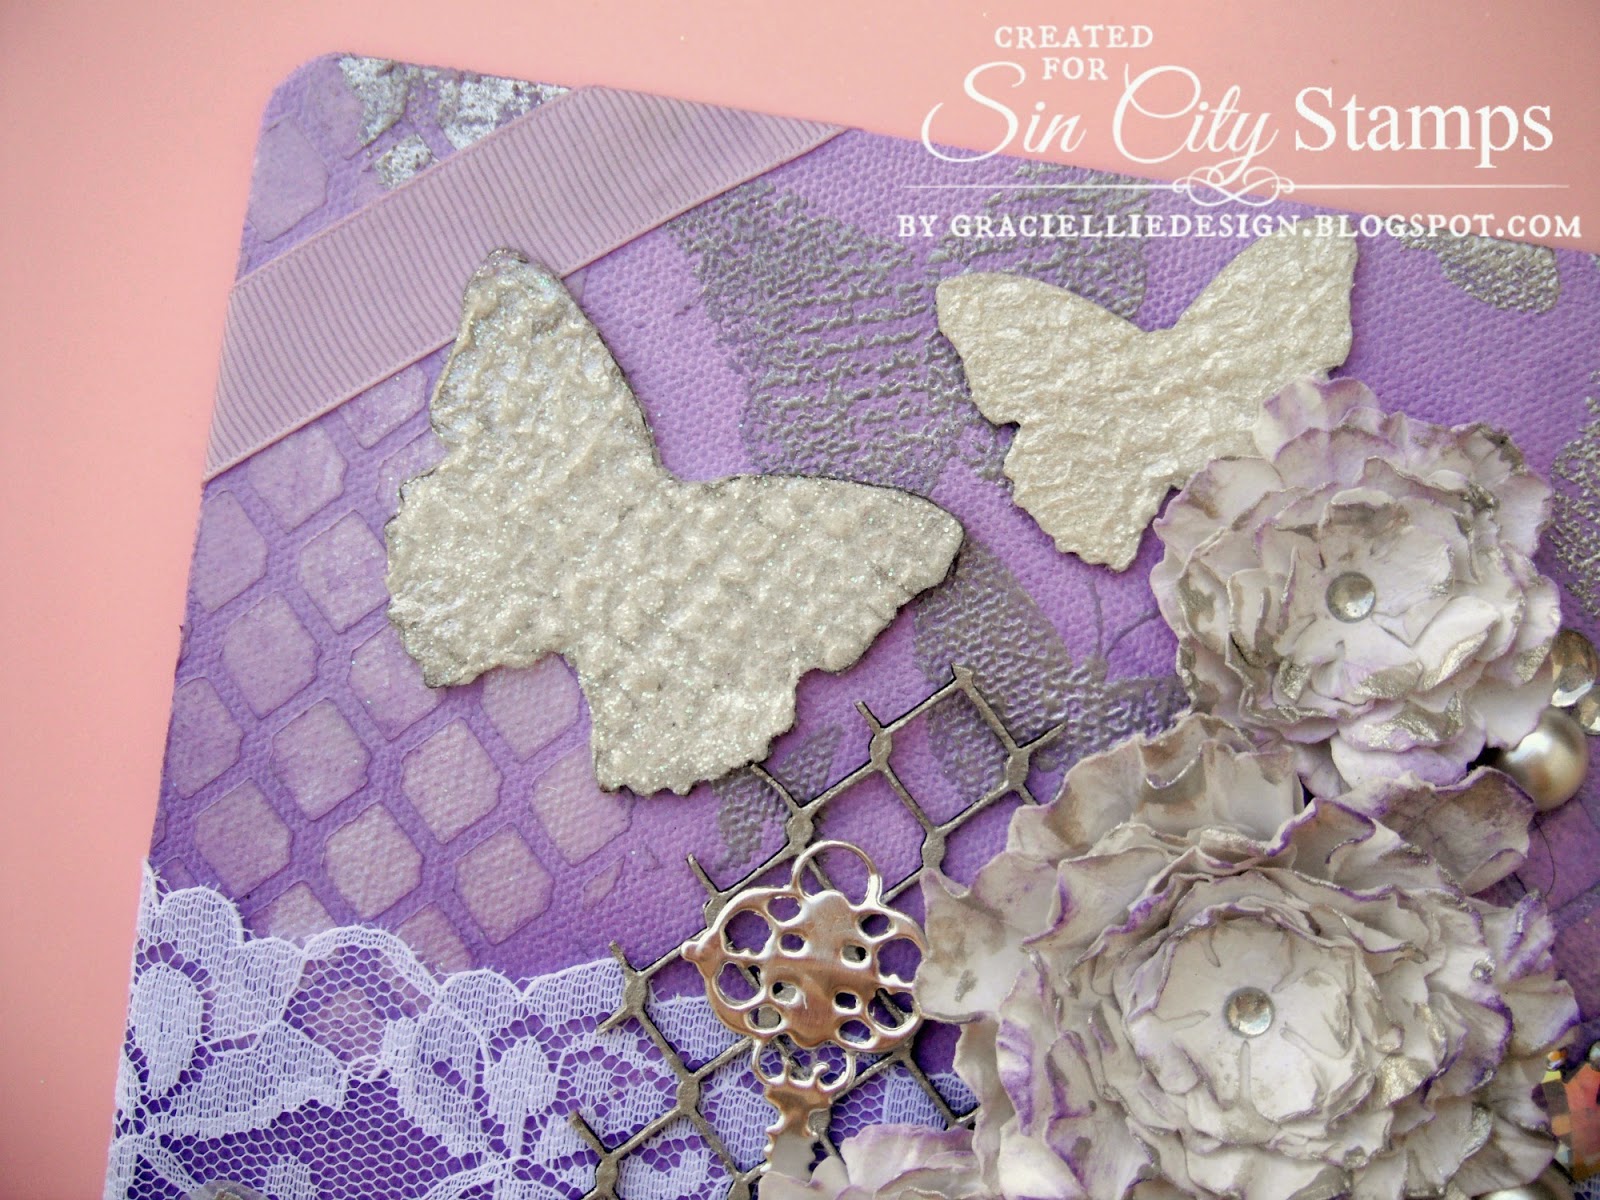
Hello and welcome. It's Gracie from Graciellie Design and I'm excited to be here once more, to share with you a new project. This month Sin City Stamps has partnered with PanPastel, and I am very excited! My teammates have been presenting such creative projects on the Sin City Stamps' blog showcasing products from both companies, and they've done an amazing job.
PanPastel is such a forgiving medium, it blends so well, it can be corrected with a simple eraser, and it has such rich color, it's is a delight to work with them!
For my project I used PanPastel in Lilac and Lilac Tint together with Sin City Stamps chipboard pieces and rubber stamps. I made a canvas, embellished with handmade flowers and many other elements.
Sin City Stamps: Love of Butterflies rubber plate, Chicken Wire with Butterflies Mask, Chicken Wire w/Butterflies Chipboard Sheet, Chicken wire with Butterflies Chipboard Book,
PanPastel: Violet, Violet Tint
Cottonwood Arts: Cottonwood Arts Thin 6"x 6"Canvas (to be released), Angled Cut Art Sponge - Sofft Tools
DreamWeaver Pearlescent Embossing Paste
Add a Little Dazzle metal sheet
Miscelaneous: Ribbon, lace, glitter, acrylic paint, vellum, cardstock, various adhesives, pearls and crystals
Check out How to Make a 3D Embellished Canvas With Pan Pastels by Gracie CH on Snapguide.
I hope you enjoyed my project and tutorial as much as I enjoyed making it and I hope you are inspired to try it out too! If you have any questions feel free to contact me through a comment here or at my blog.
Wednesday, February 5, 2014
Box Full Of Love
I am so excited to be embarking on a new creative journey as a member of the Sin City Stamps Design Team. I hope you enjoy the projects that I bring to you, a mix of scrapbooking, stamping, claying, and much more. Come along as I experiment and create with new products from Sin City Stamps (www.sincitystamps.com) & Frog Dog Studios (www.frogdogstudio.com)
I love little treasure boxes. I found a small cardboard box (3"x3"x2") that I decided to deconstruct to create a new, better version. With that thought in mind I gathered my materials:
1 sheet "Music Notes" by Recollections Scrapbook paper
1 sheet textured cardstock
glue stick, pencil, & scissors
GlueDots
Trace the opened box template onto "Music Notes" paper and cut out carefully. Cover entire back of cutout with glue stick and attach to the back of textured cardstock. Press together adding more glue as needed. (Please Note: the music notes should BACK to the texture) Score fold lines into the textured side of cutout and begin to fold box. Cuts for flaps can be made using an exacto knife OR the scissors (I find the Exacto knife to make cleaner lines). Fold box together. Use GlueDots to adhere flaps.
Now you are ready to move on...
Frog Dog Studio was gracious enough to supply design team members with the February "Mixed Media Kit". I choose the VersaMark watermark stamp pad, the Romantic Background stamp(from Sin City Stamps), and the Magenta PanPastel. The VersaMark ink is wonderful to use with embossing powders, so I tried 2 variations: one stamped directly onto the cardstock and the other colored (first) with Magenta Pan Pastel, then stamped. I was curious what would happen if I stamped the ink without any embossing powder and was pleased to see a beautiful, delicate image emerge!
(Note: The top image has Marcasite embossing powder applied, the middle has Pearlustre Amestyst [both by Stampendous], and the bottom image is the VersaMark all by itself).
I used a decorative pair of scissors to cut the bottom image out. Placed against the music box the image needed a little pop. A bit of Magenta on a Sofft Art Sponge smudged along the edge was the perfect touch.
Now to make a treat for inside,but that will have to be a project for another day :-) Have a beautiful, creative day!
I love little treasure boxes. I found a small cardboard box (3"x3"x2") that I decided to deconstruct to create a new, better version. With that thought in mind I gathered my materials:
1 sheet "Music Notes" by Recollections Scrapbook paper
1 sheet textured cardstock
glue stick, pencil, & scissors
GlueDots
Trace the opened box template onto "Music Notes" paper and cut out carefully. Cover entire back of cutout with glue stick and attach to the back of textured cardstock. Press together adding more glue as needed. (Please Note: the music notes should BACK to the texture) Score fold lines into the textured side of cutout and begin to fold box. Cuts for flaps can be made using an exacto knife OR the scissors (I find the Exacto knife to make cleaner lines). Fold box together. Use GlueDots to adhere flaps.
Now you are ready to move on...
Frog Dog Studio was gracious enough to supply design team members with the February "Mixed Media Kit". I choose the VersaMark watermark stamp pad, the Romantic Background stamp(from Sin City Stamps), and the Magenta PanPastel. The VersaMark ink is wonderful to use with embossing powders, so I tried 2 variations: one stamped directly onto the cardstock and the other colored (first) with Magenta Pan Pastel, then stamped. I was curious what would happen if I stamped the ink without any embossing powder and was pleased to see a beautiful, delicate image emerge!
(Note: The top image has Marcasite embossing powder applied, the middle has Pearlustre Amestyst [both by Stampendous], and the bottom image is the VersaMark all by itself).
I used a decorative pair of scissors to cut the bottom image out. Placed against the music box the image needed a little pop. A bit of Magenta on a Sofft Art Sponge smudged along the edge was the perfect touch.
Now anyone who knows me can see that this is a bit plain for my taste. Time to add a bit of (what else??) polymer clay and create a little dimension. I just happened to have the perfect flower on my clay table. A few GlueDots to the back and it is attached.
Hmmmmm, still needs a little something. Perhaps some ribbon....punch a few holes, weave the ribbon in and out
Maybe a button...
Final touch, a card is needed. I chose a simple message from the Romantic/vintage Ephemers Sheet, roughed up the edges a bit with a Faber Castell black Gelatos and tucked it in behind the flower. Now to make a treat for inside,but that will have to be a project for another day :-) Have a beautiful, creative day!
Subscribe to:
Posts (Atom)
Copyright Text
Blank Page Muse 2018 Sin City Stamps 2013