Thursday, April 27, 2023

Butterfly Card Sympathy Card

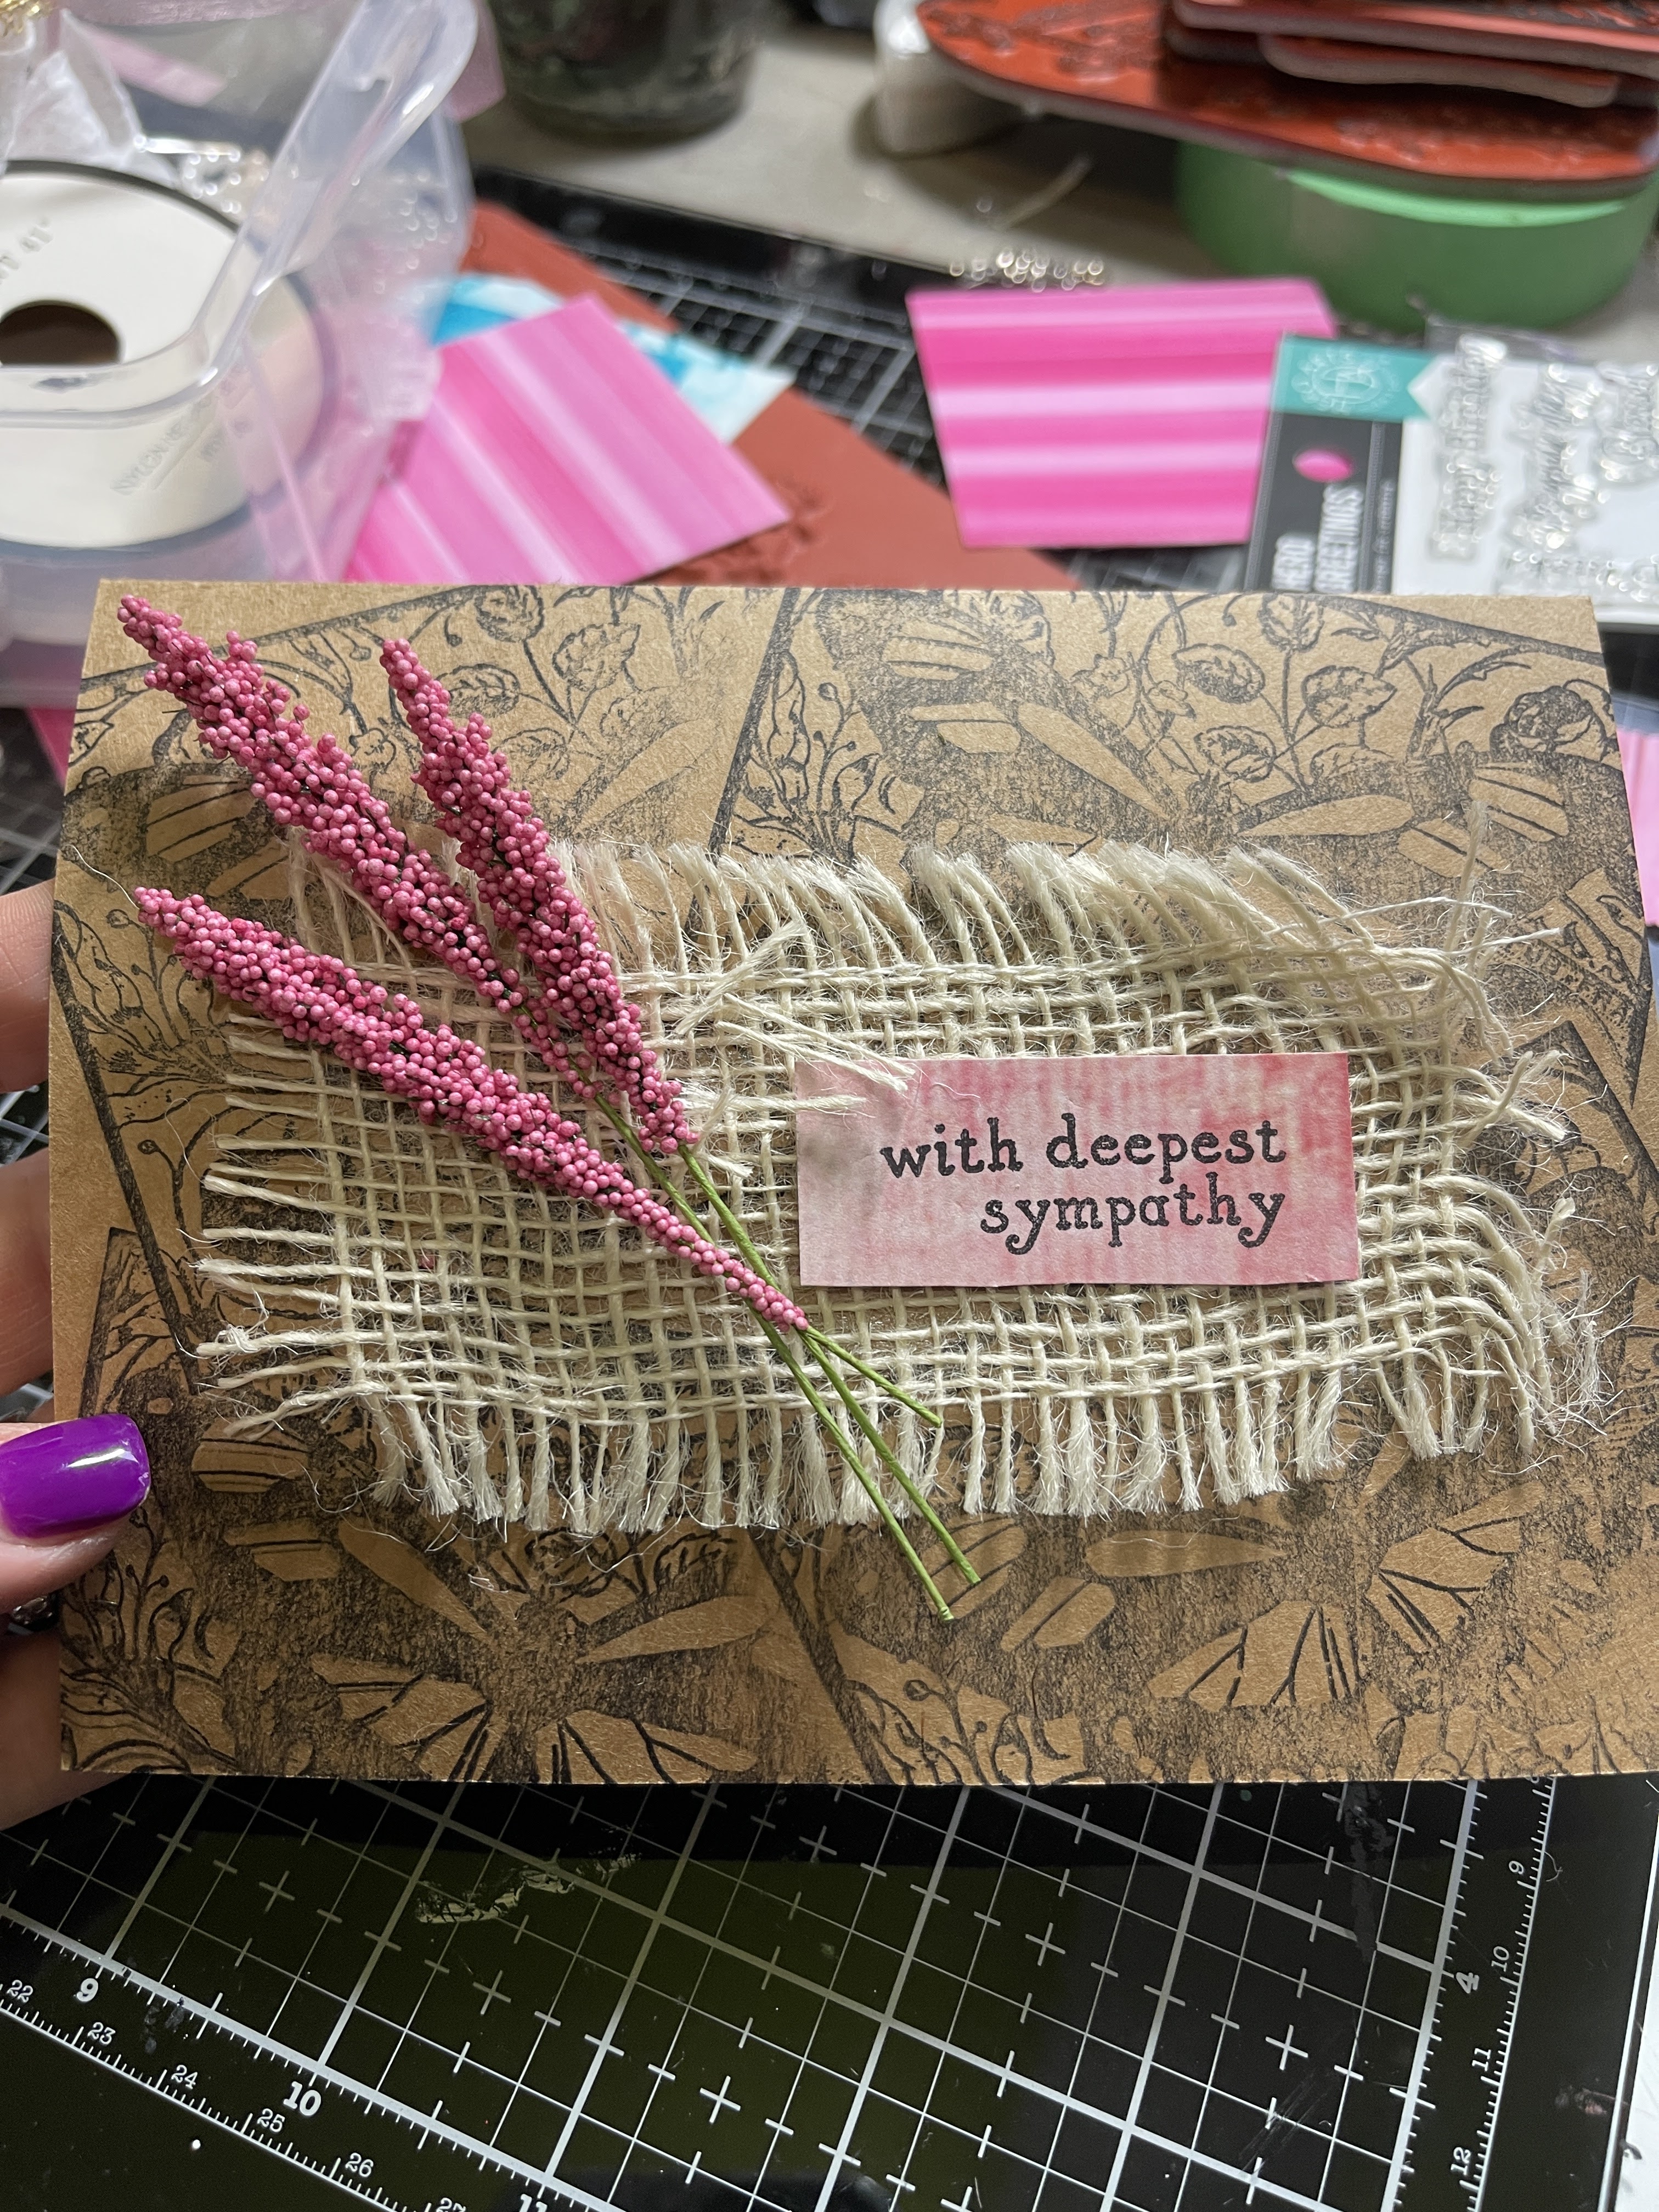
 Today I am excited to share this cheery sympathy card I created!


  Sadly my handmade sympathy card stash is completely depleted. So I decided to create so extra cards for my stash.  The layers on this card make it more suitable for a personal delivery. 


To recreate this card you will need:

Blank Page Muse Supplies/I Brake for Stamps Supplies

I Brake For Stamps  Zebra Butterfly Collage

Blank Page Muse Sweet Passion 6x6 inch sheets Paper Pack designed by Pam Bray

Other Supplies

 Ink, Kraft card base, Burlap ribbon, Floral sprigs, Jute


Stamp by stamping your I Brake For Stamps  Zebra Butterfly Collage stamp onto your kraft card base. I used a stamp platform to make positioning easier. 


Mask off first stamped image and move stamp and re-stamp on another area of your card. 


Mask off the second area and move stamp and re-stamp on another area of your card.


Mask the third stamped image and move your stamps and re-stamp. The results is 4 butterfly collages stamped onto your card base. 


Layer burlap ribbon onto your card base. 


Trim floral sprigs and add to card.  Hand write  or stamp greeting. Tie a jute bow to add to your card to as a final finishing touch for  your card 


 I hope you are inspired to get creative with your Blank Page Muse Stamps. 


Be sure to follow us at 

The Blank Page Muse- https://blankpagemuse.com/


FB Fan Page-  https://www.facebook.com/groups/blankpagemuse/


Instagram Shop-  https://www.instagram.com/blankpagemuse/


Instagram Blog-  https://www.instagram.com/blankpagemuseblog/


Twitter-  https://twitter.com/BlankPageMuse


Pintrest- https://www.pinterest.com/blankpagemuse/boards/


Sunday, April 23, 2023

Happy Cat

 Hi everyone, Steph Ackerman here!

 Today I am using some amazing products from Blank Page Muse and I Brake For Stamps.


Supplies:


I found the pattern paper from the paper pack was all that was needed to have this stamped image stand out.

The full tutorial can be found on my blog.

Thanks for stopping by.

Steph

Looking for more Inspiration? Click the links below!
The Blank Page Muse Shop https://blankpagemuse.com/

Save 15% of your Blank Page Muse orders with discount code:  BPMSteph


Tuesday, April 18, 2023

Birthday card with Stencil Butters

Hello from design team member, Heidi. Today I would like to share a card that is primarily stenciling.  I used two colors of stencil butter, which are found in the Blank Page Muse shop.  The ones I used are the pearl ones, and they are just sooooooo pretty!  The photos do not do this justice - it was so hard to capture!


I just randomly applied the two colors stencil butter over the stencil to cover the stencil, and then when I scraped off the excess, they blended and mixed to get a really pretty look.  The base for this was the silver glitter alcohol ink cardstock.  It does hold up well to stencil butter.

I didn’t want to cover up any of the pretty stencil, so I used a fun circle sentiment over top, matted the card in the same color turquoise cardstock, and called the card complete.

If you haven’t had a chance to try these stencil butters, they are really a lot of fun, and easy and smooth to use.

The products I used in this card are:

The Crafters Workship Wave 6x6 stencil

Turquoise Stencil Butter

Denim Stencil Butter

I Brake for Stamps sentiment from Thinking, Happy, Get Well, Thanks set

You can also find more inspiration at the links below:

The Blank Page Muse- https://blankpagemuse.com/

FB Fan Page- https://www.facebook.com/groups/blankpagemuse/

Instagram Shop- https://www.instagram.com/blankpagemuse/

Instagram Blog- https://www.instagram.com/blankpagemuseblog/

Twitter- https://twitter.com/BlankPageMuse

Pintrest- https://www.pinterest.com/blankpagemuse/boards/


Thursday, April 13, 2023

Butterfly Spring Greetings

 Spring Greetings!  Nothing says spring like the color pink and butterflies!  


 So, Today I am excited to share this cute all purpose Card I created!   I love All purpose cards because they can be used for just about anything from birthday to thank you to thinking of you cards!  I can never have too many.   I also tend to limit the layers so that they can be mailed without extra postage. 


To recreate this card you will need:

Blank Page Muse Supplies/I Brake for Stamps Supplies

I Brake For Stamps  Zebra Butterfly Collage

Blank Page Muse Sweet Passion 6x6 inch sheets Paper Pack designed by Pam Bray

Other Supplies

 Ink, card base, Decorative scissors (remember those?), adhesive gems


Stamp by stamping your I Brake For Stamps  Zebra Butterfly Collage stamp onto your Blank Page Muse Sweet Passion 6x6 inch sheets Paper Pack designed by Pam Bray


You can see how pretty the stamp looks stamped on the Pam Bray Sweet Passion papers. 
Trim your stamped image with Decorative Scissors and set aside.


Cute a piece of the Pam Bray Sweet Passion papers with decorative scissors and adhere to the left side of your card base. 

Layer the Stamped image onto your card as shown. 

Add adhesive gems to your card as desired to add dimension. 


 I hope you are inspired to get creative with your Blank Page Muse Stamps. 


Be sure to follow us at 

The Blank Page Muse- https://blankpagemuse.com/


FB Fan Page-  https://www.facebook.com/groups/blankpagemuse/


Instagram Shop-  https://www.instagram.com/blankpagemuse/


Instagram Blog-  https://www.instagram.com/blankpagemuseblog/


Twitter-  https://twitter.com/BlankPageMuse


Pintrest- https://www.pinterest.com/blankpagemuse/boards/


Saturday, April 8, 2023

Spring Bunny

Hello from design team member, Heidi.

Today I would like to share this cute spring bunny.  She is peeking out of a spring meadow.  

How I did this card was starting with watercolor paper.  I took 3 shades of Distress inks and sponged them on the side of my panel. I didn’t bother doing any masking or anything, just sponged them on and blended.  The colors are Scattered Straw, Mowed Lawn and Broken China.  I then splattered some clean water on to get texture, and then, I splattered some water colored with the Broken China blue ink to get some colored texture.  


After this dried, I stamped my bunny over top with Versafine Black ink.  I used water based markers to fill in the image and then blended it with a wet brush.  

After adding this sentiment on a green strip and matting with the same color, I finished the card with a few different tiny orange gems.  

I really like the spring look of this card!  I hope it gives you an idea too.

The stamp I used is from the I Brake for Stamps store and it is called Large Rabbit.  It is available both separate and as a part of this great set called MS110 Full Plate.

You can also find more inspiration at the links below:

The Blank Page Muse- https://blankpagemuse.com/

FB Fan Page- https://www.facebook.com/groups/blankpagemuse/

Instagram Shop- https://www.instagram.com/blankpagemuse/

Instagram Blog- https://www.instagram.com/blankpagemuseblog/

Twitter- https://twitter.com/BlankPageMuse

Pintrest- https://www.pinterest.com/blankpagemuse/boards/

Wednesday, April 5, 2023

Mini Stamps Big Impact

Hi Chris here today sharing this cute Easter tag using the mini stamp from the Anime Fairies 2 Stamp set.  


Supplies needed to create this tag:
Manilla Tag
Sin City Stencil Template #20
Tim Holtz Distress Inks -Old Paper, Walnut Ink
Tim Holtz Distress Markers- Spiced Marmalade, Wild Honey, Pickled Raspberry, Shaded Lilac, Stormy Sky
Embossing Folder-Darice
Sizzix Die- bunny
Vellum
Staz-on Ink
Copic Markers - B24, Y15, YR04, R04, V06
Scenic Route Stickers
Ribbon
Liquid Pearls


I started by inking over the Stencil #20 template using the Old Paper Distress ink.


I then embossed the tag with my embossing folder. A little hint, I partially cut along the fold of the embossing folder just enough to allow the tag to slip through the embossing folder.

 Here is the result.

I then stamped some mini flowers on the embossed image using the mini flower stamp from the Anime Fairies 2 collection.  I used the Distress markers to color directly on the stamps .  I stamped the flowers in multiple colors.  I added Liquid Pearls to the center of each flower. 


I then stamped the mini butterfly from this set onto vellum with Staz-on and then colored the back sid of the image with Copic markers. After fussy cutting the butterflies I attached them to the tag. 


I trimmed off the bottom of the tag that was not embossed.  I die cut out the bunny and inked edges of the bunny with Walnut Distress Ink and added the bunny to the bottom of the tag.


I added some ribbon and Baker's twine and matted the tag on card stock to finish off the tag.

 I had so much fun creating this tag I decided to use the same techniques and stamps to create this card.
I sprayed Glimmer Mist all over the tag.  After embossing the tag I "painted" the vines and flowers with distress ink and my water brush.  The butterflies were stamped on cardstock and then punched out with the Martha Stewart butterfly punch.  I  layered the flowers from Petaloo with Fabri-Tac from Beacon Adhesives and added microbeads to the centers of the flowers using Gem Tac from Beacon Adhesives. I hope you are inspired to create some project using mini stamps.

Looking for more Inspiration? Click the links below!
The Blank Page Muse Shop https://blankpagemuse.com/

Monday, April 3, 2023

Girlfriend Time

 Hi everyone, Steph Ackerman here!

 Today I am using some amazing products from Blank Page Muse and I Brake For Stamps.


Supplies:

How sweet is this dress form?
Color it with Copic Markers before die cutting and adding it to a perfect girlfriend card.

The full tutorial can be found on my blog.

Thanks for stopping by.

Steph

Looking for more Inspiration? Click the links below!
The Blank Page Muse Shop https://blankpagemuse.com/

Save 15% of your Blank Page Muse orders with discount code:  BPMSteph


Copyright Text

Blank Page Muse 2018 Sin City Stamps 2013