Hi There!
Here's a favorite project from December 2013.
Barbara Rankin shows how to make this Mini Butterfly Album.
Enjoy!
Welcome to the Blank Page Muse Blog! We hope you love these amazing projects created by our fabulous Creative Stamping Team. At Blank Page Muse, we are proud to offer red rubber stamps, clear stamps and stencils. I Brake for Stamps rubber stamps are available online in the same shop. Art rubber stamps are pressed to order in the USA. We are here to help break that blank page! Visit our sister shop IBRAKEFORSTAMPS.com
Showing posts with label Love of Butterflies. Show all posts
Friday, May 26, 2017
Wednesday, February 22, 2017
Beautiful Dreamer Mixed Media Wall Art
Jenn here with you today to share my latest project using beautiful stamps from Sin City Stamps!
For this wall hanging I used the following supplies:
Sin City Stamps Love of Butterflies
8X12 art board
Heavy black gesso
Crackle paste
Spray inks in shades of teal, purple, and gold
3D Matte gel
Hot Glue
Embossing powders
Micro beads
bits and baubles...(stash)
So here is how it was done...!
1. Start by covering your surface with black gesso and let dry.
Using an old credit card or spatula scrape on the crackle paste in different levels, (thin in some thicker in others)
Let this dry.
Keep in mind that if you are using a heat tool that the crackle paste will bubble if you hold heat in one area for too long so be sure to move it constantly around your surface.
2. Using the stamps and black archival ink randomly stamp onto the white crackle paste and let dry. Now you can spray on some color!
3.While you are waiting for the colors to dry, start to prepare your stamped butterflies.
Use a ink color of your choice and embossing powder in either clear or an iridescent such as I did. Dry with heat tool and cut out. Set these aside.

4. Now for some real fun!!
Gather up all of the bits, baubles and flowers you have chosen and lay them out how you want them on your piece. Once you do this and get the look you want I recommend you snap a quick photo to refer as you glue it all down.
5. Glue everything in place and then let dry. Once it dries cover all of the bits with black gesso but do not paint the crackle space.
6. Now lightly brush a mixture of white gesso and crackle paste on the bits but do not cover all of the black. Once you have let it dry and then spray your ink colors one at a time drying in between until you achieve the desired look. I also used a brush to apply some gold I added at the end as well as with the teal in some areas. Finish it all off with micro beads for texture. Place the beautiful butterflies where you like to finish!
I hope you find inspiration in this project and that it guides you to make one of your own!
Remember to go to Sin City Stamps to purchase these any many other beautiful stamps!
Monday, August 17, 2015
How to create an Altered Planner Page
Chris here and today I am sharing the "B" side of my calendar insert i shared with you on August 3. I created to hold some of my stickers and embellishments for my Create 365 planner (which I am using as my daily inspiration and make me smile planner:D ). This is what it looks like in my planner.
To create this project I used:
Sin City Stamps:Wish, Love of Butterflies
Distress Inks and Distress Tool- Spiced Marmalade. Mowed lawn, Broken China, Fired Brick
Gesso
Ink- Ranger Archival
American Crafts DIY paper
package insert from Create 365 Calender sticky pads

If you remember I started by gesso-ing my package insert because I wasn't sure what I was going to do on the back side. .I really didn't need to gesso this based on how I ended up finshing the project.
I then started adding torn strips of the American Crafts papers to my insert until it was completely covered.
I then randomly started adding Distress Inks to my page.
I then stamped my Sin City Stamp Images onto the piece. I restamped some of the Wildflowers from the Wish collection without re-inking to create some "background" images.
And here is the Final Project.
Every time I see this page in my planner I smile!
Sunday, March 8, 2015
ART JOURNAL PAGE "TEMPUS FUGIT"
Hello! Today I am sharing an art journal page for SinCity Stamps, using their stamps and stencils.
Supplies:
- SinCity Stamps "Clockworks Inspired by Terri Sproul" stamp Set
- SinCity Stamps "Love of Butterflies" stamp set
- SinCity Stamps "Terri Sproul's Alphabet Set"
- SinCity Stamps "Heart Stencil"
- DecoArt Media Line Gesso, Acrylic Paints, Carbon Black Spray Ink
- Stewart Superior India Ink Pad
- Black India Ink in a Fineliner Applicator
- Palate Knife, Water Brush
I started by applying my Primary Yellow acrylic paint to my journal with a water brush and let it dry.
Then I added some words to my background with my Fineliner. I know it looks like scribbles but I know what it says *wink*. I let this layer dry.
I applied some Gesso over the words with a palate knife. And again, let it dry.
I framed the page with pink acrylic paint and a sponge. I also added some pink paint to the inside of the pages.
When that was dry I sprayed the black spray ink through the heart stencil and let it dry.
Now I laid my stamps out to decide where to put them. I don't know why but "Tempus Fugit" was in my head for days. I took 4 years of Latin in high school, because I'm an idiot awesome *lol* and thought the roman numerals and the butterflies were so very fitting. I stamped the stamps with black India ink.
I used the Terri Sproul Alphabets to write "Tempus Fugit" on the bottom which means Time Flies *i'm sure you all knew that*. Time really does fly! I feel like things are going by so fast lately it is making me dizzy. I hope things start slowing down soon. I like to cherish each moment.
Thank you for visiting! I hope you are inspired by my page. Please go to the SinCity Stamps store and get some of these amazing stamps!! You will LOVE them!
xxDaniella
Thursday, November 27, 2014
Butterfly Canvases
Hello! It's Gracie. This month Sin City Stamps has partnered with Cottonwood Arts. I've used their excellent canvases for various projects of mine, and today I want to share a set of butterfly canvases I've colored and embellished.
Though I have presented these canvases individually, I had the intention of coordinating their design to hang them together as a set. I used 6"x 6" round corner canvases.
Check out How to Make a 3D Embellished Canvas With Pan Pastels by Gracie CH on Snapguide.
Check out How to Make a Shabby Chic Canvas Using a Gelli Plate by Gracie CH on Snapguide.
I hope you are inspired to get some Cottonwood canvases to try out some or many of the techniques we've been sharing with you this month! If you have any questions feel free to leave me a comment here or at my blog!
Thanks for stopping by.
Though I have presented these canvases individually, I had the intention of coordinating their design to hang them together as a set. I used 6"x 6" round corner canvases.
Check out How to Make a 3D Embellished Canvas With Pan Pastels by Gracie CH on Snapguide.
Check out How to Make a Shabby Chic Canvas Using a Gelli Plate by Gracie CH on Snapguide.
I hope you are inspired to get some Cottonwood canvases to try out some or many of the techniques we've been sharing with you this month! If you have any questions feel free to leave me a comment here or at my blog!
Thanks for stopping by.
Thursday, October 23, 2014
Shabby Chic Canvas
Hello and welcome! It's Graciellie posting today.This month Sin City Stamps has partnered with Gelli Arts! What a great combination of products! I've had a great time creating personalized backgrounds with Gelli Arts' Gel Plate, and adding details with SCS stamps. It's almost therapeutic the way the projects come together, and how we have no precise control of the resulting background using the Gel Plate (a truly spontaneous artistic process).
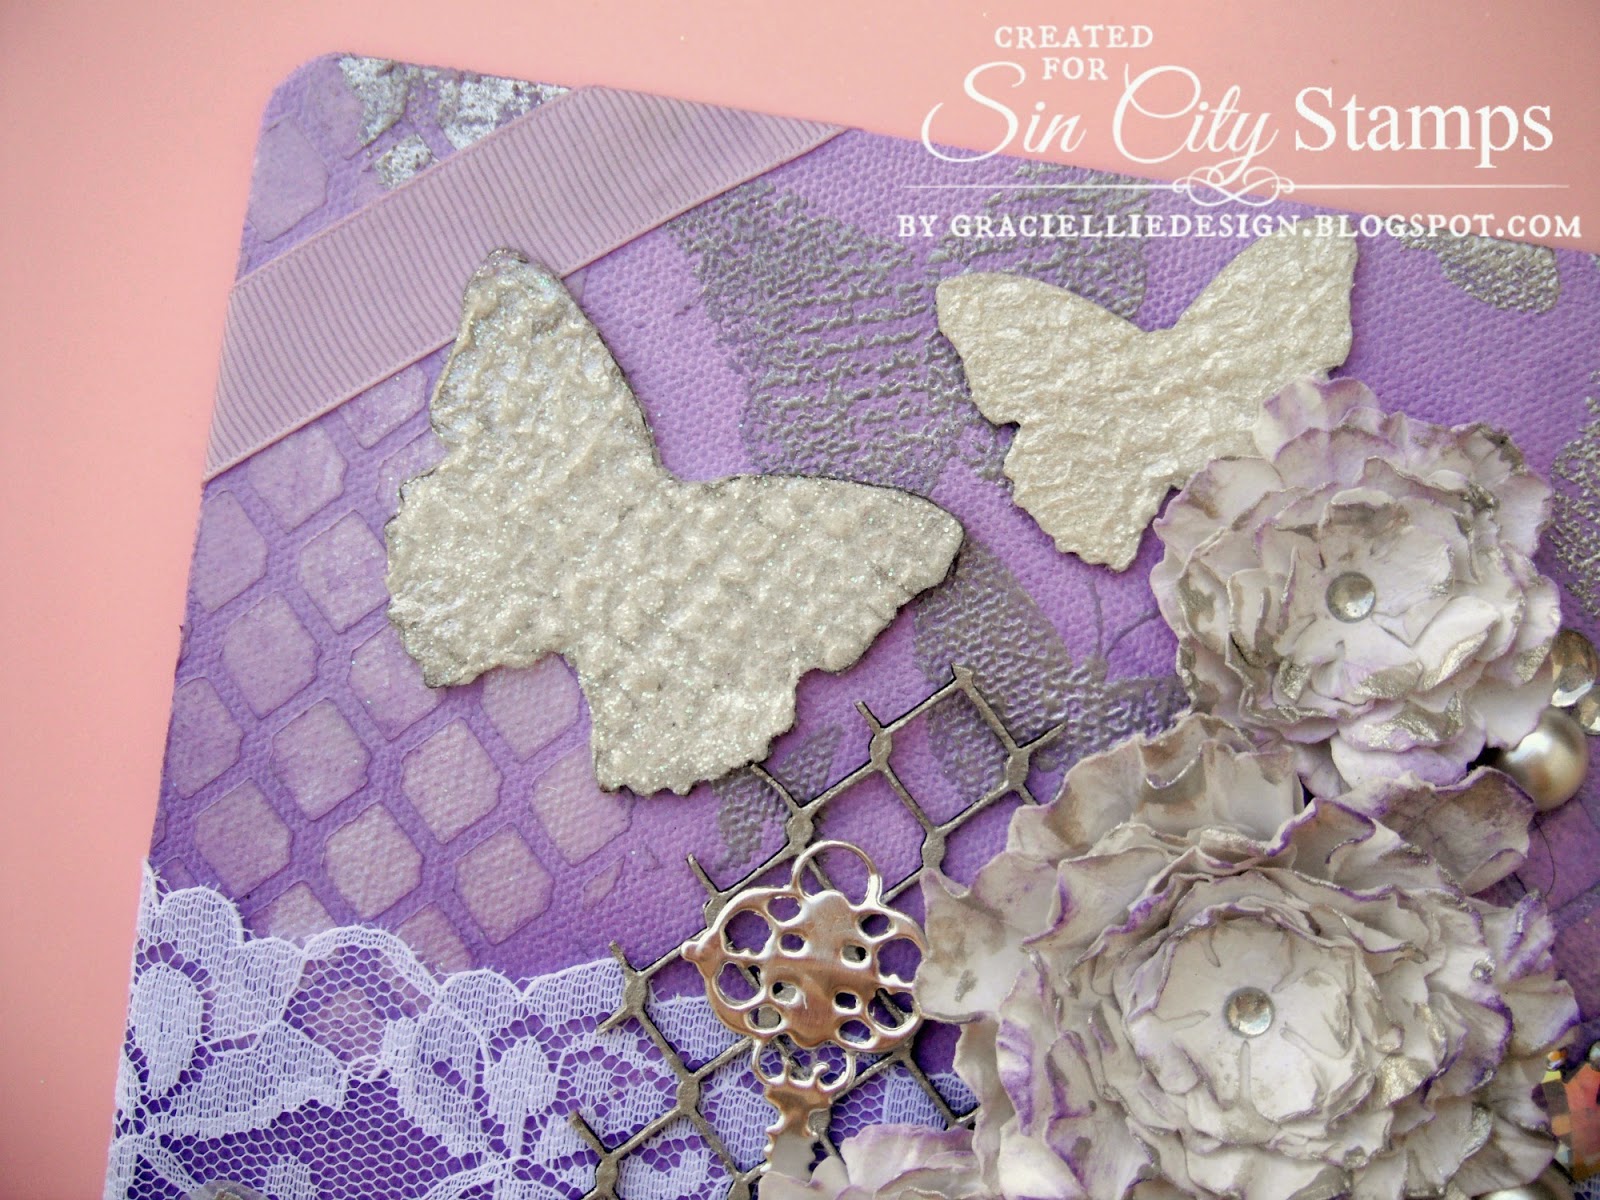
Today I want to show you a 6"x 6" pink, gold, and silver canvas I made.
Main Supplies
Sin City Stamps:
Butterfly Mask
Chicken Wire with Butterflies Mask
Love of Butterflies Plate of Rubber
Gelli Arts 5"x 7" Gel Plate
Cotton Wood Arts 6"x 6" canvas (to be released)
Other
Crackle Embossing Paste
Palette knife
Brush
Baby wipes
Paints: Poster paint in pink and metallic acrylic paints in gold and silver
Embellishments: 2" lace, 3/8" gross grain ribbon, gold vintage buttons, Fused string pearl beads, pearls, crystals
Adhesives: Uhu all purpose adhesive, Bazic two sided tape
I layered many butterflies that I stamped, heat embossed in gold and fuzzy cut to create a 3D effect. The background was created with Gelli Arts Gel Plate. I also stenciled the canvas with crackle embossing paste, which added to the shabby chic design.
I prepared a step by step tutorial for you. Start the guide below to check it out!
Check out How to Make a Shabby Chic Canvas Using a Gelli Plate by Gracie CH on Snapguide.
I hope you like my project and tutorial! For more about the products used, click on the links added to the supply list. If you have any questions feel free to leave me a comment here or at my blog.
Thanks so much for stopping by!
Today I want to show you a 6"x 6" pink, gold, and silver canvas I made.
Main Supplies
Sin City Stamps:
Butterfly Mask
Chicken Wire with Butterflies Mask
Love of Butterflies Plate of Rubber
Gelli Arts 5"x 7" Gel Plate
Cotton Wood Arts 6"x 6" canvas (to be released)
Other
Crackle Embossing Paste
Palette knife
Brush
Baby wipes
Paints: Poster paint in pink and metallic acrylic paints in gold and silver
Embellishments: 2" lace, 3/8" gross grain ribbon, gold vintage buttons, Fused string pearl beads, pearls, crystals
Adhesives: Uhu all purpose adhesive, Bazic two sided tape
I layered many butterflies that I stamped, heat embossed in gold and fuzzy cut to create a 3D effect. The background was created with Gelli Arts Gel Plate. I also stenciled the canvas with crackle embossing paste, which added to the shabby chic design.
I prepared a step by step tutorial for you. Start the guide below to check it out!
Check out How to Make a Shabby Chic Canvas Using a Gelli Plate by Gracie CH on Snapguide.
I hope you like my project and tutorial! For more about the products used, click on the links added to the supply list. If you have any questions feel free to leave me a comment here or at my blog.
Thanks so much for stopping by!
Thursday, September 25, 2014
PanPastel Florals
Hello! It's Gracie from Graciellie Design. It's time to show you my last project for this month's collaboration between Sin City Stamps and PanPastel. What an amazing collaboration should I say! In this opportunity I made a card featuring a technique I really enjoy, colored dry embossing.
Main Supplies
Sin City Stamps - Love of Butterflies (sc4) plate of rubber
PanPastel - Violet, Violet Tint and Permanent Green
Other
Blender marker
Embossing Folder
Papers - Beige leather textured cardstock, lilac metallic cardstock
Adhesives - Mounting tape, two sided tape and Uhu all purpose adhesive
Lilac gross grain ribbon
I have a step by step photo tutorial for you. To see how I made my card, please start the guide below.
Check out How to Color a Dry Embossed Background With PanPastels by Gracie CH on Snapguide.
I hope you enjoyed seeing my card and tutorial. Thanks so much for stopping by!
Main Supplies
Sin City Stamps - Love of Butterflies (sc4) plate of rubber
PanPastel - Violet, Violet Tint and Permanent Green
Other
Blender marker
Embossing Folder
Papers - Beige leather textured cardstock, lilac metallic cardstock
Adhesives - Mounting tape, two sided tape and Uhu all purpose adhesive
Lilac gross grain ribbon
I have a step by step photo tutorial for you. To see how I made my card, please start the guide below.
Check out How to Color a Dry Embossed Background With PanPastels by Gracie CH on Snapguide.
I hope you enjoyed seeing my card and tutorial. Thanks so much for stopping by!
Wednesday, September 10, 2014
Lilac Canvas - Pan Pastel & Sin City Stamps
Hello and welcome. It's Gracie from Graciellie Design and I'm excited to be here once more, to share with you a new project. This month Sin City Stamps has partnered with PanPastel, and I am very excited! My teammates have been presenting such creative projects on the Sin City Stamps' blog showcasing products from both companies, and they've done an amazing job.
PanPastel is such a forgiving medium, it blends so well, it can be corrected with a simple eraser, and it has such rich color, it's is a delight to work with them!
For my project I used PanPastel in Lilac and Lilac Tint together with Sin City Stamps chipboard pieces and rubber stamps. I made a canvas, embellished with handmade flowers and many other elements.
Sin City Stamps: Love of Butterflies rubber plate, Chicken Wire with Butterflies Mask, Chicken Wire w/Butterflies Chipboard Sheet, Chicken wire with Butterflies Chipboard Book,
PanPastel: Violet, Violet Tint
Cottonwood Arts: Cottonwood Arts Thin 6"x 6"Canvas (to be released), Angled Cut Art Sponge - Sofft Tools
DreamWeaver Pearlescent Embossing Paste
Add a Little Dazzle metal sheet
Miscelaneous: Ribbon, lace, glitter, acrylic paint, vellum, cardstock, various adhesives, pearls and crystals
Check out How to Make a 3D Embellished Canvas With Pan Pastels by Gracie CH on Snapguide.
I hope you enjoyed my project and tutorial as much as I enjoyed making it and I hope you are inspired to try it out too! If you have any questions feel free to contact me through a comment here or at my blog.
Monday, June 16, 2014
"Flutter By" Sin City Design Team Project by~ WildHeart Art ~
~Flutter By~
Sin City Design Team Project
By WildHeart Art
I have always loved butterflies with the beautiful colors in their wings as well as the transparent colors in stained glass artwork so I decided to check out my "stash" for this design team project and try to incorporate them both together. I love the outcome and it was a very fun and easy project to do!
~Supplies~
Journal page
Gesso
Glass Bead Gel
Fine glitter
Alcohol inks
Dylusions Ink Sprays
Prima Color Bloom Spray
Black ink pad
Blue acrylic paint
1) Gesso your art journal page and let dry.
2) Spray randomly with the ink sprays and let dry.
3)Apply the butterfly die cuts and using bead gel medium and a palate knife, spread the bead gel medium over the die cut to cover, in a very thin layer. Sprinkle some fine glitter over the butterflies and let dry.
4) When dried add the alcohol inks by drops onto the wings and body randomly to emulate the beautiful colors on the wings.
5) Using the swirl stamps in the Terri Sproul Art Journal stamp set, apply the stamps here and there with black ink. Then using the butterfly stamp to stamp in the middle right of the page.
As you can here in the close up of the wing the bead gel and glitter give it that texture and the alcohol colors give it that lovely transparent color.
6) Here I finished off with some dots of acrylic paints in blue to bring it all together
Hope you have enjoyed this unique butterfly project!
Have a beautiful creative day!
~In love & Faith~
Sherri
Subscribe to:
Posts (Atom)
Copyright Text
Blank Page Muse 2018 Sin City Stamps 2013