Showing posts with label Heart Stencil. Show all posts

Tuesday, February 14, 2023

Sending You Hugs & Kisses!

 Hi Stamping Fans!

Can you believe it's February already? A perfect month to share some "love" themed creations!


Today I have some quick Valentine tags to share with you using minimal supplies:
tags swiped with gesso, music paper, stencil and ink pad plus your chosen valentine's stamps!

Products used:

"The Old and New" Stamp Set
"Gothic Garden Flowers" designed by Miss Rach
"Hearts" Stencil designed by Magda Polakow


***Remember to us the code BPMSharon at the store for 15% off ***
So many fab stamps to choose from!
Note: you can use the code at either the IBFS Store OR the BPM Store - why not do an order from each and increase your stash!


And visit our social media sites for more stamping fun!
I Brake For Stamps -https://ibrakeforstamps.com/ 

Sunday, June 6, 2021

Baby Elephant!

 Hi BPM Fans!

Can you believe it's June already? this year is going so quickly!

It's Winter here "Down Under" so perfect weather for being indoors creating with my Blank Page Muse Stamps!


Our "theme" for the month is "Say It" - this makes me think of words - so today I have created a newborn card with the word "baby" and I think that says it all to explain the card purpose!


Supplies:
Blank Page Muse Stamp: Cute Baby Animals II Set - Baby Elephant
Blank Page Muse Stencil: Hearts Stencil designed by Magda Polakow
Stamped Pattern Paper: See my Post from March
Base Card
Black Ink Pad
Alphabet Die Cuts & Die Cutting Machine
Ink Pads & Sponge
General supplies: scissors, glue, coloring mediums, embellishments

Instructions:
Start by Stamping the little Baby Elephant onto white cardstock and color with your fav coloring mediums. Fussy cut.


Next step is to stencil your base card using the Hearts stencil. Use a sponge and colored ink pads to cover one corner of your card front.


Use your alphabet die cuts and scraps of patterned/stamped card to make the word "Baby".


Arrange your main stamped image with coordinating embellishments - fiber, hessian and adhere to the card front. 


Add your die cut letters and you have completed your card!


Such a perfect soft colored card for a newborn!

Thanks for joining me!

Happy Stamping!

Sharon


Don't forget to check us out at all of our social media sites
The Blank Page Muse- https://blankpagemuse.com/

Thursday, February 18, 2021

Two Romantic Hearts xxx

 Hi BPM Fans!

Here we are approaching the end of another month! I hope you have been enjoying our month of "Romance" and have felt inspired by the DT creations!

Today I am sharing an idea for a romantic card - perfect for lots of occasions depending on what sentiment you use! Always great to have an idea for any occasion cards using the same stamp!


Supplies:
Blank Page Muse Stamp: Vintage Style Dancing Couple
Blank Page Muse Stamp: Heart from Scribble Hearts & Elements Set designed by Pam Bray
Blank Page Muse Stamp: Two Hearts One Love Phrase
Blank Page Muse Stencil: Hearts and Broken Hearts designed by Stephanie Eaton
Base Card
Card front covered with ink stained paper towel OR Patterned Paper
White Paint
Stamp Pad & Scrap Card
Glue or double sided tape, spatula and scissors 
Embellishments


Instructions:
Cover your card front with paper towel. I use the paper towel I have blotted excess ink sprays with. Alternatively use patterned paper or gelli prints cut to slightly smaller than your base card front. Use your stencil, white paint and a spatula to apply the stencil design randomly over the card front. Allow to dry.


Stamp your BPM stamps onto the scrap card using your choice of ink colour and your choice of card stock colour. I have chosen kraft card and a red ink pad to co-ordinate with my paper towel background. Have fun with different coloured inks for your main images no need to stick to just black! Fussy cut your stamped images.


Adhere the hearts, vintage couple and wording along with any embellishments to the card front. 


This card works well with any romantic wording/phrase stamps. Perfect for a wedding or engagement card or for your valentine/special person!


Happy stamping and creating and thank you for joining me again today!

Sharon


Don't forget to check us out at all of our social media sites
The Blank Page Muse- https://blankpagemuse.com/

Sunday, May 10, 2020

STENCIL IT QUICK IDEA SHARON May Challenge Link is Open

Hello Hello Lovely Stampers!
Our Stencil It Challenge Link is OPEN, Yay!
There is no winner for the April Challenge, we only had 3 players which we adore you for playing along in these challenging days! Contact me for a Stamper's Badge for playing if you like!
hello at blank page (muse) dot com


This month has seen the DT show you how to use the new Blank Page Muse stencils on their creations - such a lot of inspiration!


DT Member Sharon loves to use lots of layers and texture on her creations and today she has a quick idea for using stencils on any bits and pieces you have laying around like paint chip samples, gelli prints, painty pieces, tags - anything at all!
You can use plain white Gesso or coloured texture paste to add more interest to your backgrounds adn then add a main stamped focal image or for a quick creation add some collage characters!
You can have lots of fun playing around with your stencils!


CLICK HERE to see the stencils available now in store!


Don't forget to check us out at all of our social media sites
The Blank Page Muse- https://blankpagemuse.com/
Pintrest- https://www.pinterest.com/blankpagemuse/boards/


And....our link up!


Thursday, May 7, 2020

Dream BIG Art Journal Page

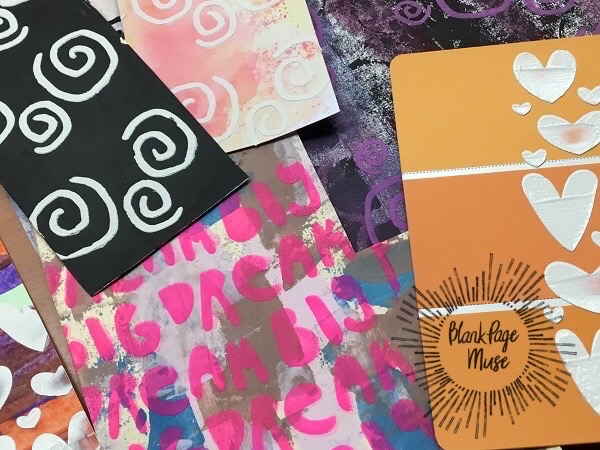
Hi everyone! It's me, Tonya and I am here to share my art journal page I created using the Clara and Dream Big StampsHeart Stencil and the feather stamp from the Flower and Bird Sketches Stamp Set.


I started by watering down blue ink, adding a wash of color to the page and letting dry.  I placed the Heart Stencil on top of the page and taped it down with washi tape to hold it in place. Next I inked up several Art Daubers in different shades of blue and inking over the stencil.


I placed the Clara stamp onto the MISTI Stamping Tool, inked and stamped onto a Watercolor Paper Rectangle Diecut.


I used an assortment of inks that I watered down to watercolor the stamped image and once dry I went back over it with Colored Pencils.


I stamped two feathers from the Flower and Bird Sketches Stamp Set, watercolored and once dry fussy cut both out. I cut a slit on both sides of the image, added a little adhesive and placed the stamped feathers into the slits. 


I adhered the Clara image to the journal page and I placed the "dream BIG" stamp onto the MISTI Stamping Tool and stamped onto the upper journal of the page.  


I finished off the page by adding washi tape under the sentiment and on the Clara diecut. Be sure to stop by Balnk Page Muse to pick up these stamps and stencils which can be found HERE. As always if you have questions about this project please let me know.
Also if you aren't following Blank Page Muse on their other social medias you can find them on: Facebook , Instagram  and Pinterest .


Supplies

Blank Page Muse: Clara and Dream Big Stamps
Blank Page Muse: Heart Stencil
Blank Page Muse: Flower and Bird Sketches Stamp Set
Various Inks
Watercolor Brushes
Colored Pencils
Art Daubers
Watercolor Paper
Art Journal
MISTI Stamping Tool
Beacon Adhesive: Zip Dry Adhesive
Diecut Machine
Nested Borders Rectangles Diecut
Scissors
Washi Tape


Thanks for stopping by, hope your day is wonderful and enjoy creating!


Sunday, March 8, 2015

ART JOURNAL PAGE "TEMPUS FUGIT"

Hello!  Today I am sharing an art journal page for SinCity Stamps, using their stamps and stencils.

Supplies:


I started by applying my Primary Yellow acrylic paint to my journal with a water brush and let it dry.

Then I added some words to my background with my Fineliner.  I know it looks like scribbles but I know what it says *wink*.  I let this layer dry.

I applied some Gesso over the words with a palate knife.  And again, let it dry.

I framed the page with pink acrylic paint and a sponge.  I also added some pink paint to the inside of the pages.

When that was dry I sprayed the black spray ink through the heart stencil and let it dry.

Now I laid my stamps out to decide where to put them.  I don't know why but "Tempus Fugit" was in my head for days.  I took 4 years of Latin in high school, because I'm an idiot awesome *lol* and thought the roman numerals and the butterflies were so very fitting.  I stamped the stamps with black India ink.

I used the Terri Sproul Alphabets to write "Tempus Fugit" on the bottom which means Time Flies *i'm sure you all knew that*.  Time really does fly!  I feel like things are going by so fast lately it is making me dizzy.  I hope things start slowing down soon.  I like to cherish each moment.

Thank you for visiting!  I hope you are inspired by my page.  Please go to the SinCity Stamps store and get some of these amazing stamps!!  You will LOVE them!
xxDaniella

Copyright Text

Blank Page Muse 2018 Sin City Stamps 2013