Showing posts with label shabby chic. Show all posts

Saturday, June 24, 2017

Live Carefree & Fearless Card

Hello Sin City Fans,
For those who love shabby chic & vintage, then my card has everything you could want.
 Incorporating a sewing theme, lace, flowers, & birds make this card rustic yet feminine.
Come follow me and I will show you just how I did it.


Supplies:

1. Inhale Exhale Art Stamp Set (Sin City Stamps)
2. Dress Forms Steampunk Rubber Stamp Set (Sin City Stamps)
3. Flower & Bird Sketches Art Rubber Stamp Set (Sin City Stamps)
4. watermark ink pad / brown & black ink pad
5. embossing powder (white, black, & magenta)
6. heat gun
7. pattern paper scrap
8. paper edge distressing tool
9. acetate & permanent black ink pad
10. pearl domes
11. lace & trim


Directions:
1. Trim 1/2" off the vertical edge of the card front.  Adhere a piece of lace to the edge of the inside of the card. Distress the edge of a 5.5" square of patterned paper and then distress a matching solid paper.  Attach a third coordinating paper to a 6x6" card base.  Layer the two distressed papers offset as shown.


2. Use watermark ink to stamp the dressform onto a scrap, apply white embossing powder, and heat set.  Carefully, cut out the bodice and discard the base.


3.  Next, use permanent black ink to stamp the base onto acetate and trim.  Attach the base to the back of the bodice using dimensional foam tape.


4. Stamp the sentiment in the upper right corner of the card.  Use watermark ink, apply magenta embossing powder, and heat set.

5. Next, stamp the flying bird onto a scrap of brown cardstock and carefully cut out.  Adhere the dressform and bird to the card.

6. Stamp three feathers onto cardstock using watermark ink, apply white embossing powder, & heat set. Cut out the feathers and adhere them fluttering down to the lower right corner.

7. Finally, embellish the card with a random scattering of pearl domes.  Add a piece of trim folded casually near the dressform. Apply brown distress ink to the edge of the cardfront.

A Closer Look:


To purchase the inspiring sentiment & wonderful dressform image, visit  www.sincitystamps.com

For more inspiring paper-craft projects from the Design Team, be sure to visit us at
the Sin City Blog and follow us on Facebook.
To learn more about our designer Karen, please visit her blog, Art & Soul.

Thanks for visiting!

Thursday, January 1, 2015

New Year's Card with Shabby Style

Happy New Year, everyone!  Are you ready for a fantastic year?  I know I am.

I decided to make a card with elements that I feel represent a year's passing.  The wings represent how time flies, while the clock hands and gears are parts of that fast-moving clock that seems to never slow down.  And of course, the Roman numerals represent the year, 2015.


Cut tan card stock to 6" x 12", fold in half to make a 6"x 6" top folded card.

Adhere 5-3/4" x 5-3/4" print paper to card front, edging with similar colors of ink to match the paper colors.

Stamp Roman numerals, as shown.  You will need two "III", an "X" and a "V".
To change the "III"s to M's to represent each 1,000 years, I used post-it notes to mask areas of the "III" and stamped the bottom of the "V" between each "I I I" to turn it into an "M".
Fussy cut the Roman numerals and adhere to card front.

Stamp wings from the Sin City Wings stamp set twice onto scrap tan card stock and fussy cut each.
Layer wings onto card, lifting the top pair of wings with pop dots.

Stamp small clock hand onto scrap tan card stock, fussy cut and adhere to center of wings with more pop dots.  Add Stickles glitter glue to wings (Antique Linen) and clock hand (Vintage Photo).
I wanted a bit more shabbiness, so I added splotches of Frayed Burlap distress crackle paint.

After it dried, I added some Vintage Photo distress stain to bring out the cracks, and then some metal gears to the bottom splotch and to the bottom of the clock hand.

Supples used:

Sin City Stamps:  Sin City Wings stamp set; Clockworks Inspired by Terri Sproul stamp set;
Other: Tan card stock; Print paper (Prima); Distress Stickles (Vintage Photo, Antique Linen); Distress Ink Pads (Black Soot, Vintage Photo); Distress Stain (Vintage Photo); Metal gears (various); Distress Crackle Paint (Frayed Burlap); foam dots

I hope you enjoyed my shabby style New Year's card today.   If you like it, I hope you will visit the Sin City Stamps online store to see what other stamps and accessories they have.  Be sure to also visit the blog regularly as the team has so much inspiration to offer.  Also, I would love for you to stop by my blog to see more of my work!

Thanks for stopping by, and have a wonderful weekend!

Barbara

Thursday, November 27, 2014

Butterfly Canvases

Hello! It's Gracie. This month Sin City Stamps has partnered with Cottonwood Arts. I've used their excellent canvases for various projects of mine, and today I want to share a set of butterfly canvases I've colored and embellished.


Though I have presented these canvases individually, I had the intention of coordinating their design to hang them together as a set. I used 6"x 6" round corner canvases.


Check out How to Make a 3D Embellished Canvas With Pan Pastels by Gracie CH on Snapguide.


Check out How to Make a Shabby Chic Canvas Using a Gelli Plate by Gracie CH on Snapguide.

I hope you are inspired to get some Cottonwood canvases to try out some or many of the techniques we've been sharing with you this month! If you have any questions feel free to leave me a comment here or at my blog!

Thanks for stopping by.


Thursday, October 23, 2014

Shabby Chic Canvas

Hello and welcome! It's Graciellie posting today.This month Sin City Stamps has partnered with Gelli Arts! What a great combination of products! I've had a great time creating personalized backgrounds with Gelli Arts' Gel Plate, and adding details with SCS stamps. It's almost therapeutic the way the projects come together, and how we have no precise control of the resulting background using the Gel Plate (a truly spontaneous artistic process).

Today I want to show you a 6"x 6"
pink, gold, and silver canvas I made.


Main Supplies
Sin City Stamps:
Butterfly Mask
Chicken Wire with Butterflies Mask
Love of Butterflies Plate of Rubber
Gelli Arts 5"x 7" Gel Plate
Cotton Wood Arts 6"x 6" canvas (to be released)
Other
Crackle Embossing Paste
Palette knife
Brush
Baby wipes
Paints: Poster paint in pink and metallic acrylic paints in gold and silver
Embellishments: 2" lace, 3/8" gross grain ribbon, gold vintage buttons, Fused string pearl beads, pearls, crystals
Adhesives: Uhu all purpose adhesive, Bazic two sided tape

I layered many butterflies that I stamped, heat embossed in gold and fuzzy cut to create a 3D effect. The background was created with Gelli Arts Gel Plate. I also stenciled the canvas with crackle embossing paste, which added to the shabby chic design.

I prepared a step by step tutorial for you. Start the guide below to check it out!

Check out How to Make a Shabby Chic Canvas Using a Gelli Plate by Gracie CH on Snapguide.

I hope you like my project and tutorial! For more about the products used, click on the links added to the supply list. If you have any questions feel free to leave me a comment here or at my blog.

Thanks so much for stopping by!


Wednesday, August 13, 2014

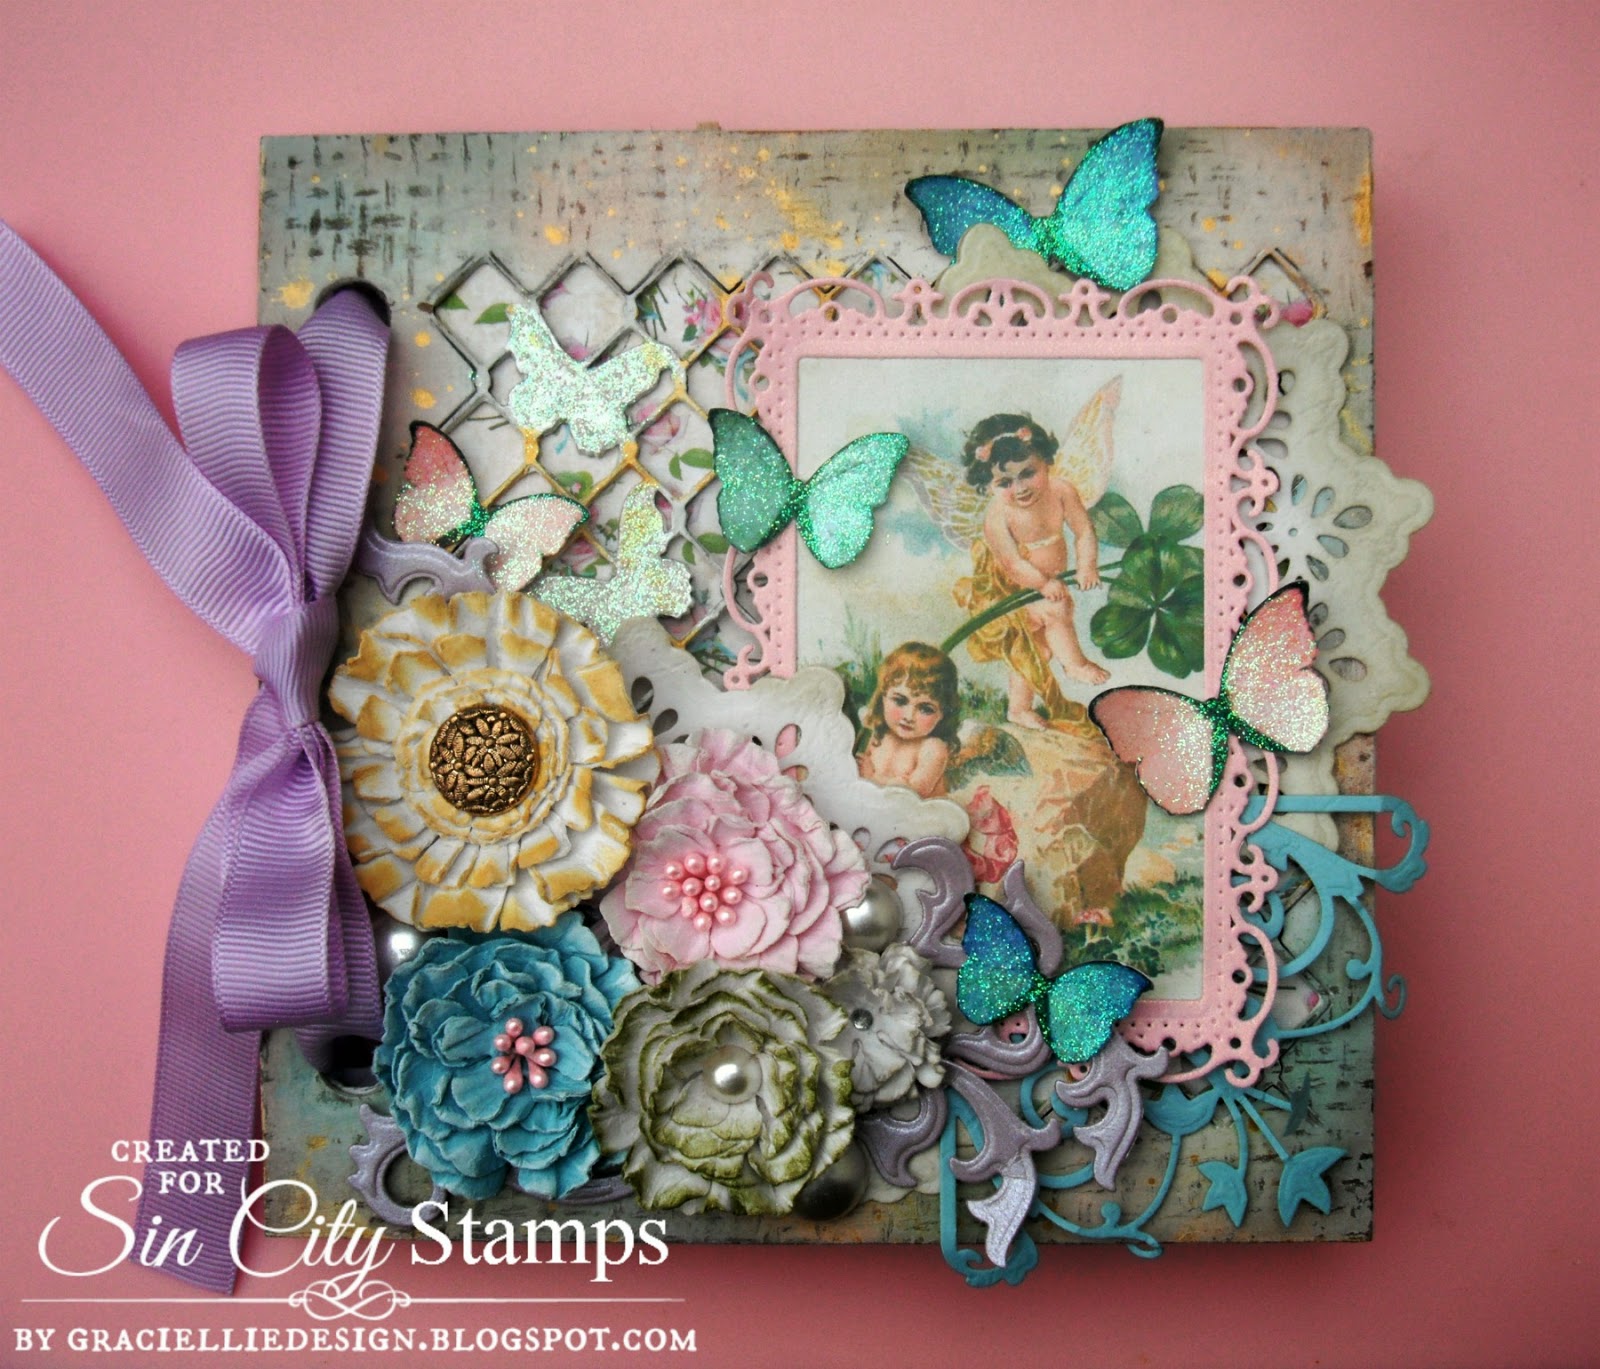
Vintage Fairy Album

Hello! I'm Gracie from Graciellie Design and this is my very first post for Sin City Stamps. Today I'll be sharing a vintage/shabby chic fairy album I made using products from Sin City Stamps and from our blog partner for the month of August, Altered Pages. I will guide you through each step of the process through a photo tutorial.


Everything on this album was made from scratch, from the handmade flowers to the inside pages... To make it, I used the following materials:

Main supplies
Sin City Stamps Chicken wire w/ Butterflies Chipboard Book
Sin City Stamps Love of Butterflies Plate of Rubber
Sin City Stamps Chicken Wire with Butterflies Mask
Altered Pages' Fragile Fairies collage
Altered Pages' Fairy Wings Collage
Altered Pages' Alphabet F Collage
Altered Pages' Library Card
Other
Poster paint
Acrylic paint
Inka-Gold
Distress Inks
Pigment ink
Leather textured and metallic cardstocks
Spellbinders dies
Pearl stickers
Pearl stamens
Vintage button
Adhesives
Ribbon


To see how I created my album, please start the guide below and follow each step.

Check out How to Make a Vintage Fairy Album by Gracie CH on Snapguide.

I hope you enjoyed my project and tutorial. To purchase the products I used to create this album, please click on the corresponding link on the list of supplies. If you have any questions, feel free to contact me through a comment here or at my blog.  

Thanks so much for your visit.


Copyright Text

Blank Page Muse 2018 Sin City Stamps 2013