Showing posts with label love. Show all posts

Friday, February 6, 2026

Cupid Cammy

Hi everyone, Steph Ackerman here today using some amazing stamps and Stencil from Blank Page Muse.


Blank Page Muse Stamps: Cupid Cammy, Love Fancy Word Art
Blank Page Muse Stencil:  Hearts Stencil


Place the stencil on white cardstock.
Using a dauber, ink through the stencil using a variety of pressures to achieve different effects.


Stamp and emboss Cammy.
Color with Copic Markers and fussy cut the image.

Create a card from red cardstock.  Mat the stenciled panel with gray cardstock and add to card.
Die cut 2 ovals using the same red and gray cardstocks, adding to the card.
Place Cammy on top.
Love and fussy cut Love, matting and adding to the card.

Thanks for stopping by.

Steph

Looking for more Inspiration? Click the links below!
The Blank Page Muse Shop https://blankpagemuse.com/

Friday, February 11, 2022

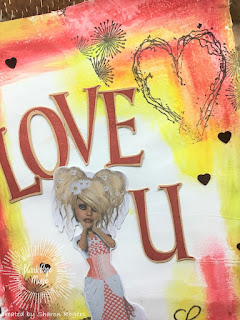
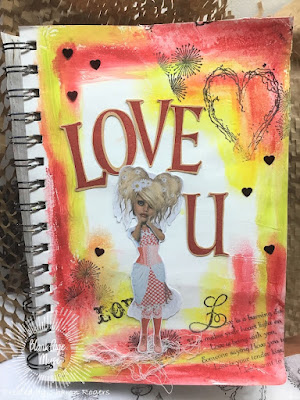
Love U xxx

 Hi Stamping Fans!


Can you believe we are already into the month of "Romance" for 2022? I've created a romantic page in one of my art journals using rubber stamps to compliment a collage image!
Stamp links are below and if you want to see the process pop over to my blog by clicking "here"!


Here are the links to the stamps I used from the BPM Store:
Alphabet Letter Sheet designed by Terri Sproul

Remember if you use the code BPMSharon at the store checkout you can save 15% on your stamp order - what better excuse do you need to go check out the huge range and nab some rubber stamps to create with! AND remember you can also use this code for discount at the "I Brake for Stamps" store as well! Fantastic way to build you stash of stamps and save some money!


Tuesday, February 16, 2021

Quick and Easy Love Card - Stamping on Shiny Card Stock

 Greetings !  I am here today sharing this quick and easy card I created using Blank Page Muse's Love Faith & Family Vintage Art Rubber Stamp Set.   I admit I was on a vintage kick when I created this card. I also admit to being a little inspired by Willy Wonka and those MAGIC Golden Tickets! 

This card was a lot about what happens if I try this?   I had scraps of gold shiny card stock and white shimmer ink on my desk (because I never clean up!!!! but rather move the piles around until I am all done!  It pretty rare that my card require so little "steps" to finish!  But the impact of stamping on the gold shiny card stock was just "WOW!" 

Supplies needed to recreate this card include:

Blank Page Muse's Love Faith & Family Vintage Art Rubber Stamp Set. 

Shiny Gold Card stock

Tsukineko Brilliance Pigment Inkpad, Matte Moonlight White

patterned paper, paper doily, flowers Card base

Stamp LOVE from the Blank Page Muse's Love Faith & Family Vintage Art Rubber Stamp Set using  

Brilliance White ink. This ink dries fast, even on shiny card stock, but I did speed it up a bit with my heat gun. I just love how cool this looks!   


Add stamped image onto doily and add to patterned paper on card base. card. 
Add flowers to finish your card. 

I hope you are inspired to get creative and try new things with your stamps! Be sure to follow us at 

The Blank Page Muse- https://blankpagemuse.com/


FB Fan Page-  https://www.facebook.com/groups/blankpagemuse/


Instagram Shop-  https://www.instagram.com/blankpagemuse/


Instagram Blog-  https://www.instagram.com/blankpagemuseblog/


Twitter-  https://twitter.com/BlankPageMuse


Pintrest- https://www.pinterest.com/blankpagemuse/boards/

Thursday, February 4, 2021

Vintage Slim Romantic Card

Greetings!  Today I am excited to share my tag I created to go along with this month's challenge  theme at Blank Page Muse which is ROMANCE! I admit I was inspired by all the vintage goodness that was created for last month's challenge.  I also decided to hop on the slim line card trend and make this card slim!  

To recreate this card you will need:

Other Supplies - Distress Inks, Water Color Markers (to stamp images), Card stock, Tag, patterned paper, and ribbon

Start by creating your slim card.  Cut a piece of white card stock to 7 x 8 1/2 inches.  Score and fold to create a 3 1/2 x 8 1/2 inch card. Cut a piece of patterned paper slightly smaller than your card base and adhere to your card. 


Using Blank Page Muse Rose Flower with Leaves Art Rubber Stamp by Terri Sproul, color stamp with markers and stamp repeatedly onto your tag. 


I just love the vintage look of this tag!  Stamp Blank Page Muse LOVE Fancy Word Art Rubber Stamp Small onto bottom of your tag.   Mat your tag onto cardstock. 

Add matted tag to your card and finish with a satin-y ribbon to complete that vintage look!
I hope you are inspired to get creative with your Blank Page Muse Supplies.  For more inspiration, be sure to follow us at 

The Blank Page Muse- https://blankpagemuse.com/


FB Fan Page-  https://www.facebook.com/groups/blankpagemuse/


Instagram Shop-  https://www.instagram.com/blankpagemuse/


Instagram Blog-  https://www.instagram.com/blankpagemuseblog/


Twitter-  https://twitter.com/BlankPageMuse


Pintrest- https://www.pinterest.com/blankpagemuse/boards/


Wednesday, April 1, 2020

Sparkly LOVE! April Challenge Theme!

Hi BPM Fans!!!

And so another month is upon us!

I really hope everyone is safe & healthy in these trying times!
And I hope that you are all getting some enjoyment from stamping & crafting!

Ready for the April Challenge??? Our challenge for this month is "Sparkle & Shine" - a perfect theme for lifting our spirits and feeling bright & glittery LOL!!!


I hope you like my creation for today!

Please have some fun and play along and link your sparkly creations to our challenge!


Supplies:
Blank Page Muse Rubber Stamp: "LOVE"
Metallic Silver Card Base: 12 x 12cm square used for this card
Scraps Silver Metallic Card
"Shiny" patterned paper x 2 patterns
Embossing Pad, Silver Metallic Embossing Powder & Heat Gun
Glue and/or Double Sided Tape

Instructions:


Tear your patterned paper into strips that will suit the size of your base card - 3 strips of each pattern.


Weave the strips and tear the ends to neaten. Adhere to your base card.


Stamp and emboss your focal stamp onto the scrap silver metallic card and tear away the excess.


Adhere the focal embossed image to the card front on top of your woven paper. Add any other embellishments.


Thanks for joining me today!

Happy stamping!

Stay safe!

Sharon

Don't forget to check us out at all of our social media sites
The Blank Page Muse- https://blankpagemuse.com/
Pintrest- https://www.pinterest.com/blankpagemuse/boards/


Now you have the theme and a lovely project, come on back on April 10 when the new link will be live!


Monday, February 10, 2020

A Patchwork of Love...and January's Challenge Winner!

Hi BPM Fans!!

We're already into another month for 2020! Can you believe it?

Our theme this month is using multiple stamps - hope you are going to play along with our challenge and show us how you can use lots of yummy rubber stamps on your creations! Use at least 3 real rubber or clear stamps, no digis.

I've made this romantic card - perfect for this Valentine's month! 
Remember way back when this was a technique for creating a card background with stamps? It's fun to play around with the "old" way of stamping haha - I always thought this was an effective way to create a background!

Hope you feel inspired to have a go!


Supplies:
White Card Base
Sticky Note Pad
Ink Pads & Sponge for adding Colour
Dark Coloured Ink Pad for Stamping

Instructions:
Use your sticky notes to create a "frame" in the middle of your card front as shown below in the picture.


Use your sponge or applicator and cover the exposed card with ink.


Using your choice of stamp and a dark ink pad stamp onto the coloured square.


Repeat the above steps over the rest of the card front changing your ink colours and stamps!


You will end up with a patchwork looking card front which is perfect on it's own or you can add a feature stamp to the front or even just a bold sentiment!


A main feature stamp was added to the card as an option to add more interest: Romance Classic Couples used for this card. Lots of possibilities for adapting your card to any occasion!


Thanks for joining me today - hope you will play along with our challenge this month - we can't wait to see what you create!
Make sure you pop back here to the blog to get some more inspiration from the DT!!!

Happy stamping!

Sharon


Love this seasonally wonderful romantic card by Sharon! 

Now for the winner of our January 2020 Challenge!!

#7 Vivian!
Vivian all of us love how you stamped this fun card! Congratulations!! Please email me at blankpagemuse(at) gmail (dot) com !


Don't forget to check us out at all of our social media sites
The Blank Page Muse- https://blankpagemuse.com/
Pinterest- https://www.pinterest.com/blankpagemuse/boards/


You can link up your new stamped creative project here or above under the Challenge tab above! Remember to use at least 3 clear or rubber stamps. No digi stamps. The stamps don't have to be ours but we'd love it if they were!


Thursday, December 26, 2019

Two Hearts One Love

Hi Blank Page Muse Fans!

Hope everyone had a fab day yesterday for Xmas - maybe some of you are still celebrating???

I decided to finish the year off with a creation not related to Xmas but perhaps new beginnings for 2020


This is a great card for making up quickly - perfect for an engagement or wedding - nice and romantic!


Supplies:
Pre Cut Patterned Window Card OR Make Your Own with Patterned Card and a Square Punch
Cream Coloured Card
Black Archival Ink
Embellishments
Scissors, double sided tape, glue

Instructions:
Start by stamping your BPM stamps onto some cream coloured card with black archival ink and fussy cut the birds and bird cage. The phrase will be placed behind the card front window so stamp onto a piece or card large enough to fit behind the window.


Use double sided tape to attach the phrase behind the card front window. Arrange the other stamps and your embellishments on the card front and adhere.


A perfect card which you can adapt to suit any occasion!

Thanks for joining me today!

Wishing you all a very festive season and a happy new year which is just around the corner!

Happy stamping!

Sharon

Don't forget to check us out at all of our social media sites
The Blank Page Muse- https://blankpagemuse.com/

Saturday, April 6, 2019

Love Signs

Hey BPM Fans!
Mercy here again with another project that is sure to brighten a room, wall, or shared area.  
Many chain stores as well as online outlets, have a variety of compressed wood pieces that are perfect for decorating.  In my example, the Love sign was found in the holiday section of Dollar Tree. 
 It's smooth porous surface is great for inking, stamping, collage, and general altering. 
Really, the sky's the limit with these forms and stamping with permanent ink really showed up remarkably well.


Steampunk themed stamps were used for this project, however any themed stamps would look really great on them for a variety of rooms, seasons and uses. 

Supplies:
Dylusions Inks: Yellow and Red
Composite Wood Sign
Permanent Archival Black Ink
Vintage Gold Wax by Prima
Post-it Notes
Inexpensive Sponges
Scissors

Instructions:

1. Spray lightly at the top of your composite sign some of your yellow ink.  Use the sponge to rub in ink, and wipe off, pulling the yellow down the letters.  Dab any excess yellow ink to some scrap papers to reuse later.  Once the yellow is dry, spritz the bottom of each letter lightly, blending with the same sponge the ink there, pulling the red up into the yellow.  Intermingle the inks for a rainbow like affect from the top of each letter, down to the bottom.  Allow to dry.


2. Organize each of the stamps to figure out the best layout for each to be added to the letters.  Try to visualize where the best placements are along the letters for each image. In this case, the stamps were flipped over for spacing, arranged by size as well as theme, making sure as much of the image would be shown on the letters.  Once you decide on best placements, move the stamps off the sign so that you know exactly where to stamp each on the project.

3.  Ink up your stamps with the black archival pad, making sure the stamp is completely covered in it.  It's important to make sure all the stamps, before you stamp, are inked evenly since you have one chance to really get this right.  Once confident the stamp is loaded perfectly, carefully stamp directly on the letters.


4. Stamp all the images to the surface, making sure not to overlap.  If you want overlap or layering, use the post-it notes and mask off the images you wish to protect as the top layer image.


5. Once all the inks are dry and surface is completely decorated, use Vintage Gold wax and apply to all the edges.


Check to see that everything is dry to touch before hanging on a door, standing on a table, or wherever you are needing a little love.


Looking for more Inspiration? Click the links below!

More ideas & crafts by Mercy

Want an extra 15% off on your next order? Use this code on your order! Good until June 1, 2019. BPMDtMercy2019

Tuesday, January 29, 2019

A Valentine's Wish...


Hi Blank Page Muse Stamps Fans! 
Have you been enjoying this month's "Valentine's" themed creations and inspiration?
I'm sharing a mixed media semi vintage style card today - perfect for you to make for that someone special!

Supplies:

Blank Page Muse Stamp: "Make a Wish" from the Dandelion Wishes with Butterflies Set
Blank Page Muse Stamp: Vintage Style Man & Woman from the Romance Classic Couples Set
Black Base Card
Card 1cm smaller than the front of your base card
Old Book Pages
White Watercolour Paper/Card & Small piece white card
Heart Stencil & Texture Paste
Ink Sprays and/or Brea Reese Glitter Ink or like Product
Black & Pink Archival Ink
Gold "Smooch"
Watercolour Pencils and Water Brush

Embellishments: ink stained muslin cloth, corner charms, diamante
General supplies: glue stick, glue, spatula, heat tool to speed up drying process, scissors, double sided tape, mounting tape


Instructions:
Start by cutting your base card from black card or using a pre-made card base. Use your glue stick to adhere torn pieces of old book pages over your card front piece which is cut to 1cm smaller than your card front. Cover the entire front with the pages and then trim excess from sides of card.


Use a "love" themed stencil to apply texture paste to the card front. Note: I didn't cover the entire front - it looks more effective to "miss" bits!! The stencil used here was cut from a piece of acetate on a Cameo Silhouette. We all have our favourite stencils- this I one of mine! Allow to dry.


Once the texture paste is dry spray some pink ink spray and Brea Reese glitter ink and spread over the page by spritzing with a bit of water and "moving" the ink around on the card. Gold and Pink colours used on this card. Allow to dry.


To add a finishing touch to the card front "edge" the piece with gold Smooch or like product. Allow to dry. Remember you can speed up any of the drying processes carefully with a heat tool.


Stamp the Romantic couple onto watercolour paper with Black Archival ink. Stamp the "Make a Wish" wording onto plain white card. Cut around the wording and edge with Pink Archival ink.


Colour the Romantic Couple with watercolour pencils and a water brush and when dry fussy cut the image ready to use on the card front.


Use double sided tape or glue to adhere the card front to the card base. Gather all your stamped images and embellishments ready to arrange and adhere to the card.


Adhere all the elements to the card - use mounting tape to adhere the main Vintage Couple.


Happy Stamping!
Sharon
 Don't forget to visit us at all of these Social Media Sites for more inspiration:

The Blank Page Muse- https://blankpagemuse.com/

Copyright Text

Blank Page Muse 2018 Sin City Stamps 2013