Showing posts with label Stamps. Show all posts

Sunday, December 7, 2025

Birthday Hugs


     Birthday Hugs

Good day, fellow crafters. It's Tamara once again, with a new post showcasing my latest card created using  Blank Page Muse products! Today, I want to send you the biggest birthday hug imaginable—one that's warm, full of joy, and overflowing with all the love you've shared so selflessly. May your year ahead be as beautifully layered and full of life as these petals, with every twist and turn leading to moments that make your heart sing. Let's dive in!


To create this project, you will need the following:

Stamps

 Paper

  • (1) White Cardstock  - 4.25" x 5.5"
  • (1) White A2 card base 

Tools and Consumables

  • Sticky mat (optional but very useful to hold work in place without using tape)
  • Scissors
  • Liquid glue
  • Paper Trimmer
  • Purple Ink
  • Black ink 
  • Ink-blending brush(s)
  • Stamping tool (I use a Misiti)
  • Colored Pencils
  • Masking sheet 4.25" x 5.5"
  • Low-tack adhesive 
  • Sentiment of your choice (Mine came from my stash) 
Process: 
  • Secure the white cardstock to the stamping tool.
  • Align the carnation stamp in the center of the panel.
  • Use low-tack adhesive on the back of the carnation stamp and then secure it to the stamping platform with some light pressure.
  • Ink the stamp with the Black ink, and then stamp the image. Reapply ink to the stamp and restamp if required for complete even coverage.
  • Remove the stamped panel from the stamping platform and secure the masking sheet in its place.
  • Ink the stamp with the Black ink, and then stamp the image. Reapply ink to the stamp and restamp if required for complete even coverage.
  • Remove the masking sheet and trim it along the edges of the image with scissors.
  • Peel the masking sheet back and apply it over the image previously stamped on the cardstock panel.
  • Secure the masked panel to your worksurface or the sticky mat.
  • Use the Purple ink and an ink brush to ink blend a background around the image to the desired hue.
  • Once the ink has dried, slowly peel the masking sheet off at a 45-degree angle to minimize the chances of tearing the image below.
  • Remove the panel from the sticky mat and secure it to a work surface.  I prefer my glassboard because it is ultra smooth, but I have also found a clipboard to work well.
  • Use colored pencils, Pinks, Reds, and Greens, to color in the image.
  • Secure the panel into the stamping platform, align, secure, ink, and then stamp the sentiment.
  • Remove the panel from the stamping platform.
  • Secure the background panel to the black cardstock with liquid glue.
  • Adhere the completed panel to the A2 card base with liquid glue.

The stamps I used can be found by following the links in the materials list, or you can find them with a quick search on www.blankpagemuse.com. Visit our social media sites for more stamping fun!


Saturday, December 26, 2020

A Trio of Snowmen

 Happy Holidays! Today I have created 3 ornaments for Blank Page Muse this month. I love making ornaments and they make great gifts when visitors stop by around the holidays.

Supplies 

Metal Tree ornament
Stickles
Shrink Plastic
Paper Mache round ornament shape
Dimensional Texture paint

I like using found items and recycling them or using items and dressing them up. I bought this metal tree ornament a while ago and found it when I was looking through my Christmas box. I used the Snowman image from the Snowman Snowglobe and cut him down then glued him to the tree. I then used Stickles for some sparkle.


This next ornament was made with Shrink Plastic. 
Here is a quick tip to use the Inkjet Shrink Plastic and resizing images for ornaments. 


This ornament is on a paper mache round base, I covered the base with texture paint for a snowy look than when it was almost dry, I liberally applied glue and placed the snowman on the ornament. 


Ornaments are so fun to make and make great gifts for any time during the holiday season!

Looking for more Inspiration? Click the links below!
The Blank Page Muse Shop https://blankpagemuse.com/


Sunday, May 19, 2019

Happy Father’s Day card

Hello there all our fellow BPM fans! Jess here with you sharing a card using some of those famous red rubber stamps!! This time it's a different masculine take on Father's Day. I just love this stamp set by Kate Leitch! Come along, let's craft a unique Father's Day card together!

Products used:
Spectrum Noir: Watercolor paper
7 Dots Studio: Hazy Days
Prima Marketing Inc. Junkyard Findings: Lightbulb
Ranger Ink: Archival Black ink
Hobby Lobby: Wooden gears
American Crafts: Sticky Thumb - foam dots
Black and White gesso
(Shop now and save! Use code BPMDtJessica2019 to save %15 off your total order!)

I am in LOVE with this stamp sheet! The possibilities are endless!!
1. Cut your desired card size
Do you like using up scraps in your stash? Well, here's your chance
Pull out some of your paper scraps
2. Begin by cutting them at different lengths and sizes
3. Stamp and cut out your images using black ink

4. Take some large pieces of scrap paper and mount the two larger stamped images onto them
5. Cut them out leaving a thin boarder around the images
6. Start mounting your paper layers using tape

7. Use some foam dots or cardboard pieces to mount your top layer of stamped images


8. Adorn the card with some wooden gears adhering them with tacky glue
9. Finally, splatter the front of the card with watered down white and black gesso

You have finished your card! 
Here are some close-ups for you to enjoy!


Thank you for stopping by today!
We look forward to seeing you next time!

Visit and follow us for more inspiration:

Wednesday, May 1, 2019

Just a Note

Hello there all our fellow BPM fans! Jess here today sharing with you a note card using some of those fabulous red rubber stamps!! This month, I'm going for a more masculine appeal. I just love this stamp set by Kate Leitch too! Come along, let's craft some fun pieces for the guys in our lives!

Products used:
Blank Page Muse: Seth Apter Rocky Road embossing powder
Spectrum Noir: Watercolor paper
Ranger Ink: Archival Black ink
American Crafts: Sticky Thumb - foam dots
(Shop now and save! Use code BPMDtJessica2019 to save %15 off your total order!)

Here is a fun photo of the stamp sheet I used!

You cannot tell me that this script stamp is not GORGEOUS! I just had to show it off a bit!
1. Cut your desired note card size
2. Begin by distressing the edges of your paper with a pair of scissors or other tool of your choice
3. Get out your stamp, embossing pad, and powder

4. Emboss your script stamp directly in the middle of the card
5. Heat emboss your stamped script using your heating tool
6. Stamp and cut out your images using black ink
I like leaving a very thing white line surrounding the images to make them POP.


6. Now get out your distressing tool of choice and some ink. We are getting inky!
7. Start blending from the edges inward
The idea here is to have the inner part of the note card the lightest, making the stamped images the focal point. 
8. Finally, use some foam dots or cardboard pieces to mount your stamped images.

Here we are! We have our finished notecard! 
Here are some close-ups for you to enjoy


 Thank you for stopping by today!
We look forward to seeing you next time!

Visit and follow us for more inspiration:

Thursday, March 28, 2019

Fishing Cards

Hello Crafty Friends,

Marie-Christine with you today with 2 bright cards.
Lets go fishing and pick up some seashells by the sea!


BPM Rubber Stamps used:

Fishing Word Rubber Stamp

(Shop now and save! Use code BPMDtMariaChristine2019 to save %15 off your total order!)

Other Supplies
Printed Cardstock
Watercolor Paper
Watercolor Paints
Stencil
White Modeling Paste
Seashells


First, cut 2 squares of paper to make your cards and apply some white modelling paste with a stencil.


When it is dry, colour with watercolour paints, use different colours and add some water with a spray.


Here, my 2 backgrounds.


Then, stamp your fish and colour them with watercolour. Cut them.


Adhere the seashells and the fish. Put some colors on the seashells if you want. Stamp the title on a printed cardstock and adhere it on the card. When it is dry, adhere your cards on a large printed cardstock with double-sided.


Hope you have enjoyed my tutorial!

Thanks for stopping by today.

Marie-Christine
Inspiration Team Member
Please visit the following for more inspiration!


Wednesday, March 6, 2019

Embossed Medallions

Hello! I have to say that this Medallions stamp is one of my favorites! It can be used for backgrounds or snowflakes along with many other ideas.

With that being said I wanted to do a quick inspiration for tags for gifts or any other ideas you might have with this idea.

Supplies -
Blank Page Muse stamp
Medallions Ornate - Michelle Frae Cummings

(Shop now and save! Use code BPMDtKelly2019 to save %15 off your total order!)

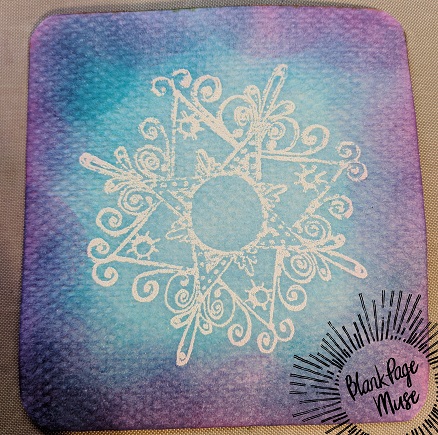
Brush a light coating of cornstarch over the white cardstock with the makeup brush. Then stamp the Medallion Ornate stamp with Versamark ink in the center of the cardstock. Apply white embossing powder and heat set image.


Using the 3 ink colors, starting with the lightest color, sponge on in a circular pattern starting in the center and working your way out. The using the second color, sponge along the outside of the first color and finish off with the last color on the outside edges. When the color overlaps it will create new colors so be careful in choosing the color.

Round off the corners with the corner rounder punch and you are finished!

This would technique would make great tags for gifts all year!

The Blank Page Muse Shop http://blankpagemuse.com/
That's Crafty  UK And Worldwide here http://www.thatscrafty.co.uk/blank-page-muse.html


Monday, February 2, 2015

Love Vanquishes Time


Hi, Chris here sharing my first reveal for Sin City Stamps. 

For this project I used the following supplies:

Sin City Vintage Fashion Stamps
Tissue paper
 Archival Ink (black)
Distress Ink (Antique linen)
Cardstock
Letter stickers
Embossing Folder
Lace Heart Doily
Black lace
Baker's Twine
Decoupage 
Sandpaper

To create this card, I started with a White cardstock card base (10x7 ).  I cut out a card base "top" in black and adhered to the card base. 

I then stamped the watch from the Sin City Vintage fashion on a cream colored tissue paper.  I stamped multiple images.  (the folds won't matter or show up. )


I then tore the tissue paper into pieces and adhered to a piece of white cardstock (to create the card background) and to a chipboard heart using decoupage.  After the pieces were dried I trimmed off the excess paper and sanded the edges.  I attached the cardstock background piece to the card. 


I then Embossed a 4 x 6 piece of cardstock.  I slightly sanded the embossed piece and then matted the embossed piece onto black cardstock, and attached diagonally onto the card


I cut the inside heart out from the white heart doily and then inked the doily with Distress Ink.


 I attached the heart on the left side of the card trimming off half of the heart for use on another project. I then added the letters to the heart and backed the heart with black lace and added to the card.  I added a baker's twine bow to the heart to help soften the bold black and red tones. 


Hope you enjoyed this card and technique!  Here is another picture of the final product! 


Monday, June 23, 2014

Free

Hey!  It's Robin Redd (a.k.a. RockinReddRobin!)
 
  
Today, I worked on an art journal page based on week 4 of The Documented Life Project.  If you don't know about The Documented Life Project, click the link, here, for more details.

Personally, I don't keep the weekly journal as they do.  I just use the art journal prompts when I can get to them.  Like I said, this is the art journal prompt for week 4 and they are on week 26!

Week 4's journal prompt was to "Write a secret message and then paint over all but one key word."
I had written a letter, a while back, on watercolor paper for this use.  I didn't know of this prompt, specifically, but it's kind of cool how it worked out.

I used the background stamp and the wings stamps from the Classic Spark collection.  I LOVE these wings and that background stamp will get used over and over, for sure!

 I LOVE these wings.

 And, that background stamp will get used over and over, for sure! 

I hope I have inspired you to create something today.

Until next time...

Copyright Text

Blank Page Muse 2018 Sin City Stamps 2013