Showing posts with label wings. Show all posts

Friday, August 20, 2021

Paper Dolls

 Hello crafty friends! Kelly Parker on the blog today with Blank Page Muse using several of their people and photobooth stamps which are listed below.  I love using people and face stamps, they are so versatile and a fun way to make all kinds of projects!

Supplies -

Various pieces of collage papers
 - gelli prints
 - magazine pages
 - old book pages
 - washi tape
 - stickers
White Cardstock
Versafine Clair Ink

Stamp out the images onto the white cardstock, draw a body and cut out the images. Stamp the Vintage Lady and Steampunk Gentleman, cut out the wings for use on the dolls. 


Glue assorted papers to the bodies of the dolls and embellish with stickers, lace, washi tape, sequins, and hats. At this stage, you can use anything you want to decorate and embellish your dolls. You can also use a paint pen to create more texture and marks on each doll. When you are finished, you can ink the edges with a crayon, ink pad or pen or even do some stitching on the body of the doll. 


Here is each doll up close, Enjoy!!


Monday, December 7, 2020

Angel Wings Chrismas Ornament

 For December all Blank Page Muse DT members are making Christmas ornaments. Because we are all busy in December I thought to make a quick and simple ornament, that does not require a lot of supplies to make. The process can be watched in the video below. This idea can be used with any symmetrical stamp, e.g. butterflies, flowers or whatever theme you want your Christmas decorations to be.

If you want to make a lot of ornaments, it is easy to set up you own assembly line, first stamp out all the images you want to turn into ornaments, next color them, emboss, cut the images out and add the hanger. A fun activity to do together with kids. 


List of materials used:

Rubber Stamp "Angel Feathered Wings Heart shaped" by Blank Page Muse, (this stamp can also be found on the "Wings"stamp set.)

White cardstock

Waterproof stamp ink in black

Embossing ink pad

Silver Holographic embossing powder

Colored pencils 

Wire, ribbon, or twine

Scissors

Heat gun

Glue


For detailed instructions, see video:


Here another picture, it's hard to capture the glitter in a photograph.


I hope you enjoyed watching the video and will have fun making your own ornaments. For more ideas check in on the blog regularly, there will be lots of fun projects made by the team this month.


Looking for more Inspiration? Click the links below!

Wednesday, August 29, 2018

The Flying Coin and Other Tales......

Hi Again Everyone!
Back for my second post for this month!
Are you enjoying the "ATCoins" theme we have going on at the moment?
It seems everyone has gone crazy for this new "fad" and I'm no exception especially as I now have a 2.5" die cut that I can use to go crazy cutting ATCoin bases - addicted? Yes!
Today I've created some ATCoins but instead of using them to trade I have used them as the main focus on journal pages!!! LOL Some are just too cool to give away!!
I was given a fab ATCoin collage sheet of "faces" and they were just perfect for teaming with the Blank Page Muse Stamps to create these fun and whimsical pages in my journal!
Hope you enjoy!
Supplies:

  • Blank Page Muse Stamps:
  • Feathered Wings
  • Dragonfly by Pam Bray
  • Dare to Fly Word Stamp
  • ATCoin Bases (2.5inches round) cut from gelli prints or patterned paper
  • Collage Faces: Art Tea Life sheet used for these creations
  • White Card
  • Archival Ink Pads
  • Tools & Accessories: scissors, glue, embellishments ie. muslin cloth, encyclopaedia wording, washi
  • Optional: embossing ink and powders or glitter glue
  • Journal page backgrounds or decorated tags, index cards etc.

Instructions:
Start by cutting your ATCoin bases from Gelli printed card or alternatively use patterned paper.


Stamp the Blank Page Muse "Feathered Wings" onto white cardstock using coloured ink of your choice - co-ordinate with your ATCoin backgrounds. Fussy cut the wings.


Cut the "Faces" from the collage sheet and adhere to your ATCoin backings.


As an option you can cut your ATCoin backings from plain white card and embellish the edges with glitter glue or embossing ink and powder for a sparkly look!


Add the Feathered wings to make little "characters". These ATCoins are ready to embellish your journal pages!


The following steps show how I completed a couple of journal pages with the ATCoins:

You can also use your ATCoins to embellish altered index card and large tags - lots of possibilities!

Start with a background and choose one of your "character" ATCoins and some embellishments.


This "character" is reminiscent of the Greek God "Hermes" who is typically depicted with a winged hat - so instead of using the stamped wings as wings they were used to symbolise Hermes winged headwear! This ATCoin has been added to the page with muslin cloth, encyclopedia page with "Hermes" description and a few pink gemstones.


There are so many fab Blank Page Muse Stamps that you can adapt for this purpose: shown below is the Large Dragonfly stamp and another of the ATCoin characters ready to be adhered to another journal page!


Page background ready to add the coin - added washi tape, muslin cloth and the Blank Page Muse stamp "Dare to Fly" - perfect for the end look!


And the finished page with the dragonfly "character" as the main focal point!


Thanks for joining me again today!
I hope you like my little ATCoin Characters and you are inspired to try some for yourself!
Happy Stamping!
Sharon
PS Don't forget to check out all the links below for even more inspiration with Blank Page Muse Stamps!
The Blank Page Muse- https://blankpagemuse.com/

Sunday, July 29, 2018

Time Flies!

Hi Blank Page Muse Fans!!
Time for me to share another creation with you!
I've made another postcard creation this month entitled "Time Flies" and I don't think there is a truer statement especially as we get older LOL!!
I wanted a vintage feel but still have a "travel" theme as I have been focusing on making Travel themed postcards this month here at the Blog!
Spread your Wings and "Come Fly With Me" and find out how I created this!!


Supplies:
Blank Page Muse Stamps:
Pocket Watch with Face
Feathered Pair of Wings
Time Flies It's Up To You To Navigate (only used "Time Flies" words)
Art Journaling #2 Set
Seth Apter Baked Textures:
Vintage Beeswax
Patina Oxide
Gold Embossing Powder
Index Card 6 x 4 OR Card cut to 6 x 4 size
Linen Finish White Cardstock
Memento Rich Cocoa Ink Pad
Embossing Ink Pad
Vegetable Glycerin
Distress Ink Pads: walnut stain, vintage photo, tea dye, old paper, lucky clover, worn lipstick
Embellishments: ie. muslin cloth, cotton
Tools: heat gun, scissors, paint brush, sponge applicator for Distress Inks, cotton tip or makeup applicators

Instructions:
Start by gathering your stamps and ink pads. Used here is a lined index card as the lines add texture and age to the look.


Stamp using the "aged brown" coloured Distress inks with the wording and texture stamps from the Art Journaling Set. Use the sponge applicator to cover the unstamped areas with colour.


Use the paint brush to apply a thin layer of glycerine to the entire card. (Glycerin can be used for embossing - not my idea - I have been watching Youtube videos where people have been using it!)


Add the Vintage Beeswax powder to the entire card. Use your heat gun to "emboss".


Add some more glycerine to the edges of the card and apply the Patina Oxide enamel and emboss with the heat gun.


You now have a lovely shiny background and you can still see the background stamping through it plus a contrast colour to border the postcard.


Next step is to stamp our images for the front of the postcard. Using the Rich Cocoa stamp pad stamp the Pocket Watch with Face onto the Linen finish cardstock and fussy cut (here the "top" of the stamp has been cut off)


Add some basic colour to the watch face using a cotton bud and distress ink. This is very easy to do - no colouring skills required - just add small amounts of colour to the cotton bud and rub onto the card to achieve a subtle effect.


Stamps the wings onto Linen cardstock with embossing ink and emboss with gold embossing powder. Fussy cut and separate the wings.


Finally stamp the "Time Flies" onto card with the Rich Cocoa ink. Cut the "Time Flies" words only and edge with Distress Ink.


Gather the embellishments you want to use and start to arrange everything on the base postcard. Adhere the wings on the sides of the Watch.


Adhere the muslin cloth, cotton and main images to the front of the postcard.


Place the wording in the bottom corner.


Print out a postcard backing - used here by Art Tea Life. you can also make your own. I like the vintage style of this one which matches the front of my card!


 The completed postcard ready to "wing" it's way around the world before time gets away!


Thanks for joining me - hope you enjoyed the process!
Be sure to pop back here regularly for lots of inspiration and creativeness from the DT - we love creating with the amazing range of stamps at Blank Page Muse!
Remember to join our Facebook Group for new release information and to share your creations with us!


Have a great crafting week!

Sharon


Thursday, November 2, 2017

Christmas Art Journal spread

Hello all, Monique here showing you how I made this page in my small Moleskin art Journal

Supply list:
Music paper (old sheet music or scrapbook paper)
Glue
Scissors
Glitter glue
Black and blue  waterproof stamp ink
Paints in vintage green, colonial green and traditional burnt umber
Punched holly leaves
Water
Stencil
Paintbrushes
Colored pencils
Vintage image/ clip art
Black pen
Acrylic block
Pencil
Glitter cardstock in vintage green / yellow and red colors
Step 1: Put the journal on the music paper and trace around it to have a guideline to cut the paper to the right size to fit in your journal.

Step 2: Glue the music paper in the journal and let the glue dry.
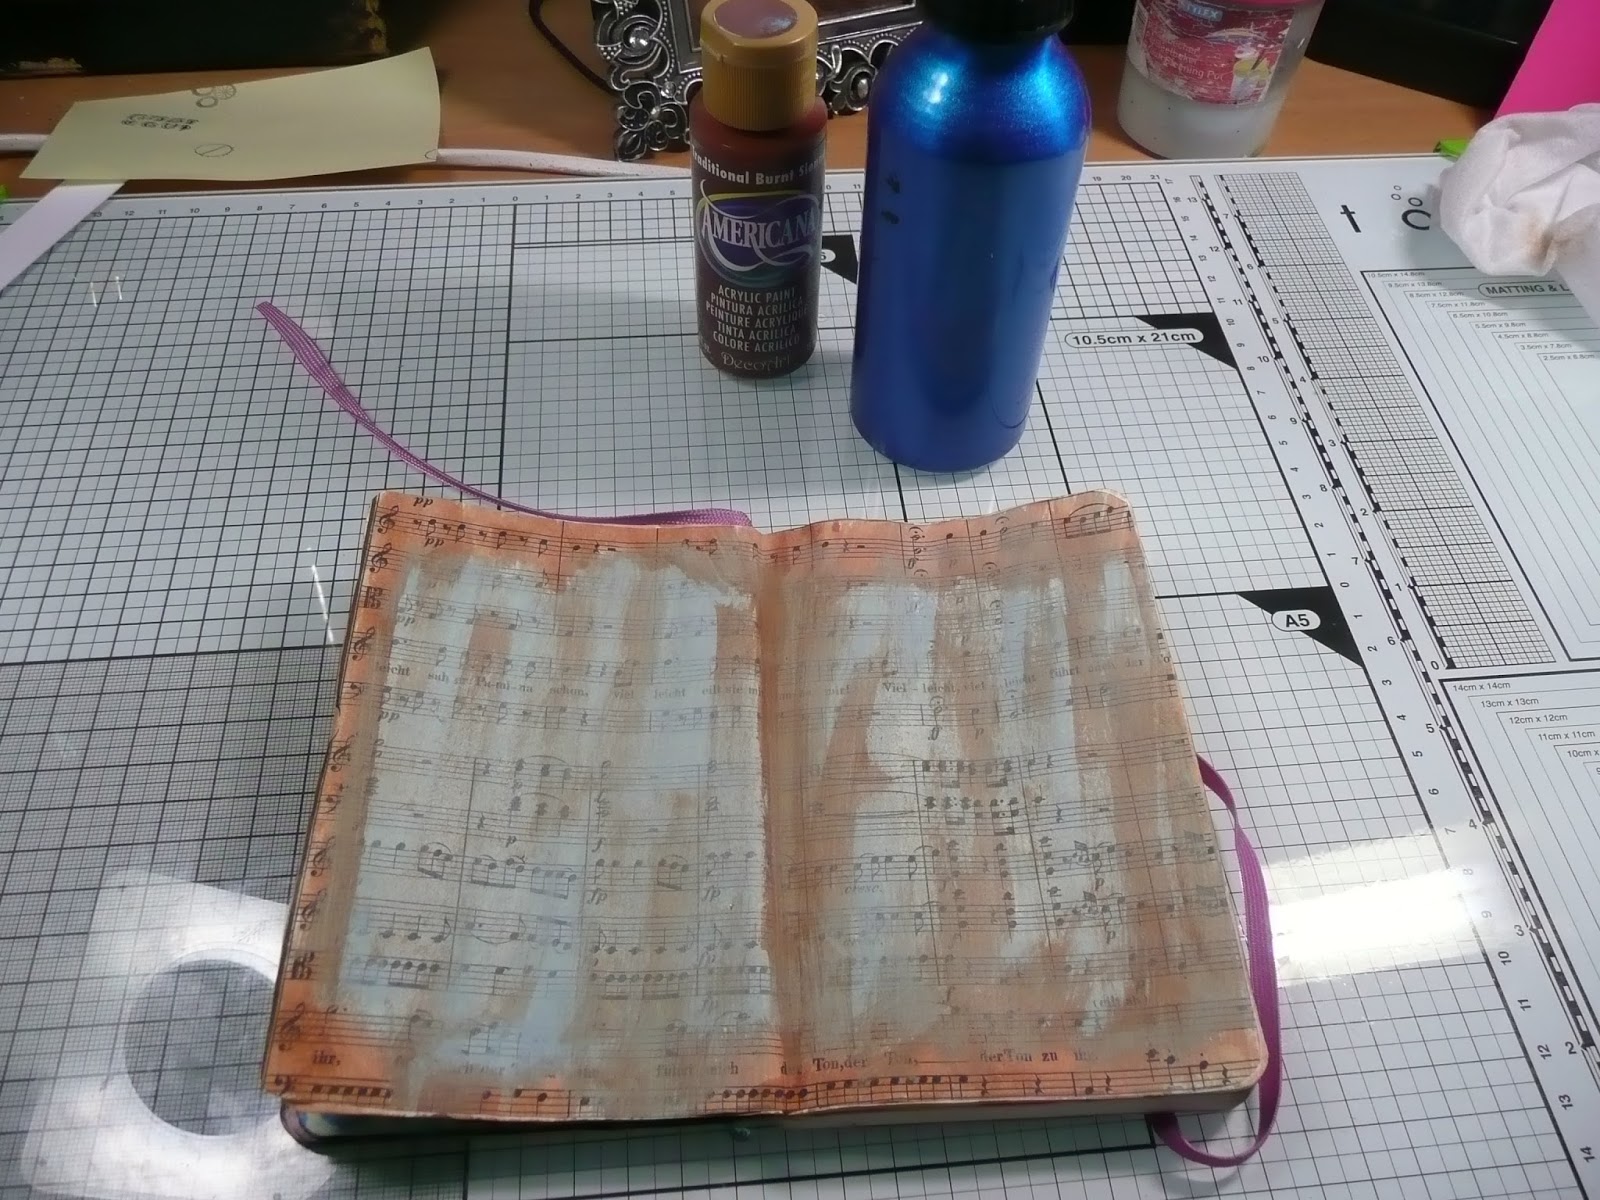
Step 3: Add a thin layer of vintage green paint using a paint brush. Leave the edges blank. You don't have to be precise, we are aiming for an old rustic look. Make sure the print of the paper stays visible.
Step 3: Thin some burnt umber paint with a little water and paint the edges and also add a bit over the green paint, make sure you can still see the print of the paper through the paint. If you used too much paint, just remove some using a baby wipe
Step 4: Use a stencil and Colonial green paint on the page.
Step 5: Make impression using the Sin City Fancy Curls and Flowers flourish art stamp and a waterproof blue ink on the edges and the corners, but also in the middle of the page. Use different parts of the stamp by turning it,  like in the picture.
Step 6: Use the Sin City Skull Streetlight Halloween art stamp on the left page, make sure your stamp ink is waterproof otherwise it will smudge when adding next layers.
Step 7: Make an impression using the Sin city angel feathered wings heart shaped rubber stamp, make sure the wings are in the right spot to be the wings of the vintage figure, so make a little mark on the paper before stamping by putting the image in place, remove it after you made the positioning mark and stamp the wings using black waterproof ink.
Next color the wings.  I used pencils in Blue, Purple and white

Step 8: Adhere the vintage image on the wings impression, make sure the feet line up with the bottom part of the wings. Next trace around the image using a black pen that will allow you to fade it into the background a little before it dries permanently ( I used a Faber Castell Pitt marker). Also use this pen and same technique to create a bit of a surface for the lamp and the angel to stand on. So draw a line and fade it out using your finger.
Step 9: Punch out the holly leaves and berries using glitter cardstock, I used green and yellow for the leaves and pink for the berries. Use the holly to cover the skull on the lamp.
Step 10: Add glitter glue on the edges of the page and on the "ground"where the lamp and the angel are standing. Also add a bit on the lamp, I was aiming for a snow effect.
Step 11: Write a sentiment.

Here some more pictures of the finished page.


Thanks for visiting.

To purchase these supplies, visit www.sincitystamps.com

Sin City Stamps Blog

    Follow us on Facebook
Join the Sin City Fan Group. HERE 

Copyright Text

Blank Page Muse 2018 Sin City Stamps 2013