Showing posts with label Sin City Art Stamps. Show all posts

Saturday, December 16, 2017

Peace and Joy


Hi all, Monique here to show  you how to make this tag.
I originally thought this was going to be quick and easy but it turned out to be a lot more work than I thought. Worth it though,  so enjoy!

Supplies

Sin City stamps: Cherub border background and Vintage wavy banner

Liquid masking fluid
watercolor paint
pencils
stencil
Wire
Cardstock
dies
modelng paste
3 d foam
waterproof stamp ink in black


 1) Stamp the images using waterproof black ink on a tag
 2) Cover the stamps with liquid masking fluid using an old paint brush (the masking liquid dries into a rubber like mask that will resist water color paint)
 3)Mix water and blue and green water color paint on a piece of plastic or acrylic stamping block and press it onto the tag to create the background.
 4) Repeat till you like the result and let dry.
 5) Scrape modeling paste through a stencil and let dry.
 6) Remove the masking fluid (you can rub it off but be careful not to remove the modeling paste too much.)
 7) Colour the modeling paste and the stamp impressions, I used Inktense pencils.
 8) Die cut a swirl and stars , use gilding wax on the swirls and paint the stars yellow.
 9) Adhere the swirl to the center of the rays.

 10) Wrap some wire into a circle like in the photo.
 11) Attach the wire to the swirl and hang a star in the wire circle
12) Use foam tape to adhere the smaller stars and add a sentiment to the banner.
 Here is some closer looks at the stars.


Thanks for visiting.

To purchase these supplies, visit www.sincitystamps.com

Sin City Stamps Blog

    Follow us on Facebook
Join the Sin City Fan Group. HERE 

Sunday, December 3, 2017

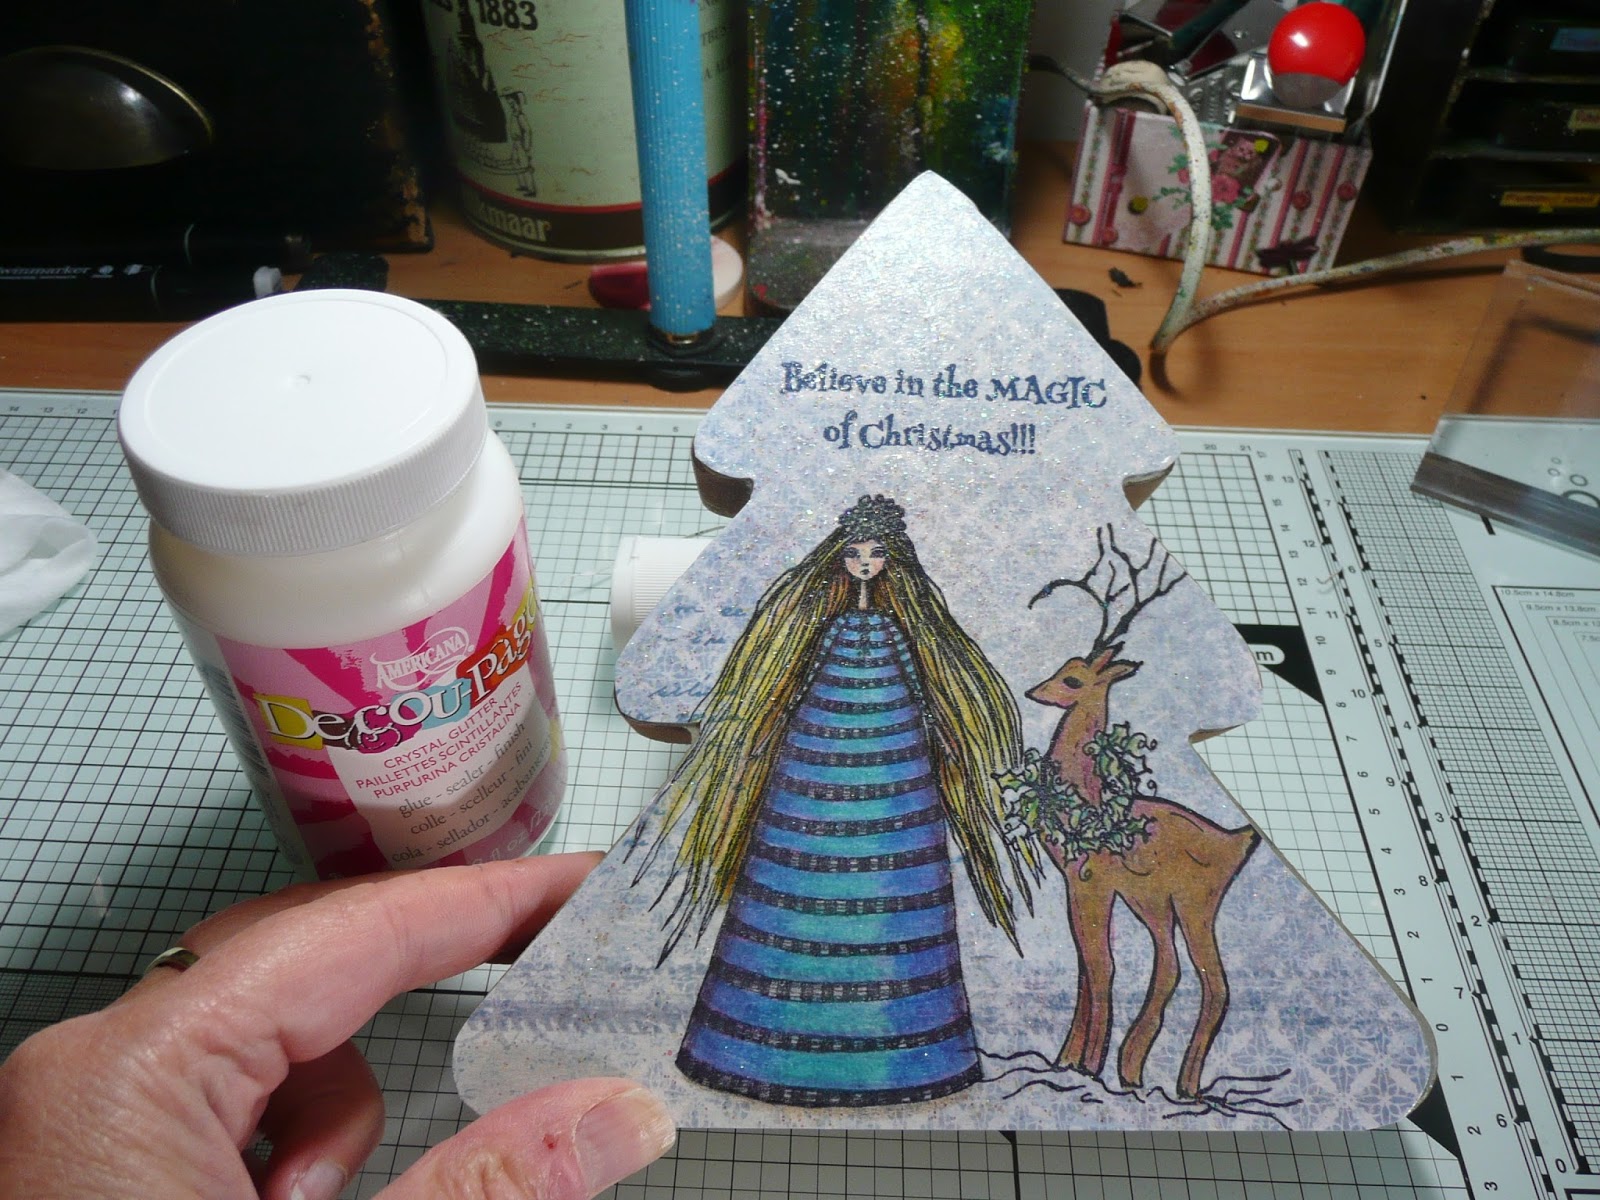
A Christmas Tree Tag Ornament

Hi all, Monique here, showing you how I made this home tag ornament for Christmas!

Supplies:

Sin City rubber-stamps used:
  Winter Reindeer ,
  Phoebe art doll
and the sentiment from the Country Vintage Christmas set.

Additional products used:
Wooden Christmas tree shape,
 Patterned paper,
Rhinestones,
 Metallic colored pencils,
Glistening Snowtex,
 Decoupage crystal glitter
, Craft Twinkles,
Glistening Snow Writer,
 Waterproof black and blue stamping ink


Step 1:Trace the shape of the tree on to patterned paper and cut it out.


Step 2 : Stamp the winter Winter Reindeer, using black ink, see pic


Step 3:Make a mask and cover the reindeer before stamping Phoebe art dolll, to make it look like the reindeer stands before Phoebe art doll. Use black ink.

 Step 4: Use blue ink to stamp the sentiment from the Country Vintage Christmas set.
 Step 5: Colour in the images, I used metallic pencils to get a shiny festive result.
 Step 5: Add Craft Twinkles to the patterned paper
 Step 6: Adhere the paper to the tree using decoupage glue with glitters in it.
 Step 7: Add snowtex to the ground and the glistening snow writer to the edges of the tree
 Step 8: Decorate the top of the tree using rhinestones. Let the snowtex and snow writer dry. The Snow writer will dry transparent to give an icey look.
 Here the finished result and some close ups.


For more inspiring paper-craft projects from the Design Team, be sure to visit us at the Sin City Blogand follow us on Facebook

Join the Sin City Fan Group. HERE

Saturday, November 18, 2017

Yikes Tentacle Plant Mixed Media Tag

Hi all

Here is an easy mixed media tag made using Monique's  Wildflower Yikes Stamps.

Product list
Large tag die cutter
white card
Black archival ink
Tyveck Material
Metallic paints


Start off with a large blank tag and using a blending tool, Apply light orange ink across the top and bottom of the tag. Next use purple ink and apply it across the middle and blend a little into the orange.


Stamp the boarder stamp around the edges of the tag and then stamp the wildflowers into the corners of the tag. You can layer up the tentacles to  create larger flowers.


Stamp out Yikes into the center of the tag.


Cut out cogs from Tyveck material and paint with metallic paints. 
Tyveck can be bought as sheets or you can buy disposable overalls and cut that up.
Create a flower by placing a metal brand though the center of the cogs and melt with a heat tool.


Wednesday, November 8, 2017

How to Alter a Charming Washi Tape Holder

Hello crafty friends,

Learn how to use your Sin City Art Stamps to decorate a bin to add a personal touch to your craft room!


You will need
A MDF or other storage container
Red acrylic paint
Clear varnish
Crackle glaze

1) Cover all the bin with Gesso
2) Paint with red paint


3) Using black pigment ink, Stamp a few butterflies into the corners and then stamp out a dandelion border.


4) On the outer panels, stamp out rows of butterflies,


5) On the bottom inside panel, Stamp out a mixture of dandelions and butterflies.


 6) Coat outer panels with a clear varnish
7) Coat inside area with a crackle glaze or clear varnish
8) Glue the pieces together.

Thank you for visiting

Tuesday, September 19, 2017

How To Create A Spell Binding Halloween Card

Hello all

Here is another Halloween card made using Sin City Stamps!

Halloween patterned paper
White Card
Purple ink pad
Sepia ink pad
Brown ink
Crackle medium
White paint

Cover the card with patterned paper.
Stamp cob webs into the corners of the card.
Stamp the bingo stamp onto card stock and ink over with brown ink.
Allow to dry and then paint over with the crackle medium.
Once set dry brush with white paint and wipe off excess.


Stamp out potion bottles and brush with brown ink.
Add crackle medium to the bottles and once set dry brush with white paint.


Cut them out and adhere them to the corner of the bingo card.
Add a sentiment


Thank you for visiting


For more inspiration please join our fan group https://www.facebook.com/groups/sincitystampsfangroup/

Friday, August 25, 2017

Learn How To Create This Entangled Octopus Time Card

Hello

Here I have a steampunk themed card made using the Octopus Time stamp set.
Products
Card blank
Sepia ink
Purple ink
12 x 12 steampunk themed papers

Cover a 6 x 6 blank card with brown paper and the half with patterned paper.

Cut out a large hexagon from faux print style paper and glue to center of card.


Stamp out the octopus lady onto white card using a purple ink pad. Use sepia coloured ink to colour over the white areas and then adhere to the edge of the hexagon. 


Stamp out the cog cluster onto card and color in before cutting out and adding to the corner of the card.


Finish by adding a witty sentiment.

Visit our Facebook group for more inspiration

Saturday, July 29, 2017

Quick Idea's- Grungy Textures ATC Set

Hi all

Here are some quick ATCs to show you using the new Background Grunge stamp set by Pam Bray.


To create the backgrounds, Add paint and then stamp textures over the top.


Stamp out the circles onto card stock and colour them in before adhering them to the ATCs.


Create different style of ATC by changing colours and combining different texture stamps.

Thanks for visiting.

Copyright Text

Blank Page Muse 2018 Sin City Stamps 2013