Showing posts with label Just Us Girls. Show all posts

Friday, February 7, 2020

Just Us Girls~ Using Stamps Multiple Ways with Guest Designer, Sari "Granne"!

Hello Lovely Stampers!
Today we another special post from one of our Guest Designers, join me in welcoming Sari!

Sari made 3 cards using the same stamps and it looks like she had a lot of fun along the way!


I used the "no line" technique, stamped (masking one of the girls) the images with Distress Ink Antique Linen and then colored them with watercolors.

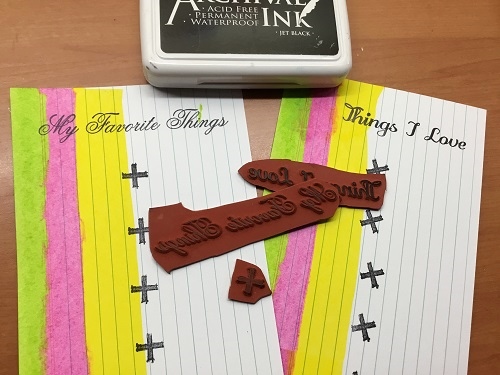
The other set I stamped with black ink. My watercolouring on those was a disaster so I decided to make them even more messy by slapping "loose" color on them using piece of acetate. Then I fussycut the girls and glued them onto design paper.


 Blank Page Muse stamps, Just Us Girls

Meet Sari!

I'm a Finnish mother of 2 teenage girls. I’ve been stamping since 2011, I got started when my neighbour introduced me to the world of stamping and paper crafting in real life and in blog land; that’s how my blog also got it’s name: Granne (=neighbour in Swedish).
Usually I make cards, but I do love making ATC’s too, and and and ... what ever seems to be fun and inspires me. Sometimes things work out nicely sometimes not, but I have fun creating.


You can find more of Sari's projects on her blog:

I can't wait to see what else Sari create for us, can you?
Come on back later on to see more and please do come back to play along in our creative challenge. The theme this month is use any 3 stamps! ( no digi stamps) The link opens on February 10th!

Have an amazing day and we'll see you again soon!

Wednesday, October 16, 2019

Celebrate Dictionary Day with Blank Page Muse

Hello!  Susie on the blog and today we are celebrating Dictionary Day!

I am kind of a word nerd and will admit to flipping through the dictionary to find new and interesting words.  Who knew there was a day to celebrate that?! When I saw the Creativity Definition stamp from Blank Page Muse I had to have it!   Since today is Dictionary Day, I decided to combine my stack of gel prints with the definition stamp to create more ATCs for my CAS card stash.

Time to play...


Supplies:
Creativity Definition Word Phrase Rubber Stamp by Terri Sproul
Just Us Girls Line Figure Art Rubber Stamp Sheet by Terry Sproul
Background Grunge Art Rubber Stamp Sheet by Pam Bray
Gel prints for backgrounds
Archival Ink - Black, Aquamarine
Cardstock

Directions:
Cut gel print paper to 3.5" x 2.5" and stamp with Creativity definition in black ink.


Stamp female figure with black ink.


Stamp Background Grunge elements as desired.


Optional:  Stamp Background Grunge elements with alternate colors before adding definition and figure images.


Repeat to create additional gel print ATCs.


Mat ATCs with white cardstock and mount on black cardstock to create CAS cards.


I have to say, the Background Grunge stamps were great for adding little elements that balanced the designs and the Just Us Girls Line Figures are perfect for a little abstract playtime. I love making these ATCs because it is a fun and practical way to use up my creative experiments!

Thanks for stopping by and I hope you find some time to play today!
Susie


Looking for more inspiration?
Click the links below!


Thursday, July 25, 2019

Just Us Girls Journaling

Hi Again Blank Page Muse Stampers!
Hope you are all enjoying our colourful month of inspiration!
I decided to create some "journaling" cards which are great for making notes and recording your thoughts!
And to make it quick and easy I've made them with only minimal supplies - perfect for those on a budget and also perfect for using up your bits & pieces of left over card and paints!
You can also adapt this style to your bullet pages and journals!
Hope you have fun!
Supplies:
Blank Page Muse Stamp Set: Just Us Girls
Blank Page Muse Stamp Set: Art Journaling #2
Index Cards 6" x 4"
Acrylic Paint 3 colours
Old Gift/Credit Card
Black Card
Embossing Ink and Fine White Embossing Powder
Black Archival Ink
Tools: glue, double sided tape, heat gun, scissors
Instructions:
Gather your index cards, paint and gift card.

Place "blobs" of paint along the left hand side of the card at the top.


Use the old gift card to drag the paint from the top to the bottom. You should have enough paint on the gift card to paint another index card. Allow to dry.


While the paint is drying stamp the "Just Us Girls" onto black card using your embossing pad. heat emboss with fine white embossing powder. Fussy cut the gals!


Using you Black Archival Ink stamp your choice of wording from the Art Journaling #2 stamp set directly into the index cards. Use the little cross to act as "bullet" points for your notes and jottings!


Use double sided tape or glue to adhere your fussy cut gals to the side of the card where they stand out on the bright coloured paint!


Try playing around with other Blank Page Muse Stamps and colour combos and hae fun creating these cards!


Use your journal cards on their own, in your journals or diary - have fun with them!


Happy Stamping
Sharon
Don't forget to check us out at all of our social media "haunts"!!!
The Blank Page Muse- https://blankpagemuse.com/

Wednesday, March 20, 2019

Sunshine

     Hello again, friends! Samantha here and I'm excited to be back on the blog sharing my card with you. I love these beautiful girl stamps. They're so much fun.
     I was inspired to create this card by the way that this particular stamp looks like she's walking toward something. I thought that maybe she was walking toward the sunshine and as such I felt that the sentiment I used was perfect.

(Shop now and save! Use code BPMDtSamantha2019 to save 15% off your total order!)


For this one layer card you will need:

  • White A2 (5.5" x 4.25") card base
  • Black ink
  • Masking tools of your choice
  • Inks for blending
  • Clear shimmer brush
  • Colored pencils


     Stamp one of the girls from the stamp set onto the card base using black ink.
     Cover the stamped image with a mask of your choice. I prefer to use notebook paper covered with repositionable adhesive.
Over the girl place a second mask. I used a piece of cardstock from which I'd die cut a circle. Tape down.


     Using your inks, do some simple ink blending over the masked image.


     I used Distress Inks in shades of blue, pink, and yellow.


     Remove the circle mask. You should have something like this.


     Take your sentiment stamp and, using black ink, apply to the lower left side of the stamped girl, slightly overlapping your ink blending.


     Remove the mask from the stamped girl image.


     Color the girl with any medium you'd like. I decided to go with colored pencils. I also chose to apply shimmer over the ink blended area with Wink of Stella. Completely optional but it does add a fun touch.


     That's it! Make sure you check these stamps out if you haven't already. Have a terrific day and I'll see you again soon!
~Samantha


Looking for more inspiration?
Click the links below!

The Blank Page Muse Shop
Facebook Fan Page
Instagram- Shop
Instagram- Blog
Twitter
Pinterest

Thursday, March 14, 2019

Something in the Way

   
     Hello, hello! Samantha here and today I'm sharing my art journal page with you. I recently started art journaling and I thought it would be fun to incorporate my new favorite stamp set; the Just Us Girls stamps by Terri Sproul, onto a page.


     I used Versamark Watermark ink and clear embossing powder to heat emboss one of the girls my page. Then I took my watercolors and spread them over my pallet. I spritzed them with water and smooshed them over the heat embossed image.


     I am crazy about this messy watercoloring technique. You never get the same look twice!


     I also used the Mayo Angelou sentiment stamp from the Correspondence stamp set by Katy Leitch to finish this page off. I think it's perfect for this project.

(Shop now and save! Use code BPMDtSamantha2019 to save %15 off your total order!)

     I hope that this will inspire you and I thank you for taking the time to check out my design. Have a fantastic day.
     Until next time!
     ~Samantha


Looking for more inspiration?

Click the links below!

The Blank Page Muse Shop
Facebook Fan Page
Instagram- Shop
Instagram- Blog
Twitter
Pinterest

Monday, March 11, 2019

Everyday Happiness

     Hello, everyone! Samantha here and I'm thrilled to be back on the BPM blog sharing my latest card with you.
     I came up with the idea for this card while playing with masking. Some of my best ideas come to me when I allow myself to play with my supplies, no agenda or expectation attached. Plus I adore these girl stamps and got tons of ideas just from looking at them!
(Shop now and save! Use code BPMDtSamantha2019 to save 15% off your total order!)


     For this card you will need:

  • Black A2 sized card base (5.5" x 4.25")
  • White cardstock panel cut to 5.25" x 4"
  • Masking tools of your choice
  • Inks in several colors for blending
  • Stencil
  • Embossing powder in white and pink
  • Black die cut circle
  • Sticky embossing ink pad
  • Medium of your choice to color in the stamped image
  • Gems
  • White gel pen


     Begin by stamping one of the girls from the stamp set onto the center of your white card panel. Cover her with a mask. I'm using a mask that I made from notebook paper and repositionable adhesive.


     Cover her with a round mask. I'm using a circle that I die cut from cardstock and backed with repositionable adhesive.


     Use your inks to do ink blending around your second mask.


     When you're finished, remove the mask.


     Next you're going to cover this panel with another mask. Use an anti static tool over the exposed surface.


  Place your stencil over the mask. I'm using one that has little stars. Press your sticky embossing ink pad over the stencil.
Remove the large mask and stencil before sprinkling on your pink embossing powder. Heat set.    After heat setting your embossing powder remove the mask from the stamped image. You should have something that looks like this.


     Using whatever medium you prefer, color the image. I used Spectrum Noir alcohol ink markers.


     Take the Every Single Day stamp and stamp onto a circle die cut with part of one side cut straight. Heat emboss with white embossing powder.


     Adhere the stamped circle to the card panel and then layer the card panel onto your black card base. Add a few gems.


     To finish the card off use a white gel pen to add highlights to the stamped image.
That's it!


     Thank you so much for taking the time to check out my card. I hope that it will inspire you to make one of your own.
Have an amazing day.
-Samantha


Looking for more inspiration?
Click the links below!

The Blank Page Muse Shop
Facebook Fan Page
Instagram- Shop
Instagram- Blog
Twitter
Pinterest

Tuesday, August 21, 2018

Born to Stand Out Card

Hey There BPM Fans,

If you know a teen, then you know it can be difficult to find the right card for them. Whatever, the occasion, this is a sure a winner. It is simple, bright, and full of fun. Maybe just to brighten their day or as a pick me up during a difficult time. Let your special teen know they are not alone and you are in their corner.
Born to Stand Out Card

Blank Page Muse Stamps:   www.blankpagemuse.com
Art Journaling Mixed Media Stamps Set 1 Pam Bray Designs
Just Us Girls Line Figures Stamp Set
Flamingo Row Red Rubber Art Stamps by Pam BrayDesigns
         
Other Supplies:
  • black ink pad
  • white cardstock 
  • rainbow ink pad
  • clear mounting block
  • black marker
  • black cardstock
  • orange card base (5x7")
Directions:
1. Ink the striped background stamp with a rainbow ink pad and stamp onto white cardstock.  Make three impressions and carefully cut them out.

2. Next, adhere them to the middle of a orange card base.  Leave a narrow gap between each panel to create a split panel background with three distinct parts.

3. Stamp a feminine figure onto white cardstock and use a black marker to color it in to create a silhouette. Carefully, cut out the silhouette and adhere it between two of the rainbow striped panels.

4. Ink an encouraging sentiment stamp with black ink, stamp it onto white cardstock, and matte it with black cardstock.  Finally, doodle a simple narrow border around the card with a black marker.

A Closer Look:
 

            Blank Page Muse Shop http://blankpagemuse.com/
            Facebook Fan Page https://www.facebook.com/groups/bla...
            Instagram - Shop https://www.instagram.com/blankpage...
            Instagram - Blog https://www.instagram.com/blankpage...
            Twitter https://twitter.com/BlankPageMuse
            Pinterest https://www.pinterest.com/blankpage...

To learn more about our designer Karen, please visit her blog, Art & Soul.

Copyright Text

Blank Page Muse 2018 Sin City Stamps 2013