Sunday, December 10, 2017

Fabric Angel Christmas Ornament

Happy Holidays from the Sin City Stamps Design Team!

It's Karen's turn to share her fabulous idea for stamping an ornament. Follow along step by step as she shows just how easy it is to make. Try this trendy mixed media idea and stamp directly onto muslin fabric.

Directions:
1. Cut a rectangle of muslin fabric 4x5" and use black ink to stamp the Phoebe Art Doll image.

2. Cut 2 additional rectangles of muslin fabric to add stability to the finished project. Next, pin the layers together and use a sewing machine to sew a stitch 1/2" around the edge. Trim away the excess to create a 1/4" seam.

3. Remove the nozzle from the bottle of mist and use a paintbrush to color the dress and hair. Apply flesh color chalk to the face and blend pink chalk into the cheeks. 

4. Fray the edges of the muslin fabric by using a pin to carefully loosen the threads. Separate the weave and gently remove rows of thread to create the fringe. Lightly apply a dusting of brown chalk along the edge of the fringed fabric to give it an aged vintage appearance.

5. Embellish the dress with gold beads and adhere a piece of gold trim for her halo. Use gold embossing powder to color the wooden accent word and heat set. Attach it over the lower section of the dress with liquid adhesive.

6. Stamp three pine branches onto muslin fabric, color, and, cut out.


7. Attach a loop of ribbon to the top of the muslin for hanging. Embellish the top of the tag with three pine branches and a wooden snowflake.

8. Finally, carefully slice through the fabric on both sides of the dress. (1 1/2")  Weave a piece of organza fabric (5x7") through the openings.  Adjust the folds of the fabric to create the wings and trim the edges to the desired length and shape.


Sin City Stamps:

Other Supplies:
muslin fabric
black ink pad
sewing machine
mists - maroon, green, brown
paint brush
chalk
wooden embellishments
gold beads
ribbon
organza fabric
gold embossing powder
heat gun
liquid adhesive

A Closer Look:


 To purchase the stamps to complete this project, visit www.sincitystamps.com

For more inspiring paper-craft projects from the Design Team, be sure to visit us at
the Sin City Blog and follow us on Facebook

Join the Sin City Fan Group. HERE 
To learn more about our designer Karen, please visit her blog, Art & Soul.

Thanks for visiting!

Friday, December 8, 2017

Ho Ho Ho, Bah Humbug and all that Xmas Stuff!!!


Hi Sin City Fans!
Today I am sharing my embellished store bought Xmas decoration using a stamp by Sin City which has been "adapted" to be a Xmas stamp LOL!!!
This is a quick and easy but effective little creation!
For those of you who don't know me well I am rather "Bah Humbug" about Xmas so I don't have a lot of Xmas stamps BUT I am also a big believer in using stamps for a purpose other than what they were meant for - I like versatility and good value for money to get the most from your purchases!!
This creation uses inexpensive store bought decorations with minimal supplies but you end up with a fab and unique handmade Xmas ornament!!


Supplies:
  • Sin City Stamp: Small Round Line Art Face
  • Stamp also found in this set: Sunshine Cherub Sun Flowers
  • Collage Xmas Hat: used here by Art Tea Life "Figgy Pudding"
  • Store bought Xmas Decorations
  • White Card
  • Black Archival Ink Pad
  • Coloring markers or pencils
  • Xmas accents ie. holly, berries, cones etc.
  • Scrap muslin cloth
  • General supplies: scissors, glue

Instructions:
Gather your goodies which are minimal and therefore cheap to make - perfect at xmas time when you have other expenses!


Stamp the Sin City "Face" onto white card using your Black Archival ink. Hint: if you want a more sparkly look why not use gold or any sparkly embossing powder to stamp the image! Color with your favorite coloring medium - Copic markers used for this creation.


Print your collage hat and fussy cut and adhere top the fussy cut face.


Grab your purchased ornament (and the hanging twine which came with the pack used here), your scrap of muslin cloth, face with hat and your Xmas accent/embellishment along with your glue.


Start by adhering the muslin cloth to the ornament, scrunch it up for effect and dimension. Add the face and embellishment. Tie the thread to the top ready to hang.


And then you have a finished and very unique ornament for your tree!!


I hope you have enjoyed this quick and easy creation!!
Have a great festive season!
Happy Stamping!
And don't forget to join us at our Facebook Group for lots of fun and inspiration AND keep an eye out in the new year for exciting happenings!!

Sharon

Wednesday, December 6, 2017

Vintage Christmas Ornaments


Hi Everyone! 
It is that wonderful Holiday Season time of the year! 
Today I am sharing some Vintage Christmas Ornaments I created using Sin City Stamps and printable from Mixed Up Merchandise.

I started with some paper box ornaments from a craft store and gessoed them in white lightly. 
Once that was dry I used the Leaves rubber stamp set SC44 and stamped randomly using brown, green, and gold inks.
 I coated the stamping with an iridescent embossing powder and set with a heat tool.

Leaves Rubber Stamp Set Sheet by Terri Sproul SC44

Then I added my printable s and some stone effect texture paste with glitter to create the sparkling snow.
A big red sugared flower adds just a pop of cheery color!


Thanks so much for viewing my project and I hope that you enjoyed it! 
HAPPY HOLIDAYS!!

Visit our Fan Page to see more idea's and share your own!

Tuesday, December 5, 2017

Happy Birthday Envelope Art

 Hi Michelle here with a envelope art quick idea!
Its my nephews Birthday this month so I wanted to make his card little bit 'extra-special' with some envelope art!

I used this stamp from the Sending Smiles Whimsical Mail Art collection by Rick St. Dennis MFA.
How cute is that jester?

 I stamped the image onto the front of a plain envelope and colored in with fine tipped markers. 


I personalized the rest with some hand lettering.

Do you think he'll like this?
I know I would!
Be sure to visit our Fan Page to see more idea's and share your own!


Monday, December 4, 2017

How To Create A Beautiful Vintage Christmas Card


Hi all
I have used the Steampunk'd Christmas Stamp Set to create a vintage Christmas card. You can use these stamps for more traditional Christmas crafts too. 
Product list
6 x 6 Card
8 x 8 Christmas papers
Paper Poinsettia Stickers
Banner Nesting Die
Red ink pad
Wooden Frames
Marker Pens

Start off by covering a 6 x 6 card blank with patterned paper. 
Then cut out a large rectangle from green pattered paper.
For the next layer, use a banner die and cut out a sheet of matching paper, Wrap red twine around the top and adhere to card.


Glue paper to the back of the wooden frame and adhere to card.
Stamp out the Santa stamp onto white card and colour in with markers.
Cut out the Santa and adhere to the wooden frame


Decorate with paper flowers and cut a sentiment out of the patterned paper.


Thank you for visiting


Sunday, December 3, 2017

A Christmas Tree Tag Ornament

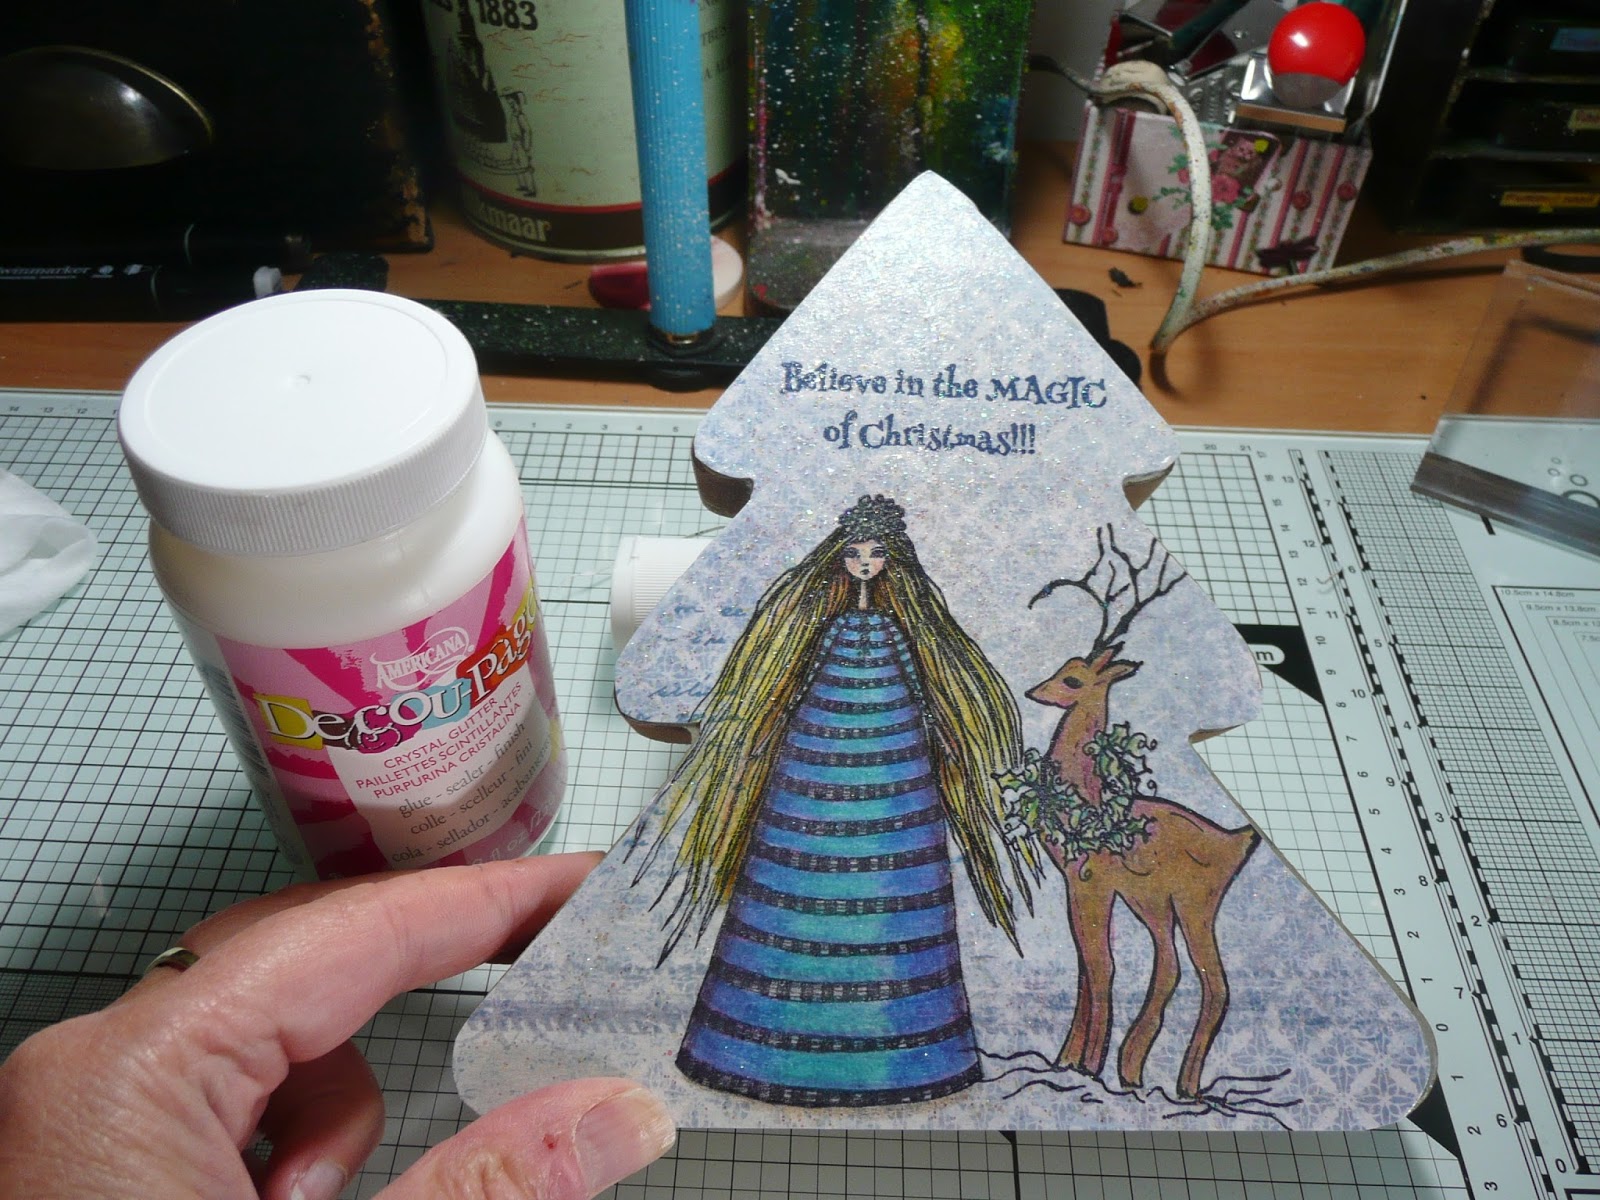
Hi all, Monique here, showing you how I made this home tag ornament for Christmas!

Supplies:

Sin City rubber-stamps used:
  Winter Reindeer ,
  Phoebe art doll
and the sentiment from the Country Vintage Christmas set.

Additional products used:
Wooden Christmas tree shape,
 Patterned paper,
Rhinestones,
 Metallic colored pencils,
Glistening Snowtex,
 Decoupage crystal glitter
, Craft Twinkles,
Glistening Snow Writer,
 Waterproof black and blue stamping ink


Step 1:Trace the shape of the tree on to patterned paper and cut it out.


Step 2 : Stamp the winter Winter Reindeer, using black ink, see pic


Step 3:Make a mask and cover the reindeer before stamping Phoebe art dolll, to make it look like the reindeer stands before Phoebe art doll. Use black ink.

 Step 4: Use blue ink to stamp the sentiment from the Country Vintage Christmas set.
 Step 5: Colour in the images, I used metallic pencils to get a shiny festive result.
 Step 5: Add Craft Twinkles to the patterned paper
 Step 6: Adhere the paper to the tree using decoupage glue with glitters in it.
 Step 7: Add snowtex to the ground and the glistening snow writer to the edges of the tree
 Step 8: Decorate the top of the tree using rhinestones. Let the snowtex and snow writer dry. The Snow writer will dry transparent to give an icey look.
 Here the finished result and some close ups.


For more inspiring paper-craft projects from the Design Team, be sure to visit us at the Sin City Blogand follow us on Facebook

Join the Sin City Fan Group. HERE

Saturday, December 2, 2017

Poinsettia Card

Hello Friends,

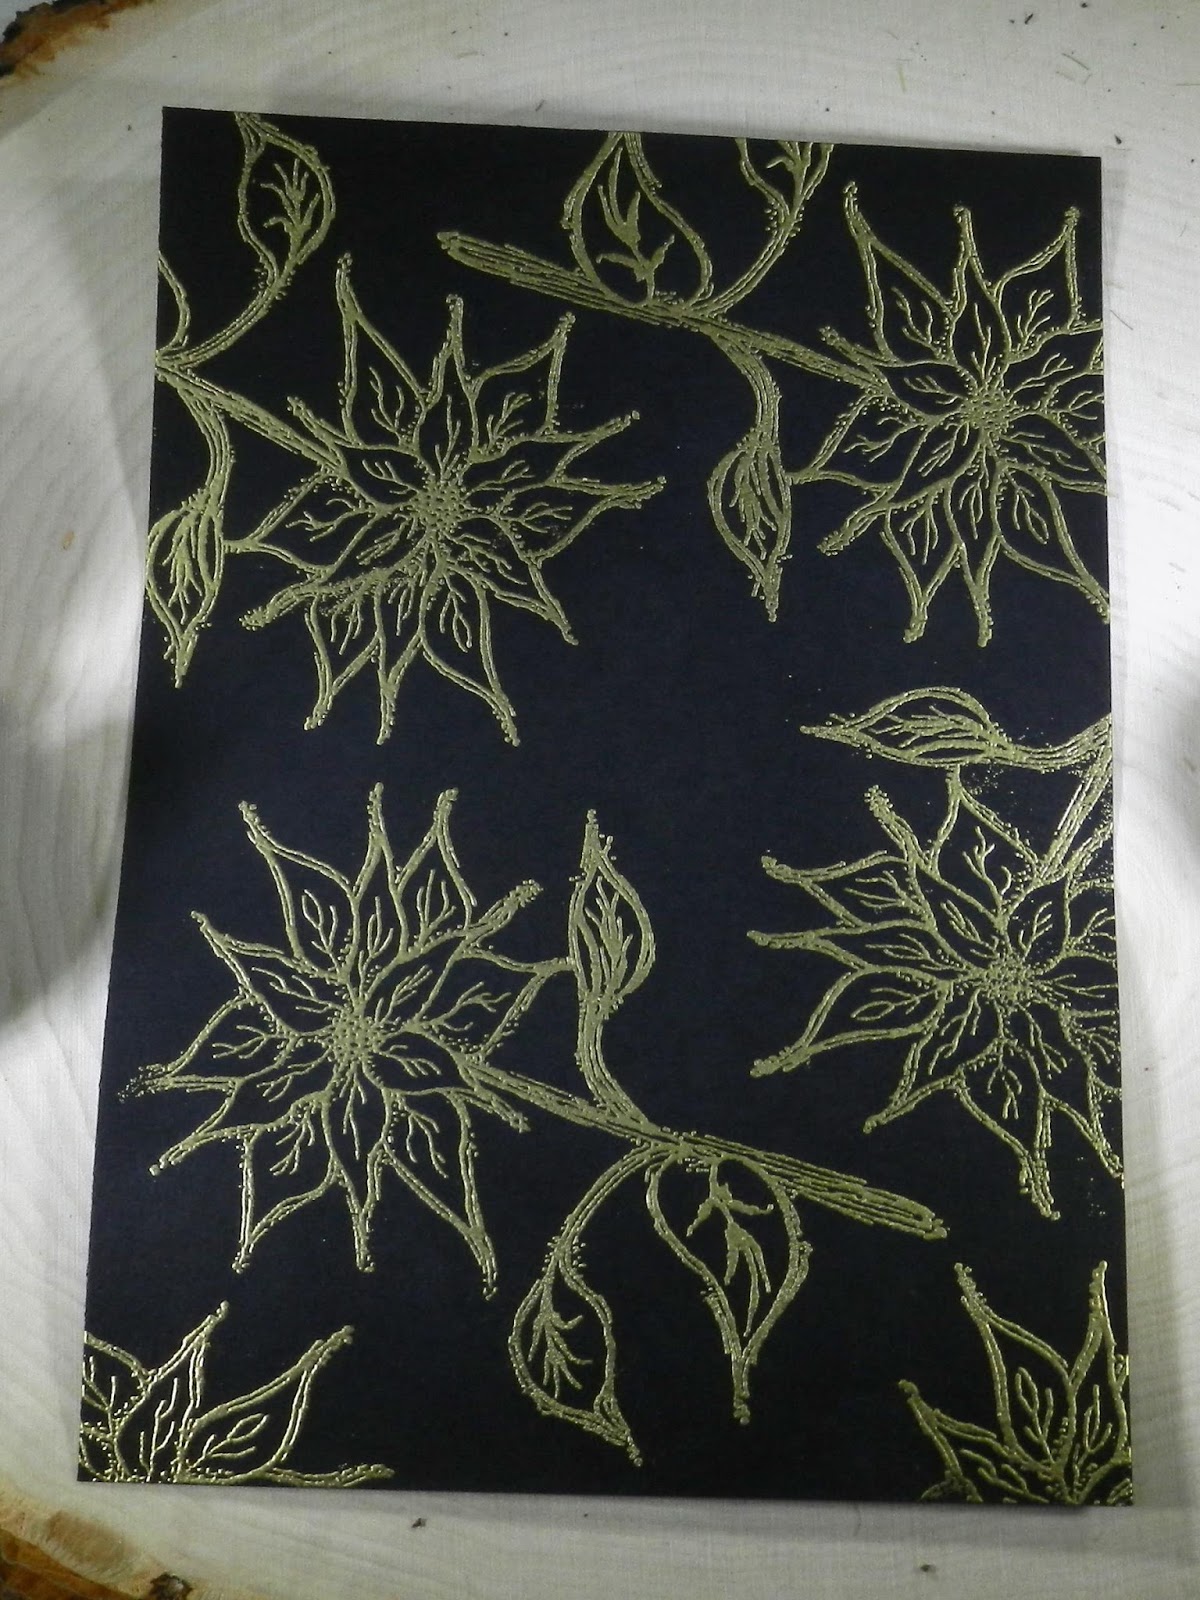
Today I am using the Classic Christmas Art Rubber Stamp Set by Pam Bray Designs from Sin City Stamps. I love how the large poinsettia stamp can be used as a background or a focal point. I have incorporated both options in my card for today.

Supplies:
  Sin City Stamps - Classic Christmas 

Other Supplies:
  Gold embossing powder
  Glitter pen
  Red enamel dots
  Red, black, green and craft card stock
  Frame die
  Copic Markers


Step 1:  Stamped poinsettia multiply times on black card stock and embossed in gold.


Step 2:  Filled in open areas with small star stamp from other Sin City Stamp set.  These too are gold embossed.


Step 3:  On white card stock gold embossed another poinsettia. Cut out the flower only and colored it in using Copic markers.  Added glitter pen to center of flower to increase the sparkle.


Step 4:  Cut out the frame in red card stock and attached to background using froam tape.


Step 5:  Next I layered this layer onto red and craft card stock.  I then added the colored poinsettia using foam tape and the leaves from the cut out flower which was also colored with Copic markers.


Step 6: Finally. I stamped the sentiment on a matching green pennant and affixed to card.  A few red dots completed the card.


Please share your cards with us on the Sin City Facebook Fan page.

X

Friday, December 1, 2017

Burlap Reindeer Ornament


Chris here and today, sharing this ornament I created for Sin City Stamps!
 I admit I was a little freaked when to call came out to create an ornament - even rushing out to purchase a  "ornament" to cover with stamped images.  But once I took a deep breath I decided to play and have fun with the challenge and I  LOVE  the results!

To re-create this tag you will need
Sin City Stamps - Classic Christmas
Burlap, Corrugated paper
Flower sprig
Jute
pompom
glitter
glitter glue - red
Watercolor markers
Multi media glue
Archival Ink

Start by cutting a  scrap of burlap into a tag shape with a flap for hanging.
 Fold over flap to create a "pocket" to later insert string.


Stamp the reindeer with Archival Ink.  Color image with Watercolor markers and a water brush.


Adhere reindeer to corrugated paper and add glitter to "snowy" area of stamped image.

Add reindeer piece to tag. 
Add piece of silver sprig, jute bow and the pompom.  Add jute to hang ornament and finish reindeer with a drop of red glitter glue onto his nose! 

Here is a close up of the finished project! 


Copyright Text

Blank Page Muse 2018 Sin City Stamps 2013