Showing posts with label leaves. Show all posts

Friday, October 17, 2025

Do Something that Makes You Happy

 Hi everyone, Steph Ackerman here today using some amazing stamps and stencils from Blank Page Muse.


Blank Page Muse Stencils:  Butterfly Trails Circles, Leaves 2 Collage
Inks:  Distress Oxide: Crackling Campfire, Mustard Seed, Pumpkin Spice


Using the Leaf Stencil, move it about a white panel until you like its position.
Using assorted inks, add color to each leaf.


Place the Butterfly Trails stencil upon each leaf adding dimension to each.
Using the Wet Cement stamp, randomly stamp between the leaves.


Stamp and color the girl with Copic Markers.
Die cut and add her to a scalloped panel.
Place on the background.


Add the panel to green cardstock, then to a brown card.
Stamp the phrase, mat with green cardstock and add to the card with foam adhesives.

Thanks for stopping by.

Steph

Looking for more Inspiration? Click the links below!
The Blank Page Muse Shop https://blankpagemuse.com/


Monday, October 13, 2025

Fall Pumpkin Patch

 Hi everyone, Steph Ackerman here today using some amazing stamps from Blank Page Muse.


Blank Page Muse Stamps: Fall Collection 2
Distress Oxide Inks:  Wild Honey, Ground Espresso
Crackling Campfire, Pumpkin Spice


Using an assortment of Distress Oxide Inks, ink the stamp and repeatedly stamp on white cardstock.
Ink the edges of the panel with brown ink.


Stamp the pumpkin twice on orange cardstock with black ink.
cut away one of the birds and assemble both pumpkins on the card front.
Stamp 2 different phrases, ink edges and mat with cardstock.


Mat the panel with orange cardstock and adhere to a card.
Add Pumpkin Patch to the panel with foam adhesives for dimension.

Thanks for stopping by.

Steph

Looking for more Inspiration? Click the links below!
The Blank Page Muse Shop https://blankpagemuse.com/

Saturday, April 19, 2025

Taking Flight Card~Beauty in Botanicals


 Hello, Blank Page Muse Family! This month, our theme is Beauty in Botanicals. With spring in full swing, I thought I'd create a card that has a beautiful flower. The hummingbird thinks it's beautiful, too! I started by using the Leaves Collage Stencil and a very light green ink. I applied the ink lightly with a large blending brush onto a piece of white cardstock. I then added a hint of blue ink around the edges of the panel. 

I stamped clouds, a hummingbird, a flower, and a sprig from You Make Me Happy Hummingbird Clouds Flower Stamp Set in an alcohol marker friendly black ink. I colored the sprig, hummingbird, and flower with Alcohol markers. I lined the clouds in a very light blue alcohol marker. I stamped the sentiment, then trimmed down the panel to 4 x 5 1/4 ", mounted it onto an A2 piece of black cardstock. I adhered the entire panel to an A2 card base. 
 
Products used:
White cardstock
Black cardstock
Alcohol markers
Black ink pad
Green ink pad
Blue ink pad

Thursday, September 22, 2022

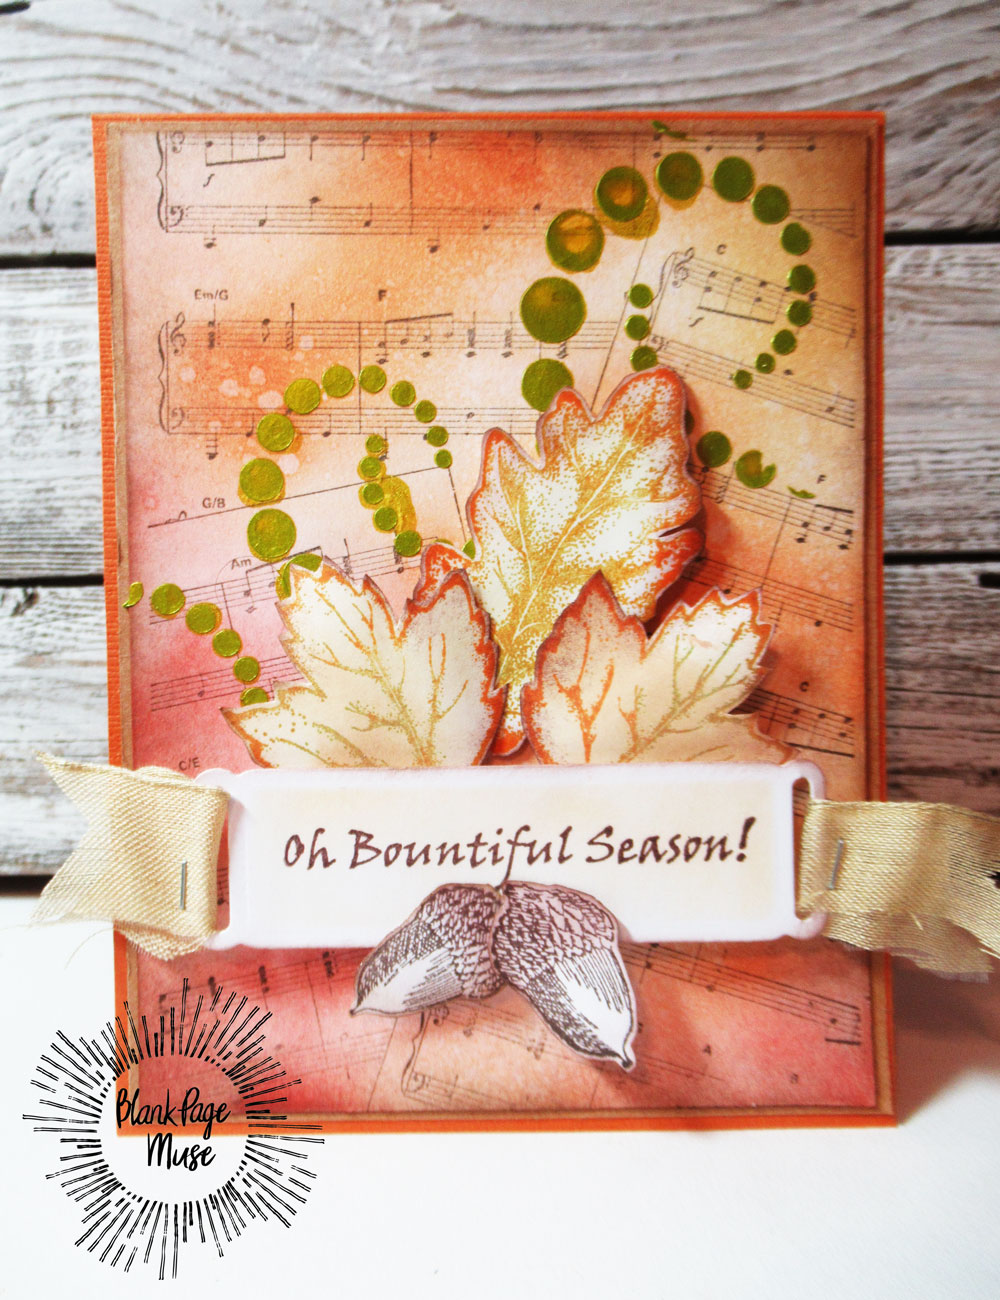
Oh Bountiful Season!

 Hi everyone, Steph Ackerman here!

 Today I am using some amazing stamps from Blank Page Muse and I Brake For Stamps.


Supplies:  
Fall is in the air. 
It's time to create Fall cards with amazing stamps and stencils from Blank Page Muse and I Brake for Stamps.

The full tutorial can be found on my blog.

Thanks for stopping by.

Steph

Looking for more Inspiration? Click the links below!
The Blank Page Muse Shop https://blankpagemuse.com/

Save 15% of your Blank Page Muse orders with discount code:  BPMStephHH

Friday, November 30, 2018

Falling Leaves

Cathy here with a Fall card for you. This card reminds me of walking in the woods when the grass is high and the dry leaves just float lazily down to the ground.
Stamps Used:
 Flower & Leaves Border by Pam Bray
 Smaller Tree Leaf by Pam Bray

Other Supplies Used:
White cardstock
Watercolor paper
Distress Oxide ink
Brown inks
Sequence mix
Foam tape
Glue

                                                                     
 Starting with the watercolor paper, create a background using the Smaller Tree Leaf  stamp using distress oxide inks.
Use fall colored inks and smooch them onto a craft mat then spray some water to activate the colors. Press the watercolor paper into the wet ink and leave out to dry. Repeat until you are happy with the results.

Ink the Smaller Tree Leaf   with brown ink and stamp all over the paper. Cut out and set aside.
Take a white card base and stamp  Flower & Leaves Border by Pam Bray with a light brown ink on the bottom of the card. Then stamp it again in a darker brown color ink in different spots on the bottom of the card.
Next arrange the leaves falling from the top of the card at one corner to the bottom of the card in the opposite corner.
On the other side you add your sequence from the top of the card to the bottom of opposite side of the card.

Visit us for more inspiration! 

FB Fan Page-  https://www.facebook.com/groups/blankpagemuse/

Instagram Shop-  https://www.instagram.com/blankpagemuse/

Instagram Blog-  https://www.instagram.com/blankpagemuseblog/

Twitter-  https://twitter.com/BlankPageMuse

Pintrest- https://www.pinterest.com/blankpagemuse/boards/

Wednesday, December 6, 2017

Vintage Christmas Ornaments


Hi Everyone! 
It is that wonderful Holiday Season time of the year! 
Today I am sharing some Vintage Christmas Ornaments I created using Sin City Stamps and printable from Mixed Up Merchandise.

I started with some paper box ornaments from a craft store and gessoed them in white lightly. 
Once that was dry I used the Leaves rubber stamp set SC44 and stamped randomly using brown, green, and gold inks.
 I coated the stamping with an iridescent embossing powder and set with a heat tool.

Leaves Rubber Stamp Set Sheet by Terri Sproul SC44

Then I added my printable s and some stone effect texture paste with glitter to create the sparkling snow.
A big red sugared flower adds just a pop of cheery color!


Thanks so much for viewing my project and I hope that you enjoyed it! 
HAPPY HOLIDAYS!!

Visit our Fan Page to see more idea's and share your own!

Thursday, January 23, 2014

Spring Pillow with Sin City Stamps and Altered Pages

Finished pillow

Karen here with another project combining digital images with rubber stamping.

For my spring pillow, I used a leaf image from Terri Sproul's Leaves by Sin City Stamps and
a bird image from the Little Spring Birdies collage sheet by Altered Pages.

I had originally intended to use Terri Sproul’s Leaves for fall projects, but there are all kinds of leaves in the set and several are just right for adding to flowers.  You can buy Sin City Stamps individually, but buying the set gives you so many options!  Even if you only buy a couple of sets, you instantly have a library of images to draw from when you set out to make something.

Supplies
muslin
printed fabric
freezer paper
thread
fiberfill
buttons for yoyo flowers
ColorBox Chalk Ink in Olive Pastel

I printed the Little Spring Birdies collage sheet onto a piece of muslin with an Inkjet printer.   You just need to cut a piece of freezer paper and a piece of the fabric to the same size (in this case 8.5 by 11 inches), put the wrong side of the fabric onto the shiny side of the printer paper and iron until they stick together.  My printer does not like anything thicker than regular paper, and it smeared black ink on some of the images, but most of them were okay.

Printed on muslin (2)

I have a bunch of fabric charm packs (5 x 5 inches) and decided to see which colors in the charm packs looked good with colors in the collage sheet.  Many fabric companies are now offering collections of small cuts.  It’s a great way to get a little bit of lots of different fabrics.  I noticed one of the collections had a red-pink color that was almost exactly the same as the red-pink of one of the birds, so I decided to work with that collection. I chose some prints for a border, cut the charms in half and sewed them together in a strip.  Then I cut the strip in half with a rotary cutter so that I had two strips.

Matching colors
I cut out the bird image, stitched it onto one of the charm squares and then stitched the square onto a piece of tea dyed muslin.  I used a zigzag stitch.

Then I figured out where I wanted my flowers and stamped the leaves with ColorBox Chalk Ink in Olive Pastel.  I used really tightly woven muslin.  For some help with stamping on fabric, see this post.

Stamped (2)
Here is a tip. I use a transparent ruler to help me with image placement:

Measuring (2)

I trimmed the piece of muslin and added my pieced borders.

Adding borders
Then I cut two more pieces of muslin the same size – one for a lining to strengthen the front and one for the back.  I pinned the muslin pieces together, leaving an opening for turning and stuffing, stitched the seam, trimmed the corners, turned the piece right side out, and ironed it.

Turned and pressed (2)
Then I stuffed it with fiberfill and stitched the opening closed.

I cut circles from two more charms and made them into yoyos.  Then I attached the yoyos with vintage buttons.  The leaves make the yoyos look like flowers.

Flower closeup (2)

Done!
Finished pillow

Copyright Text

Blank Page Muse 2018 Sin City Stamps 2013