Showing posts with label poinsettia. Show all posts

Friday, December 15, 2023

Poinsettia Trio Holiday Card

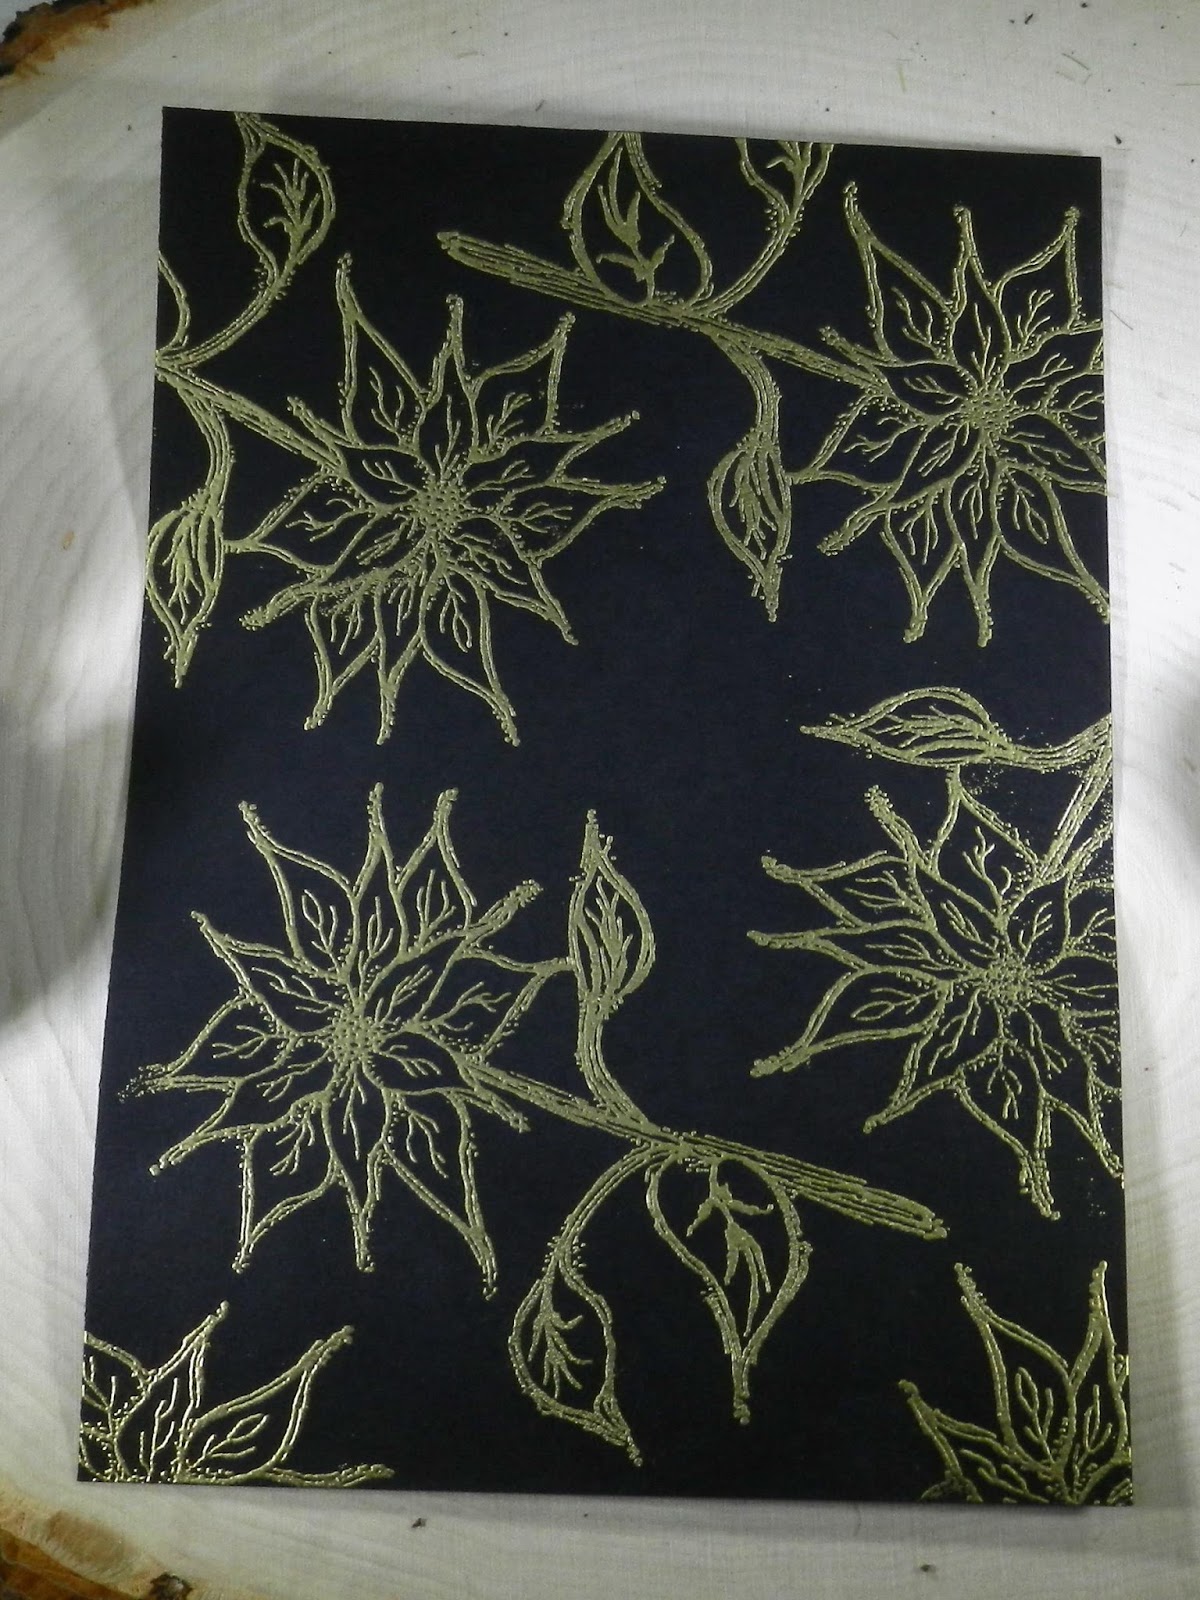
 What else says Christmas like a poinsettia?  Hope you are enjoying the season as much as I am... so much to do and time is getting away.  Be sure to take some time to create, it is good for the soul.  Today I have an quick card that other will think is fabulous. 


To make this card I used the following from I Brake for Stamps:
Poinsettia Trio


Visit my Blog HERE for a detailed tutorial!  

Thursday, December 22, 2022

Musical Merry Christmas Card

  Hi everyone, Steph Ackerman here!

 Today I am using some amazing stamps from Blank Page Muse and I Brake For Stamps.


Stamp the music background in red ink on white cardstock.
Stamp and emboss Merry Christmas on the musical panel.
Mat with cardstock and add to black card.
Create a black card.
Mat pattern paper with cardstock and adhere to the card.

The full tutorial can be found on my blog.

Thanks for stopping by.

Steph

Looking for more Inspiration? Click the links below!
The Blank Page Muse Shop https://blankpagemuse.com/

Save 15% of your Blank Page Muse orders with discount code:  BPMSteph

Friday, November 13, 2020

Classic & Elegant Poinsettia Holiday Card

I love red poinsettias, but can never make them live past Christmas. When I saw the humongous poinsettia bushes in Kona, Hawaii, I was convinced that they like warmer weather. I'm sharing today the beautiful poinsettia and sentiment stamps from Blank Page Muse Art Rubber Stamps called Classic Christmas Stamp Set by Pam Bray Designs

I'll be showing you how to make your own beautiful patterned paper with some scraps and washi tape then showcasing your card with the beautiful colored poinsettia stamp. I hope this inspires you to try make your own card and entering it in our monthly challenge, "Holiday Play."

All the supplies and instructions are listed below to make this A2 size card.

Supplies:

  • Blank Page Muse Stamp:  Classic Christmas Stamp Set
  • White cardstock - Cut to the following sizes:
    • 8-1/2" x 5-1/2" to stamp the poinsettias  twice
    • A2 size for the base (8-1/2" x 5-1/2"), fold in half
    • 4" x 5-1/4" for the mat (card front)
    • 4" x 4" for the frame (Cut 2) 
    • 3" x 2" for the sentiment
  • Black cardstock strips - Cut to ½” x 7” (Cut 3)
  • Black cardstock strips - Cut to 1/2" x 5” (Cut 4)
  • 3mm wide gold washi tape 
  • Nested square dies - 3" x 3" and next smaller size (approx. 2-1/2" x 2-1/2")
  • Black stamp pad
  • Stamp positioner or stamping block
  • Scissors
  • Paper trimmer
  • Your favorite adhesive
  • Your favorite coloring medium (I used Copic markers. Colors listed below)
  • Clear glitter pen (I used Spectrum Noir Sparkle pen)
  • White gel pen
Copic markers used:

Red: R39, R46, R43, R30
Green: G28, G05, YG03

Instructions:
  • Stamp two of the poinsettias, color, and fussy cut. Set aside.
  • To make the background paper, using the 4" x 5-1/4" mat, lay out the black cardstock strips 1/4 inch apart. Start in the middle and work your way to the outside corners. Adhere to the card front.

  • Turn your cardstock to the back and use scissors to trim off the excess black strips.
  • Adhere the gold washi tape in between each black stripe making sure that you have an overhang of 1/4" to fold to the back. 
  • Using the 4" square white cardstock, cut out a 3" square with the die.
  • Using the other 4" square white cardstock, nest the 3" and 2-1/2" dies to cut out a frame.
  •  Add gold washi tape around the frame. Adhere the frame to the 3" mat then adhere onto the card front.
  • Adhere the poinsettias.
  • Adhere the card front onto the base cardstock.
  • Stamp the sentiment on white cardstock and trim to size. Use black cardstock to mat the sentiment and adhere to the card front.

  • Using a glitter pen, add some glitter to the centers and tips of the poinsettias.
  • Using a white gel pen, add some accent dots to the poinsettias.

I hope you give this card a try. It's a great way to use up your scrap cardstock and it's easy and fun! Thank you for stopping by! ~Betty~

 Looking for more Inspiration? Click the links below!


Saturday, December 1, 2018

Blank Page Muse Holiday Blog Hop- Winner!


Welcome to the Blank Page Muse Holiday Blog Hop!
Each one of our very talented Inspiration team members have created 
a Holiday craft idea for you to try. 
Please click on their names so you can visit the blogs and tutorials. 
Make sure you visit each of the designers,
 then come back here and let us know which were your favorite Holiday craft idea's!

One lucky reader will receive a special grab bag of assorted Blank Page Muse red rubber stamps! 
Giveaway ends December 8th, 2018

***( Update- The winner is Arianna Barbara! ) ***
Please contact us so we can send you your prize :)


Jingle Bells Blues Ornament


Lama Ornament


Song of the Snowflakes 


Ticket Shaped Ornament.


Altered Tart Tins


By: Karen Sessions

* * * * * * * * * * * * * * * * * * * * * * *

Here are the Blank Page Muse Stamps used:
(click on your favorites!)

Mannequin Dress Form
Country Christmas


Poinsettia 

Happy Lama
Soulful Dolls
Woodgrain Background
Holly Candles

Winter Wonderland

Wings
Santa on his sled
Moon Face
Sequins
Santa
Classic Christmas

Hearty Doodles


Saturday, December 2, 2017

Poinsettia Card

Hello Friends,

Today I am using the Classic Christmas Art Rubber Stamp Set by Pam Bray Designs from Sin City Stamps. I love how the large poinsettia stamp can be used as a background or a focal point. I have incorporated both options in my card for today.

Supplies:
  Sin City Stamps - Classic Christmas 

Other Supplies:
  Gold embossing powder
  Glitter pen
  Red enamel dots
  Red, black, green and craft card stock
  Frame die
  Copic Markers


Step 1:  Stamped poinsettia multiply times on black card stock and embossed in gold.


Step 2:  Filled in open areas with small star stamp from other Sin City Stamp set.  These too are gold embossed.


Step 3:  On white card stock gold embossed another poinsettia. Cut out the flower only and colored it in using Copic markers.  Added glitter pen to center of flower to increase the sparkle.


Step 4:  Cut out the frame in red card stock and attached to background using froam tape.


Step 5:  Next I layered this layer onto red and craft card stock.  I then added the colored poinsettia using foam tape and the leaves from the cut out flower which was also colored with Copic markers.


Step 6: Finally. I stamped the sentiment on a matching green pennant and affixed to card.  A few red dots completed the card.


Please share your cards with us on the Sin City Facebook Fan page.

X

Copyright Text

Blank Page Muse 2018 Sin City Stamps 2013