Showing posts with label heat embossing. Show all posts

Sunday, December 11, 2022

Nature's Wonder.....

 Hi Creative Fans!

Today I have incorporated stamps and a stencil with a digital image in one of my art journals!
Your stamps don't always have to be the "main" focal point - I love to use them to "enhance" the main image and add interest to my page - same with the stencil!


The main image is a digital file printed on tissue paper, adhered to my page and coloured with watercolours. I added some acrylic paint to fill around the image on the edges.


I stamped one of the gothic flowers with embossing ink and embossed with fine white embossing powder at the bottom of the page. I used white paint through the honeycomb stencil to cover the digital image sides and top.

To finish off I added a little bit of gold and the letters "Wonder".

Love how this turned out!

**NEW** Products used:
Gothic Garden Flowers Stamps by Miss Rach
Honeybee Honeycomb Stencil by Miss Rach


***Remember to us the code BPMSharon at the store for 15% off ***
So many fab stamps to choose from!
Note: you can use the code at either the IBFS Store OR the BPM Store - why not do an order from each and increase your stash!

Friday, March 11, 2022

Feeling Colourful!

 Hi Stamping Fans!

Another month and another opportunity to get creative with your BPM & IBFS Stamps!
However, who needs an excuse to get stamping??? Not me!

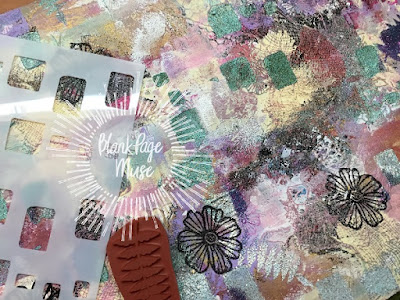
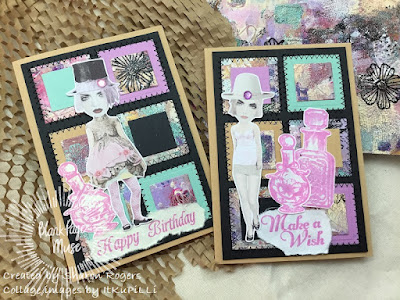
I love to create my own mixed media background paper to cut up and use - you can create some great texture with papers, stamps and stencils! I made this one nice and colourful!
I love using my background card for making cards, creating ATC's and ATCoins!


Blocks Pattern Stencil designed by DeadSeaToons
Nature Girl Stamp Set designed by Donna Gray
"Make a Wish" from the Dandelion Wishes Stamp Set designed by Terri Sproul

More details over at My Blog!


Remember if you use the code BPMSharon at the store checkout you can save 15% on your stamp order - what better excuse do you need to go check out the huge range and nab some rubber stamps to create with! AND remember you can also use this code for discount at the "I Brake for Stamps" store as well! Fantastic way to build you stash of stamps and save some money!


Sunday, October 10, 2021

Nevermore said Poe!

 Hi Stamping Fans!

Well it's October - such a fun month to be creating with spooky images!


Today I am sharing some bright "Poe" inspired tags - I wanted to use bright colours so I grabbed my Purple and Green Distress Inks and started stamping! 

You can see details over at my blog CLICK HERE!

Stamps used are available from the BPM Shop links below and if you use the code BPMSharon you can get 15% off your stamp order!

Poe designed by Rick St Dennis
Dribonez set designed by Rick St Dennis
Nevermore Word Art


And visit our social media sites for more stamping fun!


Tuesday, September 28, 2021

Unicorns & Whimsy!

 Hi Again BPM Fans!

More Whimsical inspiration for you to finish off our month of Whimsy!

Just love the "Unicorn Wishes" stamp set designed by Donna Gray!
Unicorns have a magical whimsical feel and they are the perfect choice of stamps to finish off this whimsical month here at the BPM Blog!


Don't forget that you can also grab stencils at the store - perfect for all your creations - I've used "Slimline Stars" designed by Pam Bray.


Pop over to my blog for more details: CLICK HERE

Remember if you use the code BPMSharon at the store checkout you can save 15% on your stamp order - what better excuse do you need to go check out the huge range and nab some rubber stamps to create with!

Looking for more inspiration then click on the links below!

The Blank Page Muse- https://blankpagemuse.com/

Thursday, January 21, 2021

Mini Vintage Gift Cards!

 Hi Blank Page Muse Stamps Fans!

Hope you are all enjoying our "Vintage" theme this month and that you have been able to join our current challenge - there is still time to play along!

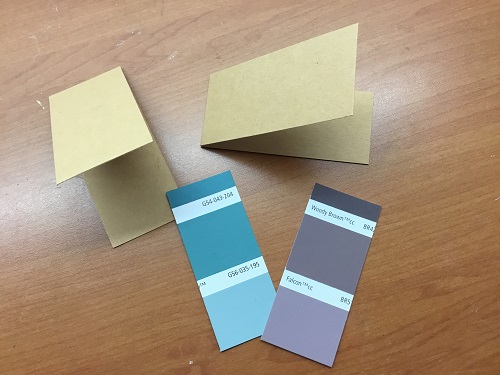
Today I am sharing some mini gift cards - you may remember a few months ago I created some cards with paint chip sample backgrounds and collage elements - well I really hate throwing out even the tiniest of scraps so I decided to use the excess paint chip pieces and make some similar cards but on a very small scale! Great for using up scraps of plain coloured card too!

I love that you can also use this idea for mini cards for any occasion!

Supplies:
Blank Page Muse Stamps: Background Grunge Set
Scrap Card any Colour cut to size and folded in half
Paint Chip Sample Off Cuts cut to just smaller than mini card front
Embossing Pad & Embossing Powder
Collage Images - "Art Tea Life" collage Sheet used for these cards
Small Embellishments & String, Ribbon or Fibre
General: scissors, glue, ruler, heat gun, hole punch

Instructions:
Use your scrap base card to make mini cards that are slightly smaller than your scrap paint chip samples.


Start by stamping and embossing your paint chip samples.


Adhere the stamped and embossed paint chip to your mini card front and punch a hole n the top corner.


Add a small collage image and small stamped sentiment and any tiny embellishments.


Punch a hole in the top corner of the mini card and add some string, ribbon or fibre to use to attach to your gift or xmas tree!

Thanks for joining me today and I hope 2021 brings you lots of time for crafting!

Have fun creating!

Sharon


Don't forget to check us out at all of our social media sites
The Blank Page Muse- https://blankpagemuse.com/

Thursday, May 28, 2020

Hearts of Love...

Hi BPM Fans!

Hope everyone is doing well and moving forward as best you can!

What a year it has been so far! Thank goodness for rubber stamps, stencils and crafting supplies!


Today I have another stenciled creation to continue along with our theme this month of "Stencil It".
I love using stencils to add texture, dimensions and interest to backgrounds.
I love using collage elements as well so being able to combine BPM Stencils and collage characters works perfectly for me with my creations!


Supplies:
Blank Page Muse Stencil: Hearts designed by Magda Polakow
Pam Bray Watercolour 6 x 6 Inch Paper Pack
Base card
Embossing Paste
Embossing Powders x 3
Heat Gun
General supplies: craft knife/scissors, ruler, spatula, double sided tape, glue
Embellishments of your choice

Instructions:


Start with a base card and a piece of patterned paper from the "Watercolour" 6 x 6 set OR any of the gorgeous paper pads designed by Pam Bray! Cut a piece of patterned card slightly smaller than your card base. Cut this piece in half diagonally as shown in the picture above and adhere to your card. You can multiple cards at once as you have a "spare" piece of patterned paper!


Lay your chosen stencil on the card front and apply the embossing paste over the whole stencil. Remove the stencil and apply embossing powders. Use multiple colours of powder and apply randomly over the embossing paste - apply each colour separately and shake off excess before applying each subsequent colour! Use your heat gun to emboss.


Add a focal collage element to the bottom corner along with any embellishments you like. Add a collage or a stamped sentiment and you have a card perfect for any occasion!


Thanks for joining me today and remember you do still have time to play along with our stencil themed challenge so why not whip something up and link up to our challenge!

Happy stamping!

Sharon


Don't forget to check us out at all of our social media sites
The Blank Page Muse- https://blankpagemuse.com/

Tuesday, December 31, 2019

First Christmas Together Ornament

Hello!  Susie on the blog today with a Quick Idea for a "First Christmas Together" ornament.

All the ornaments on my Christmas tree remind me of events and people in my life.  Decorating my tree every year is like a walk down Memory Lane. I love to reminisce with my husband and children as we "deck the halls".  I also like to give ornaments that commemorate special events: a graduation, a new home, a new baby or...a First Christmas Together!

Time to play...


Supplies:
Lady & Man Clock with Writing Art Rubber Stamp
Clearsnap ColorBox Blends Inks
Archival Ink, black
Embossing ink
Embossing powder, black & clear holographic
Decorative circle die
Metallic gold cardstock
Metallic gold marker
Want2Scrap Baby Bling, black & clear rhinestones

Directions:
  • Stamp and heat emboss the image with black ink and embossing powder.


  • Color image as desired and protect with a layer of clear embossing powder. 
  • Cut out the image and adhere to decorative background. (I used a Spellbinder's die cut, but you could actually use a store bought doily - they come in lots of different colors and finishes.)


  • Add sparkle and texture around the edge with self adhesive rhinestone bling!


  • Optional:  write on the back with names, dates and personal note.


Happy New Year and thank you for stopping by!  I hope you find some time to play today!
Susie

Looking for more inspiration?
Click the links below!

Thursday, October 24, 2019

Sweet Scented Flowers!

Hi BPM Fans!!!
You know Xmas is coming so I have a quick gift idea to share with you today - super simple and only a few supplies required!!
Hope you feel inspired to have a go - I always love decorating soaps and using them as gifts!
One of the best things is you can use any stamps, card and coloured embossing powder for this project!
Supplies:
Blank Page Muse Stamp: Whimsical Daisy by Pam Bray Designs
Oatmeal Coloured Card
Embossing Ink Pad
Black Embossing Powder
Heat Gun
Handmade Soaps
Scissors, double sided tape, string, ruler, cutter
Instructions:

Start with your card, stamp and embossing supplies. Randomly stamp over the card with your stamp, cover with embossing powder and heat set.


Cut the embossed card into strips slightly smaller than your soap as shown below so when you wrap the soap you can still get the colour contrast as well as the embossed strip. Use string or fibres of your choice to tie a basic knot or bow around your soap. You may want to use double sided tape to secure the embossed card before tying the string.


Make several at a time so you can have a set to use as a gift! Quick and easy but a really great way to be creative with your gift giving. Make some spooky Halloween themed ones for the Trick or Treaters!
 
Thanks for joining me today!
Happy Stamping!!
Sharon
Don't forget to check us out at all of our social media sites
The Blank Page Muse- https://blankpagemuse.com/

Thursday, August 22, 2019

Butterfly Love...

Hi Everyone!

I hope you have all been enjoying the DT makes this month and getting some ideas and inspiration for layering on your creations!
Today I am sharing some mini "moo" sized gift cards - perfect for attaching to little gifts!
They are quick and easy to make and you can use any Blank Page Muse stamps you have on hand ad you can make them any size you like - I like the mini size - they are nice and cute and they were perfect for my little jar of bath salts!
Supplies:
Blank Page Muse Stamp Set: Heart of Nature Butterflies Bees by Donna Gray
Blank Page Muse Stamp: "Love" word Dandelion Wishes Set or ay other little word stamp
Embossing Pad and fine Black & White Embossing Powder
Black card - cut to 140mm x 28mm plus extra black card
Scrap of painty card - cut to 66mm x 25mm
Small piece of white card/paper to glue inside gift card for writing greeting
Embellishments: string/twine and small piece muslin
Tools: heat gun, ruler, scissors, knife, glue, double sided tape or glue stick, hole punch
Instructions:
Cut your black background card to size and score in the middle and fold in half.

Cut your "painty" card to just smaller than the front of the base cards so when it is ready to adhere it leaves a nice black border around the outside.


Next step is to stamp and emboss all the card elements. Use the garland flowers to stamp on the painty card with theblack embossing powder. Stamp the small butterfly onto black card and emboss with white powder and fussy cut. Stamp the "love" word onto black card and emboss in white and free hand cut the word.


Glue the embossed painty card to the gift card front and then arrange and glue your butterfly, muslin cloth and word to the front.


Use a small hole punch and punch a hole in the top corner of the card to attach twine.

Hope you have enjoyed my embossed and layered gift tags - a perfect way to personalise your gifts - even better if your gifts are also handmade!!


Have a wonderful week!
Happy stamping!
Sharon
Don't forget to check us out at all of our social media "haunts"!!!
The Blank Page Muse- https://blankpagemuse.com/

Monday, July 8, 2019

A Handwritten Card - Is that still a "THING"???

Hi Blank Page Muse Stamps Fans!


I'm happy to be back for another term on the DT here at Blank Page Muse Stamps and getting to enjoy more rubber stamping FUN with you all!!!!!
Hope you enjoy everyone's creations and the new stamps you will be able to see in use!!


Today I am sharing an idea for a stationary set with a monochrome theme that is quick and easy to make but very classy and would make a lovely gift for someone who still loves to handwrite letters and use the postal system!

Supplies:
Card & Envelope Set in Silver Grey (make your own set or use a purchased set)
Note: any colour stationery will work if you have a similar shade of embossing powder!
Embossing Ink & Fine Silver Embossing Powder
Heat Gun
Silver ribbon or raffia to "wrap" your set to use as a gift (optional)
Instructions:


Using a range of the stamps from the "Correspondence" set stamp your envelopes and folded cards with embossing ink.
Sprinkle with your silver embossing powder and emboss with your heat gun.
You can also emboss plain paper to fit envelopes when folded for a more "letter" style of stationery. the possibilities are endless!


If using your set as a gift arrange your embossed cards and matching envelopes into a pile and tie/secure with silver cord or raffia. you can even make a little matching tag to finish the gift.

Thanks for joining me today - hope you feel inspired!
Happy stamping!
Sharon


Don't forget to check us out at all of our social media "haunts"!!!
The Blank Page Muse- https://blankpagemuse.com/

Copyright Text

Blank Page Muse 2018 Sin City Stamps 2013