Showing posts with label Correspondence Pen Ink and Postage stamp sheet. Show all posts

Thursday, May 25, 2023

Altered Playing Cards!

 Hi Crafty peeps!

Can you believe we are already into May!


Today I am sharing some altered playing cards - I haven't altered any cards for some time - I have been mostly doing art journal pages.


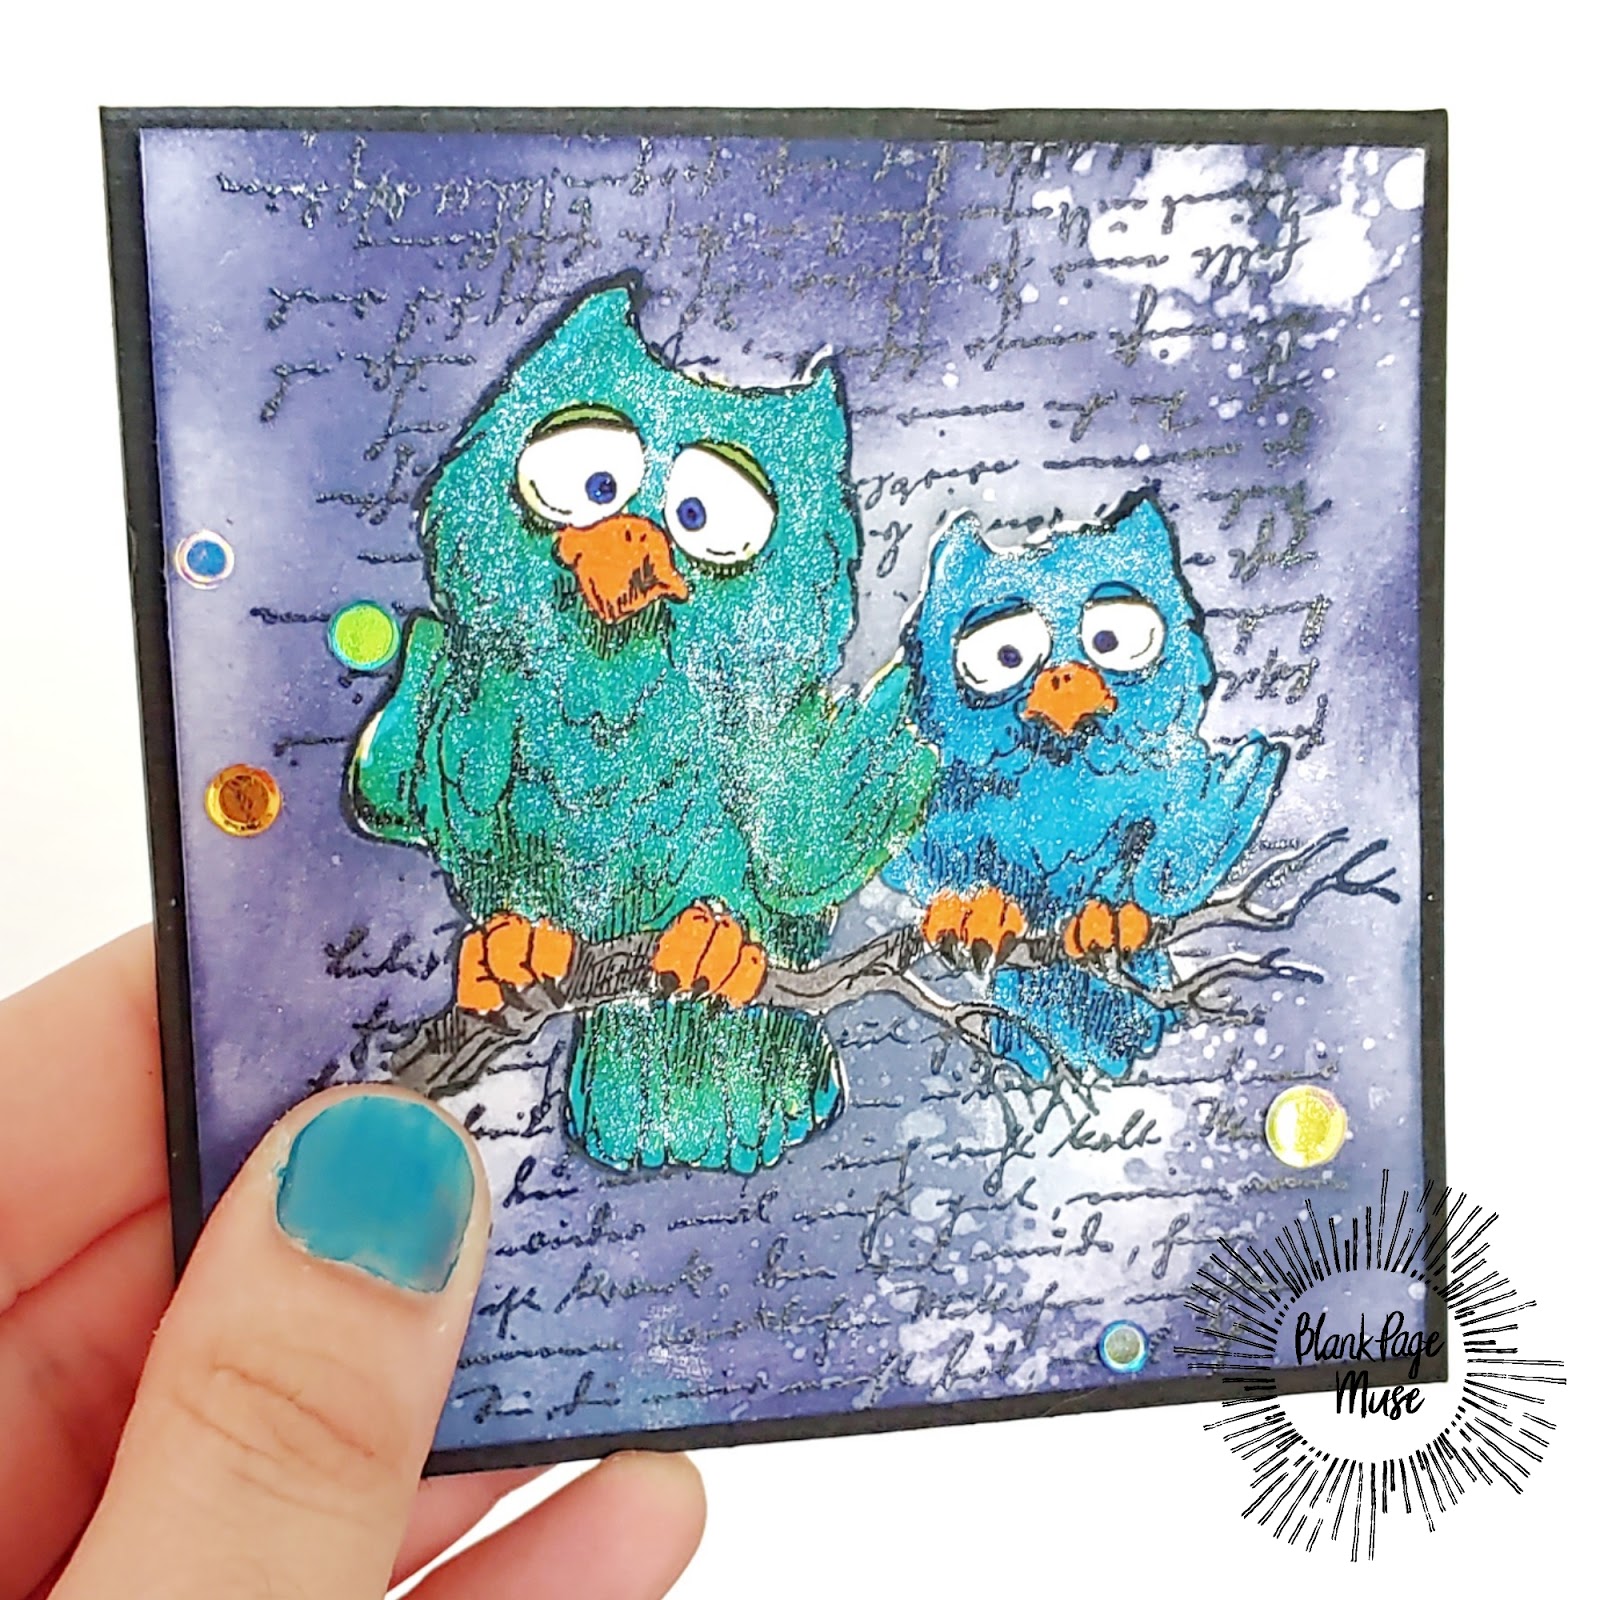
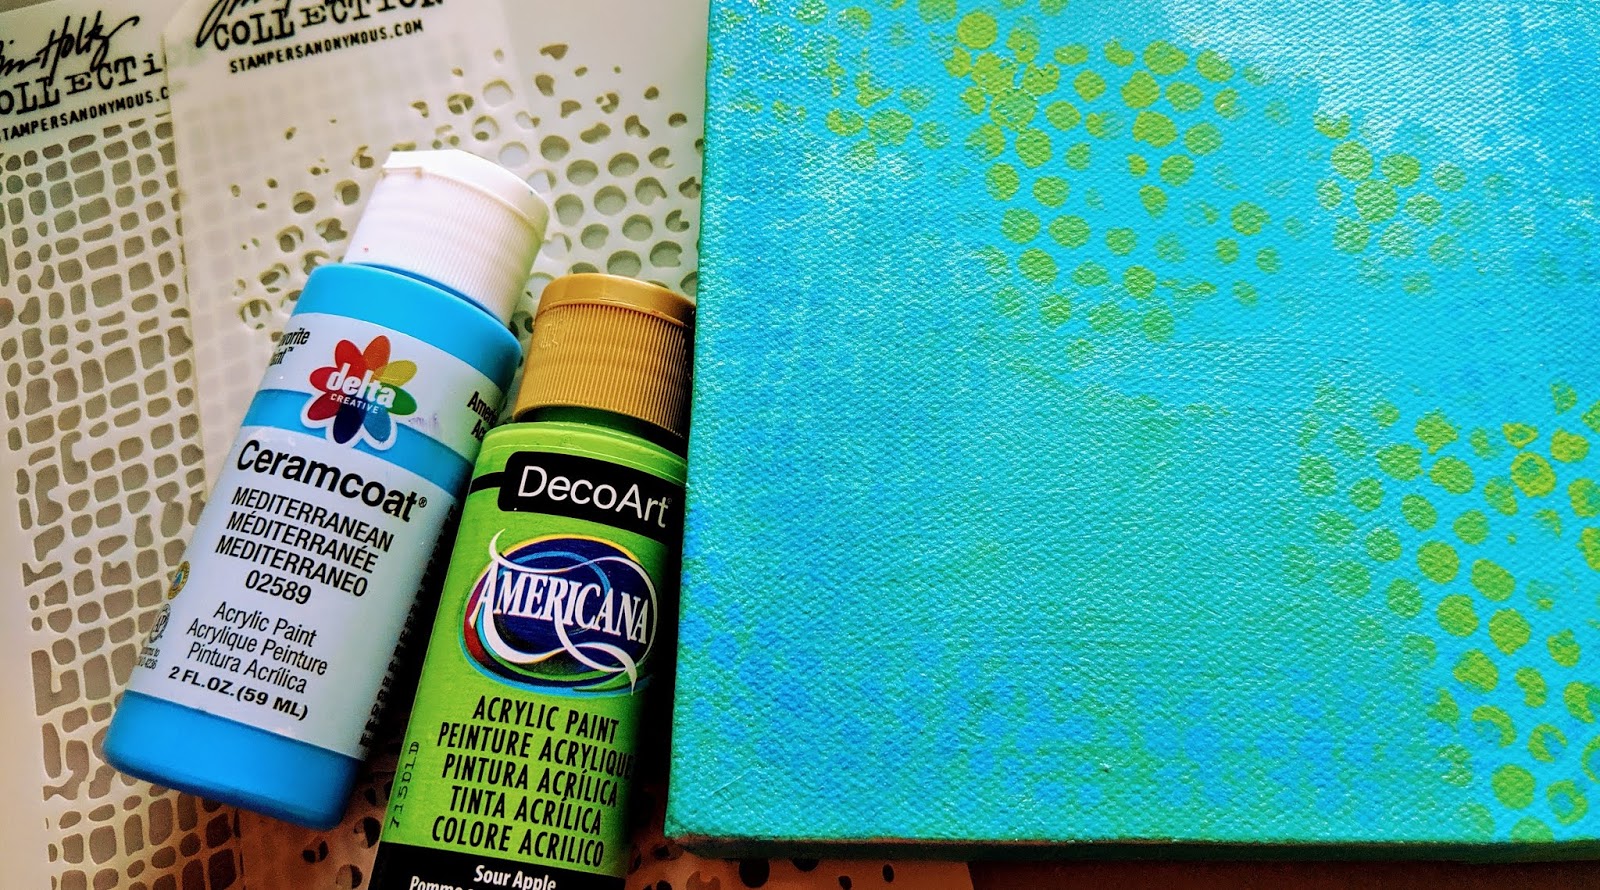
To create the backgrounds I added some scrunched tissue paper to the card and sponged some distress ink around the edges and across the card. I used clear gesso and the "Monarch Journal" TCW stencil available in store: click here. Once dry I added some black liquid acrylic paint and spritzed. And to finish off the background I used the text stamp from the "Correspondence" Stamp Set available in store: click here.


Next I added some elements to the front of the cards to finish off. I had some fabric butterflies from my stash and Tim Holtz paper dolls along with these stamps from the store: "Gothic Garden Flowers" by Miss Rach, phrase stamp from the "Fashionista" Sheet at IBFS.


Quick and easy vintage feel altered playing cards!


***Remember to us the code BPMSharon at the store for 15% off ***
So many fab stamps to choose from!
Note: you can use the code at either the IBFS Store OR the BPM Store - why not do an order from each and increase your stash!


And visit our social media sites for more stamping fun!
I Brake For Stamps -https://ibrakeforstamps.com/ 

Wednesday, October 9, 2019

What a Hoot

Hello, hello. Samantha here with a card that's "owl" you'll ever need. I love making open ended cards that can be used for any occasion and that is what inspired this one.


For this project you will need the following:


Stamp your owls to your white cardstock. Cover with masking paper.


Stamp your letter stamp down the length of the white cardstock with black embossing ink. Cover in clear embossing powder and heat set.


Using blending inks of your choice blend over the cardstock. I used Distress Oxide inks in Chipped Sapphire and Faded Jeans. I also added a few droplets of water to the cardstock.

Remove the masking paper and color the owls in with a coloring medium of your choice. Place your craft foam on the back of your cardstock and adhere to your card base.

Optional; add sequins and brush over owls with a clear shimmer pen.


Easy and effective. I hope you will give this a try yourself. Head on over to the Facebook fan page and show us what you were inspired to create.
Until next time,
Samantha


Looking for more inspiration?

Click the links below!

The Blank Page Muse Shop

Facebook Fan Page

Instagram- Shop

Instagram- Blog

Twitter

Pinterest

Thursday, October 3, 2019

Urban Life

Hello everyone! Thought I would drop in with a new project today for your walls using Blank Page Muse Stamps.


Supplies used for this project -
Urban Scene stamp 
Script stamp from Correspondence Pens by Katy Leitch
VersaMark Clair Nocturne ink
Distress Oxide ink Cracked Pistachio and Vintage Photo
2" deep 6" x 6" stretched canvas
DecoArt paint - teal, lime green, blue
Martha Stewart Teal glitter paint
Tim Holtz stencils - burlap and circles
Sequins
Stickles - Silver
Art Glitter Glue
Wink of Stella clear pen

To start the project, paint it all over with teal paint, let dry. Stencil with lime green and blue on opposite corners. Sponge on the glitter paint in select small areas, let dry.


Using the Distress Oxide ink and a blending tool, apply ink to white cardstock in about a 5" x 5" area, sprinkle with water and let dry. Stamp the Urban Scene stamp onto inked cardstock with VersaMark Clair ink. Tear the edges towards you on each side, this allows the edges to be more feathery and take on ink better. Ink blend the edges with the VersaMark and Vintage Photo ink.


Stamp the script stamp randomly on the canvas. Then using the glue, attach the stamped image to the canvas using an old credit card to smooth out the surface. When this step is dry, use Wink of Stella on the bird in flight for some more shine. Apply the sequins with the glue and add a small dot of Silver Stickles to each center.


Hope you liked this wall decor piece and please share your creations in the Blank Page Muse Facebook group!!

The Blank Page Muse- https://blankpagemuse.com/


Monday, July 8, 2019

A Handwritten Card - Is that still a "THING"???

Hi Blank Page Muse Stamps Fans!


I'm happy to be back for another term on the DT here at Blank Page Muse Stamps and getting to enjoy more rubber stamping FUN with you all!!!!!
Hope you enjoy everyone's creations and the new stamps you will be able to see in use!!


Today I am sharing an idea for a stationary set with a monochrome theme that is quick and easy to make but very classy and would make a lovely gift for someone who still loves to handwrite letters and use the postal system!

Supplies:
Card & Envelope Set in Silver Grey (make your own set or use a purchased set)
Note: any colour stationery will work if you have a similar shade of embossing powder!
Embossing Ink & Fine Silver Embossing Powder
Heat Gun
Silver ribbon or raffia to "wrap" your set to use as a gift (optional)
Instructions:


Using a range of the stamps from the "Correspondence" set stamp your envelopes and folded cards with embossing ink.
Sprinkle with your silver embossing powder and emboss with your heat gun.
You can also emboss plain paper to fit envelopes when folded for a more "letter" style of stationery. the possibilities are endless!


If using your set as a gift arrange your embossed cards and matching envelopes into a pile and tie/secure with silver cord or raffia. you can even make a little matching tag to finish the gift.

Thanks for joining me today - hope you feel inspired!
Happy stamping!
Sharon


Don't forget to check us out at all of our social media "haunts"!!!
The Blank Page Muse- https://blankpagemuse.com/

Tuesday, May 14, 2019

Vintage Tag

Hello Crafty Friends,

Look at this vintage tag Marie-Christine created!


BPM Stamps used:


other products

Printed Cardstock
Distress Oxide
Sticker
Vintage photo

She used printed paper and Distress Oxide to do the background. She stamped words on it, then she adhered some piece of printed papers and a vintage photo. She stamped pens on a cardstock and cut them before to stuck them on the tag. To finish, she adhered a title sticker.

Thanks for visiting!

Looking for more Inspiration?

Click the links below!


Tuesday, May 7, 2019

Faux "Wax" Seal Gift Card Holder

Stephanie has a quick idea to share with us!
She always wanted to get a wax seal but all those supplies can get pretty expensive,
So she did some research and found out that you can use embossing powder and rubber stamps
to achieve the same effect!
How awesome is that?!
Faux Wax Seal Gift Card Holder

Blank Page Muse Products:

Other products used:
Kraft paper 
Gift Card Envelope Die
Embossing Powder
Ink pad
Scrapbook Glue

Be sure to use coupon code: BPMDtStephanie2019 to save 15% off your order!

S


Die cut the kraft paper for the envelope and stamp with text stamp from the Correspondence, Pen, Ink and Postage set. 


She used Antique Linen Distress Ink just to give the paper the illusion of texture.


Add a small puddle of glue to the sealed envelope. Sprinkle embossing powder on the glue puddle. She used Emerald Creek Charred Gold. Heat the embossing powder and while it is still liquid add more powder until you have the desired amount.


 Press the stamp into the molten embossing powder and let cool.
 Lift stamp up and voila you have your wax seal!


She added a little ink to the edge of the envelope to finished the project. If you enjoyed this quick and easy tip just follow the links below for more inspiration.

For more BPM Inspiration just follow the links below!

More projects by Stephanie


Wednesday, March 27, 2019

Flamingo Card

Hello BPM Fans!!

Today I would like to show you how I created a Flamingo card for the Under the Sea theme this month.  I was a bit out of my element for the projects this month and I am not a big ocean/sea fan. I like to sit in my pool in the summer, fewer animals in my pool and no sand to drag into the house later! I work a lot of hours and I like to have time to create and not spending all my time cleaning house!


Supplies used 
Blank Page Muse Stamps -

(Shop now and save! Use code BPMDtKelly2019 to save %15 off your total order!)

Other supplies used - 
tissue paper
ink in 3 pink colors
black ink
markers
glue stick
stamp platform
foam tape
white embossing powder
Versamark ink
black cardstock
white watercolor paper
white card base

1. Using the different pink inks, stamp them randomly in a line on a piece of white tissue paper with stamps from the Background Grunge sheet and the Hearty Doodles sheet, then using the black ink, stamp the Open Weave Fishnet in a line on white tissue paper. I used the circles from the Background Grunge stamp and repeatedly stamped them over each other. I used the script stamps from the Correspondence Pens sheet and stamped it in a line on the white tissue paper. 

Quick tip - To tear the tissue paper, use a fine line brush with very little water and draw a line down the tissue paper, tear along this line to give you a nice torn edge.

2. Taking one of your stamped tissue pieces, glue it down about 2/3 from the edge of the black cardstock. Repeat with the other two layers. 


3. Using the stamp platform, stamp the Flamingo several times onto watercolor paper then color the flamingo with markers. I used several colors over each other to get the effect I was looking for on the feathers. Then fussy cut the flamingo and glue it over the layered tissue paper. 
4.  Next, using the Dear Beach sentiments the were cut apart, stamp in Versamark ink onto black cardstock and heat emboss with white embossing powder. then trim down to fit across the card front. 


This card could be used for any occasion!  Don’t forget to check out the stamps at Blank Page Muse.

The Blank Page Muse- https://blankpagemuse.com/


Monday, February 18, 2019

Faith Journaling Canvas

I have often marveled at the beautiful faith journaling pieces I have seen and have wanted to try to create a piece for my self. Since this month's challenge also called for a little masking, I decided to incorporate a masked heart.  
Instead of a Bible verse I choose the theme of a recent sermon. If  that isn't your thing, how about adding a quote from your favorite author? 


Blank Page Muse Supplies

Other Supplies
10x10 Canvas Board
Faber Castell India Ink Pitt Pen
Jute (twine)
Glaze
Archival Ink 
Glimmer Mists 
Scrap paper (for masking)


Start by cutting a heart from scrap paper and use it as a template to draw a heart onto the canvas.

With a pencil, write your bible or sermon quote inside of heart. Erase writing lines. 


Mask heart again for stamping. Begin stamping the BPM Correspondence Pens, Ink & Postage Art Rubber Stamp Sheet by Katy Leitch


This was my canvas after I finished Stamping.

Add Jute around heart border. 

Begin Misting Heart with Glimmer Mist.

Once Dry Add glaze over heart to see color.  This look a little sloppy as I used a water base glaze with the water based mists and the glaze started pulling the mist off a bit. 

Once the Glaze is dry. Mist the rest of canvas as desired to finish.   I included lots of photos so you can see the color depths.


The Blank Page Muse- https://blankpagemuse.com/


Copyright Text

Blank Page Muse 2018 Sin City Stamps 2013