Welcome to the Blank Page Muse Blog! We hope you love these amazing projects created by our fabulous Creative Stamping Team. At Blank Page Muse, we are proud to offer red rubber stamps, clear stamps and stencils. I Brake for Stamps rubber stamps are available online in the same shop. Art rubber stamps are pressed to order in the USA. We are here to help break that blank page! Visit our sister shop IBRAKEFORSTAMPS.com
Sunday, February 18, 2024
Time Flies: It's up to You to Navigate!
Friday, April 16, 2021
Art Journal - Nature's Art
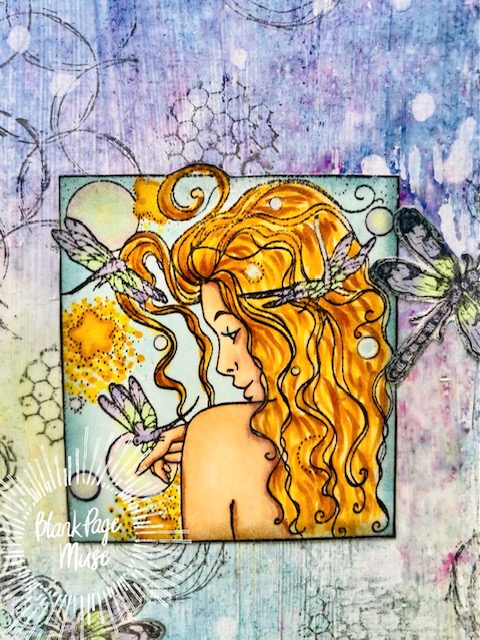
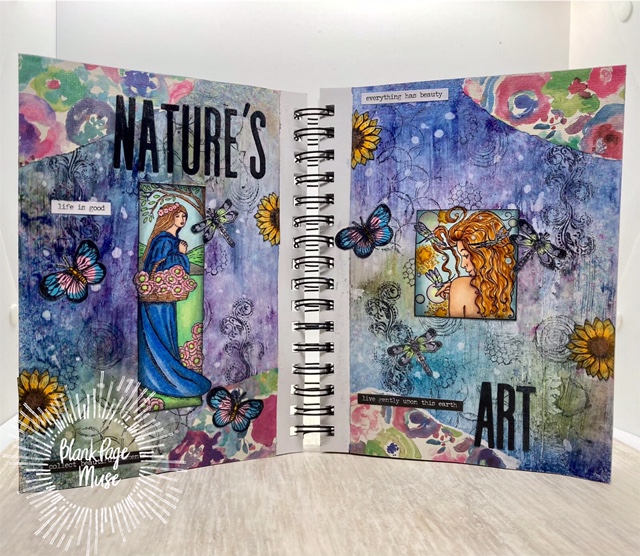
Hello BPM Fans! It's Betty here! My favorite season of the year is Spring. I love how the trees are bare one week then full of leaves the next, the smell of fresh cut grass, and the sound of birds chirping. My husband and I walk every morning and it's been a delight to see all the different flowers blooming everywhere. This inspired me to create my art journal pages called Nature's Art using stamps from Blank Page Muse Art Rubber Stamps (please see supplies list below for list).
- Blank Page Muse Art Rubber Stamps:
- Dragonfly Lady-The Femmes Series
- Girl with Basket of Flowers
- Small Sunflower Blossom by Pam Bray Designs
- Small Dragonfly by Pam Bray Designs
- Background Grunge by Pam Bray Designs
- Stamping block
- Washi tape, wax paper, Press and Seal (to protect coils, margins, and other pages)
- White gesso
- Paint brush
- Distress Spray inks: Bundled Sage, Salty Ocean, Chipped Sapphire, Seedless Preserves, and Picket Fence
- Water spray bottle
- Heat gun (optional)
- Floral patterned paper of choice
- White cardstock for stamping images
- Coloring medium of choice. I used both Prismacolor pencils and Copic markers
- Scissors
- Black cardstock
- Alphabet dies
- Press and Seal or Transfer tape
- Liquid glue
- Distress ink pad: Black Soot
- Distress ink blender brush/pad
- Water dropper
- Collage Medium (I used Tim Holtz Distress Collage Medium)
- Sentiment stickers (I used Tim Holtz - Small Talk stickers)
- Prepare the art journal pages by covering the coils with Press and Seal and the margins with washi tape. Add wax paper under the pages.
- Paint on a layer of gesso and let it completely dry.
- Place the journal into a box so the over spray is contained in the box.
- Spray the Distress Ink onto the pages, but don't overlap too much. Spray water over the ink so the ink will spread. Gently use a paper towel to mop up puddles. Use a heat gun to quick dry or air dry.
- Using the Background Grunge stamps, randomly stamp images using a stamp block or without. The entire image of the stamp does not have to stamp to create the background. Select a variety of stamps from the set to use.
- Tear patterned paper corners and adhere using collage medium.
- Stamp and color the butterfly, sunflower (stamp partial or cut flowers in half since they will be placed on edge of journal page), and dragonfly stamps then fussy cut. Use any colors you like, but here's what I used:
- Butterfly (Copic markers): Y17, B02, RV02
- Dragonfly (Copic markers): YG11, BV00, BV01
- Sunflower (Copic markers): Y17, Y35, Y13, E33
- Stamp and color the Girl with Basket of Flowers. Use any colors you like. Here are my Prismacolor pencil colors:
- Skin: 116, 018, 019, 020
- Cheeks: 082
- Hair: 117, 114, 010
- Blue: 042, 043
- Tree & Basket: 114, 116
- Green for leaves and flowers: 110, 061
- Pink flowers: 080, 082
- Grass: 057, 110, 061
- Sky: 101
- Walkway: 065
- Stamp and color the Dragonfly Lady. Use any colors you like. Here are my Copic colors:
- Hair: E39, YR27, YR24, Y32
- Skin: E04, E11, E21, E00, E000
- Cheeks: R20
- Lips: R21
- Dragonflies: YG11, BV00, BV01
- Stars: Y24, Y11, Y15
- Blue background: B00, B000
- Bubbles: Y00, B000, BV000; plus Castle Arts colored pencil #35 lavender light.
- Using the Distress Ink in Black Soot, ink the edges of each image. Set aside.
- Using alphabet dies and black cardstock, cut out the words "nature's art."
- Using a self-healing mat or surface with grid lines, add a line of removable adhesive onto the mat. Line up the die cuts onto the mat and place a piece of transfer tape or Press and Seal on top to pick up all the letters at once. Use a spatula to help lift the die cuts off the mat.
- Add liquid glue to the die cuts the place them onto your journal pages.
- Carefully peel off the transfer tape or Press and Seal.
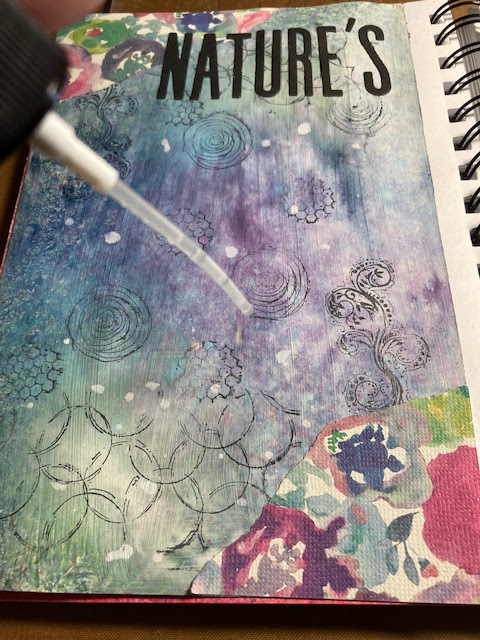
- Using the end of the water spray pump, add a few big drops of water onto the journal pages for some texture (optional - this was a last minute, spur of the moment idea).
- Adhere all the images onto the journal pages using collage medium. Add the sentiment stickers.
- Lastly, apply a light coat of collage medium all over the pages.
Tuesday, March 10, 2020
Anything But a Card! So how about ATCs and ATCoins???
Welcome back crafty stampers! So happy you are here today!
This month our challenge theme is Anything But a Card! I adore this theme, it's just so f u n!!
It's Kim today and I wanted to share some ATCs and ATCoins I made. I made them for a swap but sadly my partner never got them :( I took a few photos because, I'm not afraid to say it, I really liked how they came out. And I really wanted to share them! So, I hope you like them. I don't have process photos but they are super easy and fast and fun to make with whatever stamps, papers, pens, inks, basically whatever you might have on your desk!
Friday, August 2, 2019
August 2nd for Fan Art Friday
Scribble Daisy
Monday, June 24, 2019
Dragonfly Mini Art Journal Page
Hello Blank Page Muse Fans! Today, I thought I would share a mini art journal page that was recently added to my Bullet Journal. This is a 8.2" X 5.5" format size, so the design could be used on an over-sized card as well, or expanded into a full sized 8.5 X 11 page with room to add more stamped dragonflies.
Supplies:
8.2" X 5.5" notebook page
Dragonfly Stamp
Flower border
Happiness Blooms from Within Sentiment Stamp
United Rings Stamp from Hearty Doodles set
Black Pigment Ink
White Pigment Ink
Clear embossing Powder
Distress Crayons [Gelatos or similar water based ink can work, in this case Mermaid Lagoon and Peacock Feathers by Tim Holtz Distress Oxides were used]
Brush [A watercolor brush with it's own reservoir was used in this case]
Water
Instructions:
2. Using your brush and some water, brush across the page, blending the crayons and diluting the colors. Pull edge to edge, drawing out the color to the paper borders. It should look like a light wash of color framing the heavier colored center. Once it's all blended out, allow to dry.
Monday, February 11, 2019
Remembering Edith
Dragonflies hold a personal significance for me. My best friend's late mother, Edith, let me borrow her beautiful, bejeweled dragonfly pin when I was very young. Every time I see a dragonfly I'm reminded of her.
Let's get started! You will need the following materials to make this card:
- Dragonfly Top View stamp by Pam Bray Designs
- The determined woman sentiment stamp from the Up, up, and away steampunk stamp set
- White A2 sized card base
- Purple cardstock panel cut to 5.5"x 4"
- Green cardstock panel cut to 4 3/8" x 3 1/8"
- White cardstock panel cut to 3" x 4.25"
- White cardstock sentiment strip cut to 3" x 7/8"
- Two small squares for the faux banner tails cut to 1" x "7/8
- Purple ink
- Black ink
- Repositionable adhesive
- Small sequins
Ink up your dragonfly stamp with purple ink.
Look at how nicely this stamp inks up! Nothing stamps the way rubber does.
Stamp the dragonfly three times, going off of the panels slightly each time.
Gently pull the panels apart.
Adhere the white panel to the green panel. Layer onto your purple cardstock and then add entire panel to your card base.
Using black ink stamp the determined woman sentiment onto the strip of cardstock.
Cut notches into the small squares to create the tails of your faux banner.
Using the sentiment strip as a guide, determine where the banner tails should go and adhere to the card front.
After attaching the sentiment over the banner tails with foam tape, add small sequins to the card front. I used five. I think that odd numbers are very pleasing to the eye.
That's it! A beautiful dragonfly card that can be used for many different occasions. This one will be going to my best friend as a 'just because' card.
Thank you so much for taking the time to read through my tutorial. I hope that you have an awesome day.