Showing posts with label Katy Leitch Designs. Show all posts

Monday, April 15, 2024

Just A Note

Hello, Lyneen here,
      I love vintage and distressed cards!  How about you?  For this card I created the vintage background paper with Blank Page Muse stamps. I stamped on velum for effect!


For this card I used the following from Blank Page Muse:

Vintage style Postcards background Art Rubber StampsTTS114-01 

Correspondence Pens, Ink & Postage Art Rubber Stamp Sheet by Katy Leitch SCKTL-001 (Stamps, Pens, Script background)


To learn how I created this card visit my blog HERE!

Please visit our social media sites for more stamping fun!

I Brake For Stamps - https://ibrakeforstamps.com/

The Blank Page Muse- https://blankpagemuse.com/

FB Fan Page- https://www.facebook.com/groups/blankpagemuse/

Instagram Shop- https://www.instagram.com/blankpagemuse/

Instagram Blog- https://www.instagram.com/blankpagemuseblog/

Twitter- https://twitter.com/BlankPageMuse

Pinterest- https://www.pinterest.com/blankpagemuse/boards/


Sunday, August 6, 2023

Fantastic Plastic (in PINK)!!!

Hi Stamping & Crafting Fans

Hope everyone has been enjoying the crafting inspiration from the DT here at the Blog!

I've been making time for crafting lately and it has been great - even doing a few classes and an ATC swap which has inspired my post for today!


I love using acetate to make things and recently I participated in an Aussie swap Pink/Plastic themed ATC swap so I decided to make a few more using BPM stamps and accessories available in store!

To start I cut some thick acetate to ATC size and used shades of pink and gold alcohol ink - alcohol ink I've had for years and never used! I love the effects of the different colours moving and blending with each other!


Stamps used:
Correspondence Set by Katy Leitch - Script stamp


***Remember to us the code BPMSharon at the store for 15% off ***
So many fab stamps to choose from!
Note: you can use the code at either the IBFS Store OR the BPM Store - why not do an order from each and increase your stash!

Friday, November 19, 2021

Ginkgo Journal Tuck Book

  Hello friends, guest designer Kelly here today using the Ginkgo Leaf, and script stamp from the Correspondence stamp set to create this little book.


To make this book, I used a shipping tag folded in half then used inks and stamping on the background. Washi tape was added  with the stamped Ginkgo leaf and some ribbon.
Use an assortment of handmade papers for the inside page, then sew them all together. 

Looking for more Inspiration? Click the links below!
The Blank Page Muse Shop https://blankpagemuse.com/
FB Fan Page https://www.facebook.com/groups/bla...
Instagram - Shop https://www.instagram.com/blankpage...
Instagram - Blog https://www.instagram.com/blankpage...
Twitter https://twitter.com/BlankPageMuse
Pintrest https://www.pinterest.com/blankpage...

Monday, August 2, 2021

Altered Book with Photo Stamps

 Hello friends! Today, I am on the blog with Blank Page Muse and I have created an altered book using an old book and stamps along with paint, stencils, and papers. 


Supplies used - 

Several Sentiments stamps from Blank Page Muse
Old book
Handmade paper
Assorted papers
Stapler
Art Glitter Glue
Gesso
Paintbrush
Acrylic paint in various colors

First of all, you will need to prep the book. To start this process, I tear out every other page so that the spine is not overloaded with pages, then glue two pages together for a less tear-resistant surface to work on. Coat each page with gesso and let dry.

While the pages are drying, stamp the images onto a mix of papers. I generally just stamp out my images onto several colors of paper then I have them ready when I am working on building the pages. 

After the pages are dry, paint them with acrylic paint in a variety of colors, let dry, then make some marks with tools such as a credit card, stamps, pens, etc. with a contrasting color of paint. Let this dry. While your pages are drying, look over your assorted images and papers and start to piece them together in layers for the book pages. These pieces can be stapled or glued together or even stitched on before placing them in the book. 

Now that the pages are dry, using large stencils and white or black paint or your choice of color, stencil over the book pages. 
For the orange page above, I used the Water Cloud Masks by taping them down with painter's tape. After the stenciled pages are dry, keep adding marks, splatters, dots, and more. At this stage, the pages are ready for the images and papers that are layered. You can use ink on the edges or a water-soluble pencil and draw along the edges for emphasis. Also, add any sentiments that you like at this point. Your book is now finished!

Here are the finished pages. Just remember that if you don't like a page or colors you used, just keep adding layers! 


Here is the cover, it had been painted with acrylic paint then crackle medium then layered with acrylic paint again to create the crackle, then using archival ink on the edges along with a glaze of paint over the top. 

Thanks for stopping by!!

Thursday, June 17, 2021

Say it by Journaling It!

 Hi Again BPM Fans!

Hope you are enjoying the creations the DT have been sharing so far this month - always such a wide range of inspiration and different ways to use our Blank Page Muse Stamps!

Today I am sharing a couple of tags using a gelli plate and stamps to follow our "Say It" theme for the month!

Hope you enjoy!


Supplies:
Blank Page Muse Stamps: Correspondence Pens, Ink & Postage Set designed by Katy Leitch
Blank Page Muse Stamps: Art Journaling #2 Set "Journal It" stamp designed by Teri Sproul
Small Gelli Plate
Acrylic Paint & Brayer
Black Ink Pad
Tags
Washi tape
General supplies: glue, scissors, scrap black twine, scrap washi tape.

Instructions:
Start by stamping the ink pot, pens and journal it wording onto white card and fussy cut.


Brayer your acrylic paint over the gelli plate.


Use the wording stamp to stamp over the gelli plate.


Lay your plain tag over the gelli plate and pick up the stamped paint. Allow to dry.


Stamp the excess paint the wording stamp has picked up off the gelli plate and stamp it onto a plain tag - this way you actually create two tag backgrounds at once!


Edge the tags with the black ink pad along with the "journal it" wording. Add a scrap of washi tape and arrange your stamped images onto the tag and adhere. finish off with a piece of black twine at the top of the tag.


Happy Stamping!

Sharon

Don't forget to check us out at all of our social media sites
The Blank Page Muse- https://blankpagemuse.com/

Saturday, April 10, 2021

Mini Canvas "Wish"

 Hello everyone, Monique here on the blog with an inspiration idea.

For today's post I made a mixed media mini canvas. I like the idea of combining collage with stamping. We crafters have lots on tiny bits of paper that are left overs from our craft projects. Don't throw them away, keep them in a box and use them in small works of art like on ATC's, tags or on a small canvas like I did. You can even paint over, or stamp over the left over papers to match them to you project.


Supply list:

Blank Page Muse stamps

Dandelion Wishes with butterflies SC0085 by Terri Sproul

Correspondence Pens Ink & Postage SC KTL 001 by Katy Leitch

Small canvas (I used 6,5 x 6,5 cm)

Acrylic paint in: Moon yellow, Blue Chiffon, Sable Brown, Antique Mauve, Cobalt Teal Hue, Quinacridone gold.

Matte Medium

Left over papers from old books, music paper, patterned paper etc.

Bottle cap (or something round to stamp with)

Brayer

Palette knife

Waterproof stamp ink (I used mermaid lagoon and Vintage photo distress  archival ink)


For detailed instructions, see video here:


Here a closer look for all details


Don't forget to decorate the sides of the canvas, for a more finished look.


Thank you for stopping by and have a great day! I'd love to have you follow/subscribe on my YouTube channel


Tuesday, January 19, 2021

Vintage Perfume Greeting Card


Vintage Greetings!  Today I am excited to share this card I created  to play along with this month's Any Thing Goes and Vintage Challenge here at Blank Page Muse! This car was so fun to create and feature 4 different stamp sets! 


Vintage Greetings!  Today I am excited to share this card I created  to play along with this month's Any Thing Goes and Vintage Challenge here at Blank Page Muse! This car was so fun to create and feature 4 different stamp sets! 

The four stamps sets featured include


Other supplies needed to recreate this card include:
card stock- white and pink , kraft card base, paper doily, patterned paper, distress inks, kraft tag, paper bag, stamp punch, water color markers and water brush, adhesive (regular and dimensional) , ribbon, flower 

Cut the pink card stock slightly smaller than your card base. Stamp the Blank Page Muse Sequin Waste Light Art Rubber Stamp by Terri Sproul onto the pink card stock with distress inks. 


Stamp the script text from Blank Page Muse Correspondence Pens, Ink & Postage Art Rubber Stamp Sheet by Katy Leitch, repeatedly onto your tag with distress inks. 


Layer patterned paper onto your stamped card stock. Add paper doily then adhere tag to card. 


Stamp Blank Page Muse Vintage Scents Perfume Ephemera Art Rubber Stamps onto white card stock and cut out image.  Color image as desired with water color markers. 


Add paper bag to card.  Add stamped bottle to card using dimensional adhesives. 


Punch out stamp from white card stock.  Stamp feather from Blank Page Muse Flower & Bird Sketches Art Rubber Stamp Sheet Set in multiple colors.  Tuck stamp under bottle. 


Finish card with ribbons and a bow. I hope you enjoyed this project and are inspired to get creative with your Blank Page Muse Supplies. 

Be sure to follow us at 


Saturday, January 9, 2021

Vintage Inspired Altered Notebook

Hi everyone, Monique here, with an easy to make gift idea.

 I love notebooks, you can never have enough notebooks. Not sure what it is what I like about them, , but mostly it is the feel of the book when you hold it in your hands or it's just a nice looking cover, but they always make me happy.

That is why even in the digital age a notebook is a great gift, and if you personalize the covers to the receivers taste, it is usually a highly appreciated gift. Everyone needs notebooks in their life, even if you don't use them to write in them, they are just nice to look at :-).

This one started out as a kraft covered small notebook, the perfect size to carry with you in your purse or pocket, and it fits in an envelope so easy to send as happy mail!


Supply list:
the following Blank Page Muse stampsets;

a notebook with blank cover, I used one with a kraftpaper cover
Lace
Cardstock in white and turquoise
Distress ink in blues, greens and browns
Waterproof stamp ink in black, grey and blue
A die cut, scissors or punch with a scallop motive
Patterened paper or book paper


For detailed instructions, see video:


I hope you enjoyed the video and I can't wait to see your makes, please check in here for inspiration by the Blank Page Muse team regularly.


The Blank Page Muse Shop https://blankpagemuse.com/ FB Fan Page https://www.facebook.com/groups/bla... Instagram - Shop https://www.instagram.com/blankpage... Instagram - Blog https://www.instagram.com/blankpage... Twitter https://twitter.com/BlankPageMuse Pintrest https://www.pinterest.com/blankpage..

Wednesday, October 9, 2019

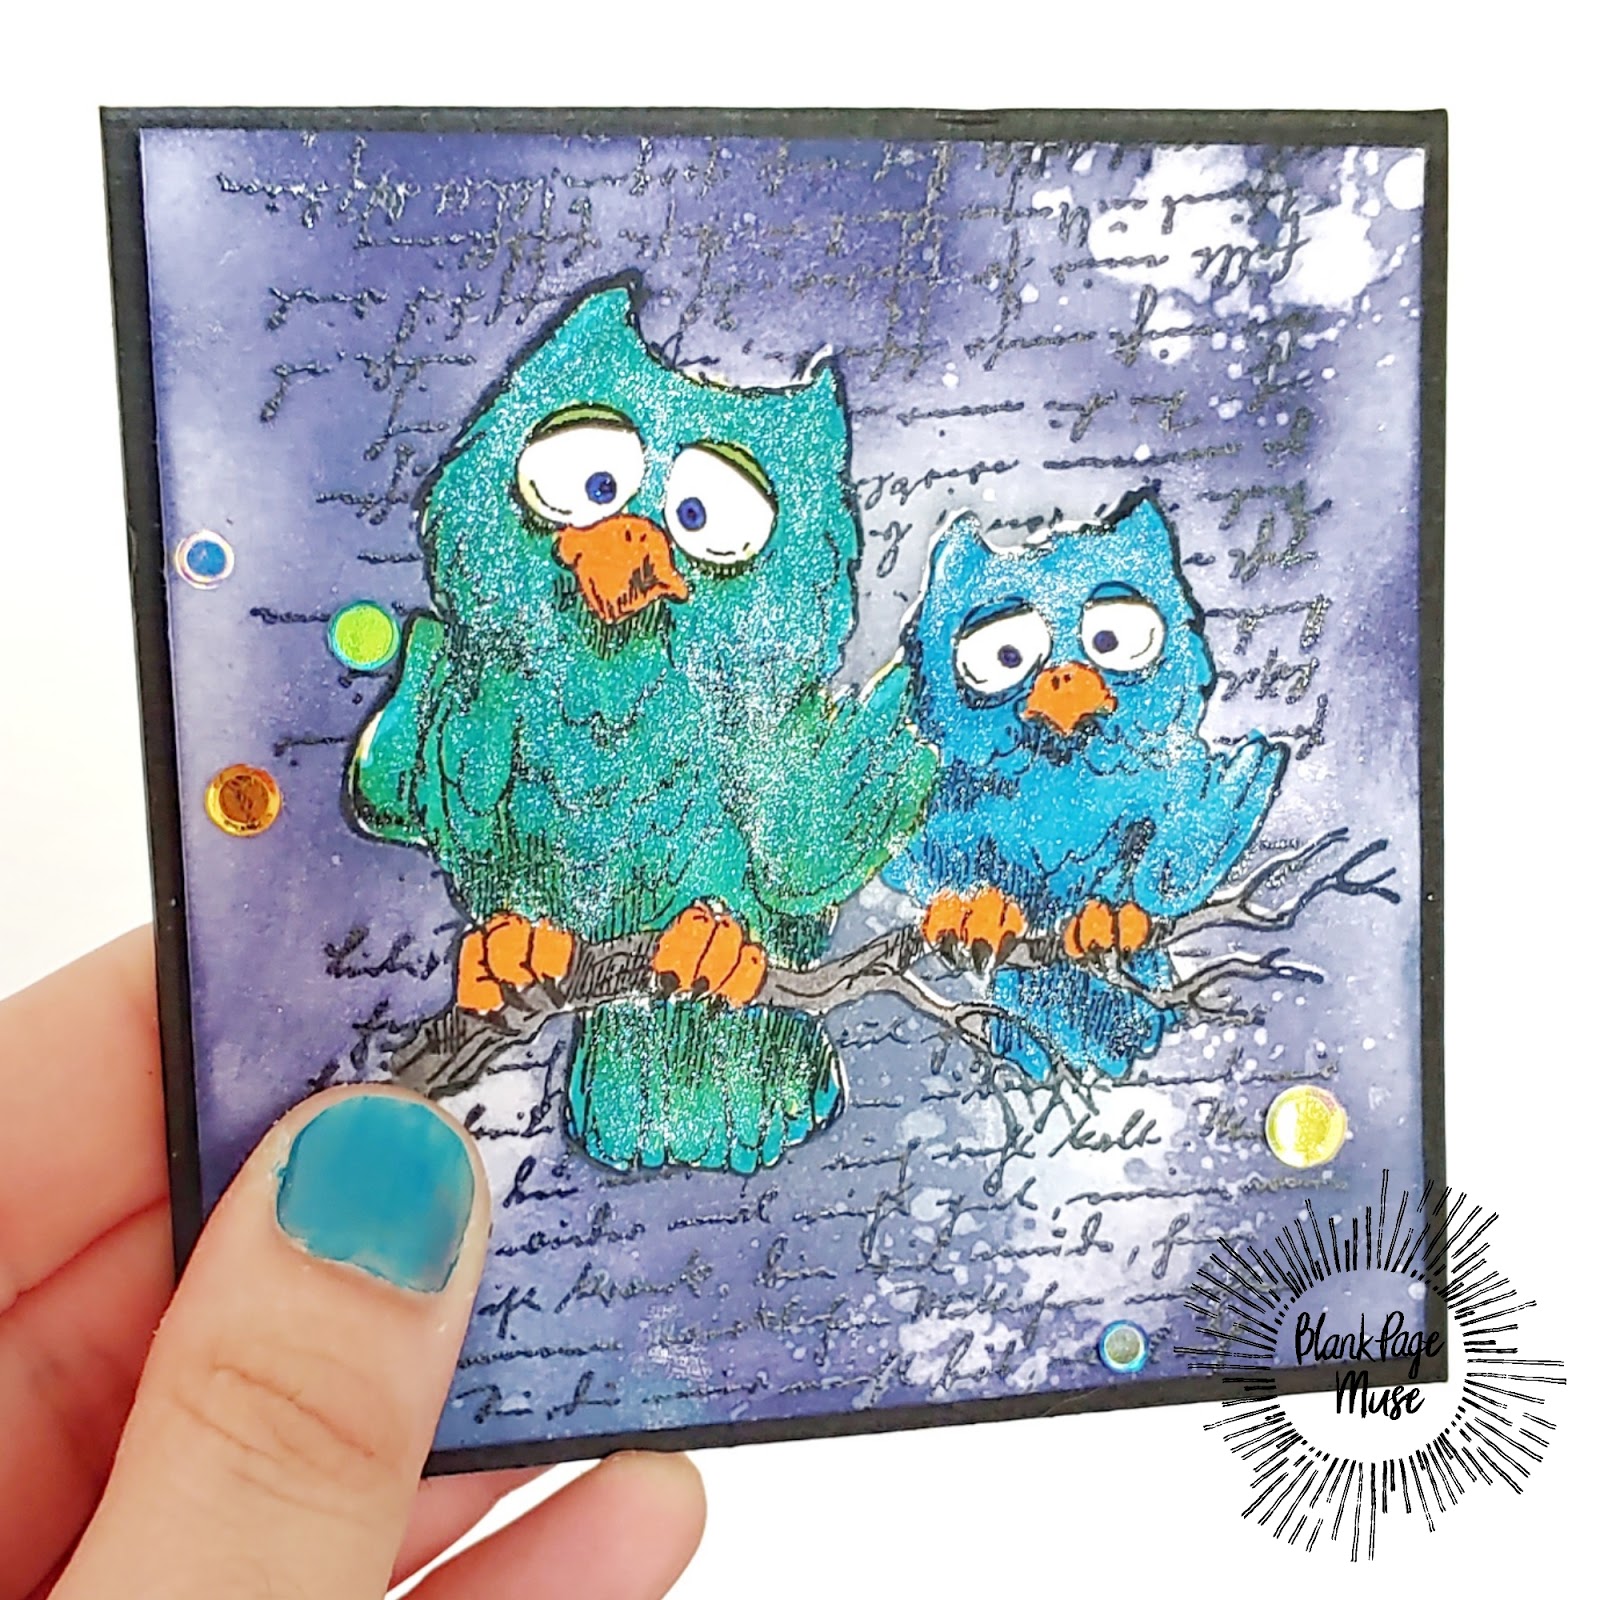
What a Hoot

Hello, hello. Samantha here with a card that's "owl" you'll ever need. I love making open ended cards that can be used for any occasion and that is what inspired this one.


For this project you will need the following:


Stamp your owls to your white cardstock. Cover with masking paper.


Stamp your letter stamp down the length of the white cardstock with black embossing ink. Cover in clear embossing powder and heat set.


Using blending inks of your choice blend over the cardstock. I used Distress Oxide inks in Chipped Sapphire and Faded Jeans. I also added a few droplets of water to the cardstock.

Remove the masking paper and color the owls in with a coloring medium of your choice. Place your craft foam on the back of your cardstock and adhere to your card base.

Optional; add sequins and brush over owls with a clear shimmer pen.


Easy and effective. I hope you will give this a try yourself. Head on over to the Facebook fan page and show us what you were inspired to create.
Until next time,
Samantha


Looking for more inspiration?

Click the links below!

The Blank Page Muse Shop

Facebook Fan Page

Instagram- Shop

Instagram- Blog

Twitter

Pinterest

Copyright Text

Blank Page Muse 2018 Sin City Stamps 2013