Friday, March 3, 2023

It Takes a Long Time to Grow Old Friends

 Hi everyone, Steph Ackerman here!

 Today I am using some amazing products from Blank Page Muse and I Brake For Stamps.


Create a card from white cardstock.
Cut a sheet of paper from the pack to fit the card base.
Cut another sheet of paper smaller and mat with black cardstock.
Assemble the layers, then add the flowers and leaves to the right corner.


Adhere the stamped, colored and fussy cut image to the card.
Add the sentiment to the upper corner.


The full tutorial can be found on my blog.

Thanks for stopping by.

Steph

Looking for more Inspiration? Click the links below!
The Blank Page Muse Shop https://blankpagemuse.com/

Save 15% of your Blank Page Muse orders with discount code:  BPMSteph

Wednesday, March 1, 2023

Tea Time with Alice and the Queen in Wonderland Tag

 Hi everyone! It's been awhile but it's me, Tonya, and I want to share a project I created. Since I love anything Alice in Wonderland I decided I wanted to create a tag using the Tea Time Alice and Peek onto Wonderland Stamp Set, Bedazzled Diamonds Stencils and Cyan Consortium Paper Pack.


For more photos and the how to's you can find the blog post HERE.

 Also if you aren't following Blank Page Muse's social medias you can find those here: Instagram, Pinterest, Facebook Business Page, Facebook Fan Page


Supplies 

Blank Page Muse: Bedazzled Diamonds Stencils
Blank Page Muse: Cyan Consortium Paper Pack 
MISTI Stamping Tool
Waterproof Black Ink
Watercolor Paper
Crackle Distressed Texture Paste 
Sizzix/Tim Holtz: Tag Collection Thinlits
Foam Pop Dots 
Stylus
Sizzix/Eileen Hull: Folio Page Pocket and Flowers Thinlits
Sizzix/Eileen Hull: Shadow Box Elements Thinlits
Stickles
Paper Cutter
Scissors
watercolors and Inks
Various Patterned Cardstocks
Thread, Sequins, Gems, Pearl Sprays
Frame Diecut, Playing Cards
Beacon Adhesives: Zip Dry Adhesive 


Thanks for stopping by, hope your day is great and enjoy creating!


Tuesday, February 28, 2023

Quick Valentine LOVE Card Set

 Hello from design team member Heidi!

Today I want to share an idea to quickly make 4 elegant Valentines.  


First choose 5 patterned papers. I chose ones that have subtle patterns, but this would work with bolder patterns, as well.

Then stamp your LOVE stamp on 4 of these.  Cut the other patterned paper into 4 2.5 inch squares. (If you are using a bold patterned paper, you may wish to white or silver heat emboss the stamp instead.)
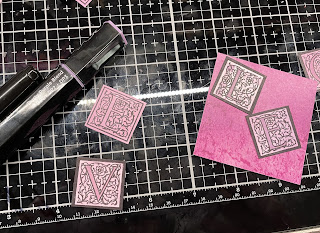
Cut out all the letters individually, leaving a slight border.  With a black alcohol marker, create a faux matte around each letter.  (This sounds fussy, but it really doesn’t take much time, especially compared to actually cutting and glueing a black mat.). Also use a colored marker to color in each letter.  I used a dusky purple marker.

Mix up the patterns and arrange the letters on each 2.5 inch square of patterned paper. I highly recommend using liquid glue for this part so that you have time to move the letters around evenly!  Also, matte this on a 2 3/8 inch black cardstock. 

I decided to go over the letters with a sakura glitter pen to bring out the letters and make it look more valentiney.

Not just use this as the focal image of your card!  I just embossed some pink cardstock, added some ribbon and some glitter glue to finish this easy cards!  You could finish them in a simpler way or more ornate way, depending on how much time you have!

Here are my finished cards!
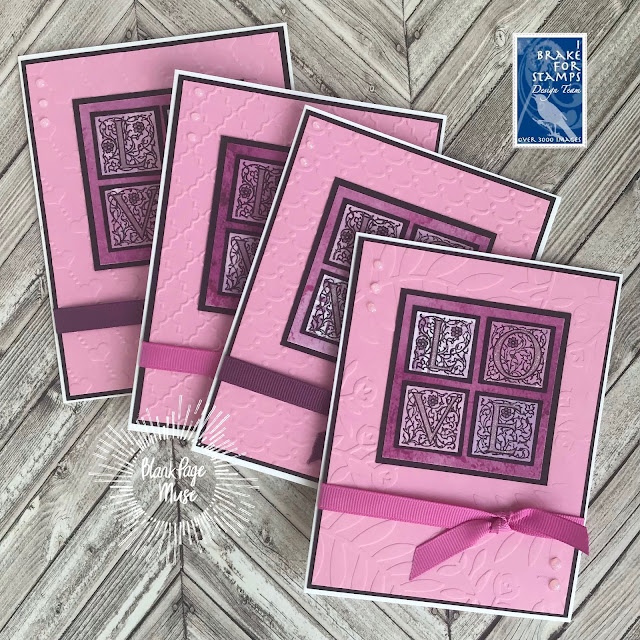

This stamp is part of a wedding stamp set in the I Brake for Stamps store:

Wedding Sheet stamp set

The papers are also in both the IBFS and BPM stores!

Pam Bray Designs Sweet Passion 6x6 paper pad

If you would like another idea for this stamp, please see my card posted HERE.

You can also find more inspiration at the links below:

The Blank Page Muse- https://blankpagemuse.com/

FB Fan Page- https://www.facebook.com/groups/blankpagemuse/

Instagram Shop- https://www.instagram.com/blankpagemuse/

Instagram Blog- https://www.instagram.com/blankpagemuseblog/

Twitter- https://twitter.com/BlankPageMuse

Pintrest- https://www.pinterest.com/blankpagemuse/boards/

Wednesday, February 22, 2023

Sweet Passion Sonnet

 Hi everyone, Steph Ackerman here!

 Today I am using some amazing stamps from Blank Page Muse and I Brake For Stamps.


Stamps: Sonnet 
Paper:  Sweet Passion


Stamp the Sonnet stamp on white cardstock in green, gray and purple inks.
Tear the panel, mat with cardstock and tear that panel.
Cut a paper from the Sweet Passion Paper Pack to fit the card, then wrap with ribbon.
Adhere to a purple card.

Adhere the stamped panel to the card with foam adhesives.


The full tutorial can be found on my blog.

Thanks for stopping by.

Steph

Looking for more Inspiration? Click the links below!
The Blank Page Muse Shop https://blankpagemuse.com/

Save 15% of your Blank Page Muse orders with discount code:  BPMSteph

Saturday, February 18, 2023

Wedding Card

 Hello from design team member, Heidi.  During Valentine season, I think it is also a nice time to make a wedding card or two.  I already have those stamp sets out, and it is good to have several on hand.


This stamp is so pretty and easy to color. I just sort of randomly “dabbed” my alcohol marker over the areas in green and two colors of pink.  I then used some gel pens to emphasize and add shimmer.  

This stamp is from the Wedding Sheet stamp set from I Brake for Stamps.  This is a great set with many images and sentiments to choose from!

You can also find more inspiration at the links below:

The Blank Page Muse- https://blankpagemuse.com/

FB Fan Page- https://www.facebook.com/groups/blankpagemuse/

Instagram Shop- https://www.instagram.com/blankpagemuse/

Instagram Blog- https://www.instagram.com/blankpagemuseblog/

Twitter- https://twitter.com/BlankPageMuse

Pintrest- https://www.pinterest.com/blankpagemuse/boards/


Tuesday, February 14, 2023

Sending You Hugs & Kisses!

 Hi Stamping Fans!

Can you believe it's February already? A perfect month to share some "love" themed creations!


Today I have some quick Valentine tags to share with you using minimal supplies:
tags swiped with gesso, music paper, stencil and ink pad plus your chosen valentine's stamps!

Products used:

"The Old and New" Stamp Set
"Gothic Garden Flowers" designed by Miss Rach
"Hearts" Stencil designed by Magda Polakow


***Remember to us the code BPMSharon at the store for 15% off ***
So many fab stamps to choose from!
Note: you can use the code at either the IBFS Store OR the BPM Store - why not do an order from each and increase your stash!


And visit our social media sites for more stamping fun!
I Brake For Stamps -https://ibrakeforstamps.com/ 

Friday, February 10, 2023

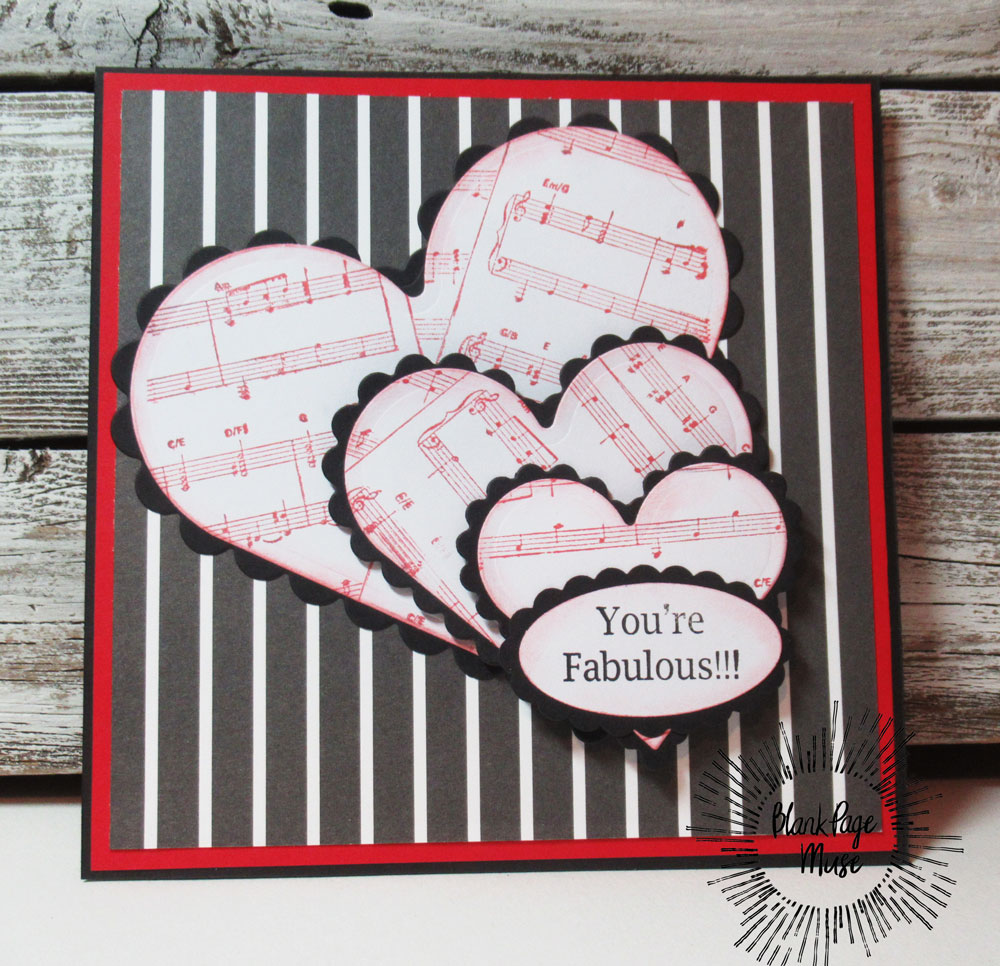
Valentine's Day Card

Hi everyone, Steph Ackerman here sharing some amazing stamps from Blank Page Muse and I Brake for Stamps.


I stamped the Music Background and used several heart shaped dies to die cut graduating sized hearts.
Matting each heart with black scalloped cardstock hearts, I arranged them on the card with foam adhesives for dimension.

 The sentiment was stamped, punched out and added to the smallest heart.

The full tutorial can be found on my blog.

Thanks for stopping by.

Looking for more Inspiration? Click the links below!
The Blank Page Muse Shop https://blankpagemuse.com/

Save 15% of your Blank Page Muse orders with discount code:  BPMSteph

Wednesday, February 8, 2023

Bloom Where You Are Planted

 Hello from design team member, Heidi.

I just recently got a stamp set from the newest release from Blank Page Muse called Gothic Garden Flowers.  It is so cute and fun.  I immediately thought they would look nice over some mixed media backgrounds.


This background was made with a gelli plate and a daisy embossing folder.  It just has a subtle texture to it.  I just stamped over the flowers in a nice black ink and it just pops so nicely.  This reminds me of a spring rain, which I am looking forward to.

This stamp set is available here:

Gothic Garden Backgrounds

Sentiment from Flower and Bird Sketches

You can also find more inspiration at the links below:

The Blank Page Muse- https://blankpagemuse.com/

FB Fan Page- https://www.facebook.com/groups/blankpagemuse/

Instagram Shop- https://www.instagram.com/blankpagemuse/

Instagram Blog- https://www.instagram.com/blankpagemuseblog/

Twitter- https://twitter.com/BlankPageMuse

Pintrest- https://www.pinterest.com/blankpagemuse/boards/

Friday, February 3, 2023

You Are My Sunshine

 Hi everyone, Steph Ackerman here!

 Today I am using some amazing stamps from Blank Page Muse.


Stamp the Crackle Heart stamp on white cardstock in gray and purple inks.
Die cut the panel.
Die cut a panel from the Sweet Passion Paper Pack, mat with cardstock.
Adhere to a pink card.

Adhere the stamped panel to the card with foam adhesives.

Fussy cut the butterfly and adhere to the card.
Add a punch sentiment to the right corner.


The full tutorial can be found on my blog.

Thanks for stopping by.

Steph

Looking for more Inspiration? Click the links below!
The Blank Page Muse Shop https://blankpagemuse.com/

Save 15% of your Blank Page Muse orders with discount code:  BPMSteph

Wednesday, January 25, 2023

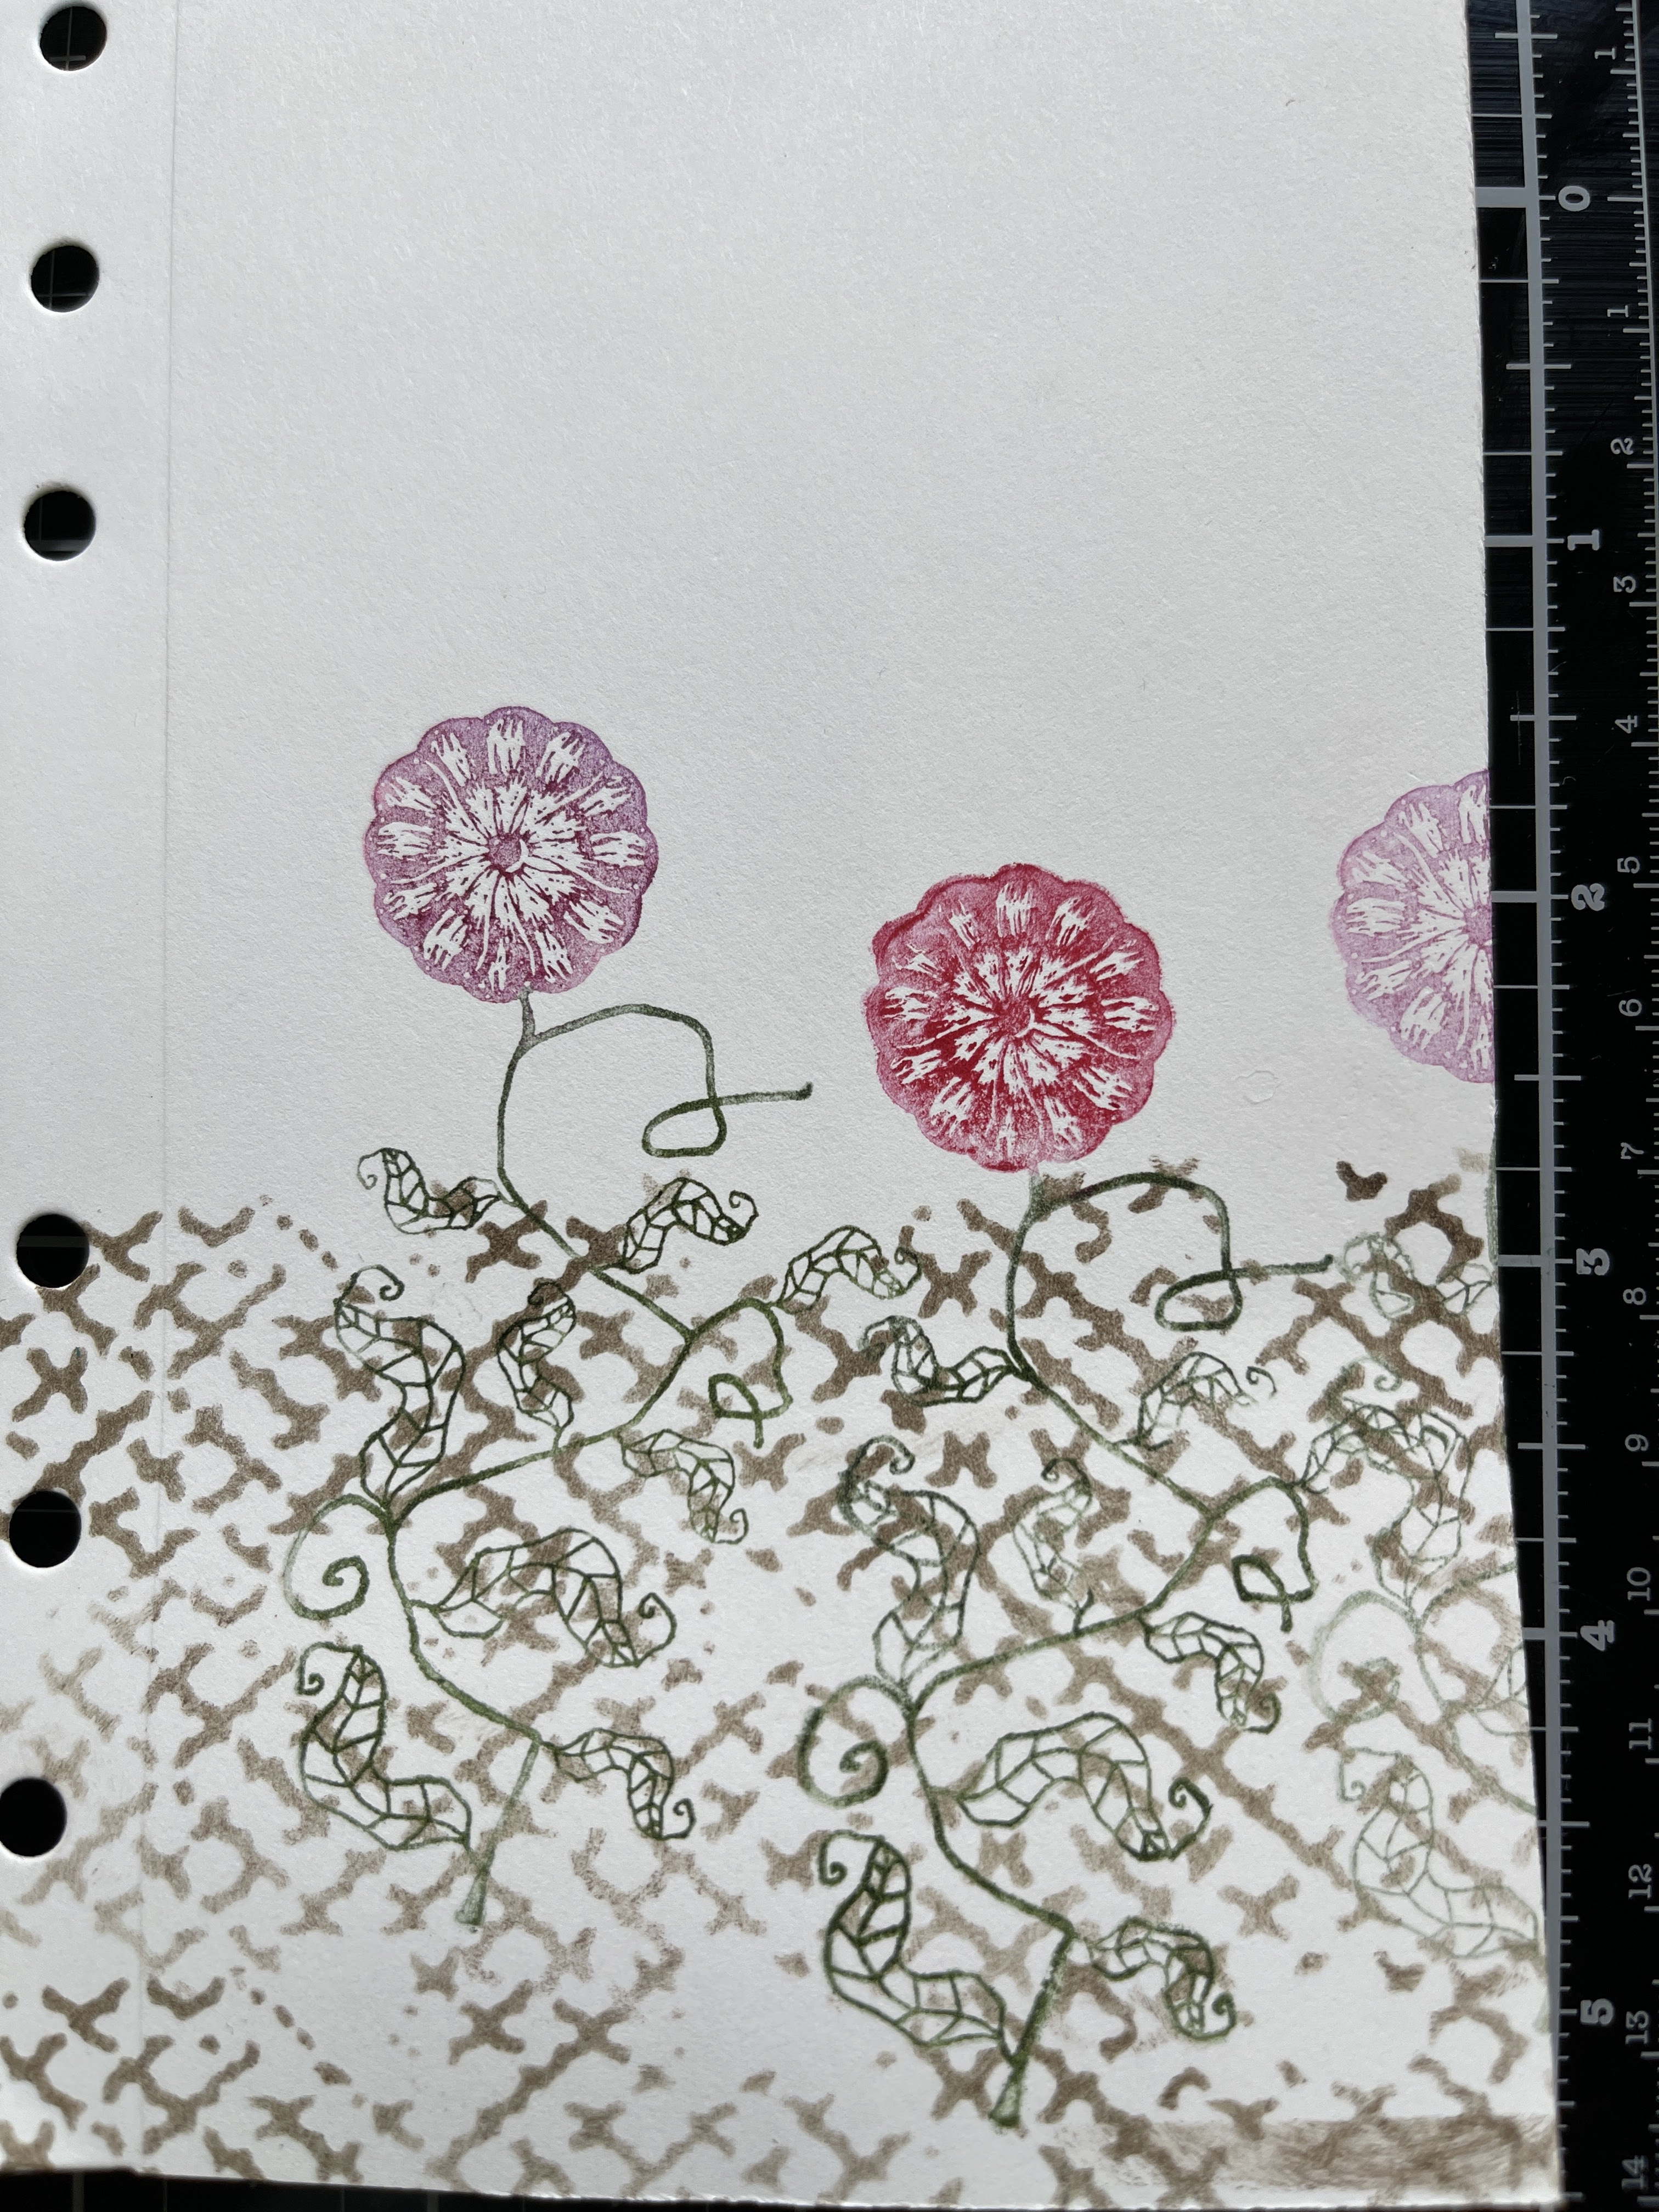
Using Gothic Garden Flowers Stamps to create a Journal Page

Today I am excited to share this stamped journal page I created using the Gothic Garden FLOWERS Art Rubber Stamps BY MISS RACH  from Blank Page Muse.  
I love to create journal pages as it gives me a chance to try out new techniques before I add them to my bigger projects!

So besides stmaping this page also features my playing with Stencil butters, the  6 x 6 The Crafter's Workshop Butterfly Collage Stencil  from Blank Page Muse   and  Blank Page Muse Water clouds Layering Shapes Mixed Media Stencil.  Add some Distress Inks, sentiment stickers  and water color markers add you are set to create. So Let's get creating! 


Using Distress ink and your 6 x 6 The Crafter's Workshop Butterfly Collage Stencil  from Blank Page Muse , ink bottom te3xture from your stencil.  Move stencil and repaet to create larger stenciled area. 


My stenciled area takes up the bottom 1/3 to 1/2 of my page. 
Using wate3r color markers ink your stamps as desired. 
Stamp onto your journal page. 
r3e-ink your stamp changing your flower color as desired  and stamp. 
Without re-inking re-stamp your image in a different location. 
Continue inking and stamping and re-stamping (without reinking untilyour have the desired amount of flowers. 


Grab your stencil butters and a pallet knife and your stencil.  Secure your stencil to your work space. THen add your stencil butter over the butterfly image. 


Carefully lift your stencil to reveal your butterfly.  Clean off your stencil.

Add sticker sentiment as desired. 

Using your Cloud stencil add stencil butter, moving stencil as desired. 


I hope you are inspired to get creative with your stamps and papers from Blank Page Muse and I Brake For Stamps.  Don't forget to use my discount code BPMChris. 


Be sure to follow us at 

The Blank Page Muse- https://blankpagemuse.com/


I Brake for Stamps-https://ibrakeforstamps.com/


FB Fan Page-  https://www.facebook.com/groups/blankpagemuse/


Instagram Shop-  https://www.instagram.com/blankpagemuse/


Instagram Blog-  https://www.instagram.com/blankpagemuseblog/


Twitter-  https://twitter.com/BlankPageMuse


Pintrest- https://www.pinterest.com/blankpagemuse/boards/


Sunday, January 22, 2023

Happy Happy Happy Birthday Card

   Hi everyone, Steph Ackerman here!

 Today I am using some amazing stamps from Blank Page Muse and I Brake For Stamps.


Paper:  Cyan Consortium


Stamp the birthday stamp on pattern paper and emboss.
Tear the right edge, mat with cardstock, then wrap with ribbon.
Adhere to a green card with foam adhesives.

Stamp and color Lexi with Copic Markers.
Fussy cut and add her over the ribbon.


The full tutorial can be found on my blog.

Thanks for stopping by.

Steph

Looking for more Inspiration? Click the links below!
The Blank Page Muse Shop https://blankpagemuse.com/

Save 15% of your Blank Page Muse orders with discount code:  BPMSteph

Copyright Text

Blank Page Muse 2018 Sin City Stamps 2013