Showing posts with label acrylic. Show all posts

Wednesday, August 9, 2017

Pens & Ink Journal Page

Hello Sin City Friends and Fans! Today I want to show you how I used the new Sin City Stamps release "Correspondence" by Katy Leitch! I just love these!

For this journal page, I chose the fountain pens (multiple and single), ink bottle, logo, script, quote, and paperclips and used them in a couple of ways.
I started with the background................................................................................................................
Use the script stamp and watermark ink to stamp.
Sprinkle embossing powder on stamped areas and heat activate with a heat tool.
**This step can be done using a colored ink and clear embossing powder as well.
For this, I used an iridescent gold embossing powder.
 Next, I added sprays of browns and blues. In between each color, add water, and move page around to allow drips and rolls of color. Be sure to dry in between every color.
Next, I stamped the multiple fountain pens on the edge using only the tips and a dark brown ink.
This added a pop of brown.
Stamp images of the pens, ink, etc. onto cardstock.
For added strength and shine, these were embossed with clear embossing powder as well.
Cut them out.
Stamp the quote onto cardstock and cut out. Add brown ink with a sponge around the edge to enhance and create depth. Adhere to page with foam dots.

Adhere your cut out stamped images. Add some flowers that coordinate with your color scheme. Splatter white acrylic or gesso and a few of the spray colors used all around the focal area. I then stamped the paper clip in a dark blue ink in various areas to add a bit more blue and to incorporate that stamp!
I hope that you have enjoyed this project and are inspired to get stamping!!
Please follow us on our Facebook Fan Page Here and share your work with us!
To purchase your stamps head over to Sin City Stamps online store!
Until next time! Thanks!
Jenn

Monday, June 9, 2014

Wrong Way

 
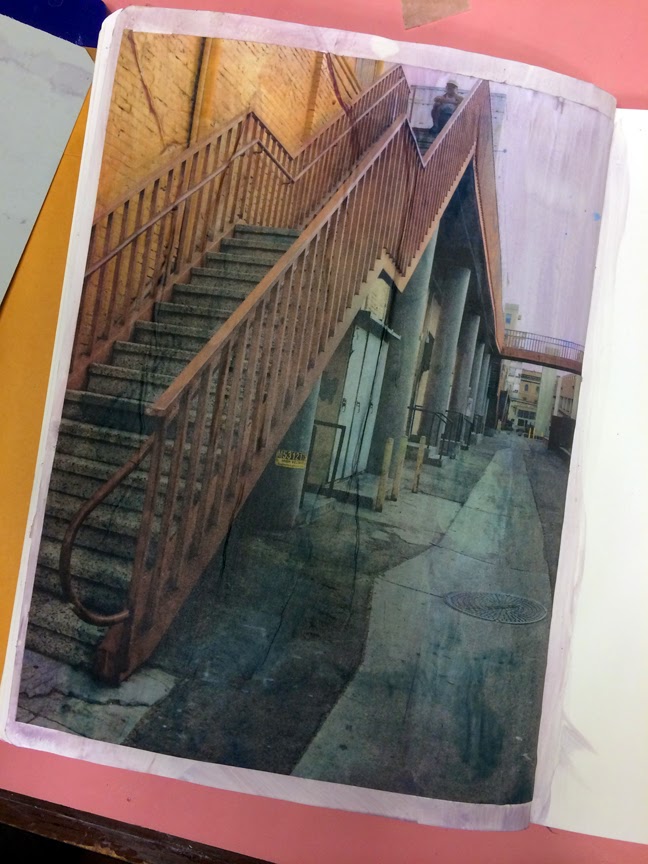
 I took this picture while strolling Santa Ana in the Art District one afternoon.  
I wanted to use my Urban Grunge stamps on a journal page 
and chose to use a photo I had taken myself as the main subject.  
I printed it on plain copy paper and glued it to my art journal page with Liquitex Matte Medium.

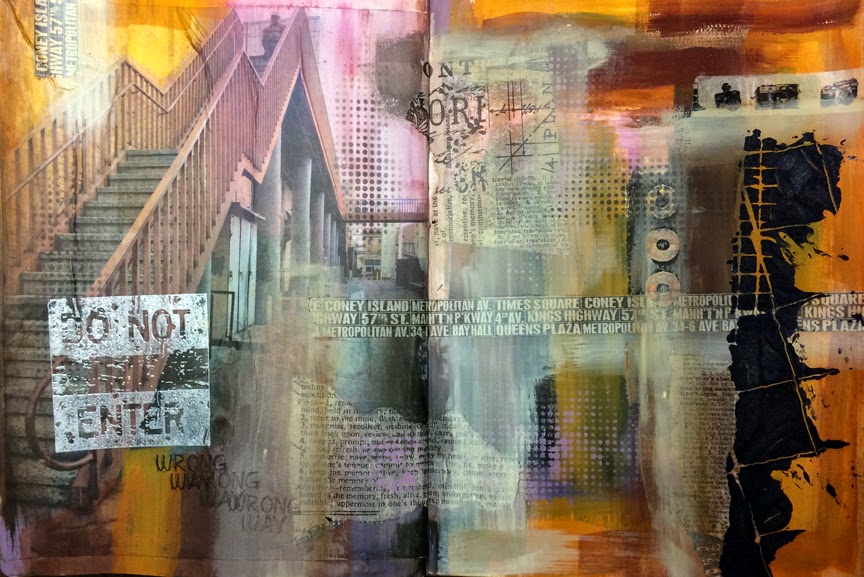
 I added paint on the opposite side of the page using colors that were in the photo, that way, when painting over my printed image, it blends through to look as if one painting.  I used both acrylic paints and Art Anthology paints.  I wanted the paint to be semi transparent in some places so the photo would show through.  Art Anthology Paints are transparent so this was the perfect tool.

 I collaged some Tim Holtz Tissue Wrap, 
some Washi tape and decorative hole reinforcers around the two-page spread.

 Then, I added another layer of paint unifying everything.
 I stamped the Do Not Enter stamp from the Urban Grunge Stamp Set 
with the White Daisy stamp from Close To My Heart.
It's a pigment ink so I added clear embossing powder over it to heat set the image.
I also used the Wrong Way stamp from the Urban Grunge Stamp Set.

 I used Art Anthology's black Stone Effects with The Crafter's Workshop stencil.  
I love how it's so gritty and thick.

Here is the full two-page spread.

I hope I have inspired you to create something today.
Until next time...

Monday, March 10, 2014

Mono-Printing Fun!

Hey Stampers!  This is Robin Redd, here, with today’s post.
SinCity Stamps is partnering up with Composimold this month.  I was stumped with ideas on what to mold with this product.  After much research I found the perfect alternative to molding with Composimold.
I made my own mono-print gel plate!   
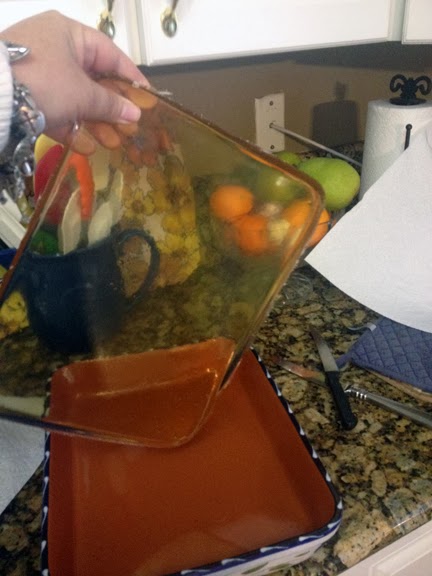
I simply heated the Composimold in the microwave for 3 minutes, poured it into a casserole pan that had no markings on inside so the mold would come out completely smooth.
I had forgotten to put in a release agent, but it came out of the pan super easy.  
 This one measures about 8” x 11”.

This is a great project to use up some of those acrylic paints you might have around in your stash.
Simply pour a couple colors of paint onto the plate and smooth out with a rubber brayer.  You can use some other kind of tool, like a spatula, as long as it doesn’t have any sharp edges.
I used some old sketch paper and laid it over the plate and smoothed it out with my hand.   
When I lifted the paper, this is what I got!
Next I placed a stencil on the plate, put paper on top of that, 
smoothed it out with my hand and got this fun print.
I removed the stencil from the plate, laid another piece of paper on it and came up with yet another print.
Now, onto a new color.
I got this pretty print with some residue of the previous colors on it.  I like this one!
I had this fun die-cut sheet of paper I place on the plate and made this beautiful print.
Here’s the residue on the plate from the last print made.
I picked up the rest of the paint onto this paper.
I love dots and circles!  I placed a stencil on the plate and spread paint over it.   
Lifted the stencil and this is what I got.
I placed an already printed paper over the painted stencil (can’t waste paint!), and got this print.   
You can get so many different looks.  The possibilities are endless.
When you are finished, just wiped down with water and a paper towel.
But, what to do with all these pretty prints?  Well, you can use them as background on a layout.   
Cut shapes out of them and put them on a card.  Tear them up and use them on a collage.
Me?  I made envelopes with some of my prints!   I took a thin piece of patterned paper and made an envelope with We R Memory Keepers Envelope Punch.
I trimmed down some papers that I had printed up on my new mono-printing gel plate 
and decorated my envelope.

I added some doodle lines along some defined shapes.

I, then, used some Project Life cards for address labels.

Now, I have some envelopes ready to send out for some happy mail.  

I can’t wait to play with my new mono-printing gel plate again.  And!....if you want to use the Composimold to make a mold, just tear up the gel plate, place it in the container, reheat it to use it as a molding compound.  Then you can make a gel plate again, when you’re ready for some more monoprinting.

Amazing….simply amazing!

Until next time...

Monday, February 24, 2014

She Flies

Hello!  This is RobinRedd, aka Rockin Redd Robin!   
I’m here today to share the first page in my new Art Journal.  I’m using the large Dylusions Creative Journal.  Up until now, I’ve been hesitant to art journal in an actual art journal.  I think because I was afraid of ruining a perfectly good art journal.  Absolute CRAZY thinking!  I had been art journaling on loose water color paper.  Loose meaning from a tablet of paper, not in a book.

I finally bit the bullet and journalled right into  a book!  And let me tell you, I LOVE this book!  As I’m completing pages, it just feels so good to hold and to flip through the few pages I’ve already completed.

With this page, I started my stamping these images onto tissue paper with a black Staz-on Stamp pad so the ink doesn’t bleed when it comes in contact with anything fluid.  –Set aside.
**Stamps used:

I will not be using any gesso as a base for any of my pages in this book because I contacted a person from Dyan Reaverly’s (Dylusions) camp and asked if she used gesso when she used this book and she did not.  When I use watercolor paper or sometimes I’ll art journal on LARGE shipping tags, I will use gesso.
To start his page, I simply took the covers off of a few different colors of Distress Stamp Pads and took them directly to the paper and smeared it around, one color at a time.  I started with Antique Linen Distress pad, covering the entire page.  I topped that with Shabby Shutters Distress Pad, then I  inked the edges and corners with the Tea Dye Distress Stamp Pad.
To get the white spots on the page, I simply drizzled plain water on the page.  I took a paper towel and DABBED it up.  I didn’t wipe it because I wanted the water to remove the ink in dots, not smears.  Then I took some watered down brown acrylic paint and splattered it across the paper. 
At this point I sprayed the page with workable fixative.  Otherwise, if I were to apply a wet medium over it, the colors will bleed.
I cut off some body parts of a girl in a magazine and with the stamped images from the tissue paper, I created a ‘new’ girl by layering all parts and adhering them to the page with Liquitex Matte Medium.
I painted these chipboard pieces from Gina’s Design’s with watercolor pencils and Distress stain, 
adhered them on with CTMH’s Liquid Glass.

I finished the page with some doodle journaling using Scarlet Lime’s black journal pen.

Here is the completed page!  Hopefully, you can use one of these simple ideas on your next creation!
Thanks for coming by!  I’ll see you in a couple of weeks.

Copyright Text

Blank Page Muse 2018 Sin City Stamps 2013