Hello everyone. Barbara here with my first post for June. Today, I want to show you one of the new chipboard book products and matching stencils and die cuts from
Sin City Stamps. This is the
Tin Man Chipboard Book, and I knew I had to have it as soon as I saw it. I've had this Graphic 45 paper collection sitting around waiting for the perfect moment to use it, and here it is. Sin City Stamps is releasing 18 new stamp plates, and three of them are from The Wizard of Oz, and all of them will be available to purchase next week, beginning 9 June. So, I decided to get my book ready so that when I get the stamps, I can "go to town" working in my book. I have posted pictures of the new stamps at the end of my post, but first, lets look at the book.
Supplies used:
Sin City Stamps
Tin Man Chipboard Book;
Lion Die Cut;
Lion Stencil;
Scarecrow Stencil;
Scarecrow die cut TIn Man Stencil; Tin Man die cut Girl Stencil; Girl with Dog die cut
Graphic 45 8"x8" Magic of OZ paper collection
Core-dinations card stock
IMAGINE Crafts/Tsukineko IrResistible Bronze Texture Spray; Memento Luxe Peanut Brittle;
Derwent Inktense Blocks
Black gesso
Ruby Slippers and Tiara glitter glue
Metallic rub-ons Kit #1
Rays embossing folder
Directions:
In order to determine how I want to color my chipboard cover, I first needed to decide what paper I wanted to show through the cut out portion. So, I chose Poppy Fields as my background. In this picture, you can see all the chipboard pieces you get with your book. Don't you just love them?
Next, I used black gesso to paint the front cover and only around the edges on the back cover.
Spray front and back of cover with Bronze Texture Spray, allowing sprayed side to dry before turning over to spray the opposite side.
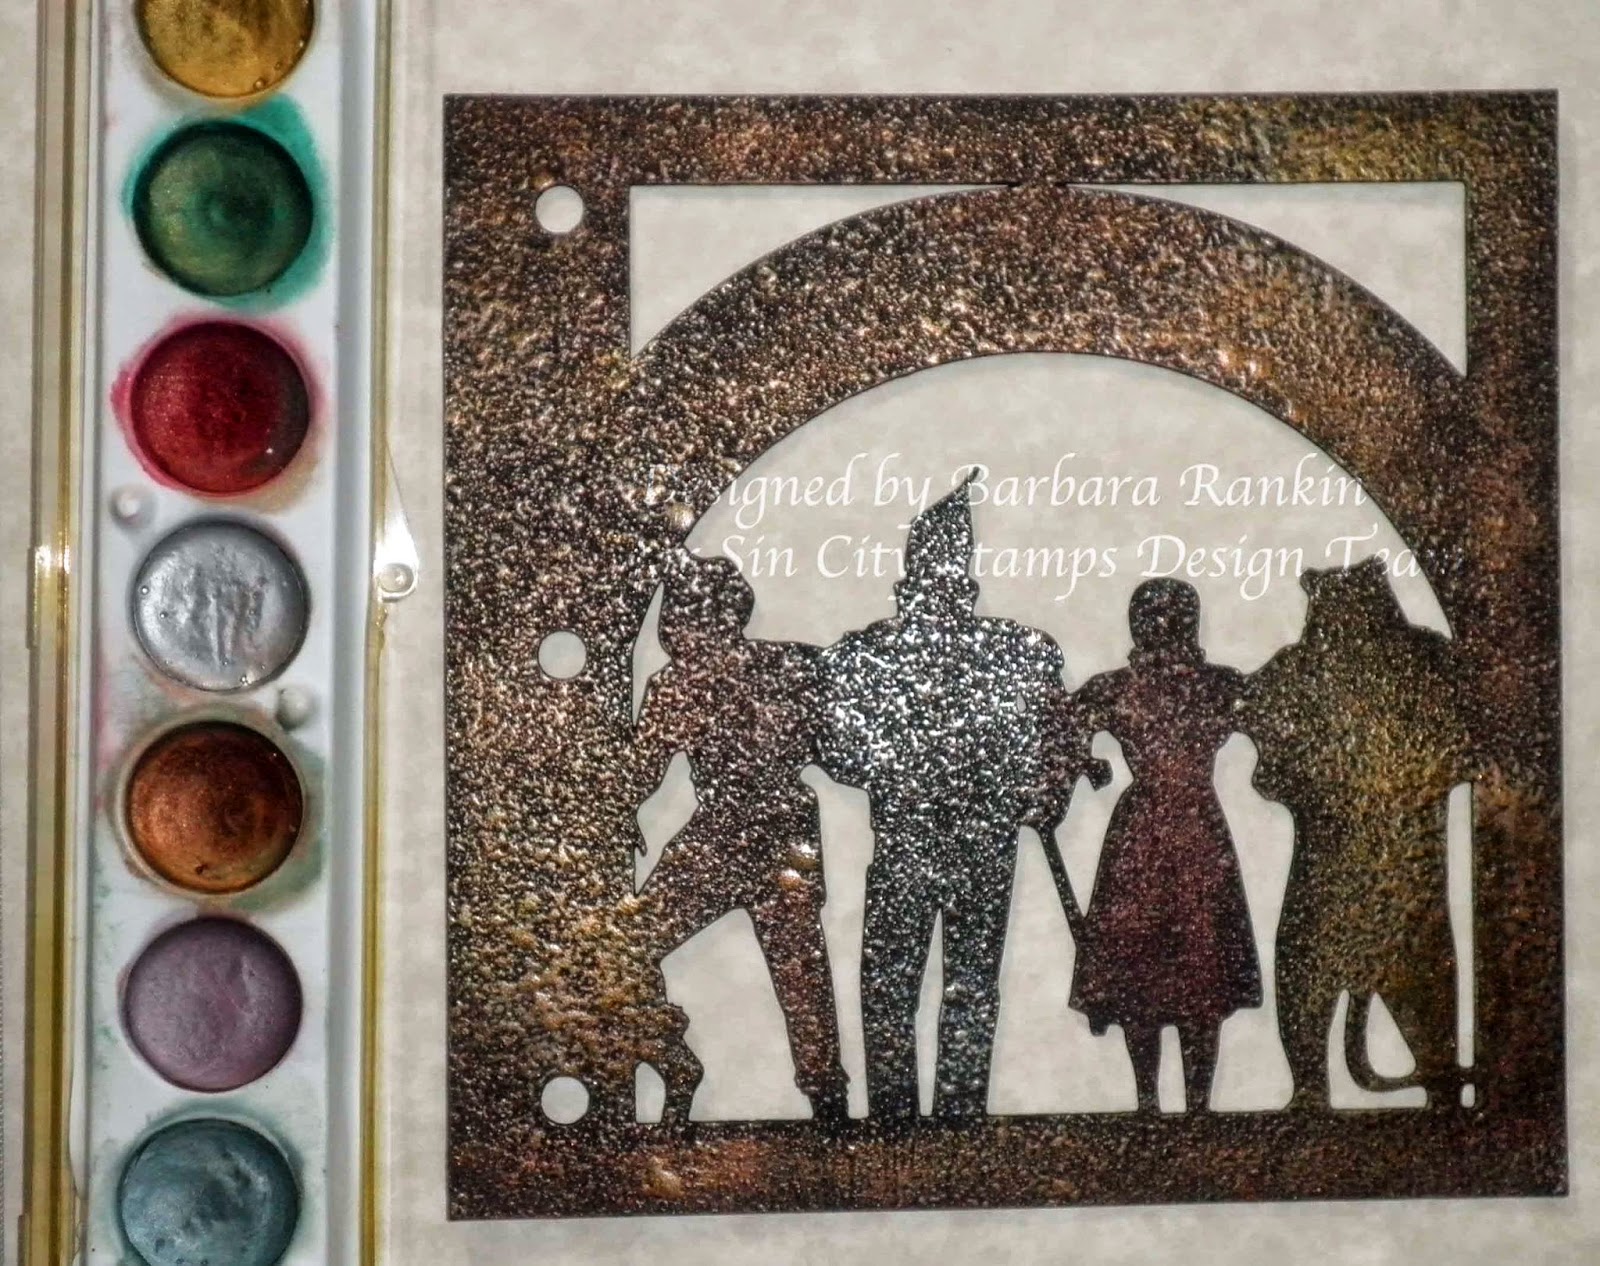
Apply metallic rub-ons in various metal colors over the entire book cover, front and back. It may not be obvious in the photos, but I used a copper color on the scarecrow, silver on the tin man, red on Dorothy, and gold on the lion. A mix of copper, gold, and silver were applied all over the remaining areas. It looks fabulous in person and really brings out the texture from the Goosebumps spray.
Here is a closeup of the texture achieved with the Goosebump, and how awesome it looks on this high quality chipboard.
Cover inside back cover with 5-5/8" square of Yellow Brick Road paper, edged with Peanut Brittle ink. Punch binding holes before moving on.
Cover outside back cover with 5-5/8" square of Emerald City paper, edged with Pistachio ink. Punch binding holes.
Now that I have my book covers prepared, I then trimmed various papers and card stock to 5-⅝" square, punched holes in each, and set my prepared book and pages aside.
Here is what you get when you order the stencils and die cuts. This one is the
Girl Stencil and matching die cuts. The die cuts come solid and in outline form. Can you see the possibilities with these? Let me show you a few ideas I have come up with.
Remove cut out bits from one of the die cuts and set aside. Paint a second, complete die cut with white gesso and let dry.
I first applied color using Inktense Block colors and a water brush. I allowed it to dry, then came back and applied Neon ink pad colors in Electric Blue and Electric Green (dress), Memento Luxe Peanut Brittle (hair, basket), and StazOn Jet Black to the dog. I did not worry about going over the lines at this time.
Another option is to use a paper piecing technique. Here, I show where I have used print paper for her dress and shoes. I also removed her face from the outline image, as it will be adhered over the painted image. You could do this entirely, or add it to your painted piece, as I have decided to do.
Emboss Rays onto tan card stock with embossing folder, sand high spots and add Rusty Hinge ink.
Adhere Dorothy to page, as shown.
Here, I just wanted to show you how the stencil matches the die cuts exactly. What does that mean to you? Well, for one thing, you could apply color directly through the stencil onto your page, or apply it to your die cut, coloring each section individually, if you prefer. The possibilities are endless with these products.
Now, how about those chipboard die cuts that came with the book? Well, as I said before, this is high quality chipboard, and it stood up to my abuse using lots of water with my Inktense blocks and other wet media, such as the glitter glue I also added to it.
And here's a look at the entire page. Isn't is just fabulous with those die cuts and chipboard accents? I am so loving these products.
And here is a closeup of Dorothy, where I gave her basket a bit of a "weave". You see, you can have so much fun decorating these. I even gave a "spark of life" to little Toto by giving him that ever so necessary white dot to his eye.
Well, this is very much a work in progress. I had hoped to have a few more pages done, but my allergies got the better of me and I was, as they say, a bit under the weather. However, my book is ready to accept all of those new stamps that Sin City has coming out. And without further adieu, here they are!!
Well, are these stamps just awesome? I want them all. If you are still here with me after all this, then thanks for sticking with me. I had a lot of news to share, and I hope you enjoyed my WIP today. Please stop back next week to see what I have added to my book, and any other creative activities I can come up with.
Thanks for stopping by, and be sure to visit the
Sin City Stamps online store for all of your art stamping needs.
Have a wonderful, creative weekend!!!
Barbara