Showing posts with label Masking Technique. Show all posts

Wednesday, May 5, 2021

Mermaids and a Masking Technique

Hello! Today I have another art journal page to share. This is the first page in my new little 5.5 inch art journal. It was so much fun going in my studio and getting lost. 


Start by stamping The Femmes Mermaid Ocean Scene onto your art journal page. Also stamp it on a scrap piece of cardstock and cut it out. This will be our mask. 


Using repositionable adhesive, adhere your mask on top of the stamped image in your journal. This will allow you to ink your journal page all up and stamp around without messing up your original stamped image. 

Using a brayer, roll Distress Oxide onto the Gel Press. I did a two toned background using Mermaid Lagoon, (only appropriate for this beautiful stamp), and Seedless Preserves. Then using a fan brush, tap the Brusho mixture onto your Gel Press... 

Once the Gel Press is all inked up, flip it and "stamp it" onto your journal page. Reink and stamp on the opposite page. 

The next step is to take the Handwritten Note Art and stamp along the edge of the Art Journal Page. 


Grab the Distress Oxide and ink around the mask...


Now for the big reveal! Remove your mask... 


...and the bonus is, the mask is beautiful and can be used on another project! 


Using several different mediums, I colored my mermaid. This was so much fun and relaxing. ...and of course, add a little bling and sparkle. 


Write your quote with black pens and your journal page is complete. 


Have no fear of the depth or trying new techniques! 

Below is a list of links for more inspiration! 

Until next time... Happy Creating! 

Christine

Click the links below for more inspiration and to connect with the Blank Page Muse Community!

The Blank Page Muse- https://blankpagemuse.com/


FB Fan Page-  https://www.facebook.com/groups/blankpagemuse/


Instagram Shop-  https://www.instagram.com/blankpagemuse/


Instagram Blog-  https://www.instagram.com/blankpagemuseblog/


Twitter-  https://twitter.com/BlankPageMuse


Pintrest- https://www.pinterest.com/blankpagemuse/boards/


Tuesday, March 2, 2021

Lotus Flower Beauty

 Hello BPM Fans! DT Betty here today! 

The lotus flower is one of the most significant flowers in the Chinese culture. The lotus flower grows in muddy waters, but it will rise and bloom into a beautiful flower. This symbolizes perfection and purity of both the heart and mind. In addition, the lotus represents long life and honor. For this reason, it's a perfect flower to put on a birthday card. Today I am sharing a card I made using a stamp from Blank Page Muse Art Rubber Stamps called "Lotus Flower on Stem with Small Dragonfly." This is a red rubber stamp. This is a single flower stamp, so I stamped it twice. I used the Happy Birthday Phrase Stamp for the sentiment.

Supplies:

  • Blank Page Muse Stamp: Lotus Flower on Stem with Small Dragonfly and Happy Birthday Phrase
  • White cardstock 6" x 6" for card base
  • Black cardstock 5-7/8" x 5-7/8" to mat card base
  • Patterned paper 5-3/4" x 5-3/4" to mat card base. Use any paper to match the colors of your flower.
  • White cardstock 4" x 4" to stamp image
  • Gold cardstock 4-1/8" x 4-1/8" to mat stamped image
  • Black cardstock 4-1/4" x 4-1/4" to mat stamped image
  • White cardstock 3"W x 1/2"H to stamp sentiment
  • Gold cardstock 3-1/8"W x 5/8" H to mat sentiment
  • White cardstock 3-1/4"W x 3/4"H to mat sentiment
  • Masking tape: 4" x 4"
  • Scrap bond paper or light weight cardstock: 4" x 4"
  • Embellishments of choice - I used Pearl rhinestones
  • Your favorite adhesive
  • Stamping block or stamp positioner
  • Your favorite coloring medium. I used Copic alcohol markers.
    • Flower: Pink - R85, R83, R81
    • Flower: Yellow - Y17, Y15, Y11
    • Flower: Brown - E1, E15, E13
    • Dragonfly: YG13, V25, V22, V20
    • Background: B000
Instructions:
  • Stamp the lotus flower stamp onto the 4" x 4" white cardstock
  • Put the masking tape over the scrap bond or light weight cardstock and stamp the lotus flower. 

  • Fussy cut the flower, then place the mask over the stamped image


  • Ink the stamp then wipe the ink from the dragonfly using a baby wipe or wet paper towel. Only one dragonfly is stamped on the card. 
  • Stamp over the exiting lotus flower that has been masked and then remove the mask. The flower that was just stamped will appear behind the first flower that was stamped.

  • Stamp the Happy Birthday sentiment 
  • Color your stamped images with your favorite coloring medium
  • Adhere all the layers as shown with your favorite adhesive
  • Adhere the pearl rhinestones and the card is finished

Thank you for stopping by today and I hope you give this card a try. It is a very versatile stamp so you can use it for many occasions. Have a creative day! 


Saturday, February 23, 2019

Masking For Selective Stamping

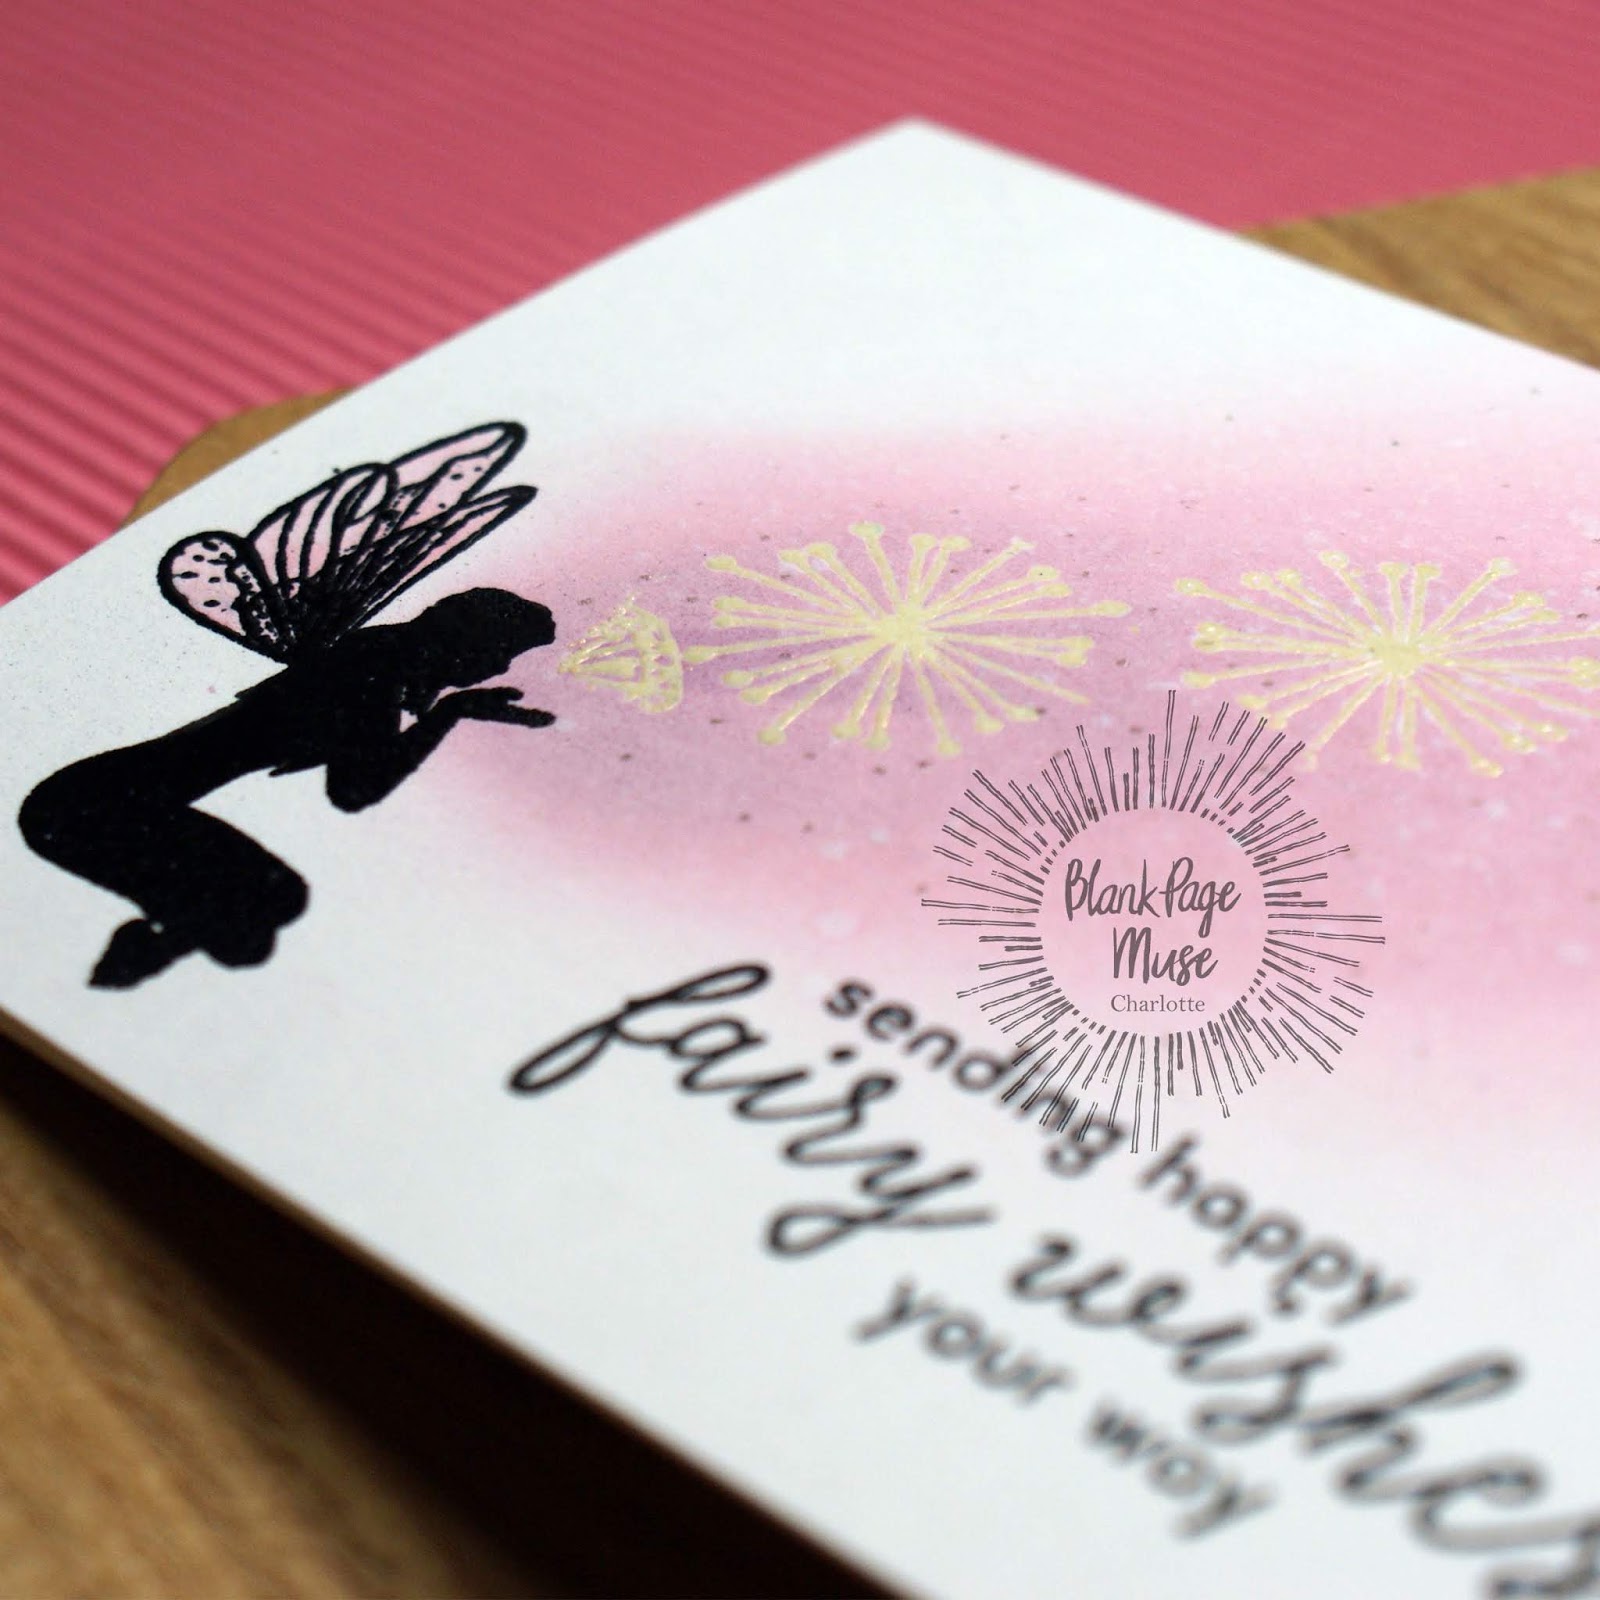
 Hi everyone! Charlotte here, and today I am sharing a pretty, one layer card that uses masking in order to utilize just a portion of a background stamp. This is a really fun technique which can be used to make your stamps even more versatile.

Blank Page Muse products used:
Small Fairy With Wings (also available as part of the Inhale... Exhale set)
Dandelion Bursts Background by Michelle Frae Cummings (also available as part of the Dandelion & Iron Works set)

Other materials:
White card base
Scrap paper and repositionable adhesive, or masking paper
Repositionable tape
Scissors and craft knife
Stamp platform
Embossing powders in black and ivory
Scrap acetate
Embossing ink
Anti-static powder tool
Distress Inks in Spun Sugar, Milled Lavender, and Seedless Preserves
Paintbrush
Sentiment stamp
Black ink
Glitter gel pen

Instructions:
Begin by stamping the Dandelion Bursts Background onto a piece of scrap paper. Trim around the edges up to the lines, then use a craft knife to carefully cut out the center. Ensure that the area that is cut away is the desired area for the finished design. Set the mask to one side.
Treat the A2 (4 1/4" by 5 1/2") white card base with an anti-static powder tool, then stamp the Small Fairy With Wings into the lower left corner using embossing ink. Add black embossing powder and heat set.
Place the card base into the stamp platform. Using the acetate as a guide, assess the correct positioning of the Dandelion Bursts Background. Place the acetate over the card base and stamp onto it, to check the stamps positioning. Apply the mask to the card base in the correct position, and use repositionable tape to hold it in place.
Treat the card base again with the anti-static powder tool, then stamp the Dandelion Bursts Background with embossing ink. Add ivory pearl embossing powder and heat set.
Remove the mask and add colour with ink blending, using Spun Sugar, Milled Lavender and Seedless Preserves Distress inks. Concentrate the darkest colors closest to the fairy's hand, and fade out through the lighter colors to white. After the ink blending is finished, buff away any ink from the embossing using a soft cloth or dry tissue.
Press the Spun Sugar Distress ink onto an acrylic block or other non-porous surface. Using a little water and a paint brush pick up some of the color and paint the fairy's wings.
Stamp the desired sentiment onto the card base, then finish off the design with some dots of glitter gel pen. Concentrate the dots so that they are more tightly clustered closer to the embossed dandelions, and sparser further away.
I hope you enjoyed my blog post! This is a very fun way of using the masking technique to get more mileage from your stamps. I hope you'll give it a try, and I'd love to see what you make if you do!


Looking for more Inspiration?

Click the links below!


Sunday, October 21, 2018

Happy Haunting Card - Masking Technique

Hey BPM Fans,
Here is quick background done using a simple masking technique and blending distress inks.  It is a useful technique that allows you layer your stamping and avoid having to fussy cut a intricate and delicate image like this witch silhouette.

Other Supplies:
  • black ink pad
  • silver mirror cardstock
  • orange, green, purple ink pads
  • ink blending tool
  • silver glitter embossing powder
  • heat gun
  • decorative buttons
  • clear mounting block
Directions:
1. First stamp the witch silhouette onto the middle of white cardstock using black ink.  Without re-inking, stamp the witch onto scrap card.  Create a mask by cutting around the witch leaving a generous border.  (TIP: The mask does not need a perfect image as it is going to be discarded and will not appear on the final project.)

2.  Next, place the mask over witch image. Load the cobweb stamp with embossing ink and stamp the design over the masked witch image.

3. Remove and discard the mask.  Then apply silver glitter embossing powder to the cobwebs, shake off the excess, and heat set.

4. Next, apply ink to the background using a ink blending tool. Add lime green around the witch to create an eerie glow and then blend orange & purple randomly to bring out the cobweb background pattern.


5. Matte the stamped image with silver mirror cardstock and adhere to a black card base. Next, add a 3D embellishment for her to hold.

6. Then stamp a "Happy Haunting" greeting using black ink and matte with silver mirror cardstock. Adhere it to the lower right partially overlapping the edge of the card.  Finally, embellish the card with cat button.


A Closer Look:
 

       Blank Page Muse Shop http://blankpagemuse.com/
            Facebook Fan Page https://www.facebook.com/groups/bla...
            Instagram - Shop https://www.instagram.com/blankpage...
            Instagram - Blog https://www.instagram.com/blankpage...
            Twitter https://twitter.com/BlankPageMuse
            Pinterest https://www.pinterest.com/blankpage...

To learn more about our designer Karen, please visit her blog, Art & Soul.

Friday, March 3, 2017

Stamped Image Masking Technique

 Hi Everyone!
I belong to a card making group that meets at my home once a month. This months theme was "Masking". There are many types of masking in the card world, and this tutorial is just one of them! I made this card for our swap and to show you how fun it is to play with Sin City Stamps!


 Materials and tools needed:


So the first thing you want to do is to stamp your images onto the newsprint paper. The reason I use news print is that it won't bleed and its thin enough to make the mask.  Here we are starting with the wheel stamp. I stamped the wheel onto the white cardstock, then again onto the newsprint.  I carefully cut it from the newsprint and placed it onto the wheel stamped cardstock with the removable adhesive.

 Next I began to stamp the bottle images as shown.  When I was done, I carefully removed the wheel image.

I stamped about 5 bottles onto the newsprint, cut them out and placed them over the pre-stamped bottles with the removable adhesive. I stamped the shell image over the newsprint bottles and then moved the bottles to the other side and added the rest of the shells.  Once all the newsprint images were removed, I started coloring in the images with color from the ink pads.

 After I was done coloring everything in, I placed the card onto the craft mat and secured in place with tape. Then I carefully cut out all the unpainted cardstock with the craft knife.
I adhered this onto the front of my card and finished with a few embellishments.  .


 Here is another card I made for myself.


 What do you think? Are you inspired?
Try it out and show us your creations on our new Sin City Stamps Fan Page on Facebook!

Copyright Text

Blank Page Muse 2018 Sin City Stamps 2013