Showing posts with label Dandelion Burst Background. Show all posts

Wednesday, September 1, 2021

Dancing in the Rain

Hi everyone, Steph Ackerman here using a wonderful background stamp 
called Dandelion Bursts by Michelle Frae Cummings.


I love background stamps because they can truly be the focus of your card.  
If it's a bit smaller than your card, 
place it off center and add a phrase that overlaps the background.

The full tutorial can be found on my blog.


Thanks for stopping by.


Looking for more Inspiration? Click the links below!
The Blank Page Muse Shop https://blankpagemuse.com/

Wednesday, September 11, 2019

PMS

Hello, hello! Samantha here with a quick and easy project for you. One of the things I love to make are snarky cards and that is why this PMS stamp was right up my alley.


Let's get started. For this card you will need:


Using your sticky embossing ink pad stamp the Dandelion Bursts stamp onto your white cardstock and heat set with gold embossing powder. Mask along the border using your low tack tape.


Using your blue inks do some basic ink blending on your panel.


Remove the low tack tape. Trim your cardstock so that a .25" border will exist all along the stamping. Finished size will be 3.75" x 5.25". Adhere to your card base.


Using a shade of blue ink stamp the PMS stamp onto white cardstock. Cut into a sentiment strip and glue to the bottom of your card.


Pretty easy, right? I absolutely love this card and I hope it will inspire you. Make sure you head on over to the shop to check out all the great snarky stamps that Blank Page Muse has to offer. How many can you find?

Until next time,
Samantha

Looking for more inspiration?
Click the links below!

The Blank Page Muse Shop

Facebook Fan Page

Instagram- Shop

Instagram- Blog

Twitter

Pinterest


Saturday, June 22, 2019

It Could Have Been a Train Wreck

Hello Blank Page Muse fans.  Gail here today.  This month the team is getting all interactive.  I've made a shaker card in many shades of bright colours with a Crazy Cat!


Blank Page Muse Stamps used:
Katz Cat Holding a Scared Duck 
Dandelion Bursts Background


(Shop now and save! Use code BPMDtIona2019 to save %15 off your total order!)


Other Supplies Used:  
Acetate
Double Stitch Rectangle die   
Patterned Paper
Black Archival Ink
Staz.on black ink
Distress Inks
Gel Pens
Sequins
Foam tape


Stamp the Dandelion Bursts Background onto acetate using black Staz-on ink.  Use the stitch rectangle dies to cut a frame from patterned paper and adhere it over the stamped acetate panel.  


Stamp the  Katz Cat Holding a Scared Duck with black archival ink on white card, color in with distress inks and gel pens, then fussy cut.


Taking the framed acetate panel, add some foam tape and a generous scoop of sequins. 
Then attach it to the base card.


Finish with the crazy cat and his duck.


Thanks for dropping by.  I hope you get the chance to stamp something fun today!


To see more of Gail's projects visit her blog

Monday, April 22, 2019

Phoebe Likes Flowers

Hello Blank Page Muse fans. 
 Gail here today, and it's my Birthday, so there will be cake!
  Do feel free to drop by and share a piece with me.  But first, a card..........


Blank Page Muse Stamps used:


(Shop now and save! Use code BPMDtIona2019 to save %15 off your total order!)

Other Supplies Used:
Staz-on
Black Archival Ink
Alcohol Inks
Acetate
Distress Inks
Gel Pens


Stamp Dandelion Burst Background onto acetate using black Staz-on ink.  Turn the acetate over and colour the back with Raisin and Caramel alcohol inks.


Take a lime green trifold aperture card and add some tone on tone colour with Twisted Citron distress ink


Glue a piece of white paper to the first flap of the card and the acetate panel over the aperture.  Glue the first flap over the acetate panel.


This is what the front of the card now looks like.


Stamp the flower cluster from the Phoebe Art Doll set onto some card, mask and stamp Phoebe.  Fussy cut and colour the flowers with gel pens.


Colour Phoebe with Mustard Seed, Mermaid Lagoon and Worn Lipstick distress inks.


Add her to the card and stamp the Grungy Brick Wall stamp along the top with black archival ink.

Thanks for dropping by, I hope you get the chance to eat some yummy cake today!
  Hugz


Blank Page Muse Shop http://blankpagemuse.com/
            Facebook Fan Page https://www.facebook.com/groups/bla...
            Instagram - Shop https://www.instagram.com/blankpage...
            Instagram - Blog https://www.instagram.com/blankpage...
            Twitter https://twitter.com/BlankPageMuse
            Pinterest https://www.pinterest.com/blankpage...

To see more from Gail visit her blog

Saturday, February 23, 2019

Masking For Selective Stamping

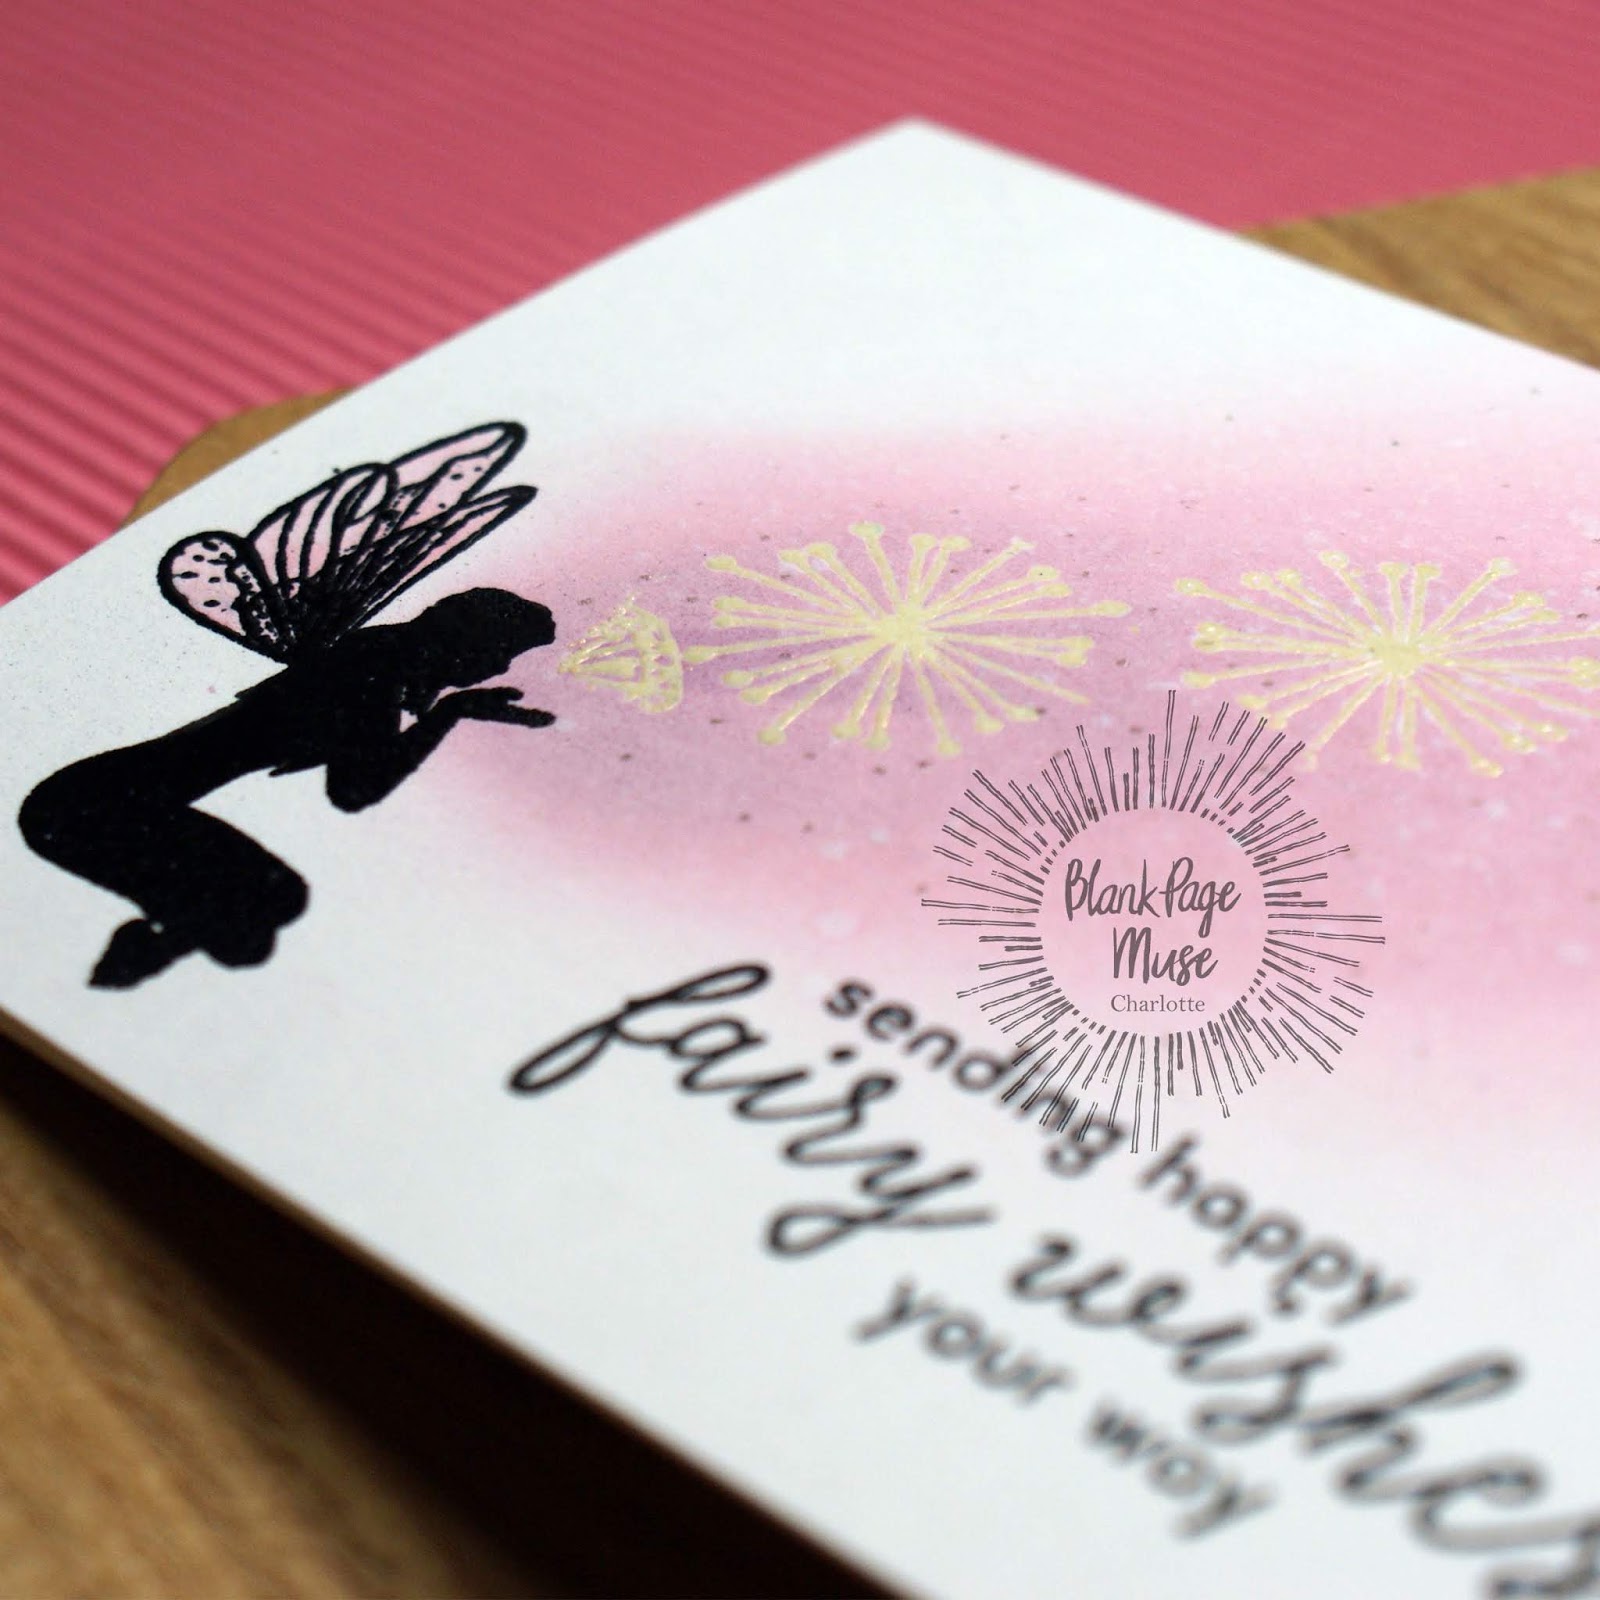
 Hi everyone! Charlotte here, and today I am sharing a pretty, one layer card that uses masking in order to utilize just a portion of a background stamp. This is a really fun technique which can be used to make your stamps even more versatile.

Blank Page Muse products used:
Small Fairy With Wings (also available as part of the Inhale... Exhale set)
Dandelion Bursts Background by Michelle Frae Cummings (also available as part of the Dandelion & Iron Works set)

Other materials:
White card base
Scrap paper and repositionable adhesive, or masking paper
Repositionable tape
Scissors and craft knife
Stamp platform
Embossing powders in black and ivory
Scrap acetate
Embossing ink
Anti-static powder tool
Distress Inks in Spun Sugar, Milled Lavender, and Seedless Preserves
Paintbrush
Sentiment stamp
Black ink
Glitter gel pen

Instructions:
Begin by stamping the Dandelion Bursts Background onto a piece of scrap paper. Trim around the edges up to the lines, then use a craft knife to carefully cut out the center. Ensure that the area that is cut away is the desired area for the finished design. Set the mask to one side.
Treat the A2 (4 1/4" by 5 1/2") white card base with an anti-static powder tool, then stamp the Small Fairy With Wings into the lower left corner using embossing ink. Add black embossing powder and heat set.
Place the card base into the stamp platform. Using the acetate as a guide, assess the correct positioning of the Dandelion Bursts Background. Place the acetate over the card base and stamp onto it, to check the stamps positioning. Apply the mask to the card base in the correct position, and use repositionable tape to hold it in place.
Treat the card base again with the anti-static powder tool, then stamp the Dandelion Bursts Background with embossing ink. Add ivory pearl embossing powder and heat set.
Remove the mask and add colour with ink blending, using Spun Sugar, Milled Lavender and Seedless Preserves Distress inks. Concentrate the darkest colors closest to the fairy's hand, and fade out through the lighter colors to white. After the ink blending is finished, buff away any ink from the embossing using a soft cloth or dry tissue.
Press the Spun Sugar Distress ink onto an acrylic block or other non-porous surface. Using a little water and a paint brush pick up some of the color and paint the fairy's wings.
Stamp the desired sentiment onto the card base, then finish off the design with some dots of glitter gel pen. Concentrate the dots so that they are more tightly clustered closer to the embossed dandelions, and sparser further away.
I hope you enjoyed my blog post! This is a very fun way of using the masking technique to get more mileage from your stamps. I hope you'll give it a try, and I'd love to see what you make if you do!


Looking for more Inspiration?

Click the links below!


Tuesday, February 5, 2019

Put On Your Angel Wings

Hello Blank Page Muse fans.  Gail here today with some ideas on combining two stamps to give a different look to your image.  This month the team is exploring things with wings so I decided to add some wings to Phoebe Art Doll and make myself an angel. 


Blank Page Muse Stamps Used:
Phoebe Art Doll
Angels Fly on Wings of Love
Angel Feathered Wings
Dandelion Bursts Background

Other Supplies Used:
White card base
Photo paper
Alcohol inks and blending solution
Black Archival Ink
Memento London Fog Ink
Pink Petunia VersaMark Chalk Ink
Mustard Seed and Worn Lipstick Distress inks
Gel Pens


I started by dripping various alcohol inks on a piece of photo paper.  I added blending solution and some more colours.  I'm not so good with alcohol inks, so that's about as technical as it gets here today.  Just wanted something bright and pretty.  Then I stamped Phoebe Art Doll with black archival ink and fussy cut.


I stamped Angel Feathered Wings with Memento London Fog ink on white card and fussy cut.


I stamped Phoebe Art Doll with black archival ink on my card base and used part of the alcohol ink image to mask her face and hair and hands.  I stamped the Dandelion Bursts Background with Pink Petunia Versamark chalk ink and removed the mask.


I coloured her hair and face with distress inks and used gel pens to colour the flowers in her hair.  I cut along her hair line and slipped the wings behind.  I added the alcohol ink dress and stamped the Angels Fly on Wings of Love sentiment.  Isn't that a beautiful font on that lovely sentiment!! 


Thanks for dropping by.  I hope you have time to get inky today.  Hugz

Blank Page Muse Shop http://blankpagemuse.com/
            Facebook Fan Page https://www.facebook.com/groups/bla...
            Instagram - Shop https://www.instagram.com/blankpage...
            Instagram - Blog https://www.instagram.com/blankpage...
            Twitter https://twitter.com/BlankPageMuse
            Pinterest https://www.pinterest.com/blankpage...

To see more from Gail visit her blog

Tuesday, January 22, 2019

Walking Out in Dandelion Fields

Hello.  Gail here today with a vintage style card with a romantic feel. I  Love the sketchy look to this Classic Couple and I paired them with the beautiful Dandelion Bursts Background
Valentines Day is fast approaching and who wouldn't want a tall dark handsome to hold onto..........  


Blank Page Muse Stamps Used:
Other Supplies:
  • Brown base card
  • Grey-board
  • Pink paper
  • Glitter paper
  • Glitter Glue
  • Pop Dots
  • Distress Inks
  • Water-brush
  • White Gel pen
  • Archival ink - Potting Soil


Start by stamping the Dandelion Bursts Background with Potting Soil Archival ink on a piece of greyboard.  This is actually some packaging that came with some crafty item.  I cut the image out using the stamped frame as a guide.


I stamped the Classic Couple on a piece of pink paper and coloured with distress inks and a  waterbrush.  Add some details with a white gel pen and fussy cut everything out.


Back the Dandelion Bursts Background panel with red glitter paper and add some red glitter glue to the centers of the dandelions.  Mount this all onto the base card..


Add pop dots behind the couple to give them some dimension and adhere them onto the card.


Thanks for dropping by.  Hope you get some time today to get inky.  Hugz


Blank Page Muse Shop http://blankpagemuse.com/
            Facebook Fan Page https://www.facebook.com/groups/bla...
            Instagram - Shop https://www.instagram.com/blankpage...
            Instagram - Blog https://www.instagram.com/blankpage...
            Twitter https://twitter.com/BlankPageMuse
            Pinterest https://www.pinterest.com/blankpage...

To see more from Gail visit her blog

Copyright Text

Blank Page Muse 2018 Sin City Stamps 2013