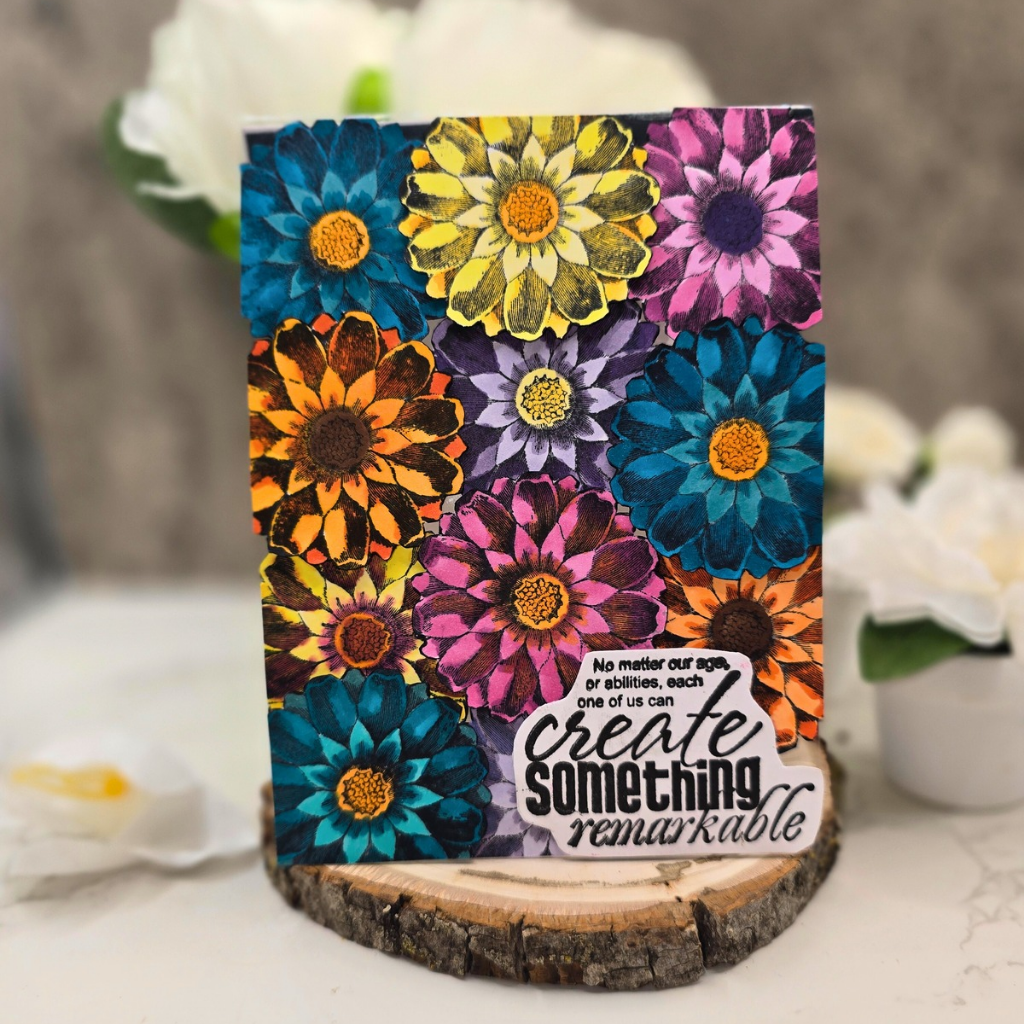
Hello! Welcome back to the BPM Blog! I am so glad you are here. We are close to wrapping up this month's theme in which the BPM DT members created projects using stamps from a stamp bundle. Are you enjoying each DT member's interpretation?
The Blank Page Muse stamps I used for my card panel are:
I temporarily adhered the Texture Wet Cement rubber stamp to my stamping platform. I used an Elmer's Washable Glue for this purpose. The glue gives the right amount of tacky to adhere the stamp to the stamping platform or acrylic block. Since it is washable, it is easy to wipe off the glue residue with a wet rag. You can also wipe off the glue from the back of the rubber stamp but I found out that in not doing so, the tackiness remains making it easy to use this stamp again.
Since I was going for a striped design, I inked portions of the rubber stamp with two inks at a time.
I pressed the inked rubber stamp to a white cardstock cut at 4 1/4" x 5 1/2".
I inked the rubber stamp again using two different colored inks. No rhyme or reason in applying the inks. I just want a nicely distribution of the four colors with some overlapping.
Before proceeding to the next stamp, I dried the stamped impression using a heat gun so the surface will be dry for the next stamping.
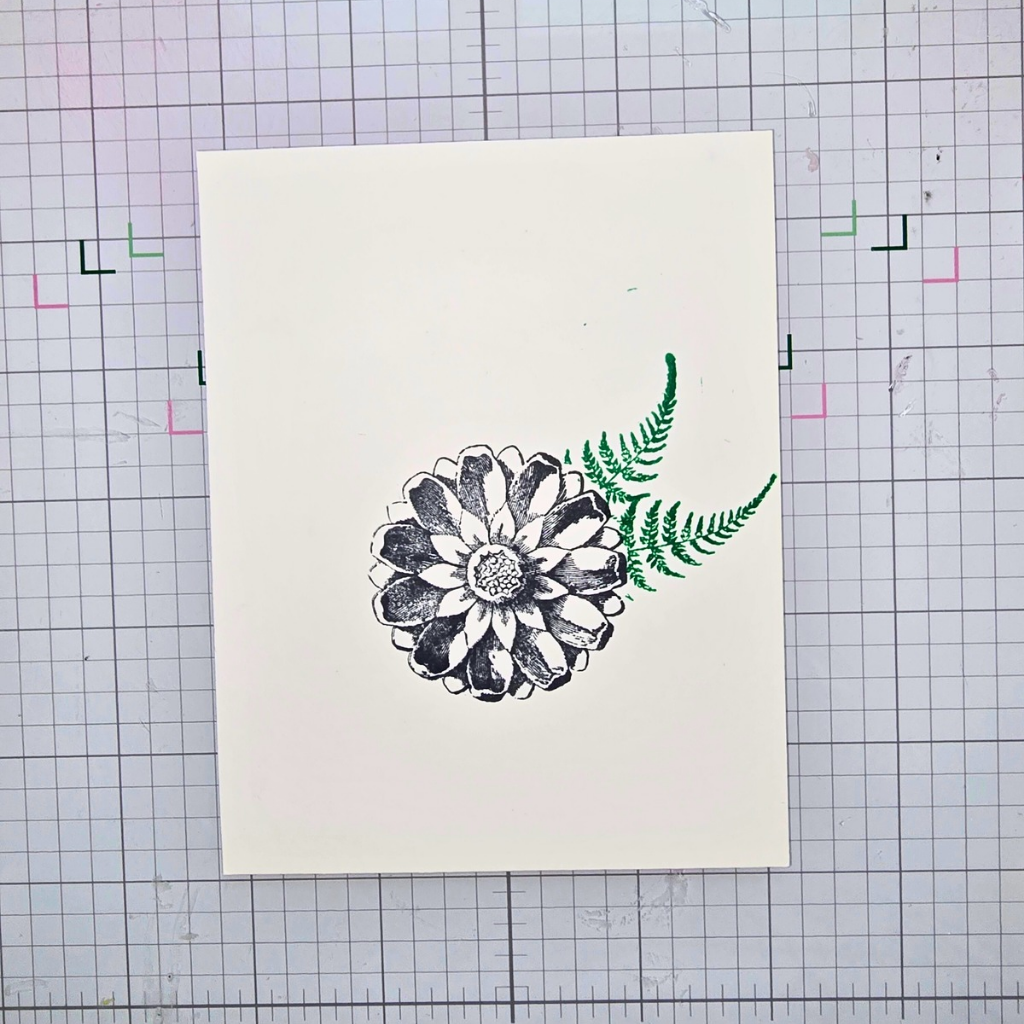
I temporarily adhered the flower stamp to the stamp positioner. There was still some temporary glue left behind by the previous stamp on the stamping platform. This was enough to hold the flower stamp in place.
I inked the flower stamp with a black pigment ink.
I pressed the flower rubber stamp to the inked panel. I used a stamp press tool which helps in transferring the inked impression to the paper especially on those detailed areas.
My first stamped impression was not dark enough. I repeated the process of stamping. This is when a stamping tool is very helpful. I stamped the flower three times total for a crisp, black impression.
I positioned the fern stamp on the inked panel then picked this up with the stamping tool using the residual adhesive on the tool. I inked the fern stamp with the same black ink I used on the flower.
I pressed the stamp on the panel and used the press tool again.
I inked and stamped the fern two more times for a darker impression.
I repositioned the fern stamp to the other side of the flower. I just eyeballed this using the end of the stem of the fern as a guide where to position the stamp. I repeated the same process of stamping.
I could have placed something in between the fern leaves like a brad or a button but I will keep it simple on this one.
I hope you like today's card and give this design a try. So much possibilities with this design. You can change up the colors or apply the inks in scattered parts of the stamp. You can also heat emboss the flower and leaves. The possibilities are endless.
Visit our social media sites for more stamping fun!
Have a blessed, brilliant and creative day!


.png)