Showing posts with label floral card. Show all posts

Monday, June 23, 2025

Stone Floral Creativity Challenge ~ Team Stamp Play


Hi, friends!  It's design team member Walter here on the blog with you.  This week I'm sharing my third card for June that I made using the same four stamps for the month: Texture Wet Cement StampEtched Stone Flower Rubber Art StampFern Art Rubber Stamp, and Sentiment Words Stamp Create Something.  For this third card, I wanted to use these stamps to create a very clean, simple, and elegant design.  When I think of elegant designs, my mind often does to one that includes gold and black.  That was the inspiration for this design.  I think that I met the challenge!


I used the following in addition to the four stamps mentioned above:

  • Cream A2 card base
  • 4" x 5.25" Black card panel
  • Gold Pigment Ink
  • Nuvo Gold Metallic marker 
  • Clear acrylic bubbles 
  • Scrap of white cardstock for the sentiment
Here's how I made it:

This is a very simple card to create.  That said, I think the the elegant simplicity of it makes up for lots of bells and whistles.  I placed my black card panel onto my stamping platform and stamped the Stone Flower onto it with Gold pigment ink.  I stamped each flower three times in three different spots to get the gold ink dark enough to be seen on the black cardstock.


Once done with the flowers, I used the Fern Stamp and stamped onto the card panel with Gold pigment ink.  Once again, I stamped it three times in three different spots.  Once done, I used a heat tool to make sure that the pigment ink was completely dry.  I ran the Nuvo Gold marker around the edges of the black card panel, then ran it around the outside edges of the card base, and then adhered the panel to the base using double sided tape.


I stamped the Texture Wet Cement background onto the white piece of scrap cardstock and let it dry.  Once dry, I stamped the sentiment stamp with Black pigment ink.  Detail scissors were used to trim the sentiment to size.  I ran the Nuvo gold marker around the edges of it, put double sided foam tape onto the back of it, and adhered it to the card.

For embellishments, I took three clear acrylic bubbles, colored the bottom with the Gold Nuvo marker to add a splash of gold to it, and then glued them down onto the the card.  The card is done!


As I said, it's a very simple card to make.  I find the design to be very pretty though and it's a good example of how you can use four very different stamps to create an elegant design.

Thanks for spending some time with me here on the blog.  I'll see you again next month for more stamping fun.  Until then . . . be well!


Be sure to visit our social media sites for more stamping fun!


Monday, June 16, 2025

Stone Floral Creativity Challenge ~ Team Stamp Play

Hi, friends!  It's design team member Walter here on the blog with you.  This week I'm sharing my second card for June that I made using the same four stamps for the month: Texture Wet Cement StampEtched Stone Flower Rubber Art StampFern Art Rubber Stamp, and Sentiment Words Stamp Create Something.  For this second card, I was inspired by memories of the chalkboards from grammar school.  On really cold days, the teacher would often let us stay inside during recess and one of my favorite things to do was draw on the chalkboard.  We'd draw everything from flowers to stick figures, but one of my favorite scenes to draw was a sunset between two mountains.  I couldn't recreate that using these four stamps, but I create a chalkboard inspired design.


I used the following in addition to the four stamps mentioned above:

  • White A2 card base
  • 4" x 5.25" Black card panel
  • White Pigment Ink
  • Lost Shadow, Hickory Smoke, Victorian Velvet, and Rustic Wilderness Distress Oxide Inks
  • Two shades of Pink Acrylic markers
Here's how I made it:

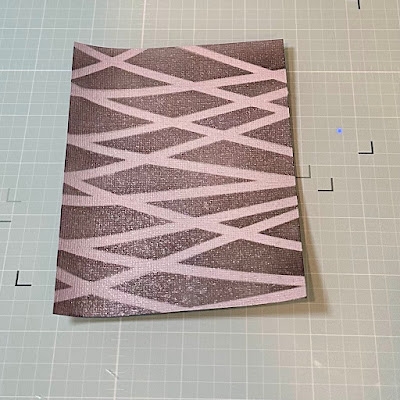
I began by stamping the Texture Wet Cement Rubber Stamp onto the black card panel with Hickory Smoke Oxide ink.  I wanted to achieve a background that looked like rubbing the side of a piece of chalk randomly across a chalkboard.  After the first stamp, I rotated the card panel 90 degrees and stamped it again with the Hickory Smoke ink.  I turned it another 90 degrees, stamped, turned it another 90 degrees and stamped again.  I then repeated these steps with the Lost Shadow Distress ink.  This created a cool looking chalkboard-like background.

I decided that the sentiment would be placed at the top center of the card panel as it's one like that I really like and wanted centered in this design.  I stamped it onto the card panel with white pigment ink and used a heat tool on low to help set the ink.

With the sentiment in place, I stamped the fern twice so that there would be one on the left side of the panel and one on the right side of the panel.  I first stamped it with the Rustic Wilderness Distress Oxide ink.  I then stamped with the same ink a second time to get enough green oxide onto the panel.  I cleaned the stamp and then stamped it a third time using white pigment ink.  The white and green inks came together to create a really nice image that is mostly green with just a little bit of white to lighten it.  I repeated this on the right side of the panel.


Next up was the stamp my flower.  I used the same stamping technique that I used or the ferns to stamp the flower.  Two passes of the stamp with Victorian Velvet Distress Oxide ink followed by a pass with white pigment ink.  It created such a pretty flower image!

I wanted to add some additional detail to the flower and knew that acrylic markers would be perfect to enhance the chalk-like look.  I used a lighter pink to color in the leaves closest to the center and add detail to the outer leaves, and then a darker shade to color the center.


I used double sided tape to adhere the card panel to the card base and . . . voila . . . the completed card!  I love the touch of whimsy that the chalkboard motif adds to the design.  It's a very light and cheery design.


Thanks for spending some time with me here on the blog.  I'll see you again next week for my final design using these four same stamps.  Until then . . . be well!

Be sure to visit our social media sites for more stamping fun!

Friday, June 13, 2025

Thank You Etched Stone Flower

  Hi everyone, Steph Ackerman here today using some amazing stamps from Blank Page Muse.


Cut white cardstock 4" x 5 1/4".
Stamp the flowers on the panel in yellow ink about the panel.


Ink the panel before matting it with green cardstock.


Add the panel to a gold card.
Place sheer leaves on the card.
Die cut Thank You in both colors of cardstock.
Adhere them together slightly off-center.

Thanks for stopping by.

Steph

Looking for more Inspiration? Click the links below!
The Blank Page Muse Shop https://blankpagemuse.com/


Monday, June 9, 2025

Stone Floral Creativity Challenge ~ Team Stamp Play

Hi, friends!  It's design team member Walter here on the blog with you.  The design team was challenged to create a card for June using the same four stamps.  Those four stamps are: Texture Wet Cement StampEtched Stone Flower Rubber Art StampFern Art Rubber Stamp, and Sentiment Words Stamp Create Something.  I decided to take that challenge a step further and use only these four stamps for each my cards this month!  I thought it would be fun to see how each stamp could be used in a different way to push my creativity.  Today I'm sharing the first card that I created for the challenge.  For this card, I wanted to focus on the beauty of the stone element and not only have the flowers look like they're stone.  I created leaves by stamping the ferns and then using a black detail pen to draw lines to create the leaf shape.


I used the following materials in addition to the stamps:

  • Black A2 Card Base
  • White 4 1/8" x 5 3/8" card panel
  • White card stock for stamping
  • Black Ink
  • Gray Ink
  • Altenew Black Ink Spray
  • Alcohol markers
Here's how I made it:

I began by stamping the Texture Wet Cement Red Rubber Stamp twice with gray ink to create the cement backgrounds for the flowers and leaves.


I then stamped the flower once on each background with black ink and then stamped each fern twice on each background with black ink.  I used a black detail pen to draw lines around the ferns to turn them into leaves.


I used various shades of gray alcohol markers to color the images: a medium and a light warm gray for the stone flowers and a medium and light cool gray for the leaves.  I fussy cut out the stamped images after they were colored.

I stamped the sentiment onto the white card panel with black ink and then covered it with low tack white tape so that it would be in place before adding black splatter to the background.  With the tape in place, I unscrewed the spray top from the Altenew Black Spray Ink and tapped it over the panel to distribute black ink splatter.  I used a heat tool on low to help dry the ink.


I removed the low tack tape and used double sided tape to adhere the panel to the card base.  I then decided on the placement of my leaves and glued them down to the card.  I put double sided foam tape onto the back of the flowers and placed them down on the card.

I'm really happy with this design!  I truly enjoy creating with monochromatic palettes, so this first card was an easy design for me to create.  That said, I find it very dramatic even if simple.


Thanks for spending some time with me here on the blog.  I'll see you again next week for my second design using these four same stamps.  Until then . . . be well!

Be sure to visit our social media sites for more stamping fun!

Friday, June 6, 2025

Etched Stone Flower Card

 Hi everyone, Steph Ackerman here today using some amazing stamps from Blank Page Muse.


Cut cardstock 4" x 5 1/4".
Stamp the flowers on the panel in black ink.
Stamp the leaves in green ink.
Stamp the background in gray ink around the flowers.

Mat the panel with green ink before adding to a black card.


For the interior of the card, cut a 2nd panel of white..
Lightly stamp the background stamp in gray ink.
Mat with green cardstock and add to the card base.


Thanks for stopping by.

Steph

Looking for more Inspiration? Click the links below!
The Blank Page Muse Shop https://blankpagemuse.com/


Friday, May 23, 2025

A Little Birdie Told Me ~ Wings

Hi, friends!  It's design team member Walter here on the blog with you.  Today I'm sharing my final card for the May theme of Wings.  For this card, I wanted to focus on a bird and the Flower & Bird Sketches Art Rubber Stamp Sheet Set provided the perfect images to use.  The bird stamp is so beautifully detailed.  I didn't want to use traditional bird colors though . . . I wanted the bird to pop.  I decided upon stamping it on patterned paper for a touch of whimsy.  I feel that it creates a happier aesthetic and is very pretty.  Oh, and a little birdie told me that you're amazing!


I used the following to create it:
Here's how I created it:

I began by stamping the trio of flowers onto the card panel using black ink to create the main focal point.  I thought it would be a nice effect to have an arch of floating "invisible" feathers around the floral.  The next step was to use the smallest feather stamp and clear embossing ink to stamp the arch design in place.  I made sure to place the feathers in different positions to give a "stages of falling" look.


Once all of the wings were stamped, I restamped the floral element with black pigment ink and then dusted the entire panel with clear embossing powder.  I wanted to seal the floral to add a shine to it and help it stand out.


I decided to use gel pens to color the flowers to make sure that they are opaque since alcohol markers would have given them a more translucent effect.  I started with a darker base gel pen, let it dry, and then put in highlights were a lighter shade.  I'm pretty happy with how they look!  I then stamped the sentiment at the top of the card.


I stamped the bird onto some patterned paper with Scorched Timber ink and then fussy cut it out.  I put some double-sided foam tape onto the bird and set it aside.  I covered up the sentiment and floral with low tack tape and used the inside part of the sprayer to tape some Caramel Toffee ink splatter onto the card.


The last step was to adhere the panel onto the card base and then place the bird down onto it.  While a very simple design, it's packed with nice colors and some really cool design elements.  I hope that you like it!


Thanks for spending some time with me here on the blog.  I'll see you again next month for a new theme.  Until then . . . be well!

Be sure to visit our social media sites for more stamping fun!

Saturday, May 10, 2025

Thinking About You ~ Wings

Hi, friends!  It's design team member Walter here on the blog with you.  Today I'm sharing my first card for the May theme of Wings.  Wings is such an expansive theme that can cover so many things from airplanes to insects.  For this card, I wanted to focus on the beauty of wings.  What's more full of natural beauty than a butterfly?  And even better is if it's a non-traditional butterfly such as the one that I'm using on my card: a butterfly shape with butterfly shadows inside of it with beautiful florals and sheet music in the background.  It truly is nature's symphony!  It's a great card to share with someone who needs a pick-me-up or to let them know that they are on your mind.


Here's what I used to make it:
Here's how I made it:
  • Aligned stencil onto light blue card panel and stenciled the pattern with Spun Sugar Distress Oxide Ink.


  • Stamped the Thinking of You Sentiment onto the top center of the card panel using blank pigment ink.
  • Cut a piece of white lace ribbon and attached it to the card panel using craft glue.
  • Adhered the card panel to the base using double sided tape.


  • Stamped the butterfly image onto white cardstock using black pigment ink.
  • Blended Rosy Cheeks Ink around the outside of the image and then blended Minty Fresh Ink inside the image.


  • Added shading around the edges of the image with a dark gray alcohol marker and then went over the entire image with a light gray alcohol marker.


  • Added detail to daisy petals with a white gel pen.
  • Cut out the image with scissors and adhered to the card with double sided foam tape.
  • Glued down three clear acrylic bubbles.


And just like that . . . the card is done!  A beautifully detailed stamped image, such as this butterfly, makes creating such a card so easy.  You can make the coloring as light or heavy as you'd like and add as much or as little detail as you'd like.  The design speaks for itself!

Thanks for spending some time with me here on the blog.  I'll see you again next month for a new theme.  Until then . . . be well!

Be sure to visit our social media sites for more stamping fun!

Thursday, April 24, 2025

Be Brave ~ Beauty in Botanicals

Hi, friends!  It's design team member Walter here on the blog with you.  Today I'm sharing my third card for the theme of Beauty in Botanicals.  For me, there is something so beautiful about a monochromatic card with just a pop of color.  I find them to be dramatic with a certain feeling of softness to them.  I thought it would be a great way to illustrate this month's theme.  This card tells a story of being brave enough to embrace change, finding growth, and moving on.  It may be moving on from a situation, a feeling, or whatever the case may be.  It's a great card to share with someone who needs to hear those words and begin that process.


Here's what I used to make it:
Here's how I made it:

I started with stenciling the background first.  I thought that the Intersection stencil would provide a nice background of crisscrossed lines to provide both some color and some non-floral design.  I wanted the background to contribute to the design but not take away from the flower.  I aligned my stencil and ink blended with Cloudy Night Ink.  I then went over it with Silver Lake ink to add a little variation to it.


I then misted the stenciled card panel with some Brutus Monroe Pearl Shimmer Mist Spray.  This gave it a little bit of pearlescent shine so that it didn't look too flat.


I cut two pieces of a gray & white ribbon and decided to place them at an angle in the top left and bottom right corners.  I did this to break up the pattern a bit and provide separate places to put each word of the sentiment.  Double sided tape was used to adhere the card panel to the card base.


Next up was stamping and coloring the image.  I stamped it with black ink and started by coloring the shades of gray first.  I worked my way around the stamped image and filled in the objects other than the flowers with neutral gray tones.  I used the darkest gray around the edges of the flower to add some shadow, and the lightest one of the fairy's wings.  Once done, I used a Nuvo Shimmer Pen to add some sparkle to the fairy's wings . . . a little touch of magic!  I used three shades of red to color the flowers: starting with a darker one in the center and shadow areas, blending it with a medium shade, and then blending the entire image with a lighter shade.  I used a yellow in the center, and two shades of green on the leaves.  Once happy with the image, I put double sided foam tape on the back of the image and adhered it to the base.  Three clear acrylic bubbles were added and the card was complete!


I think this card is a fun way to use flowers as a pop of color and beauty as a sign of change and happiness on the horizon.  What do you think?  Do you like this type of design?  I'd love to know!

Thanks for spending some time with me here on the blog.  I'll see you again next month for a new theme.  Until then . . . be well!

Copyright Text

Blank Page Muse 2018 Sin City Stamps 2013