Saturday, February 11, 2017

Just Clownin' Around with Print & Paint...


Hi Sin City Stamp Fans!!!


Today I am sharing a few different printed and decorated items!! When I have my Gelli Plate out I like to do "extra" prints to save for later and to also make it worthwhile getting all the paint out and making a mess LOL!! So you will see some printed envelopes, tags and cards - hope you enjoy the process!

Supplies List:
  • Sin City Stamps (of course!): Steampunk Circus Stamp Set 
  • Ink Pads
  • Embossing ink, embossing powder plus a heat gun
  • Color pencils
  • Gelli Plate
  • Paint - use your favorite colors!!
  • Roller (brayer)
  • Tags, envelopes, index cards, really anything you want to print on and create with!
  • Mark making bits & bobs ie. old credit card, old lids, bubble wrap etc.
  • Embellishments like fibers, muslin, feathers etc.
  • And of course scissors, glue, tape etc.

Her we go with the process - and remember no right or wrong and I am certainly not an expert with my Gelli Plate - I have lots to learn and today I have just used a really simple technique and added to the "pattern" afterwards!!


1. Gather up a few supplies - but as you will notice with me I always "add" as I am going because I remember something else in my "stash" that would work with what I am doing! I bet that happens to everyone!


2. Printing! This is really simple - just put some "blobs" of your fave color combo on your plate and spread it with your roller to cover the whole area. Love how this looks when it's all "smooshed" out!


3. Add your items to the plate - below I have a row of tags plus an envelope. I love to use my roller to help pick up the paint because it cleans off the roller and also decorates the back of my items!! You can add a sticky note to the front of the envelope to leave a gap for addressing if you wish! Now if you are a waste not want not gal and want to get the most from your paint grab another two envelopes, or whatever you have at hand and pick up the excess left on the plate - you still get a great print to work with!


4. Next step - once everything is dry of course is to add some images and other "marks" to the items you have printed. Picture below shows images stamped direct to each item.

You can play around with arranging the stamps to see how they will look/fit when stamped. In the pictures below both black archival ink has been direct printed to the pieces and also embossing ink and white embossing powder to decorate. The little stamps in the set are great for using to make borders and fill gaps!


For these items use an old credit card and small round lids with black paint to decorate the pieces and add more dimension along with a scrap of bubble wrap and white paint.


5. To also "decorate" some of the items with colored stamped images stamp on white card in black archival ink, color with pencils or any color medium, cut out and use as desired!!


6. Images have been added with the embellishments to the items. Lots of wording/quote stamps in this set so you can cut out the "wording" stamps and edge them with some color or with a black sharpie.


Don't you love the colors on the tag? The bird stamp was colored to match, then the coordinating feathers added along with some fiber to each tag top and the stamped wording to finish off! I love the white stamped border at the bottom. 


Below is an index card printed in yellow and reds with the cute kids stamp and "Clownin' Around" wording along with a piece of scrap muslin cloth.


The envelopes are perfect as they are although on the bottom envelope you can stamp some gears/cogs with pink and purple ink just to add a bit more pattern. I love these envelopes!


I think the clown below is my fave image from the stamp set - a bit of fun!! Add some cloth, cotton wound around your fingers and the "clown" word stamp from the set.


Hope you have enjoyed this process! I still have some printed items that I will be able to grab when I am in need of a quick background or base card for creating at short notice! I think that is the beauty of the Gelli Plate - nice and quick and you can get quite a production line going!

Thanks for stopping by!

Here's our quick links to find even more inspiration and to grab your own Sin City Stamps:
Sin City Stamps Store
Sin City Stamps Facebook Group
And you are here at "The Blog" but make sure you keep checking back - even better "follow" us so you don't miss any of the Inspiration Team posts!!

Happy Crafting
Sharon

Thursday, February 9, 2017

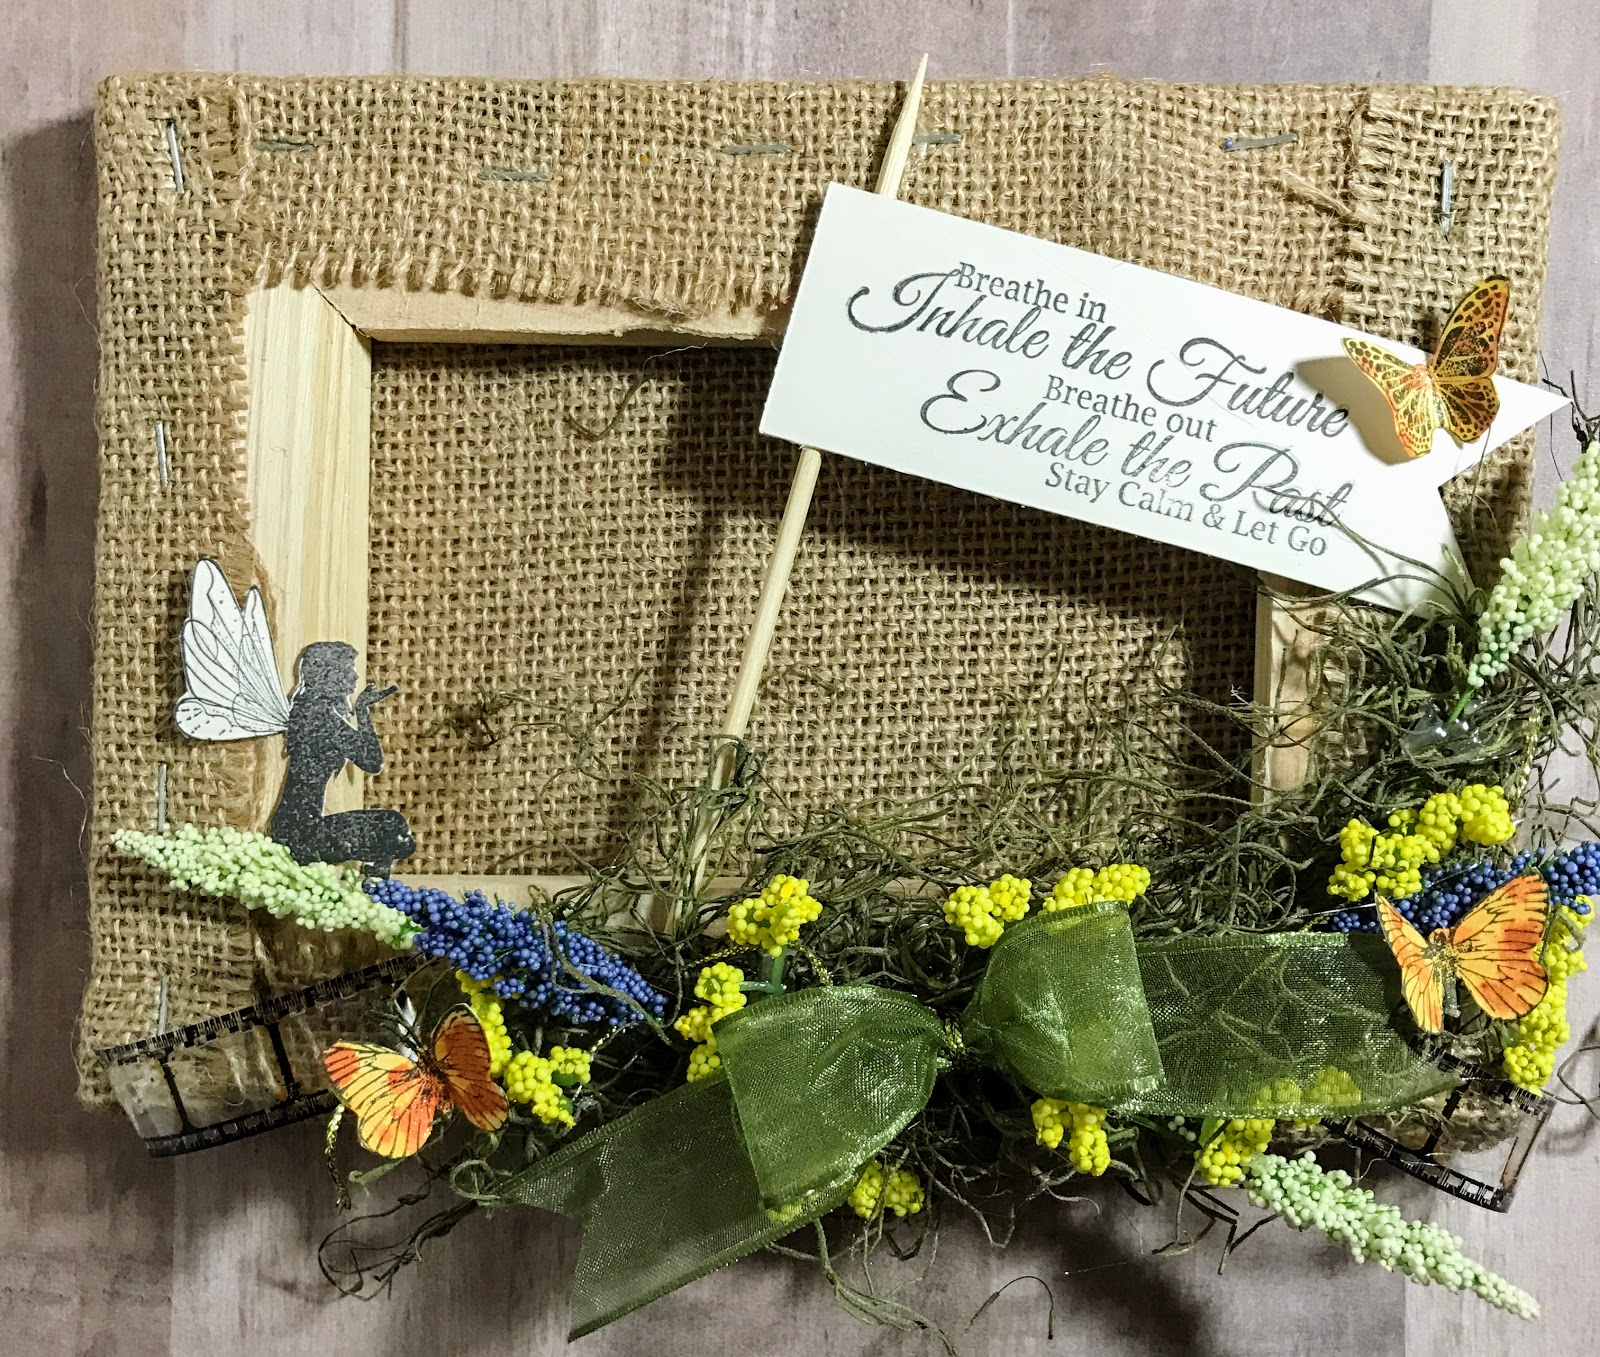
Fairies, Flowers and Foliage Art Panel


This is my very first post as a new member of Sin City Stamps 2017 Inspiration Team and I am very excited to share what I created with these beautiful stamps!
My panel collage was made using stamps from the Fairies and Blossoms 2 set and Inhale...Exhale Art stamp set.
 Both of these sets are available in the online store along with so many others to choose from!
Please find my step by step instructions below on how I made this lovely panel.
I hope this post inspires you to get creative as there are so many wonderful and beautiful things you can do with stamps!

Supplies List:
Burlap Panel any size you like I used a 8X8 here
Sin City Stamps Fairies and Blossoms 2 and Inhale....Exhale Art Stamp set
Heavy white gesso
Stencils and texture paste
Ink sprays in your color choice I used an array of maroon, gold, brown, and copper
Water sprayer
Rose gold color (or your choice) rub on paint
Small pearl beads
Flat glass pebbles
An array of floral embellishments
Wooden chipboard designs
Scraps of paper and paper doilies
Clear embossing powder
Black Archival Ink
Paper grass
Glue or gel medium
Tools such as scissors, heat tool, spatula, paintbrushes, tweezers,hot glue gun

***For Starters I like to gather up all of my supplies and do all of my prep work such as inking and stamping, embossing, and pre spraying any flowers or embellishments.
For this particular project I stamped images and quotes onto heavy cardstock using black archival ink and used clear embossing powder to add texture to the fairy stamp.
A light stain on the cardstock can achieve an old parchment look to the paper.
Set all of that aside and get started on the main project.

Then lay everything out until it is how you like and photograph the collage before preparing the background.
This way you can go back to the photo and place everything permanently.
This was my "raw" photo...

1. Using a card or spatula apply heavy white gesso randomly on burlap making sure to leave some of the burlap exposed. I actually left quite a bit exposed on this one. Allow to dry or use heat tool very lightly. (burlap can get very hot!)

2. Use your choice of stencil and texture paste to areas to add dimension. Let this dry completely.


3. Once texture paste is dry you can begin spraying your inks. I like to spray a bit of water along with each color and dry gently with heat tool. Once I have the desired look I allowed it to dry completely.


4. Once dry you can use stamps to randomly add black. I used a text stamp as well as a stamp from the Inhale....Exhale set listed above.

5. Now all that is left to do is to pull out the photo and all of your embellies, wooden designs, florals and of course those beautiful stamped images and adhere them all with either glue or a gel medium as I did.


Here are a couple close ups of this project!

 I wanted to add a little extra sparkle so I rubbed some rose gold paint with my finger over the flowers and various areas and some extra fine iridescent glitter to top faerie's wings and around some of the glass pebbles.


Enjoy!

Tuesday, February 7, 2017

Inhale Reverse Canvas


Hi Chris here and today I am excited to share this stamped garden canvas created with Sin City Stamps.
 I used:
 Sin City Anime Fantasy Fairies & Dragons II Stamp set
and Sin City Stamps Inhale...Exhale Stamp Set.

As a special treat I created a step by step slide show to show you how you can re-create this canvas!


Hope you are inspired to get stamping!
Thanks for coming by!

Sunday, February 5, 2017

Butterfly Tag

 Hello  everyone, Monique here with a little project made for Sin City Art Stamps,


Supplies used:
Sin City Stamp Sheet Dandelion Wishes with butterflies SC0085
Piece of chipboard (I used a pizza box)
Cardstock in white (use smooth cardstock suitable for stamping)
Scissors
Gesso
Acrylic paint in: yellow and dark brown
Archival stamp ink in Jet black
Colored pencils.

Decoupage Glue
Decoupage paper / Tissue Paper
Ribbon (black)
Lace (black)
Butterfly charm
Some paint brushes
Baby wipes
Acrylic block
Spray water bottle
black crayon


Step 1
Take the pizza box (or cereal box, whatever box you have) and scissors and cut out a tag shape, and punch a hole where the ribbon will be when the tag is finished.

Step 2
Gesso the tag (both sides to prevent it from warping) and let the gesso dry


Step 3
Use  decoupage glue to adhere the tissue paper to the tag and cut of the edges when glue is dry.

Step 4
Paint over the tissue paper using yellow acrylic paint, and take some of the paint off again using a baby wipe. You want the tissue paper to show through the paint.

Step 5
Make a glaze by mixing brown acrylic paint and water. Cover the tag with the glaze using a paintbrush.

Step 6
Make a puff of a baby wipe and dab the glaze off in a circular motion, you need to do this  before the paint has not completely dried. Make sure you can see the previous layers shine though the glaze. Doing this will  give the tag a bit of an aged look.

Step 7
Make sure the paint is dry before stamping the sentiment of the Dandelion set onto the bottom of the tag.

Step 8
Stamp( 3 )  butterflies from the Dandelion set on to the tag.
 This impression is used to create a shadow of the butterflies but also the little body parts that are hard to cut out will be replaced by this stamped image.

Step 9
Stamp the same butterflies onto smooth white cardstock. Color in the butterflies, with colored pencils.

Step 10
Cut out the butterflies (you can cut of the feelers and the small end of the bodies to make it easier.
Go around the edges of the butterflies with a black marker so there is no white showing. Bend the wings of the butterflies upward.

Step 11
Color in the butterfly images on the tag using a black crayon.

Step 12
Adhere the butterflies to the tag, but just use some glue on the bodies, that way the wings can still be folded. This makes it look like there are real butterflies sitting on the tag, ready to take flight.

Finish the tag by inking around the edges with the black ink pad, then adhere some lace to the bottom of the tag.
Tie the ribbon through the hole and add the butterfly charm (I used a small safety pin to do so)


Thanks for visiting!


To purchase the stamp supplies used in this project please visit www.sincitystamps.com


For more inspiring paper-craft projects from the Design Team, be sure to follow us on Facebook.


Friday, February 3, 2017

Boat in a Bottle Greeting Card

 
Hi all,
Today I am going to show you how to create this boat in a bottle card using Sin City Stamps!

Supplies used:
Blue and black ink pads
Watercolors
Acrylic paints in shades of ocean blue.
The Crafter's Workshop Ledger Stencil
Molding paste
White cardstock for your card base. 
Patterned background cardstock
Gelli plate and brayer 
A spackle tool or a used gift card
Jute twine and burlap fabric or ribbon
Canvas Corp Brands Washi tape
Small sea shells, assorted seaside charms and coordinating embellishments. 
Adhesive and foam tape

Gelli Plate painting


1. Squeeze few shades of acrylic paint on to the Gelli plate and roll with a brayer to blend the colors. 
2. Place your paper over the paint and smooth down. Peel your paper off and set aside.

Close up of stamp
3. Stamp one of the shells from the Nautical set using blue ink onto the plate and then place the paper back over the top, face down. Then peel the paper back off to reveal that the shell images have transferred.

close up of painted page

4. Once your painted paper is dry, cut out a square smaller than the front of your card..

Using the stencil

5. Place the stenciling over the top of the paper. 
6. Place a bit of modeling paste at the top of the card and spread out, covering the stencils patterns.
7. Carefully lift up the stencil and set card aside so paste can harden.

Close up of patterned paper

8.Cover the front of your card with the patterned paper and then adhere the stenciled sheet onto the center.

Close up of boat in a bottle stamp

9. Stamp out the bottle stamp onto a piece of smooth cardstock and color in using watercolors.
10. Thread a charm through some jute twine and wrap it around the neck of the bottle, holding in place with tape at the back of the bottle to hold the twine in place.

close up of card
11. Adhere the bottle into the center of the card using 3D foam tape.
12. Dye your burlap with the blue ink. Place this onto your card as shown with the washi tape, sea shells and other embellishments.
close up of flowers
13. Finish your card with a stamped sentiment.

Thank you for visiting

Copyright Text

Blank Page Muse 2018 Sin City Stamps 2013