Finished card. I trimmed the panel down to 4 x 5 1/4", matted it with a yellow piece of cardstock, added a die-cut sentiment from my stash, and adhered it to a card base.
Welcome to the Blank Page Muse Blog! We hope you love these amazing projects created by our fabulous Creative Stamping Team. At Blank Page Muse, we are proud to offer red rubber stamps, clear stamps and stencils. I Brake for Stamps rubber stamps are available online in the same shop. Art rubber stamps are pressed to order in the USA. We are here to help break that blank page! Visit our sister shop IBRAKEFORSTAMPS.com
Tuesday, April 29, 2025
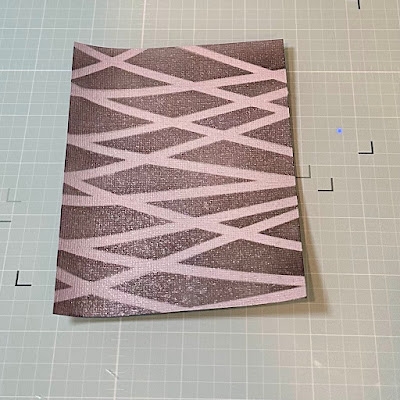
Joseph's Coat Technique Card
Finished card. I trimmed the panel down to 4 x 5 1/4", matted it with a yellow piece of cardstock, added a die-cut sentiment from my stash, and adhered it to a card base.
Friday, April 25, 2025
Monochromatic Mandala Pattern Panel
Thursday, April 24, 2025
Be Brave ~ Beauty in Botanicals
Hi, friends! It's design team member Walter here on the blog with you. Today I'm sharing my third card for the theme of Beauty in Botanicals. For me, there is something so beautiful about a monochromatic card with just a pop of color. I find them to be dramatic with a certain feeling of softness to them. I thought it would be a great way to illustrate this month's theme. This card tells a story of being brave enough to embrace change, finding growth, and moving on. It may be moving on from a situation, a feeling, or whatever the case may be. It's a great card to share with someone who needs to hear those words and begin that process.
- Intersection Criss Crossed Lines Reusable Art Projects Stencil
- Flower shape Fairy Butterfly Music Art Rubber Stamp
- Altenew Crisp Dye Inks: Silver Lake and Cloudy Knight
- Brutus Monroe Pearl Shimmer Mist
- Alcohol markers
- Gray and white ribbon
- Nuvo Shimmer Mist Pen
- Black A2 card base
- Gray 4"x5.25" card panel
- Double sided foam tape strips
- Clear acrylic bubbles
Monday, April 21, 2025
Where Flowers Speak, Friendship Grows
Where Flowers Speak, Friendship Grows
- Large Violet Stem stamp from Blank Page Muse
- Water-based ink pens (For this project, I used Altenew Artistry markers)
- Watercolor paper (I prefer Canson)
- Ink-blending brush
- Blue, Water Reactive ink (I used Distress Oxide)
- Paint Brushes
- Pattern paper (Your taste and preferences should dictate selection)
- White A2 Card base
- Boarder die (Your taste and preferences should dictate selection)
- Liquid glue
- Low-tack Tape
- Paper Trimmer
- Die cutting machine
- Stamping platform (I use a Misiti)
- Black embossing powder
- Heat tool
- Embossing ink
- Sentiment of choice
- Flat-back pearls
Process
- Using the watercolor paper and a paper trimmer, cut the paper to approximately 4.25" x 5.5".
- Place the cardstock into your stamping platform and secure it into place.
- Align the Large Violet Stem stamp into its final position
- Secure the stamp to the stamping platform using some low-tack tape.
- Close the lid and press firmly to ensure the stamp adheres to the lid.
- Double-check that it is secure because the technique to create the card requires a lot of repeated stamping.
- Choose a section of the stamp that feels comfortable to work with and use the Altenew Artistry marker to color only that portion of the stamp.
- Work with light, even strokes, making sure to only get the pigment on the raised section of the stamp.
- Make sure that there is good coverage.
- Stamp the image onto the cardstock.
- Use even pressure, making sure that the applied pressure is downward only to prevent potential stamp movement
- Clean any residual ink from the stamp with a paper towel.
- Using a damp, fine-tip brush and a light touch, pull the pigment from the edges of the stamped image towards the center of the image.
- Be sure to keep inside the lines of the image as you work.
- Take adequate time with this step to prevent smearing or bleeding.
- Allow to dry completely.
- Repeat the steps for other areas of the stamp.
- Save the fine detail or outlines for the final stamping.
- Using a die of your choice, cut out the boarders and align as shown to frame your focal image.
- Adhere into place with liquid glue
- Allow to dry
Assembly
- Secure the completed panel onto the stamping platform.
- Align chosen sentiment.
- Ink the sentiment with embossing ink and stamp the image, repeat if necessary for complete coverage
- Remove the panel from the stamping platform and apply the black embossing powder.
- Recover the excess powder.
- Heat-set the powder with a heat tool.
- Adhere the completed panel to the A2 card base with liquid glue.
The stamps I used can be found by following the links in the materials list, or you can find them with a quick search on www.blankpagemuse.com. Visit our social media sites for more stamping fun!
Sunday, April 20, 2025
Easter Pop Up Card
Hi everyone, Steph Ackerman here sending Happy Easter greetings using an assortment of stamps from Blank Page Muse. I Brake for Stamps and all brands found there are now available at blankpagemuse.com
Saturday, April 19, 2025
Taking Flight Card~Beauty in Botanicals
Hello, Blank Page Muse Family! This month, our theme is Beauty in Botanicals. With spring in full swing, I thought I'd create a card that has a beautiful flower. The hummingbird thinks it's beautiful, too! I started by using the Leaves Collage Stencil and a very light green ink. I applied the ink lightly with a large blending brush onto a piece of white cardstock. I then added a hint of blue ink around the edges of the panel.
Thursday, April 17, 2025
Colorful Blooms Grow Here ~ Beauty in Botanicals
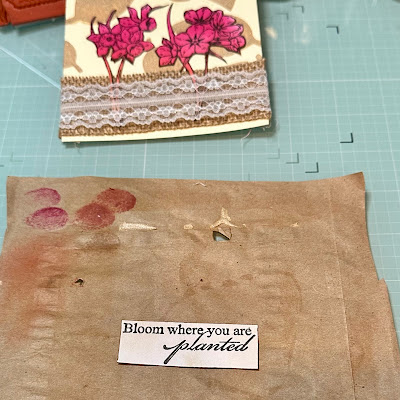
Hi, friends! It's design team Walter here on the blog with you today with my second card for the Beauty in Botanicals theme. Botanicals, blooms, and nature itself are all filled with lots of amazing color as well as rich, deep tones. I wanted to craft a project that celebrated both the rich deepness of the earth and bold color of blooms to illustrate that juxtaposition of the soil that breathes life and florals that give their thanks by beautifully blooming. I think that I was able to achieve that. What do you think?
- Flower & Bird Sketches Art Rubber Stamp Sheet Set
- Leaves Collage reusable plastic Stencil
- Perfect Paints Clover Honey Polishing Plaster
- Concord & 9th Inks: Wildberry, Watermelon, and Creamsicle
- Versafine Clair Fallen Leaves Pigment Ink
- Distress Antique Linen Ink
- Brutus Monroe Apricot Tea Stain Spray
- Clear Acylic Bubbles
- Strip of Burlap
- Strip of Lace
- Double sided foam tape strips
- A2 card base
- A2 Cream card panel
Be sure to visit our social media sites for more stamping fun!
The Blank Page Muse- https://blankpagemuse.
FB Fan Page- https://www.facebook.
Instagram Shop- https://www.instagram.
Instagram Blog- https://www.instagram.
Twitter- https://twitter.com/
Pinterest- https://www.
Walter Zemrock Social Channels - https://linktr.ee/zemstones.by.walter


.png)


