
Hello my dear crafty friends and welcome to my Sin City stamps new post.
This is Irit here today and I am going to share my Mixed Media card made with two gorgeous sets of Sin City stamps.
Usually I don't make too many cards, but sometimes the sentiment are just perfect for a card or two or even many.
So here is my Birthday card made in Mixed Media style with a lot of background stamping, hand cut stamped images, misting, heat embossing and more.
It's perfect for any gender as the colors can fit any person of any age.
As you know this new adventure is not age connected, I began my crafty adventure when I was a pretty old lady and it has been a success so far.
Supply list:
Sin City Stamps:
Steampunk'd Rubber stamps set- Collage, Hot air Balloon, Pocket watch
Steampunk Circus rubber stamps set- Happy Birthday, Let the adventure begin, Crowned clock
Other products used:
White and black cardstock
Stitched rectangles dies
Mists
Black pigmented ink
Clear embossing powder
Blue distress ink
Glaze
Metal charms
Chipboard hot air balloon
Heat gun
Stapler
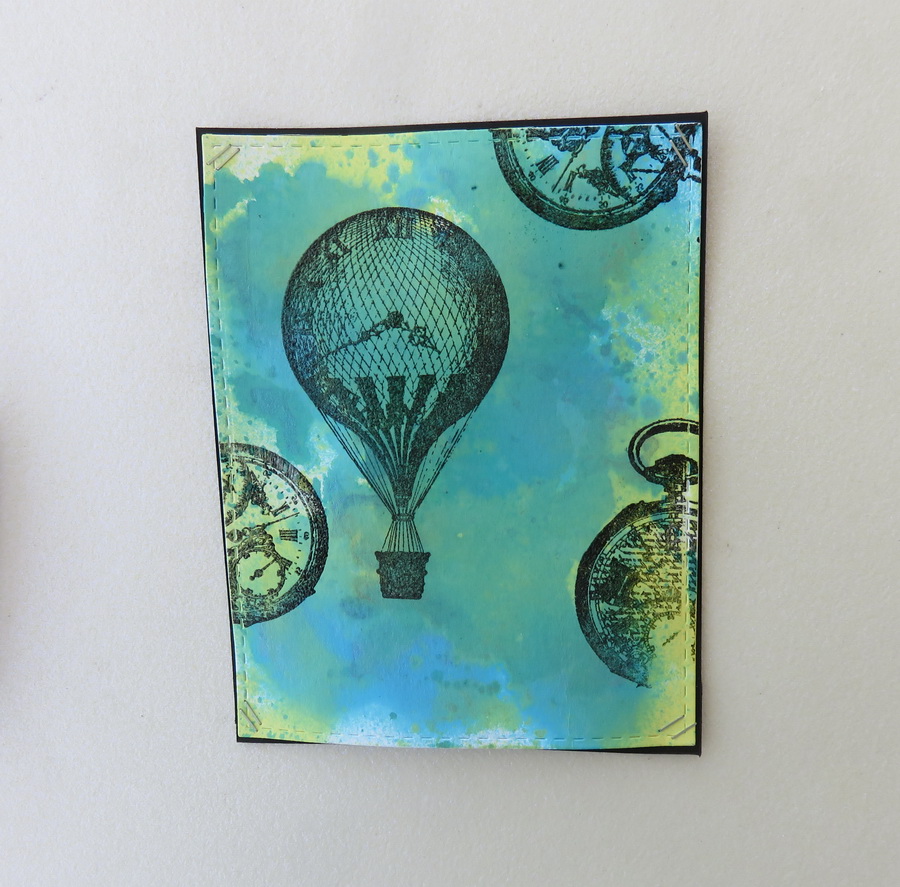
1. Die cut the cardstock to 6" x4 1/2'' rectangle using any stitched rectangle die.
Mist the cardstock with a mix of three green- blue- yellow mists.
Let this dry before adding the next color.

2. Stamp the hot air balloon and the clocks using Sin City stamps , with black pigmented ink and heat emboss with clear embossing powder.

3. Mat your stamped card with black cardstock and attach with staples at the corners.
4. Stamp the clock and two sentiments on the white cardstock with the same pigmented ink and heat emboss the stamped piece. Hand cut the clock and the sentiment strips as shown.

5. Mist the hand cut images with yellow mist and when dry glue them onto the card.

6. Stamp the part of Collage stamp image (the letter part mostly) over white chipboard hot balloon using the same heat embossing technique as on previous steps.
Paint the stamped chipboard with distress blue ink.

Enjoy your card!


For more inspiring projects from the Design team be sure to visit us at Sin City Blog and to follow us on Facebook.
Awesome creation and love the detail on this project.
ReplyDeleteAwesome creation and love the detail on this project.
ReplyDeleteGorgeous card
ReplyDelete