Friday, April 17, 2015

Life is..

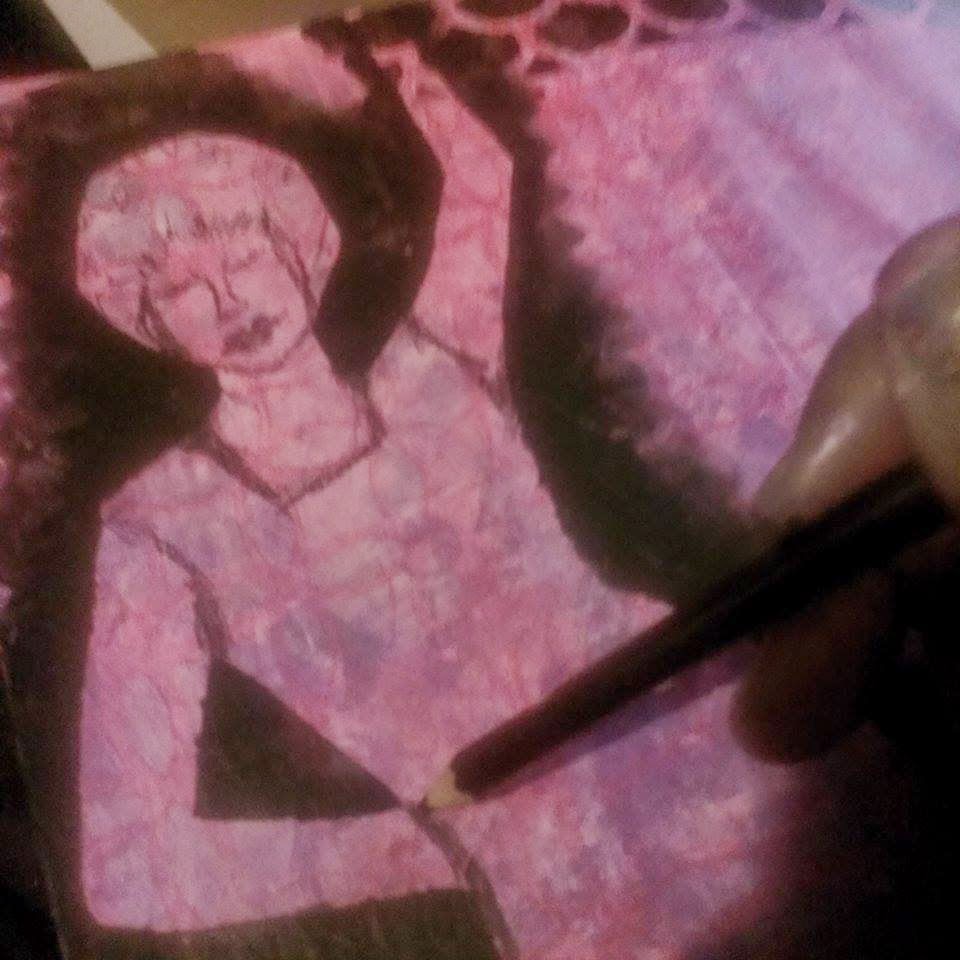
Thank Goodness its FRIDAYYYY!!  You know I have heard this as early as Thursday morning??  I am going to share something with you that every artist should know.  Sometimes we have to hear someone else say it to remind ourselves.  LIFE is a GREAT BIG Canvas.. throw all the PAINT on it YOU CAN!!  I created a journal page to remind myself.!

The supplies I used for this art journal page are:
Sin City Stamps- Pattern 2 Stencil by Terri Sproul
Sin City Stamps- Circle Collage Stencil by Terri Sproul
Moleskine Sketch
Deco Art Americana Acrylics- Blue Bird, Flamingo, Iris and Cotton Ball
Deco Art Americana Neon Acrylics- Sizzling Pink
Deco Art Gesso
Deco Art Chalkboard paint
Deco Art Paint Marker- Black
Neocolor II
Design Memory Craft- Gelatos - Blueberry,Raspberry and Bubblegum
Stabilo All Pencil- Black
Baby Wipes

I prepped my page with a gesso.  I had already laid down some napkin, book paper and rub-ons.  All it did was strengthen the page.  I had a whole knew plan to create now. I dabbed on the 3 acrylic paints with a baby wipe and let dry.  Then I painted on the neon pink.  Before it dried I plopped Circle Collage stencil down and used a baby wipe to wipe away the neon.  I was digging how that came out and did both pages.  I am really loving the stencils from Sin City Stamps.  They aren't stiff or bulky so I keep them right in my journal.


Then I stared at the page for a while.. and while I was in love with the colors and pattern from the stencil, I was stuck!  Which way to go?  I read my quote again.. I needed a body!  I immediately thought of my stash of body doubles I had clipped from a magazine thanks to Terry Sproul!!  Yep I am blaming her!  I have a lot more stencils now than I did when I first saw her Tuesday night class, (Class starts promptly at 9est/8cst) It doesn't stop me from grabbing a few I like to play with.

this is what the image really looked like..

Here I flipped her over and stenciled  her with some chalkboard paint
Then I took the second stencil, pattern 2 and made a bit of a boarder around the rest of the journal layout. Decided I didn't want a silhouette of the body.  So I loosely sketched with my Stabilo All the image of a woman.


I used my Neocolor II to add even  more color to her skin and clothing. Then I added some gesso to the open space on the right; so my quote would be be more visible. used the gelatos on the edges and I was done.  ::smiles::


Well I hope the next time you buy stencils you check out Sin City Stamps' line.  While you are there check the hot new stamps by Terri Sproul and Daniella Hayes debuts her first set!! (woo hoo!!)  As always  I appreciate YOU for coming by and leaving comments and I wish you a wonderful weekend!!


Wednesday, April 15, 2015

The sacrifices I make!

Hi everyone, need a card made real fast? I needed one today so I turned to my Plate of Rubber Stamp set, Anime Fairies.

First thing I did was to print off this sentiment on my computer using the font Petunia Bounce 16pt. Next I dug into my stash and found a birthday cake rub-on by DCWV, making sure to lay my stamp alongside it so I would have plenty of room to stamp her.

After she was stamped onto the card, I gathered some background papers using the color scheme from the cake rub-on as my focal point.

I love the way her hand is positioned here, it leaves you open to add something to it like the wand I wanted her to hold. That idea came to me because of the little stars that come with this set. I chose the largest one and a coordinating color from the cake to stamp it with some Quick Quotes Powder Puff Very Berry ink color.

Then the fun part! Coloring in the image. I used an Inktense pencil and my waterbrush for her skin, Paper Smooches in Kiwi for her dress, the same pink ink pad that I used for the pink stars was also used to color in her hair, I just used my waterbrush to pick up the color and transfer it to her hair. I used a Sakura Gelly roll to color in her wings and added a dot of it in her eyes to make them sparkle too. 

Thank you for stopping by today!

Sunday, April 12, 2015

The Wizard and Dorothy 2 By Daniella Hayes

A couple of weeks ago I won a prize on Terri Sproul's Tuesday night live show.  She has a free art journal/canvas show every Tuesday.  Check out her Facebook Page All Things Terri Sproul to find out more. 

I won that prize for knowing some Wizard of Oz trivia.  So I thought I would make this card using the Wizard and Dorothy 2 stamp set from SinCity Stamps.

Supplies:


I gathered my supplies to start.  I picked a gold flecked paper and a pretty floral paper.  I found this piece of a glitter die cut paper in my "stash basket" (which is so full it will soon be a stash box because there is so much leftovers and papers and stuff in it).  I thought the red glitter die cut had to be used to represent Dorothy's Ruby Slippers.


Next, I cut the papers and stamped the images.

I colored the image in with my markers.  I love the highlight the stamp makes on the tablecloth.

To finish, I cut the die cut apart and added it behind the paper and on the card front.

I hope you make something awesome today!  Something that commemorates something that made you super happy, like winning a prize.

Please click the links to the SinCity Stamps store.  There is so much awesomeness there, you will want it all!!
xxDaniella 

Thursday, April 9, 2015

Vintage Card


I hope everyone is having a great Friday.  Today I wanted to share a vintage style card that I made using the vintage background SinCitystamp.  This background stamp is really cool and very fun to make a project with.  Check out the website for other great stamps as well that can be purchased at http://www.sincitystamps.com.  I hope you enjoy this project and have a great Friday.
Supplies List:
  • facade (surface): Recollections brown kraft card and envelope – 5in x 6.5in (12.7cm x 16.5cm). Two sheets of Authentique 12in x 12in “Cherish Three” paper item # CHE003 and one sheet of manila card stock.
  • distress ink: gathered twig and walnut stain distress ink
  • archival ink: potting soil
  • teresa collins vintage finds brads
  • embellishments: metal corners, foliage, word band and jute string
  • idea-ology small chat stickers
  • adhesives: glossy accents, double sided tape and pop dots
  • tools: craft sheet, scissors, ink blending tool, paper distresser and sewing machine
  • stamps used: Vintage background (sc41)

Step 1: Let’s start out by taking the Authentique patterned paper and cutting this down to the desired size we will need to complete the card.  The “Cherish Three” is two sided and we are going to use each side to complete the base of the card. 
We will first take floral patterned side and cut our first size to 4.75in x 6.25in and then using the stripped side cut to a size of 4.5in x 6in.
Step 2: First we will take each cut piece of patterned paper and using the paper distresser rough up the edges.  Then edge off each side of the paper with walnut stain to dirty up the edges.
Step 3: Second take the cream card stock and stamp the vintage background on the card stock.  We will be using potting soil archival ink for this step (or any brown archival ink will do).
You will stamp the vintage background stamp twice (meaning on two cream card stock sheets). Then take one of the stamped images and cut out one of the stamped image (as shown below).

Step 4:  Now we will take the stamped image and dirty up the edges using gathered twig distress ink.

Step 5:  Our next step will be to attach the two patterned pieces of paper with the stamped image using double sided tape. Then apply metal corners to the background.

Step 6: Time to add dimension to our project.  We will take the second stamped image and cut out random boarder pieces. Then use gathered twig distress ink over the top of the items we cut out. To attach it to the background I used pop dots.

Step 7: We are now going to start adding in dimension to the card by adding some embellishments and brads.
Step 8: Using double sided tape we are going to attach this to the brown card stock.

Step 9: Now we will take Tim Holtz idea-ology small chitchat stickers and add word sayings to the card.
Step 10: Final step is to dirty up the edges of the card and we are all done.  Here is a picture of my finished piece.

Thanks for checking out this vintage card project and I hope you add this vintage background stamp to your stash today.  You won’t regret it.
Check out the store today there are such great stamps, stencils and products that you can chose from that will be great additions to your home.
Trent-TMCreative

Wednesday, April 8, 2015

Just a note to light up your day!


Hello All Lanette Here!

Today I am going to share a couple sweet little cards that can be used for almost anything!

Lets start by taking a look at my finished cards, then I will show you how I made them :)


Sin City Supplies Used: Baby Animals Art Rubber Stamps

Just look how cute they are!!!


Other Supplies Used: Tim Holtz Distress Markers, Ranger Water Brush, Tim Holtz Mask Material, Faber Castell Gelatos, Staz-on Ink, Versa mark Stamp,& Heat Embossing Powder.

Now lets look at my process......

I started by stamping my image on my two cards and the masking material.


Next I fussy cut my masked image.


My Next step was to add my verse stamp, that is also found in the Baby Animals Art Rubber stamp collection.  I heat embossed my verse so it would resit the gelato background.


After placing my masked image over my stamped image I started created my background using Gelatos. 

My last step was to remove my mask and color my zebras shirt using Distress Markers.


Lets take one more look at my cards just for fun! After all they are super cute!


Thank you so much for stopping by today!

I hope that I have inspired you to have some inky fun of your own!


Remember to like us on Facebook and stop by the store for all your stamping needs!!

As always feel free to stop by my blog Stacks of Scraps anytime!

Monday, April 6, 2015

Happy Day


Hi Chris here today sharing this layout featuring large stamps as a focal point on my layout.  
For this project I used:
Cardstock - Bazzill
Paper & die cuts - Crate paper
Paper Bow Template
Adhesives- Beacon Zip Dry, Scotch ATG
Tim Holtz Distress Ink - Worn Lipstick
TIm Holtz Distress Tool
Vellum- WorldWin
Stickers - Heidi Swapp
Embossing Folder - Cuttlebug
Brad
Punch-Martha Stewart
Stamps - Vintage Fashion- Sin City Stamps


I started by cutting 3 squares 3 inches x 3 inches.  I stamped images from the Vintage Fashion Collection.  I stamped the image a little off center to create some visual interest. As you can see I stamped a few extra images, but I only used 3 on this layout.


I cut a piece of patterned paper 6 1/4 x 11 and distressed the edges using the distressing tool.  I folded down the upper right corner and then attached the piece to a cardstock base.  I then cut a piece of cardstock to 5 1/2 x 10 1/4 inches.  I used a border punch to punch the left edge of the piece. 

I then cut a 1/2 strip of vellum and embossed it using an embossing folder.   To create the "continuous" embossing I cut a slit in the top of my embossing folder to allow the strip to slide through.  

I traced the bow template onto vellum and cut it out and then embossed the pieces before assembling the bow.  I embossed a larger piece of vellum to use as my photo mat.  Adhering vellum is tricky so I attached the vellum strip to the back of my cardstock.


I adhered my stamped imaged to the right of my cardstock and placed the cardstock on my patterned paper.  I added my vellum matted photo, tucking some journaling in behind the photo.  I added several coordinating die cuts to and my sticker title to balance out the page.

I hope the finished project inspires you to add stamps to your layouts.

Friday, April 3, 2015

Spotlight Card with Tamiko


Hey folks, T.G.I. Funday!!  Ever feel like with all the talented people in the world, that YOU would never get a chance to be in the spotlight?  When I started playing with this collage stamp from the Sin City Stamps- Plate of Rubber- Bingo, that's exactly how I felt!  There are so many cool elements here.  I couldn't just break the stamp up and use the images individually.  Well yeah, I could!  I didn't want to though!  I saw bingo boards and poker chips, keys and clocks, a bird in a cage and a hot air balloon.   What stood out to me the MOST was a teddy bear!  I felt like he would, like many of us, feel lost among all the many beautiful things.  
So I decided to put a spotlight on the teddy bear. :)


Supplies:
Tombow Markers
Water brush
Acrylic Block
Paper Trimmer
Helmar 450 Adhesive
Helmar Liquid Scrap Dots
Bling Mesh
Trim
Wooden Veener
Faber Castell Big Brush Pens
black card stock
black mirror paper
circle punch
archival ink pad


First I took the collage stamp and stamped it a few times in archival ink.  I knew exactly how I wanted to show a spotlight.  It was a technique I picked up years ago ago from SplitCoastStampers.  Great source for tutorials and inspiration.


I then grabbed three of my Tombow markers.  I chose them because they are water soluble.  I can lay down color on my acrylic block or craft mat, spritz with water and brush it on.  Leaves a really cool water color effect.


I then took my circle punch and proceeded to punch Mr Bear out from one of my additional stamped collage images.  I am leaving this portion black and white to show a *spotlight*.  I could have colored him and left everything else black and white, but I LOVE to COLOR!! 


Mounted my full image on some black mirror paper and then on top of black cardstock. Popped the circular spot out with some Helmar Liquid Scrap Dots for dimension. Used a little bling mesh, trim, a wooden camera (colored with a Pitt Pen) and the words: all lights on you.  I think it worked out well.. Don't you? :)


As always I hope you take the time to create what you love, for those you love and use Sin City Stamps while you're at it!  Thank you for stopping by and have a grand weekend!!!

Wednesday, April 1, 2015

Making a mold from your stamp


 Hi everyone, today I am sharing a card that I created by using my stamp, Anime Fairies Art Rubber Stamps  a little differently to create a sympathy card.


I first began my project by making a mold of the wings from the stamp set. I kneaded some Sculpey Clay until it was soft and spread it out on a piece of wax paper and then pressed the wings into the soften clay to get a nice deep impression. Remove the stamps, follow the directions on the clay's packaging for baking it and voilà, you have a mold to use. Next I followed the directions for making paper pulp casting to create the wings. I prefer to use paper casting as it is lightweight, which is important when mailing your card.

I used all handmade paper for this project which gives you lots of rich texture. 

Inking the raised designs on the wings to bring them out a little more.

My last step was to hand sew around the heart and then added all the layers together. I used my white Signo pen to add some faux stitching marks around the base of the card.

Thank you for stopping by, I hope you will look at your stamps a little differently and see the other ways you can use them. Stamps are a great investment and well worth their versatility!


Copyright Text

Blank Page Muse 2018 Sin City Stamps 2013