Showing posts with label Tamiko. Show all posts

Friday, November 6, 2015

The Color of Fall with Gratitude... with Tamiko


I love creating this page.. It totally says fall to me.. The the color of the leaves and texture of the bark of the trees.. I used a bunch of stamps from Sin City Stamps to create this page.  My supplies included:

Tim Holtz - Woodgrain stencil
Archival Ink Pad
Acrylic paints
Gelli plate
Deco Art- Moldeling paste
Deco Art Metallic Lustre- Espresso
Dylusions Paints- red, orange, green, yellow and brown
Gelli Plate ( I use the 8x10)
Helmar Craft and Hobby Pva glue
Spatula
Scissors
Distress ink
White Sharpie (water based)
Unibal Vision pen

What I did first is what you cant see is I made a few gelli prints using the leaves and some of the paint. I smoothed paint on the plate and stamped across it.


Then I took the modeling paste and with a spatuala I stenciled some on the page, rather thin-like.


Then I painted over the areas I stenciled with brown paint, to create what looked like a bark of a tree.


After the barks were created, I added a little bit of definition to the raised areas, by rubbing some metallic lustre. Can't see it well here..  ::sad face::


I started working on the leaves.  The leaves were stamped with archival inks and fussy cut.  I then inked the edges just a little bit.


I took my scoring tool and along the length of the leaf i created a faux crease to resemble a stem.  I also curled some of the edges of the leaf.  


I finallally adhered the leaves to the page with some Professional Craft & Hobby PVA.  I wrote my quote in white sharpie (waterbased) and outlined the lettering with plain unibal vision pen.   Gratitude helps us to see what is there instead of what isn't.  Here just a few more photos of closeups for the page.


Thanks for stopping by today and checking out my journal page.  Remember you too can see the light in every day things and its starts with gratitude and some stamps from Sin City Stamps!!  Now GO MAKE SOMETHING!!


Friday, October 2, 2015

29 Again.. Birthday Card... with Tamiko

Hey good people!  It's Friday and I have a birthday card to show you ::smiles:: I combined images from the Madame Stampset and the Bingo Stampset .. They both give me a vintage feel and seem to go together.. What do you think?


I took out my water soluble crayons called Neocolor IIs, after stamping the images with an archival inkpad on 140lb watercolor paper. I used my waterbrush pens to apply color.


I also used my Wink of Stella glitter markers to add a little sparkle.  :::if you haven't noticed I LOVE sparkle:: You won't see it much in my main picture because of the lighting in the room.


Created wording of my own in my own handwriting using a waterproof pen. Then I matted the main images and a card was created.  Cute and simple..


Hope you enjoyed my card today.  Oh by the way, tomorrow October 3rd, 2015. is WORLD CARD MAKING DAY!!  Best way to celebrate is by going over to the Sin City Stamp Site/Store and fill a basket with all your cardmaking desires and make a purchase!!  Thanks for coming by!!!


Friday, September 18, 2015

Journal Page with Tamiko

Happy Fridayyyyy!  I will make this fast for you guys!  I created a journal page using the Madame Stamp Set from Sin City Stamps by Madeline Faiella.  I enjoyed creating this page.  I was even inspired further, to create a short story to go with it.  Isn't it amazing how one art project can automatically encourage another.  


The supplies used for this page are:

CottonWood Art Journal
Patterned paper
Clear Gesso
Deco Art Neon Acrylics
Deco Art American Acrylics
Deco Art Media - Matte Medium
Stabilo All Pencil (Blue)
Paint Brushes
Water Brush
small piece of watercolor paper (140lb)
Archival Ink Pad
Deli Paper
Xacto knife


I hope you all enjoyed my journal page and slide show.  I would be happy to answer any questions you may have about my project. Here is one more picture.. to get a close up of the faces. 


Don't forget that Sin City Stamps has had a 20% decrease is stamp sets alone!  
This is NOT a sale, but it IS a BARGAIN!!


 Thank you for for your time!  Have an awesome weekend!!

Friday, September 4, 2015

Mixed Media *Madame* Tags with Tamiko

Today I created a few fun tags for you with the faces from the  Madame by Madeline  stamp plate  by Sin City Stamps.  The tag is full of texture and color.  One was done with a gesso and modeling paste background and the second was modeling paste alone.  Question?  How many of you color your images in advance?  ::raises hand::  If you don't, do you wonder why I do?  I have three reasons. 1) I like to stamp my images out on various types of papers, not all images will require coloring. 2)I love to color.   I often spend hours at a time playing with different mediums laying pigment. 3) As I color I have done two things: a) created a colored image fodder- so I can grab and go for any up and coming projects; and I have also managed to at least use my stamp once!  How often do we buy things and not use them? You BETTER USE YOUR STAMPS!! ::chuckles::  Here a few tags I created.


To create today's tags I used the following:

Sin City Stamps-  Madame by Madeline Faiella 
Manilla tags
Tim Holtz's Stencil-  Doily Lace Pattern
Deco Art- Gesso and Modeling Paste
Derwent- Inktense pencils
Caran D'Ache- Neocolors II
Pentel- Waterbrush
Spatula
cardboard
embellishments
paper
scissors

I began by placing a thin layer of gesso on one of the tags. 


Stenciled some modeling paste on both tags.


Then I added some neocolor II


Moved the color around with my water brush.


After my backgrounds were completed for the tags, I embellished them with my pre-colored stamped images, flowers, faux ribbons and blingy goodness.  Here are few more photos.


It's the holiday weekend and you have an extra day to be with family friends and play!  Check out Sin City Stamps and get ya STAMPY AWESOMENESS on.. ::smiles and waves::  Have a safe and creative holiday weekend!!

Friday, July 17, 2015

Colorful, BIG and BOLD BLOOMS with Tamiko

Hey Heyyy it's FRIDAY!!  I hope your week has been a productive one.  If not, tomorrow is another day.  Seems like my week is just beginning, (smiles) I've been in a bit of a funk, but no matter what's going on in life.. someone else is always going through something more or different that can bring them bring them down.  While everyone may not wear emotions on their sleeve or ask for help when they need it.  It is times like this, when something handmade like a card can lift anyone's spirits.

Have you ever seen a stamp and what you wanted to do more than anything is have it in your hands? How many times have you seen a stamp and you had to have it.. you've missed sale after sale putting it off.  Somethings are just worth investing in. Rubber stamps is just one of those things.. (giggles.. for me anyway) I finally got Daniella Hayes's Stampset called BIG BOLD BLOSSOMS.  This is just a few  cards I made with it.  Very well named if you ask me.


Ok let's get started making these!  I began with a sheet of mixed media paper 6x8inches.  I first covered the entire page with Deco Arts Media Gesso, then their Americana Neon Acrylics.  I love it bright and neons do it for me, but as you see, there is very little evidence of a neon in the finished piece. 


Then I wanted to use the word stamps that came with the set. This set is perfect because as I stamped these words I felt a bit of empowerment.  To receive a handmade card always makes a person feel SPECIAL.  The time and efforts you take to create embodies you with a sense of PEACE. As you deliver your handmade BEAUTY you in turn offer a bit of STRENGTH to the recipient.  Or you can interpret those words anyway that works for you, (smile) just my thoughts, Let me continue!


After some bubble wrap stampage, I found my page was still brighter then I wanted.  Then I did  a 1:1 ratio of water to gesso and did a wash over the whole page to tone the neon down.  


Then I stamped one of the blooms.  I honestly though I might get a chance to use more, but they are HUGE!!! (chuckles)  I looove it!  Unfortunately, I did get a picture of my stamping the image. I was in a zone!  Once I stamped the image, I cut the page in half.  Looks like it will be two cards.  I began to add another layer of color to my card with Neocolor II, Not to be confused with just the term Neocolors.  Neocolor IIs are water soluble.  I used  water brush to activate and move the color around.  See how the neocolors are not opaque, so the underwriting and some colors will peek through the colors.  I love that!


Once I got done adding color to the outside of my flower, I decided I wanted the bloom itself to pop more.  First I tried the black neocolor and then I decided I like the stabilo all pencil in black instead.  Once I went over it with my water brush again the black line thickened and popped the bloom right off the page for me.

the left was done with the necolor II, the right was done with the stabilo.
I liked the stabilo more, so Iwent over BOTH flowers with it.  

Then I added my white stabilo to the flower.  Again not opaque and I wasn't expecting it to be.


Then I wanted to tie the white into the card.  I added a lil gesso stamping on a textured piece of a table mat.   Yes I did! Wanna see?


Pleased with how it evolved, I still added some black pen doodles to the white stenciled goodness.   Thinking I am almost done by the way it looked, I pulled out my old trusty black gelato.  The gelato is my personal go to give that framed edge look to.  I just rubbed it around the edges and used my finger to move/buff it a bit.


I really did have fun using this BIG BOLD BLOSSOMS  by Daniella Hayes and I look forward to creating more with the three other HUGE flowers in the set.  Ha it's beginning to look a lot like Christmas and my family may get a box of handmade cards from me.  Great idea  I think!  Please stop by the Sin City Stamps Online site and grab some goodies!!! Thank you for coming by and let's have a GREAT WEEKEND!!  

Friday, June 19, 2015

Happy Father's Day.. with Tamiko

Hey folks.. Thank Goodness It's Friday!!!!  As I look forward to the weekend, as much as the next person, I realize that this weekend contains Father's Day.  ::smiles::  I am sure there will many family gatherings and dinners to honor Dad.  This day reminds me how much I miss my dad, but I determined to fill it with only the grandest of memories.  Well let's get to my Father's Day card!


What I used to create this card is..
Ranger Archival Ink- Jet Black
Koi Water brush
Papers- book page, tissue paper and base card
Embellishments- seam binding, flowers, 
Misc.- Scissors, paper trimmer, sponge applicator, wipes, 

First I took a portion of my diamond texture sheet and pounced some gesso on it.  I used the gesso because at the time I knew I wanted to add color.  Gesso primes the chipboard, therefore giving it a chance at displaying it's fullest intensity of the color. I also use the gelatos directly to the gessoed  chipboard then moved the color with a dampened finger.  I made sure to leave some white exposed.


I crumpled up the tissue paper, then flattened lightly to adhere it to my cardstock with matte medium. Also applied it over the tissue paper, because you never know what you may add the top layers. I took a dictionary book page (which happens to high light FATHER), rubbed some gelatos and moved the color with a little matte medium instead of water. that was done to kinda set the gelatos should I decide to add anything else wet over it.  Doing that helps not totally reactivate the gelatos.


I took the chipboard and stuck it down using the tacky glue.  Grabbed my seam binding and swished it around in some water-spritzed gelato yumminess for color.


Stamped my butterflies with archival ink because once it's dry, it's waterproof..  Now I am going to add more colors with the gelatos to the wings and edges.


Once that is dry I will begin placement on the card base and add the butterflies, flowers and bling.  I have to have extra sparkle.  Even if it is given a man, it's made by a woman!  ::smiles::  I also added some black gelato to color and frame my card.  Then I decided it was a little darker then I wanted.  Looked around and BAM!  Deco Art Metallic Lustre, in the most awesome turquiose, yep.. using it!! ::laughs:: Here are a few close ups.


Thank you guys for stopping by the blog!  I hope that the weekend is full of ONLY the most awesome memories of fathers, past, present and future,  Don't forget to plan ahead and consider Sin City Stamps for are your stamping needs! 

Friday, June 5, 2015

For YOU Madame... with Tamiko

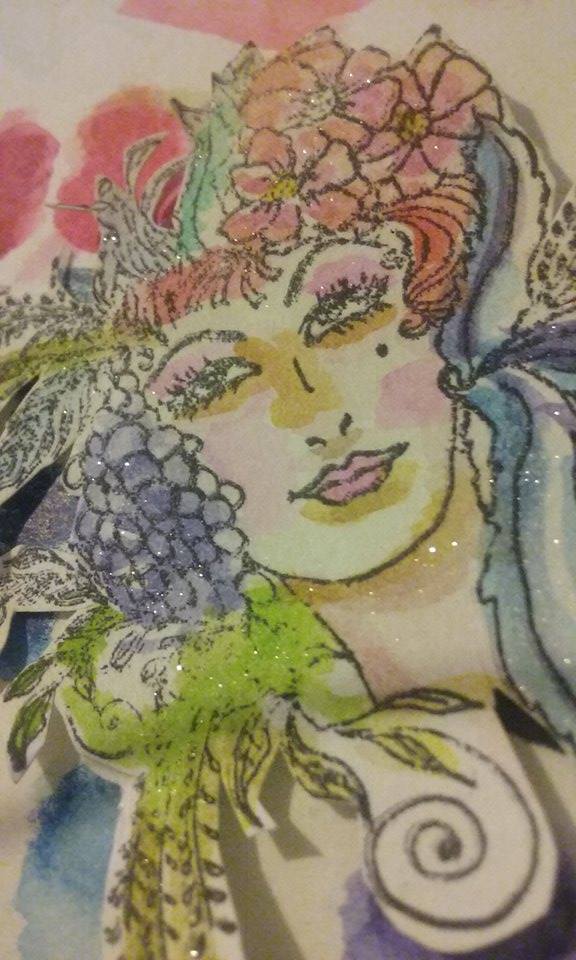
I have the most wonderful set of stamps by Madeline Faiella over at Sin City Stamps.  The set is full of very feminine women that wear adorned head pieces full of flowers and blossoms of the sorts.  I was very anxious to play and color them.  Here is what I call a shabby chic card using just one of the many images on this rubber plate.


The list of the supplies I used include but are not limited to:

  • Madame Rubber Stamp Plate by Madeline Faiella
  • Ranger Archival Ink Pad- Jet Black
  • Derwent Inktense Color pencils
  • Pentel Water brush
  • Water Color Paper 140lbs
  • Tim Holtz Distress Ink Pad - Vintage photo
  • Tim Holtz Distress Tool
  • Water Mister
  • Prima Card Stock- Ledger and Fairies
  • Helmar Tacky Glue
  • Helmar Tape
  • Misc flowers, lace trim, flatback pearl trim and embellishments
  • Scissors and paper trimmer


Took my chosen image from the plate of stamps and stamped it with archival ink on 140lb water color paper.  I like stamping on water color paper when i know i plan to get my image wet.  This reason also applies to why I use archival ink pads.  Let it dry.


Then I cut my papers and aged the edges with my distress tool and inked them with vintage photo ink pad.  I also misted the papers to move the ink and make the paper appear worn.  Adhered my papers with Helmar snail and Tacky glue.


Added lave trim and stuck it down with Tacky Glue.


I scrub colors on my water color paper and add them to my image with my water color brush.  I do it that way, because I detest seeing pencil lines in my work. I prefer to see light loose colors.  Don't forget to let your image dry.  I also like inktense in this case, because once the color dries.. it's permanent. 


Then I take my Kuretake Wink of Stella Glitter Brush in Clear and go over various parts of my image to give it a little shimmer.


added some embellishments.. they always make everything extra pretty.


Stamped Madame. Voila Shabby Chic Card!

I enjoyed using these images from the Madame Stamp set and you would too!!  Please take a moment to go over to Sin City Stamps and grab them and your other stamping needs!

Thank YOU for stopping by!!


Copyright Text

Blank Page Muse 2018 Sin City Stamps 2013