Friday, January 23, 2015

Steampunk Airship with Sin City Stamps

Hello Peggy here to show you my last posting for Sin City Stamps! Its been a great run with some great folks and Awesome product! I present: My Steampunk Nightlight! It can be hung or attached to the wall.. I love it!
Todays supplies: 
Chipboard Airship
Silver Cardstock
Patterned Paper
Stazon Ink Black
Crystal Lacquer
Chains, keys, gears, switches, bolts anything metal
Creativity!

I created a two inch molding out of chipboard around two pieces of a chipboard airship to create a 3d effect. I covered the outside of the ship with silver reflective cardstock. Below shows the stamps and metal pulled out for easy access and to help with the creative flow. 
I stamped my Sin City Stamps with Black Stazon Ink to create a back ground using four stamps. 
Next I placed my metal pieces in the order I wanted them to appear and began to adhere them with Crystal Lacquer.
This is my result below! I added a battery operated light for a glow and whalla! 


The top and bottom were covered with Graphic 45 patterned paper. I added a hook and chain for hanging. I used patterned paper to also create a floor to hold the light on the inside.
Ball chain was added.

That's it! I am very proud to have been on the Sin City Stamps Design Team for two terms and I wish all the best to Donna and her fabulous Sin City Stamps Creations!
Congratulations to the new team I can't wait to see what you come up with!
Warmly, 

Thursday, January 15, 2015

Courage Is ... Art Journal Page

Hey there, fellow stampers!  Today I am going to share my last post with Sin City Stamps for this term. But, the good news is, I am not going anywhere.  I am continuing my tenure with the design team for another term.  I guess they just cannot get rid of me!

I am going to work in my art journal again, and I want to share a few techniques with you that I have learned along the way.  I know this post is quite photo heavy, but I think it helps you to understand what I am trying to say.


I used a dabber bottle filled with white gesso and gave both pages a good coat, without trying to blend, but leaving ridges and dabber marks.  Allow this coat to dry.
On a sheet of deli paper, I stamped images from the various Sin City Stamps stamp sets, as follows:
Courage ...
Small Peacock Feathers
Leaves
Wings, Key and Lock, Wings of Love
Tear stamped images out and audition them on your journal pages.  If you want, you could take a digital picture to help you remember your placement.
Remove your images, and add modeling paste through the chicken wire stencil.

I tried to do the stencil where I have blank spots, not where my stamped images will be placed.
After the paste dries, spritz misters in Yellow Green, Turqouse, White, and Orange.   Use a baby wipe to remove and/or blend colors.
To tone down the brightness of the colors, I made a mixture of Burnt Umber and Titanium White Antiquing Cream, mixed with Retarder, to make a wash.  The photo below shows half of the page so you can see the difference.  It looks scary, I know, but the retarder gives you plenty of working time.
I painted it over the entire page and wiped off  with a baby wipe.  
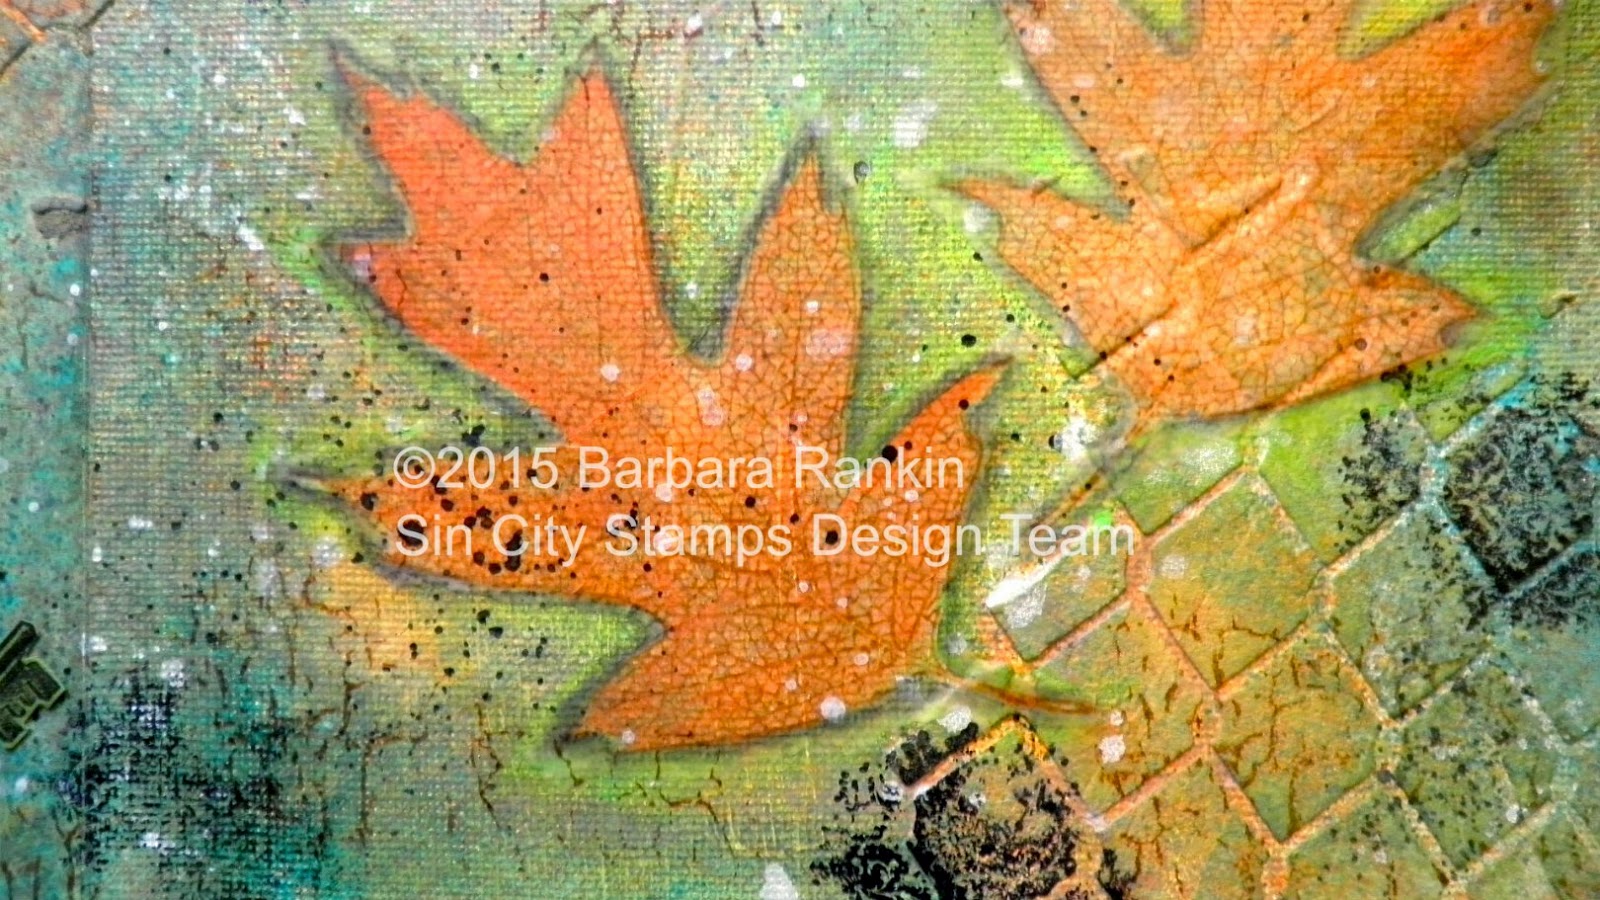
Here is a closeup of the texture and depth of colors achieved with this technique, and you can see how fabulous the SCS stenciled image looks.
Next, I used the Matte Medium to adhere my stamped images to the pages.  As you can see, the deli paper practically vanishes into the background.
Die cut 5 different sizes of funky hearts from thin chipboard and cover with white gesso.
When dry, apply a base coat of red iron oxide to each heart.
Let that coat dry, then apply a coat of the crackle paste, varying the thickness for different sized crackles.

Paint each of the deli paper stamped images with intense block colors.  These are good to use for this because the colors are vibrant while still retaining transparency, allowing the stamped images to show through.
While waiting for my paste to crackle, I decided to stamp some stamped crackles directly onto my page with spiced chai ink.
 This is a background stamp, but by curling it up and stamping only portions of it, you get these nice, irregular crackles.  Just another reason to love your unmounteds!
close up of the stamped crackles
 I added some brown distress ink over each of the crackled hearts and adhered them around my pages.
 I added  a few more of my deli paper stamped images to some of the hearts.
 I decided I wanted the key hole to show up more, so I stamped it again onto a scrap of green card stock with black ink, fussy cut it, and adhered over the wings.
I used a charcoal pencil around my images and blended it with a blending stump to add dimension to each image and make them pop off the page.  Finally, I stamped the lace fragment randomly with black ink and added some paint splats with both white and black paints.  Following are some close ups of the pages.


Supplies:

Sin City Stamps:  Wildlife stamp set; Terri Sproul's Leaves stamp set; Sin City Wings stamp set; Chicken Wire Stencil;
Cottonwood Press Canvas Notebook
StazOn ink pads: Black, Blue Hawaii, Gothic Purple, Emerald City, Spiced Chai, Claret, Orange Zest
DecoArt Modeling Paste; Matte Medium; Crackle Paste; Misters:  Yellow Green, Turquoise, Orange, White; Burnt Umber; Titanium White Antiquing Cream
Golden Retarder
Charcoal pencil, blending stump

Albeit lengthy, I hope you enjoyed my project today, and I also hope you liked looking at the photos that I think really help you visualize the true depth of colors you can get from mixed media.

Thanks for stopping by, and have a wonderful weekend!

Barbara

Sunday, January 11, 2015

A MINI ART JOURNAL

Hi!  I have an art journal to share with you today.  It is a mini, so you can take it with you wherever you go.  It measures 4.5"x3" and is made with Mixed Media paper so it is ready for all of your artsy techniques.  I even decorated it a little, so jotting down ideas or experiences is super easy!  

This is a side view  The album is made with plenty of room for you to add tons of stuff to the pages. There is even a little pocket to put things in you want to add later.

A little glimpse inside shows some spray ink and stamping.  I made 3 "signatures" of 2 pieces of paper each to put inside, for a total of 12 pages. "Signature" is a book binding term for how you add the inside pages.

I made a tutorial to show you how I made this tiny journal.


Check out How to Make a Mini Art Journal. by Daniella Hayes on Snapguide.


Thanks so much for visiting!!
xxDaniella

Friday, January 9, 2015

Background Fun with Tags

Hello! Peggy Here to show you my tags created with Sin City Stamps background set from Terri Sproul Art Journal 2 set.
Supplies used today are: 
Shipping Tags
White Gesso
Brown Stazon Ink
Black Stazon Ink
Tim Holtz Distress Ink Black Soot
Tim Holtz Distress Ink Walnut Stain
Versa Mark Ink
Clear Embossing Powder
Black Embossing Powder
Tim Holtz Distress Tool
Heat Gun
Seam binding optional

 I started with White Gesso on my tags. I wanted to play with resist so after stamping my background with Stazon Ink, I embossed another background stamp on top using Versa Mark Ink and Clear Embossing Powder. I headed this to set with my heat gun.

I stamped sentiments on my tag from the same set.. it reads.. "Just Love Us + Art". I distressed using Tim Holtz Distress Inks. I tore some edges and also distressed with Tim Holtz Walnut Stain . I used a distressing tool from Tim Holtz along the edges. I had a very sturdy tag so I creased it up a little to look worn. 
Here is another White Gesso Tag with a brick background and sentiment from Terri Sproul's Set Art Journal 2. I added some stitch marks with black Sharpie fine tip. I distressed this tag with Tim Holtz Distress Ink black soot. I used Black Embossing powder on the sentiment.
Here are my final two tags! I added some custom died seam binding to match.

I hope you enjoyed my quick tags and I encourage you to come on over to Sin City Stamps and take a look at their great selection of stamps and stencils.

Tuesday, January 6, 2015

Owl Mini Album

It's actually feeling like January here in Southwestern Ontario.

It is very cold and it's snowing.

I wanted to do something not about winter so I decided to do an Owl Mini Album.


It was fun to pick out the paper not using anything Christmas.


I did the eyes a few times and nothing was right so I left them dark.

The supplies I used are
Sin City Stamps: Owl Die Cuts
Sin City has so many gorgeous die cuts.
Burlap lace and a butterfly charm
Petaloo burlap flowers and butterfly


I cut out a few different owls from the paper stack.

I distressed all the edges.


I added a music stamp to the paper.


I added the moon 


and  the stars that came with the mini album.
I distressed them all.


I added the petaloo flowers to the branch.


I want to add to my album but I am not
sure what at this time.

Thanks for stopping by.
Make sure you check out all the new stamps
in the store.


Thursday, January 1, 2015

New Year's Card with Shabby Style

Happy New Year, everyone!  Are you ready for a fantastic year?  I know I am.

I decided to make a card with elements that I feel represent a year's passing.  The wings represent how time flies, while the clock hands and gears are parts of that fast-moving clock that seems to never slow down.  And of course, the Roman numerals represent the year, 2015.


Cut tan card stock to 6" x 12", fold in half to make a 6"x 6" top folded card.

Adhere 5-3/4" x 5-3/4" print paper to card front, edging with similar colors of ink to match the paper colors.

Stamp Roman numerals, as shown.  You will need two "III", an "X" and a "V".
To change the "III"s to M's to represent each 1,000 years, I used post-it notes to mask areas of the "III" and stamped the bottom of the "V" between each "I I I" to turn it into an "M".
Fussy cut the Roman numerals and adhere to card front.

Stamp wings from the Sin City Wings stamp set twice onto scrap tan card stock and fussy cut each.
Layer wings onto card, lifting the top pair of wings with pop dots.

Stamp small clock hand onto scrap tan card stock, fussy cut and adhere to center of wings with more pop dots.  Add Stickles glitter glue to wings (Antique Linen) and clock hand (Vintage Photo).
I wanted a bit more shabbiness, so I added splotches of Frayed Burlap distress crackle paint.

After it dried, I added some Vintage Photo distress stain to bring out the cracks, and then some metal gears to the bottom splotch and to the bottom of the clock hand.

Supples used:

Sin City Stamps:  Sin City Wings stamp set; Clockworks Inspired by Terri Sproul stamp set;
Other: Tan card stock; Print paper (Prima); Distress Stickles (Vintage Photo, Antique Linen); Distress Ink Pads (Black Soot, Vintage Photo); Distress Stain (Vintage Photo); Metal gears (various); Distress Crackle Paint (Frayed Burlap); foam dots

I hope you enjoyed my shabby style New Year's card today.   If you like it, I hope you will visit the Sin City Stamps online store to see what other stamps and accessories they have.  Be sure to also visit the blog regularly as the team has so much inspiration to offer.  Also, I would love for you to stop by my blog to see more of my work!

Thanks for stopping by, and have a wonderful weekend!

Barbara

Copyright Text

Blank Page Muse 2018 Sin City Stamps 2013