Showing posts with label words by Jane. Show all posts

Sunday, November 5, 2023

Fourth in my series of Jane Inspired Projects

Hello, Lyneen back with more Jane! Today’s Project is inspired by a quote from Jane Austen’s Mansfield Park.  “I was quiet, but I was not blind.” Fanny says this during a difficult conversation with Mary Crawford, the night before Mary & Henry Crawford are to leave for London.   


Did you notice Jane Austen's image in the silhouette?

Visit my Blog HERE for a detailed tutorial! 

Please visit our social media sites for more stamping fun!

I Brake For Stamps -https://ibrakeforstamps.com/

The Blank Page Muse- https://blankpagemuse.com/

FB Fan Page- https://www.facebook.com/groups/blankpagemuse/

Instagram Shop- https://www.instagram.com/blankpagemuse/

Instagram Blog- https://www.instagram.com/blankpagemuseblog/

Twitter- https://twitter.com/BlankPageMuse

Pinterest- https://www.pinterest.com/blankpagemuse/boards/


Sunday, October 15, 2023

Third in my Series of Jane Inspired Projects

Greetings Creatives! Lyneen here, today I have another one of my series of Jane inspired projects creating with Blank Page Muse!  Blank Page Muse stamp plates "Words by Jane" are on my list of favorite stamps. The plates are inspired by the works of Jane Austen. If you are a Janenite these are for you!


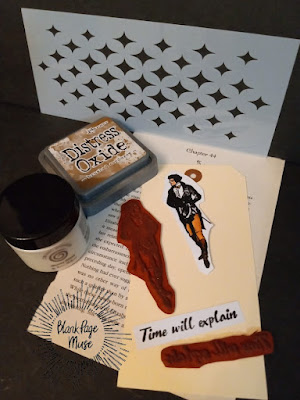
To create the tag, I used the following stamps and stencils from Blank Page Muse:


Visit my Blog HERE for a detailed tutorial!

Thursday, October 5, 2023

Second in a Series of my Jane Inspired Projects

Hello, Lyneen here creating with Blank Page Muse!  Today I am sharing my second in a series of Jane inspired projects. I fell in love with the two "Words by Jane" stamp plates over at Blank Page Muse. They are inspired by the works of Jane Austen. If you know me, you know I LOVE all things JANE! My plan for the stamp sets is to do a series of Jane projects!


To create the tag, I used the following stamps and stencils from Blank Page Muse:


Visit my Blog HERE for a detailed tutorial!

Monday, April 8, 2019

A Mother's Love Card

Hello Crafty Friends,

Marie-Christine with you today with a Mother's Day card theme, and embossing technique!


BMP Rubber Stamps used:


(Shop now and save! Use code BPMDtMarieChristine2019 to save %15 off your total order!)


Other Supplies

Pink Cardstock
Black Embossing Powder
Gold Embossing Powder
Vintage DistressOxide
Pink Distress Oxide
Watercolor Paper


Apply some Pink Distress Oxide on watercolor paper.


Use this beautiful stamp background with Gold Embossing Powder.


Stamp the silhouette on a watercolor paper and Black Embossing Powder.


Stamp the title on a piece of pink cardstock. Put some vintage Distress Oxide on the edges.

Cut a rectangle of pink cardsock and adhere your card on it.


Here is the result!

Hope you have enjoyed my tutorial!


Thank you for visiting!


Marie-Christine Denis

Inspiration Team Member


Follow us 

The Blank Page Muse- https://blankpagemuse.com/


Tuesday, January 8, 2019

Vintage Inspired Love Card

Hello Crafty Friends,

Marie-Christine with you for my first post on the Blank Page Muse Blog.
Today, I made a vintage card for Valentine day. I love retro images, I use them with my mixed media creations all the time.


BPM Rubber Stamps used:


Other Supplies
Black Cardstock
Patterned papers
Vintage trim or ribbon
Vintage image or clip art


Layer the patterned papers onto the black cardstock base.


Randomly stamp onto the layered papers.


Adhere a romantic clip art image.


To finish, I stamp word 'Love' on a small piece of paper and adhere to the card with foam tape.
Finish with a length of ribbon at the bottom of the card.


Hope you have enjoyed my tutorial!


Thanks for stopping by today.

Marie-Christine
Inspiration Team member

Please visit the following for more inspiration!

Monday, November 26, 2018

Quiet, but not blind

Hi Everyone,
Jess here today. I was starting my project with a fall theme in mind and then I stumbled across my quote stamp.  The colors evoke fall, but the sentiment can work year round!


Blank Page Products used:
Oh darling stamp
I was quiet, but I was not blind
Floral Lace
Large Bird Man


Other Products Used:
Distress Inks
Distress Oxides
Distress Crayons
Distress Markers
Cardstock
Micro Glaze
Archival Ink
Clear Texture Paste
3d Embossing Folder
Ribbon
Adhesive
Stencil
Waterbrush

Using Distress Heavy stock blend together several shades of DIstress Ink.  Spritz with water and dry completely.  Take a tiny bit of Distress Micro Glaze cover most of the background.  Stamp the Floral Lace stamp using Distress Oxide Ink and spritz with water.  Using the micro glaze on most of the background keeps the top layer of ink from blending into the background.  It also keeps some of the intricate stamp pattern, but not all of it.  The look is wonderfully aged and tattered.
Take clear texture paste and a stencil to the background.  Don't worry about it looking perfect.  Imperfect looks better! ONce the paste is dry use Distress crayon to scribble over the paste.  Smudge the crayon using your finger and the pattern pops up adding another layer to your background.
Stamp the Large Bird Man on Watercolor cardstock.  Color him in using a waterbrush and Distress Markers.  Once he is dry fussy cut the image.

To finish the background stamp your two sentiments( Oh darling  and I was quiet, but I was not blind) using archival ink.  Back them with black cardstock and play with placement on your background.  Once you're happy with placement you can glue them down.
Run plain black cardstock through your die cutting machine using a 3d embossing folder.  Take a Distress Crayon and highlight the raised areas.  The slight gilded effect is so gorgeous.  Adhere this piece right under the focal background piece you created.
All that's left to do is layer up your background.  On this card the black is attached to a distressed piece of gold cardstock.  The gold is mounted to a sage green card.  A bit of burgundy ribbon was the finishing touch.
Happy Crafting,
Jess


Thanks for coming by!
Please visit the following for more inspiration!


Monday, February 26, 2018

Fanciful Flight


Hi Everyone,
Jess here today sharing a fun card with you today.


Product List:
World Map Hot Air Balloon
Feathered Wings
Floral Medallion
Petals Rosette Medallion
Words by Jane
Rosette Hearts Set
Black Archival Ink
Sepia Archival Ink
Collage Medium
Distress Crayons
Distress Ink
Glue

Using Black Archival ink stamp your World Map Hot Air Balloon and Feathered Wings on an old dictionary page that has been coated in collage medium.
Color you images using Distress Crayons. When the paper is coated with the collage medium it allows you to blend the crayons on the paper just using your fingers.   
Stamp your sentiment from the Words by Jane set. 

Ok, here's a little booboo.  I wanted to use the large background stamp that is on the Rosette Hearts Set for my background.  I stamped it on a texture piece of cardstock and all of the detai was lost, but I liked the grungy pattern it made.  I stenciled around the border for  bit more solid visual interest. 

Cut a strip of white cardstock and randomly stamped the Floral Medallion and the
Petals Rosette Medallion using archival ink.  Add distress ink and water for an aged appearance.
Attach the strip to an oversized card. 
Add  your dictionary page on top and then add scribbles with Gel Pens
Your card is now complete. 
I hope you enjoyed this and will now make your own!


Copyright Text

Blank Page Muse 2018 Sin City Stamps 2013