Showing posts with label Sugar skull stamp set. Show all posts

Thursday, January 17, 2019

Mini Flags Made With LOVE!!!

Hello Everyone!!
Can you believe we are already halfway through January 2019???
Are you enjoying this month's "Valentine's" theme?
I'm loving all the fab creations by the DT - lots of inspiration and creativity!
Today is my first post for this new year and I hope you feel inspired to have a go at making these cute little flags yourselves - great for planners or just for fun!!
Supplies:
Blank Page Muse Stamps: Day of the Dead Sugar Skulls Set (tiny flowers used for this project)
Blank Page Muse Stamps: Dandelion Wishes with Butterflies Set (little butterfly used for this project)
Coloured Ink Pads - your colour combo choice (red/pink/black/white combo used here for "Valentine's"!!)
Scrap White Card
Large Paper Clips
Hessian (plastic backed used for this project - helps to hold the shape and a little sturdier)
Embellishments: cardboard printed wording, scraps muslin, charms, gems
General supplies: scissors, glue, cotton & thread, ruler

Instructions:
Start by stamping the mini flowers and butterfly onto scrap white card - a perfect use for those little offcuts! Fussy cut the stamped images.

Cut your mini flags from Hessian - use the size of your paperclip as a guide for the size needed. Paper clips used for this project are 5cm in length - "flags" cut to 4cm at the top and 6cm long triangles.


Use the needle and thread to attach your mini flags to the paperclips. It's much easier to sew them on before you add all the embellishments!

Gather your stamped images and chosen embellishments and start to 'lay out" on your flags for final placement and then adhere with glue.


Your finished creations are ready for adding to your planners or hanging up - you could even add a magnet and use as a fridge decoration!!! Your "beau" might like one too!!!


Happy Stamping!
Sharon
 Don't forget to visit us at all of these Social Media Sites for amazing inspiration:

The Blank Page Muse- https://blankpagemuse.com/

Saturday, November 17, 2018

Family Memories

Hello Everyone!!
Who can believe it's halfway through November already? Xmas will be her before we know it!


I hope you have been enjoying our November themed month of Family, Fall & Thanksgiving!
Today I am sharing some Sugar Skull tags with my thought process being "The Day of the Dead" and a day of remembrance and celebration of past family members lives.
I hope you like how they have turned out and feel inspired to try something like this yourselves!
Supplies:
Baggage Tags: size used here 6cm x 12cm
Cork Sheet
Black Archival Ink
Cobalt Achival Ink
Matt Chalk Acrylic Paints
Tools: spatula or paintbrush, scissors, glue
Extras: string/twine, ink sprayed muslin cloth scraps
Instructions:

Start by using a spatula or paintbrush and adding a thin layer of various colored chalk style acrylic paints to the tag background.


Once the paint is dry - which won't take long as the thin application is quick to dry - stamp one of the little "floral" stamps from the Sugar Skull set over the tag background using the Cobalt Archival Ink.


Next is to stamp the feature stamps onto the cork sheet. Stamp any (or all) of the Sugar Skulls onto the cork using the Black Archival Ink. Fussy cut the skull.


Follow the same process with the "Memories" stamp but instead of cutting the word out just tear the cork. I love this about the cork sheet - it being pliable enough to tear out images and have the messy jagged look!

Use a fine black pen to draw a border around the edge of the tag for a finished look.

Gather all of your stamped images and extra bits and pieces so you can assemble the tag!

Arrange everything on the tag and then adhere with glue - place the Sugar Skull half off the side of the tag and trim. Tie the string at the top. TIP: you can use the "other half" of the skull for another creation!!!!


Whilst I was making this I stamped and painted enough other bits & pieces so I could make some extras!


Happy Stamping!

Sharon :)

Don't forget to check us out at all of the following Social Media Sites:
The Blank Page Muse- https://blankpagemuse.com/

Tuesday, November 13, 2018

I Can See You Tags

Hi Blank Page Muse Stamps Fans!!
Today I am sharing a couple of tags you can whip up in no time!!
I'm using some stamped image "offcuts" from another of my November creations here at the blog!
Waste not want not!!!!!
Start with some little pre decorated tags (these are apporox 5cm x 9.5cm) and have been covered with scraps of stamped and ink sprayed tissue paper, book pages and some texture paste through a stencil.

I saved my "half" stamped sugar skull images from my tag step by step blog post.
Note: Sugar Skulls were stamped on a cork sheet and fussy cut out.


Gather some scraps of muslin cloth, computer generated phrases and twine for the tag top.


Arrange all the elements onto the tags and adhere with glue.


Tie the string at the tops and you have some fun tags - they could be bookmarks too!!


Hope you enjoyed these quickie tags!!
I'll see you again soon!
Sharon
And as always don't forget to visit us at all of these Social Media Sites:

The Blank Page Muse- https://blankpagemuse.com/

Thursday, July 27, 2017

Mini Cube Embossing!

Hi Sin City Fans!
Firstly to all of you who are enjoying Summer and nice warm weather can you please send me some heat here Down Under!!!!!
And now onto my step by step post for today which is having some fun with embossing powder, ink cubes and the fab Sugar Skull Stamp Set!
Hope you enjoy!
Supplies:
  • Index Cards or 6 x 4 white card (I used lined 6 x 4 index cards - I like the lines for added interest!)
  • ATC size white card
  • Black Archival Ink
  • Pigment Ink Mini Cubes - assorted colours
  • Clear Embossing Powder
  • Heat Tool
  • Embellishments of your choice eg. muslin cloth, charms, old jewellery, computer generated wording, printed ribbon
Instructions:
Gather your crafting "goodies" so you have everything at hand!

Using your ATC sized plain white card stamp your pigment cubes directly onto the background to cover the entire piece. It's not necessary to be perfect but aim for a "grid" like pattern. Use 2 or 3 complimentary colours.
Note: this is a perfect way to "use up" old ink pads - some of mine are so old that when I stamp them onto the page the top layers are actually falling off but I am getting good value by using every bit of ink!!!


Move straight onto the next step so the coloured ink doesn't dry. Using your black ink pad stamp your skull over the top of the coloured inks.


Cover the entire card with clear embossing powder. Tap off the excess and replace in the jar and put the lid on so you don't accidentally knock it over!

Use your heat gun to "emboss" the entire card. I love watching the powder and ink melt together and get all shiny!

It's a good idea to make more than one card at a time whilst you have all the items out and your heat gun at the ready! As you can see below I have made 3 ATC's below. You can decorate the ATC's and have completed creations or continue on as shown below.


The next step is to use your 6 x 4 index cards (or plain card) and repeat the steps above to emboss and decorate the sides of the card to create a border. Use the small flower stamps from the set to add to the border. Use the same colour stamp pads on the index cards as the ATC's so they "match".


The final step is to add embellishments of your choice to the base index cards and adhere your ATC's to the fronts! I have "recycled" old costume jewellery on one card which looks great and also used flat metal charms, cloth and other bits and pieces to complete!


Hope you have enjoyed my "project' for today!
Remember to check in regularly for more DT inspiration - always so many different creations and always so many amazing stamps to play with!
Don't forget to share your creations at the Facebook Group - we love to see what everyone is creating!
Happy stamping!
Sharon

Monday, July 3, 2017

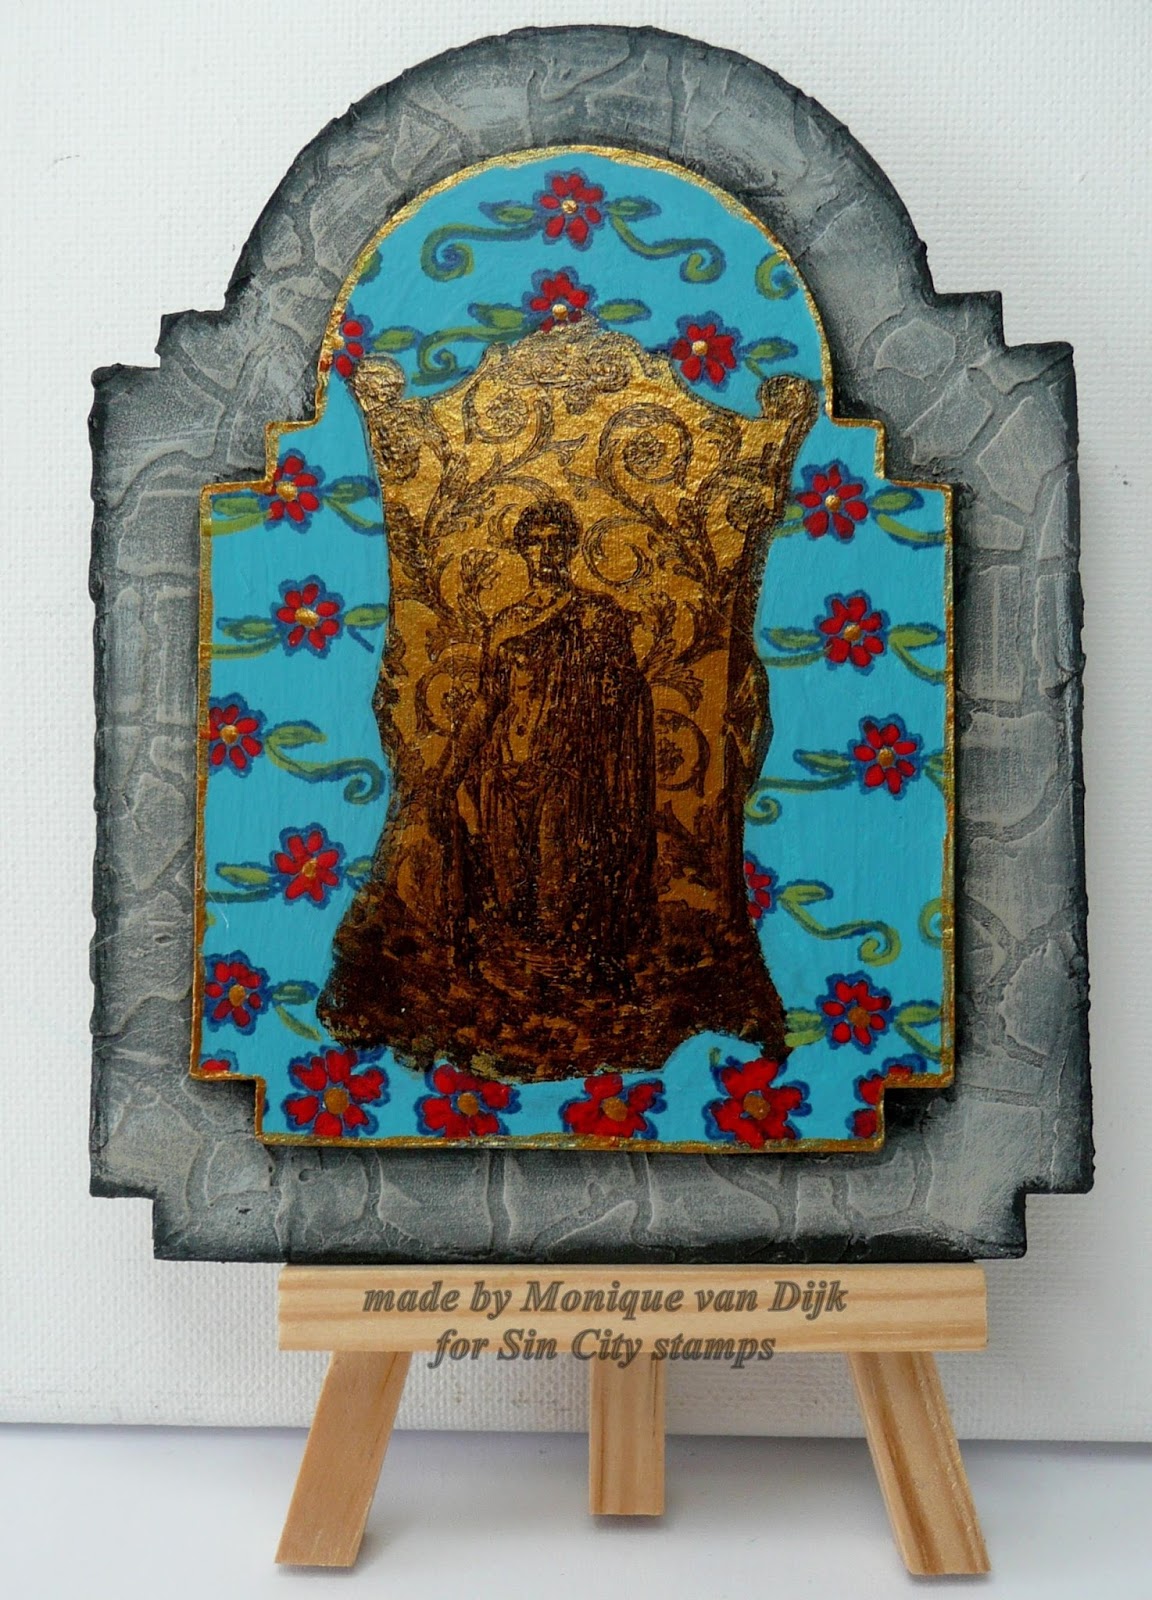
Greek Statue Shrine


Supplies used: Greek statue from the Wing it stamp sheet
flower and flourish from the Day of the Dead Sugar Skulls sheet
Vintage cabinet card die big and small 
chipboard
acrylic paint in black, dark, mid and ligh grey, Turquoise, Red and Green
Metallic paint in Gold
Modeling paste in black
stencil
waterproof black and blue stamp ink
masking paper
scissors
paint brush
palette knife

Step 1: make the die cuts
Step 2: make some extra frames (made by using both dies together) and paint alldie cuts dark grey
Step 3: use a stencil that looks a like stones (I used a die cut to make my own stencil) and add the modelijg paste through the stencil
Step 4: let dry
Step 5: use the different colours grey to create a stone look
Step 6: add black paint to the edges


Step 7: paint one of the small cabinet cards turquoise
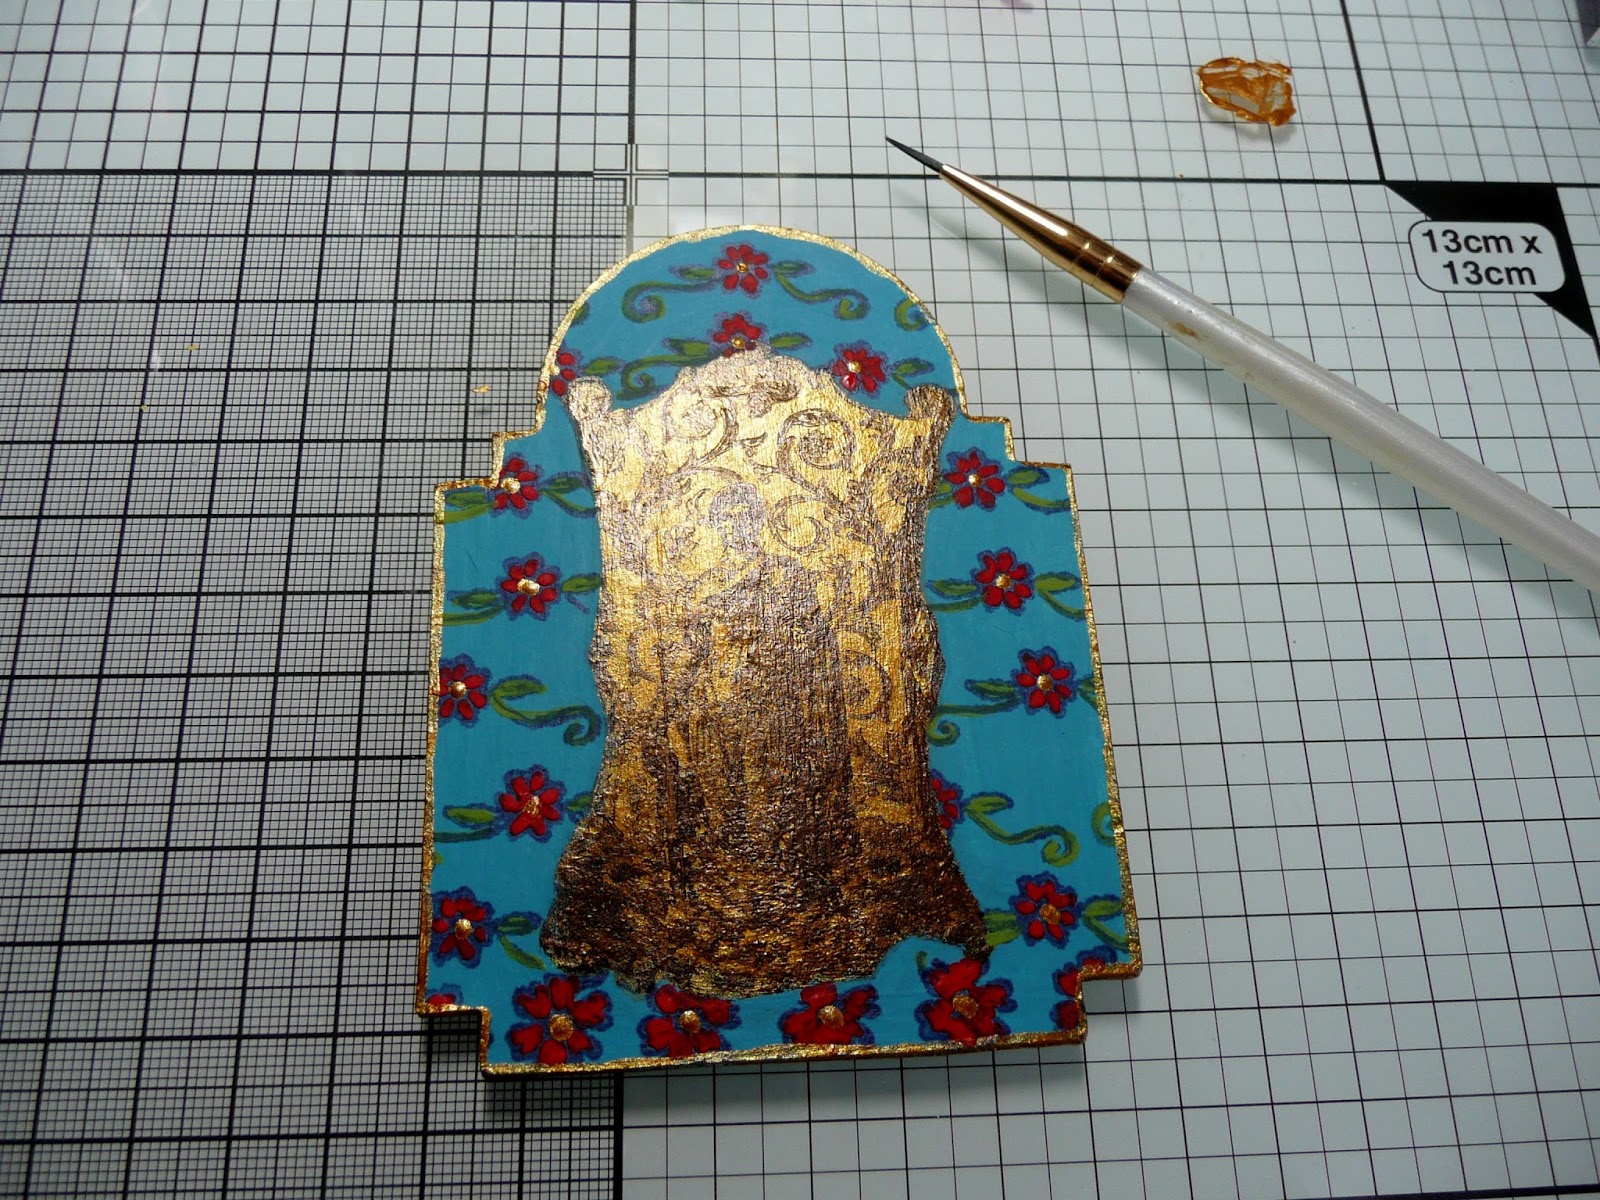
Step 8:  outline the Greek Statue stamp and paint it gold, let dry
Step 9: make an impression with the statue stamp on the gold paint using black water proof stamp ink
Step 10: use a small paintbrush and turquoise paint to go over the stamped parts that go over the gold
Step 11: Make a mask and cover the image
Step 12: stamp the flowers from the Sugar Skull sheet
Step 13: use red paint to colour the flowers , green for the leaves.
Step 14: use gold paint for the flower hearts
Step 15:  assemble the shrine


To shop Sin City stamps please visit:  http://sincitystamps.com/
and share your idea's on our Fan Group!
Thanks so much for stopping by.

Copyright Text

Blank Page Muse 2018 Sin City Stamps 2013