To create more depth for the background I used different color inks with the same stamp. This allowed me to stretch my supplies. Let's create something a bit masculine and get a bit grungy!

BPM Stamps:
Cogs & Gears Steampunk Background Rubber Stamp
Hummingbird Steampunk Cogs Gears Stamp
Chicken Wire Mesh Background Texture Art Rubber Stamp by Pam Bray Designs
Shop now and save! Use code "BPMDtKaren2019" to save %15 off your total order!
ink pads (aqua / silver / black), ink blending tool, card stock (black & aqua), mini brads, black marker, gear embellishment, black twine, clear mounting block, card base (5X7")
Other Supplies:
Directions:
1. Selectively apply silver ink to only the corner of the gear background stamp. To avoid leaving a harsh line, blot the edges of the loaded stamp with a tissue to remove some of the ink so that the intensity of the image gradually fades. Stamp the impression onto the corner of black card stock. Repeat process with other corner and set aside to dry.
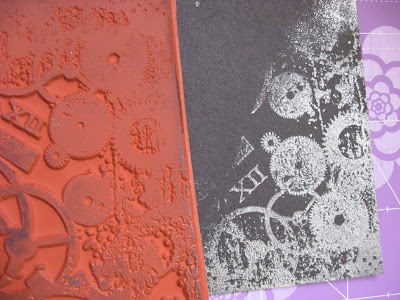
2. Load the entire gear stamp with aqua ink and stamp directly to aqua
paper. Load the same gear stamp with black ink and first stamp onto
scrap paper. The first impression will not be used. Stamp the second generation impression in the corner overlapping the first layer
of aqua stamping. The image will be lighter and create a more
distressed irregular appearance. Add a honeycomb texture stamp randomly to the background using aqua ink. Create more depth to the design by
using more than one color of ink. Use an ink blending tool to gently apply black ink to the edges to create a misty haze. Set aside to dry.


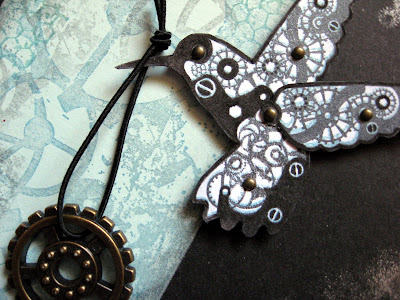
3. Create the embellishment by stamping the steampunk hummingbird onto
white card stock using aqua ink. Reload the stamp with black ink and
stamp over the first design doing your best to align the images. A
perfect line up is not required because you want some of the aqua
impression to peek out adding the appearance of more depth to the gears.
Repeat the process to create another wing for the hummingbird.

4. Carefully, cut out the hummingbirds, assemble the second wing, and add
mini brads to some of the gears. Use a black marker to outline the hummingbird and darken any important details.

5. Adhere the black card stock vertically to the right side of the card
base. Attach the aqua card stock to the left side of the card base leaving a narrow border of black. Add
the completed hummingbird to the center of the card with foam tape.

6. Add a loop of twine to a gear embellishment and hook it around the beak of the hummingbird so that it appears as if the hummingbird is carrying the gear.
Blank Page
Muse Shop http://blankpagemuse.com/
Facebook Fan Page https://www.facebook.com/groups/bla...
Instagram - Shop https://www.instagram.com/blankpage...
Instagram - Blog https://www.instagram.com/blankpage...
Twitter https://twitter.com/BlankPageMuse
Pinterest https://www.pinterest.com/blankpage...
Facebook Fan Page https://www.facebook.com/groups/bla...
Instagram - Shop https://www.instagram.com/blankpage...
Instagram - Blog https://www.instagram.com/blankpage...
Twitter https://twitter.com/BlankPageMuse
Pinterest https://www.pinterest.com/blankpage...
To see more of Karen's projects, visit her blog Art & Soul.
No comments:
Post a Comment
Thank you for visiting and leaving your kind words!
~~~
A note regarding the GDPR and EU ePrivacy Regulation:
Those leaving a comment on any post on this blog do so on the understanding that their name and personal details will be visible to anyone who visits this blog.
People entering a piece of artwork into any competition or giveaway promoted here, they do so in the knowledge that their name and blog link are visible to all who visit this blog and in so doing have published their own personal details and consented to our use of that personal information should it be selected as a winner.
Thank you.