Showing posts with label #madeline faiella. Show all posts

Friday, September 18, 2015

Journal Page with Tamiko

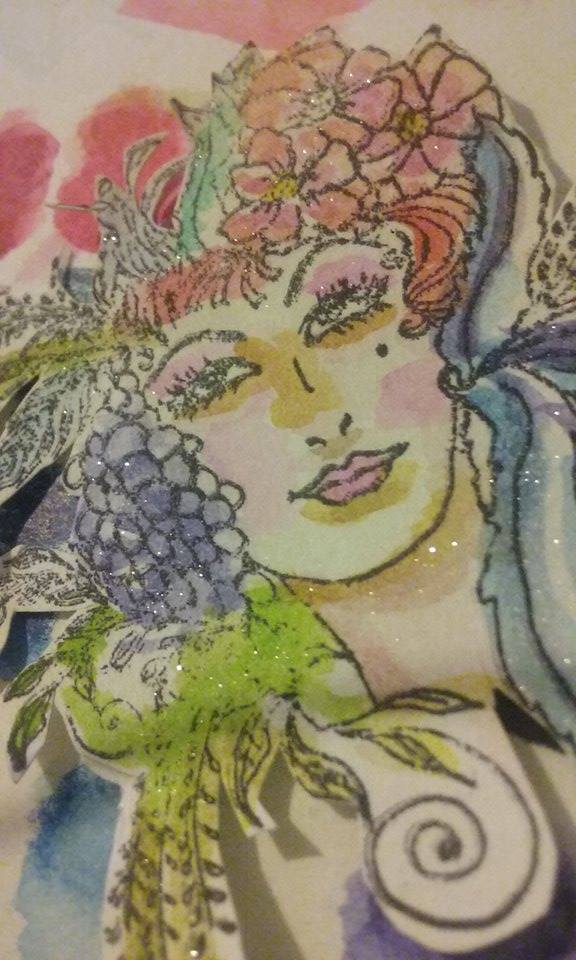
Happy Fridayyyyy!  I will make this fast for you guys!  I created a journal page using the Madame Stamp Set from Sin City Stamps by Madeline Faiella.  I enjoyed creating this page.  I was even inspired further, to create a short story to go with it.  Isn't it amazing how one art project can automatically encourage another.  


The supplies used for this page are:

CottonWood Art Journal
Patterned paper
Clear Gesso
Deco Art Neon Acrylics
Deco Art American Acrylics
Deco Art Media - Matte Medium
Stabilo All Pencil (Blue)
Paint Brushes
Water Brush
small piece of watercolor paper (140lb)
Archival Ink Pad
Deli Paper
Xacto knife


I hope you all enjoyed my journal page and slide show.  I would be happy to answer any questions you may have about my project. Here is one more picture.. to get a close up of the faces. 


Don't forget that Sin City Stamps has had a 20% decrease is stamp sets alone!  
This is NOT a sale, but it IS a BARGAIN!!


 Thank you for for your time!  Have an awesome weekend!!

Friday, June 5, 2015

For YOU Madame... with Tamiko

I have the most wonderful set of stamps by Madeline Faiella over at Sin City Stamps.  The set is full of very feminine women that wear adorned head pieces full of flowers and blossoms of the sorts.  I was very anxious to play and color them.  Here is what I call a shabby chic card using just one of the many images on this rubber plate.


The list of the supplies I used include but are not limited to:

  • Madame Rubber Stamp Plate by Madeline Faiella
  • Ranger Archival Ink Pad- Jet Black
  • Derwent Inktense Color pencils
  • Pentel Water brush
  • Water Color Paper 140lbs
  • Tim Holtz Distress Ink Pad - Vintage photo
  • Tim Holtz Distress Tool
  • Water Mister
  • Prima Card Stock- Ledger and Fairies
  • Helmar Tacky Glue
  • Helmar Tape
  • Misc flowers, lace trim, flatback pearl trim and embellishments
  • Scissors and paper trimmer


Took my chosen image from the plate of stamps and stamped it with archival ink on 140lb water color paper.  I like stamping on water color paper when i know i plan to get my image wet.  This reason also applies to why I use archival ink pads.  Let it dry.


Then I cut my papers and aged the edges with my distress tool and inked them with vintage photo ink pad.  I also misted the papers to move the ink and make the paper appear worn.  Adhered my papers with Helmar snail and Tacky glue.


Added lave trim and stuck it down with Tacky Glue.


I scrub colors on my water color paper and add them to my image with my water color brush.  I do it that way, because I detest seeing pencil lines in my work. I prefer to see light loose colors.  Don't forget to let your image dry.  I also like inktense in this case, because once the color dries.. it's permanent. 


Then I take my Kuretake Wink of Stella Glitter Brush in Clear and go over various parts of my image to give it a little shimmer.


added some embellishments.. they always make everything extra pretty.


Stamped Madame. Voila Shabby Chic Card!

I enjoyed using these images from the Madame Stamp set and you would too!!  Please take a moment to go over to Sin City Stamps and grab them and your other stamping needs!

Thank YOU for stopping by!!


Sunday, December 15, 2013

Joy Tag by Pam Bray


Post updated for the new store links at BlankPageMuse.com

Pam here today on the SinCity Stamps Blog today....can you believe it is 9 days until Christmas but you still  have time to make a few beautiful tags using Mannequin Tags Stamp and Knock on Wood Stamp Sets
https://blankpagemuse.com/knock-on-wood-rubber-stamp-set-sheet/
 I started by cutting out a tags from chipboard and white cardstock using my Tim Holtz Tag Die.
Stamp one of the white pieces with the Knock on Wood Stamp set using Apricot Brown Memories Ink. 
Spray with three different Dylusions Sprays...I used Melted Charcoal, Paintbox Red, and Pure Sunshine...spray and allow each layer to dry til you achieve the depth of color you want....
Stamp two images of your favorite mannequin from the Mannequin Tags Stamp Set, color with two of your favorite markers, fussy cut them out and layer with pop dots....
 Scallop punch the border with a border punch....
 accordion fold the strip to form a dress for the mannequin....
Glue to the top of the mannequin, tie a black sheer ribbon around the waist, fussy cut a holly leaf and add to top of black sheer ribbon, add some metal wings and gear to the stand along with other fun embellishments to dress up your tag. Add your stained binding ribbon to the top.  Have fun making tags this holiday season. Hugs Pammejo
Supplies:
Knock on Wood Stamp
Mannequin Stamp
Teresa Collins Christmas Home Paper Pad
Dylusions Sprays: Melted Chocolate, Paintbox Red, Pure Sunshine
Pearl Pen Silver
Tim Holtz Tag Die and Metals
Paper Studio Metals
Pearl and Red Gemstones
Black Sheer Ribbon
White Ribbon Binding
Tim Holtz Distress Stain: Peeled Paint, Barn Red
Bottle Cap

Copyright Text

Blank Page Muse 2018 Sin City Stamps 2013