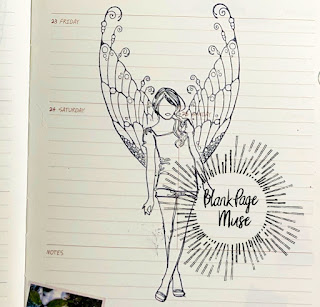
Hello! Welcome back to the BPM blog. Today's post is my second entry to my art journal. If you are curious on my first entry, please check the post, Repurposing An Old Planner-Sunflower Beatiful Botanicals.
I used the following products from Blank Page Muse:

I positioned the girl stamp set on my repurposed planner. I applied adhesive to the back of the rubber stamp using a washable adhesive glue stick. I picked the stamp with a stamp positioner. The one I used is by Fiskars. I inked the stamp and positoned the stamp positioner with the stamp over the page. I pressed the stamp positioner to the page to transfer the image to the page planner.
I restamped the image on a sticky note and fussy cut it to create a mask. If I am going to redo this step, I will use a masking paper instead of a sticky note. The masking paper is thinner than the sticky note. With the thin masking paper, the intricate wing image where it meets the girl image will all be transferred to the page planner.
To stamp the wings, I used a different stamp positioner, the Stamp-a-ma-jig, as seen in the previous photo. I stamped the wings on a transparent sheet first to give me an idea where I want the wings to be stamped. After which, I adhered the wings rubber stamp to an acrylic block using a washable glue stick. Without removing the stamp positioner, I removed the transparent film, butted the acrylic block to the stamp positioner, and stamped the image to the page planner.
I used au unused white board eraser to apply extra and equal pressure to the inked rubber stamp. This just ensures the inked image will transfer to the page planner. The white board eraser is the same as the stamp press that you can buy in the market. Just less fancy.
I inverted the wings by mistake when I stamped it, but I like it this way. It reminded me of the models in the Victoria's Secret Fashion Shows.
I colored the image with Copic markers. If you notice the red plastic, this is a used plastic binder divider which I placed on the back of the sheet I am coloring. This prevents transferring ink from the page I am coloring to the next page since I am not sure how much ink the page sheet can hold.
True enough, the paper does not hold a lot of ink. You will notice some ink bleeding on the girl image's left arm. I used the Copic 0 to push the dark brown ink back to the girl's brown shirt. Next time, I will let the ink dry before coloring with another color group.
I colored the wings with a clear shimmer pen. It is hard to appreciate this in the above photo but you can see the shimmer in the last photo. I added accents to the wings using gel pens.
After I wrote my quote using an acrylic marker, I shaded the blank areas with a brown dye ink. I was also trying to cover up the ink boo-boo I made near the right leg of the girl.
Above is a close up view of the winged girl. I hope you like today's art journal entry.
Visit our social media sites for more stamping fun!
Have a blessed, brilliant and creative day!


.jpg)


No comments:
Post a Comment
Thank you for visiting and leaving your kind words!
~~~
A note regarding the GDPR and EU ePrivacy Regulation:
Those leaving a comment on any post on this blog do so on the understanding that their name and personal details will be visible to anyone who visits this blog.
People entering a piece of artwork into any competition or giveaway promoted here, they do so in the knowledge that their name and blog link are visible to all who visit this blog and in so doing have published their own personal details and consented to our use of that personal information should it be selected as a winner.
Thank you.