Hi There!
I love creating unique backgrounds because it is so much fun to emboss and then watch as the image pops out once you apply ink over it. You can easily create beautiful backgrounds by repeatedly stamping a single design and then heat embossing the image. Use a sponge applicator to add 2-3 shades of pigment inks over the embossed design. Go ahead and have a little playtime...you can build up a stash of backgrounds to pull out when you need that last minute card.
Supplies:
- Art Journaling #2 Rubber Set (Sin City Stamps)
- Inhale Exhale Art Stamp Sheet (Sin City Stamps)
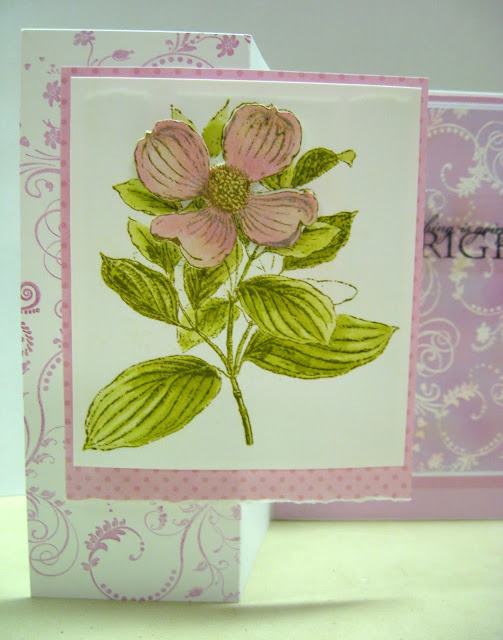
- Flower on Stem Art Rubber Stamp (Sin City Stamps)
- Watermark Ink Pad
- White Embossing Powder
- Heat Gun
- Anti-Static Bag- or cloth bag of cornstarch
- Pigment Inks / Sponge Applicator
- White & Pink Cardstock
- Pattern paper scraps
- Water Color Paints / Waterbrush
- Dimensional Foam Pads
- Permanent Black Ink Pad
- Transparency (vellum)
- Card base (5x7")
Directions:
1. Fold the front panel of a white card base in half vertically. (Z-Fold Card)
Stamp the flourish repeatedly on the left half of the card front with pink pigment ink.
Stamp the flourish repeatedly on the left half of the card front with pink pigment ink.


4. Stamp the flower image twice with green pigment ink. Use watercolor paints to shade the leaves on one image. Next, paint the petals of the second image and fussy cut. Assemble the flower with dimensional foam tape and matte with patterned paper. Tear the lower edge of the matte.

(TIP: After applying ink over the embossed design, wipe the entire image with a facial tissue to remove any small beads of ink that are clinging to the heat set powder. The slick plastic surface of melted powder will resist absorbing the ink and will remain wet leading to the possibility of transfer to your fingers or smudging and ruining your project.)
6. Adhere the matted flower image by applying adhesive only to the left front half of the panel.


A Closer Look:


Sin City Stamps:


To purchase these stamps, please visit www.sincitystamps.com
For more inspiring paper-craft projects from the Design Team, be sure to visit us at the
To learn more about our designer Karen, please visit her blog, Art & Soul.
Thanks for visiting!
Thanks for visiting!
Beautiful card
ReplyDeleteBreathtakingly STUNNING Karen - I'm just AWED. Xj.
ReplyDeleteBeautiful
ReplyDelete