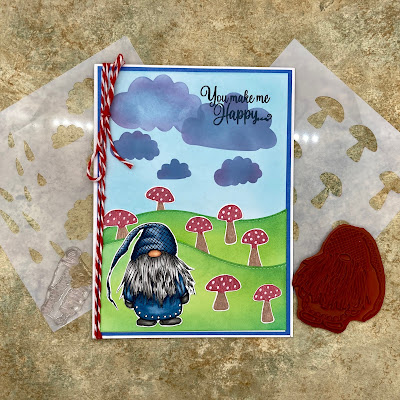
Hello! Welcome back to the BPM blog. I created a scene using BPM products. I added some ink blending to make the panel vintage looking.

The Blank Page Muse products I used on this panel are:
- World Map Hot Air Balloon Steampunk rubber stamp
- Wildflower Silhouette Border Style red rubber stamp
- Clouds & Drops 5x5" Mixed Media stencil
I trimmed a 4 1/4" x 5 1/2" white cardstock. I placed the cardstock on a sticky mat which is on top of a rotating platform. The sticky mat keeps the paper in place while I ink blend. The rotating mat gives me more freedom on blending since instead of lifting the paper off the sticky mat, I just rotate the platform.

I positioned the stencil over the white cardstock. I covered the open areas of the stencil with Post-it paper so I do not apply ink where I don't want it. I started off with a small blending brush.

I later switched to a softer, larger brush. I used oxide ink for the cloud. It is recommended to use a different brush for oxide inks. I totally forgot about this. Plus, I don't have a lot of brushes to work with in my stash. I just go by colors and clean the brush in between use.

I overlapped the clouds, applying ink heavily on the bottom part of the cloud.

I stamped the hot air balloon on a clear plastic which helped on the placement of the hot air balloon on the panel. I used a stamping positioner tool to stamp the hot air balloon on the panel.

I inked the hot air balloon with a black ink.

I pressed the stamp to the paper. The great thing about using a stamp positioner is you can re-ink and re-stamp the image on the same spot.

I stamped the hot air balloon over the clouds.

I applied washable glue to the back of the wildflower stamp to temporarily adhere this to the stamping tool. This is how I also adhered the hot air balloon to the stamping tool.

Just like with the hot air balloon, I stamped the wildflower on the clear plastic to help me with placement of the widlflower on the scene.

I slipped the panel underneath the plastic film and moved the paper until I found the place where I want the wildflower to be stamped on. I secured the paper with magnets.

I inked the stamp with a black ink.

I pressed the inked stamp to the paper.

I used a stamp press to add even pressure to the stamp. And since I used a stamping tool, I can re-stamp this image again if I need to. I set the panel aside while the ink dries. You can heat set this if you want to speed dry it.


To add color to the hot air balloon, I created a mask. I stamped the hot air balloon on a Post-it Note.

Using a craft knife, I cut an x on the center of the hot air balloon.

I cut off the inside of hot air balloon to create the stencil.

I adhered this DIY mask on the panel, lining up the opening with the hot air balloon. I blended a different blue ink on the hot air balloon.

I colored the basket with a gray color pencil to keep the monochromatic look of the panel.

I blended a darker brown ink on the edges for a more vintage look.
I hope you like today's project. This is another great way to stretch those silhouette stamps.
Visit our social media sites for more stamping fun!
FB Fan Page- https://www.facebook.
Instagram Shop- https://www.instagram.
Instagram Blog- https://www.instagram.
Twitter- https://twitter.com/
It's back! Blank Page Muse is generously offering a 15% discount to their online store to YOU, my blog readers. Just use the code BPMMaria when you check out. Enjoy!