Showing posts with label Inhale..Exhale stamp set. Show all posts

Wednesday, July 17, 2019

Faux Postage Stamps

Hello!  Susie here with my very first project for Blank Page Muse!

I have a little bit of a fascination for postage stamps so I thought I would take a crack at creating my own faux stamps. Nature is a common theme in postage stamps and a quick perusal of my stash produced a hummingbird stamp.
Time to play...


Supplies:
Hummingbird on Branch from the Inhale...Exhale Art Stamp Sheet Set SC87
Watercolor paper
Postage stamp die
Permanent, waterproof black ink- Ranger Archival was used for this project
Pigment inks - ColorBox Blends from Clearsnap were used for this project
Paintbrush
Water
Washi tape
Stamping platform
Pen - permanent black ink, superfine tip
Xyron Sticker Maker
Craft mat


Use a stamp platform to stamp the hummingbird onto a piece of paper with waterproof with permanent black ink.


Die cut a piece of watercolor paper with a postage stamp die from my stash.  Remove the die cut and   positioned the frame so that you can see the hummingbird through it, then use magnets to hold it in place.


Replace the die cut stamp in the opening so that it covers up the previously stamped hummingbird.


The die cut stamp was also embossed so there was a slightly raised area in the center.  I used washi tape to mask off the edges.


Re-ink the stamp with black, waterproof permanent ink and proceed to stamp the hummingbird.


Remove the washi tape to reveal the hummingbird image centered on the postage stamp die cut.


Next, add a rainbow array of inks onto your craft mat. Use this as a palette to custom mix your colors.


Use a permanent black ink pen to add USA and 15 cents.


Finish them off by adding adhesive to the back of each stamp with a sticker maker or double stick tape.


I love the way they turned out!  I can see using these as embellishments on cards, ATCs, and mini albums!

Thanks for stopping by and I hope you find some time to play today!
Susie


Looking for more inspiration?
Click the links below!


Wednesday, January 23, 2019

Vintage Meets Modern Valentine's Card


 Hi everyone! Charlotte here, and today I have a Valentine's Card to share with you. With this card I combined vintage and modern using an image with a vintage feel along with a more modern and graphic background design. 

Blank Page Muse products used:

Other materials:
White card base
Scrap paper and repositionable adhesive, or masking paper
Stamp platform and/or stamping blocks
Small brayer
Black ink
Two shades of teal ink
Alcohol markers or other coloring medium of your choice
Scissors
Paper cutter with scoring blade, or other scoring tool of your choice

Instructions:
Begin by positioning the image stamp in your stamping platform. When I'm stamping directly onto my card base I like to stamp first onto a piece of acetate laid over it, so that I can be sure the position is correct before committing to stamping on the card.

Use black ink, ensuring it is safe for use with your chosen coloring medium, stamp the image onto the card base. When using a particularly large or intricate stamp it can be helpful to run a brayer over it to ensure that it stamps evenly and no areas are missed.
Stamp the image again, this time onto a piece of scrap paper or masking paper. Fussy cut the image out. If you are using scrap paper, apply a repositionable adhesive to the back to create a mask. 
Position the mask over the image on the card base. The mask will allow us to add further stamping around the image without getting any of it on the image itself. Masking is a great technique when making one layer cards like this one.
Using the "forever" sentiment from the Romance Classic Couple set, stamp repeatedly across the card base with a medium shade of teal ink. Continue until the card base is covered. For extra interest, use the small "forever" sentiment from Inhale... Exhale with a lighter teal ink in a few random places between the larger words.
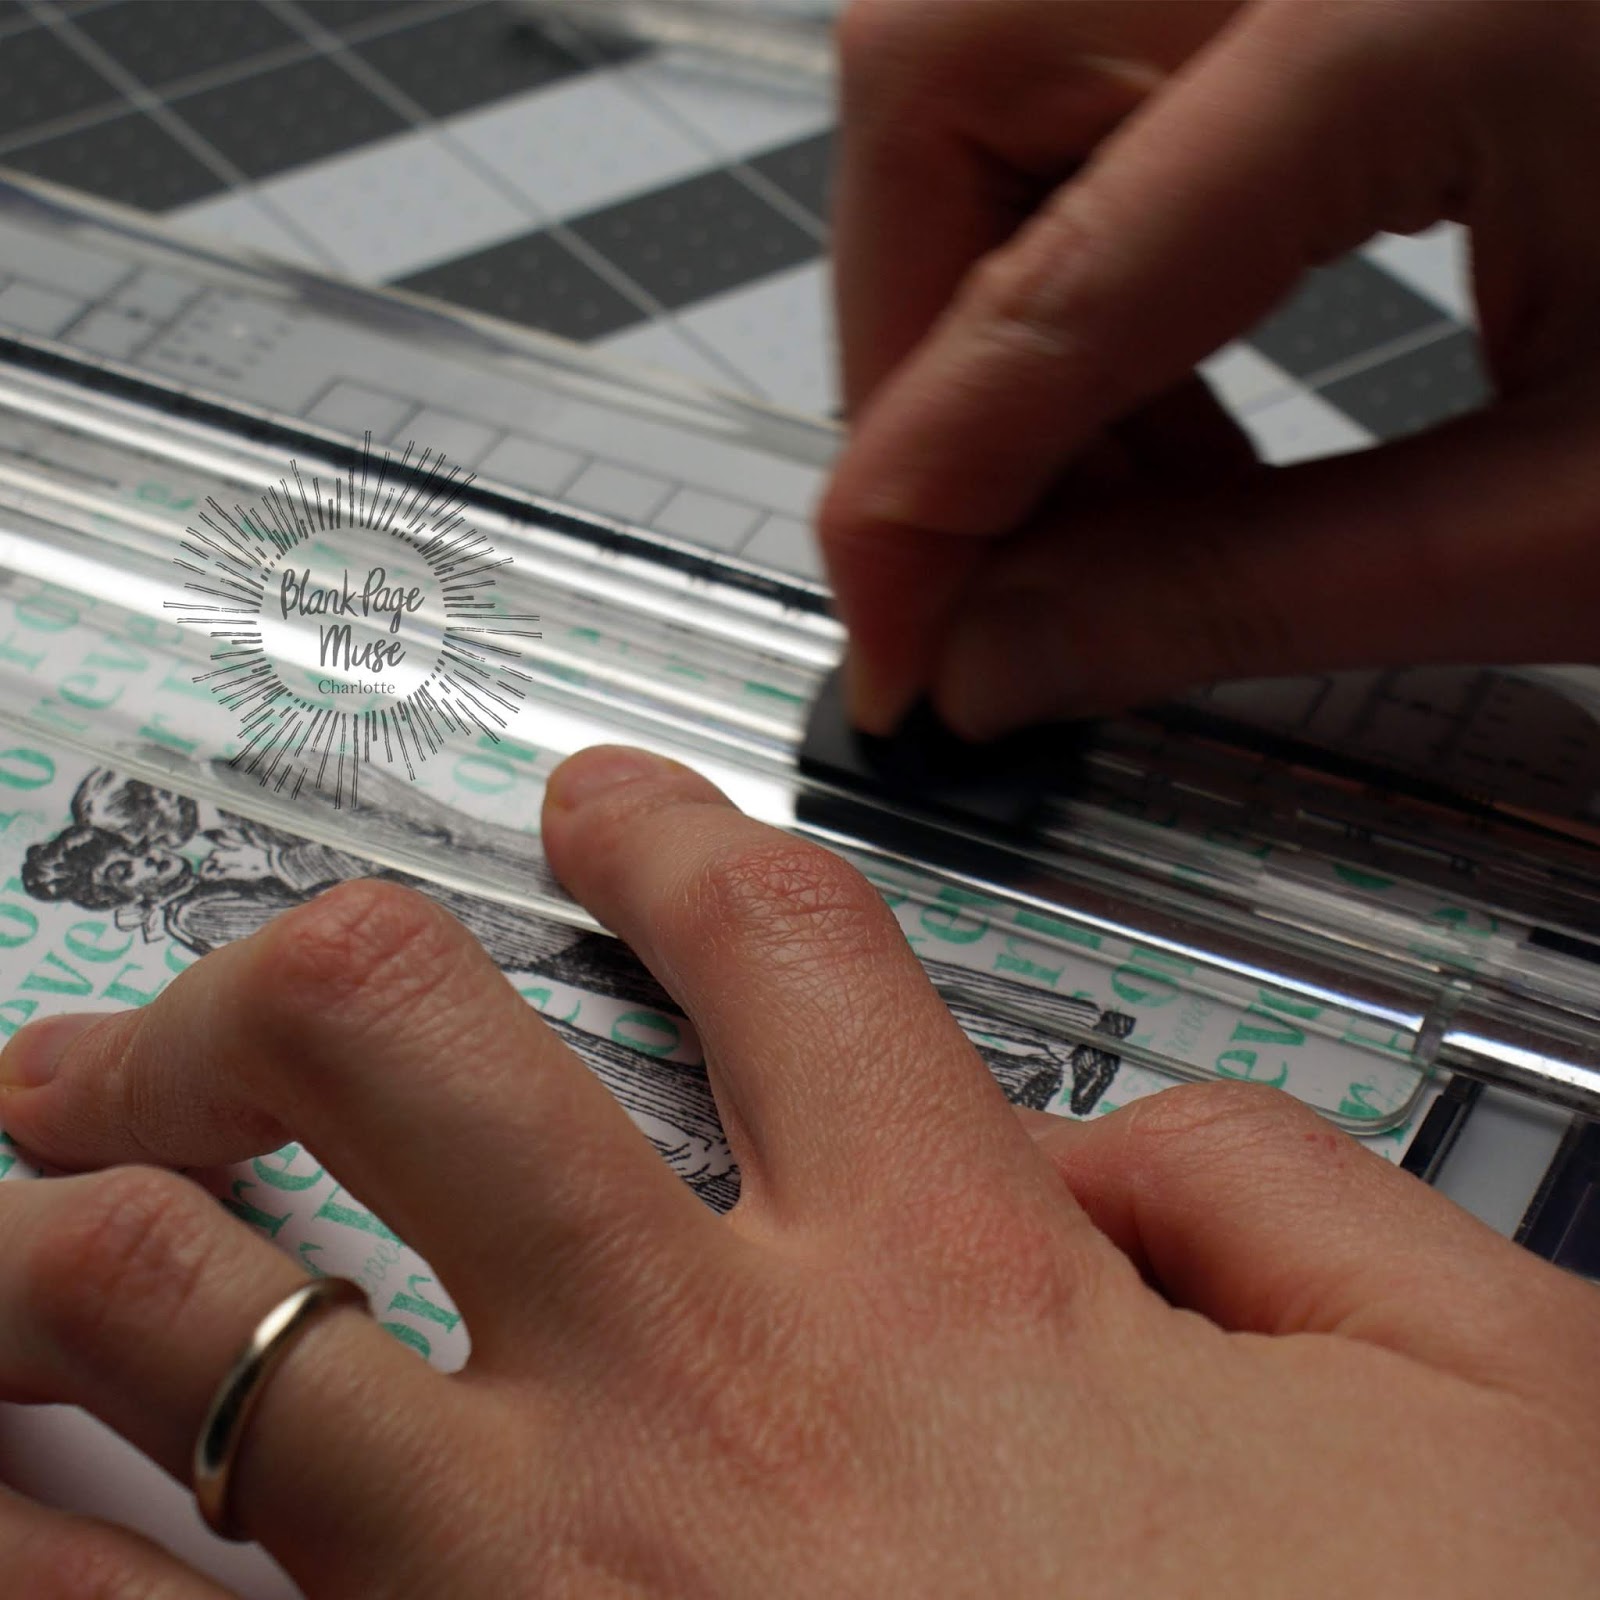
 Placing the card base into your paper cutter use the scoring blade to add a scored frame around the edges of the card. You could also use a score board for this.
Place the card base back in your stamping platform and position the larger sentiment centrally below the image. Stamp again, this time with black in, to create the focal sentiment of the card.

After removing the mask from the image, use alcohol markers (or other coloring medium of your choice) to add color to the image. As the line art of the image is so detailed it is not necessary to add detailed shading, though you can if you like.

I hope you enjoyed this one layer Valentine's card. Repeated stamping of a word or phrase can be a great way to add an interesting background to a card, and by masking the image it can remain all one layer making it easier to mail. Whilst I made this as a Valentine's card it could also work for an anniversary or even a wedding card. The technique could even be adapted to work for any occasion - how about switching to a "happy birthday" sentiment for a fun birthday card? 


Looking for more Inspiration?

Click the links below!


Monday, January 15, 2018

Turquoise Owls Mixed Media Tag

Hi all

Today's project is a combination of owls and turquoise two of my favorite things!

Product list

Michelle's Owls 
Pam's Background Grunge
Inhale...Exhale Stamp Set
Turquoise paint and ink
Black ink pad
Colored markers
Gesso
White card
Cheese cloth
Glitter
Micro beads
Cabochons
Buttons
Adhesive


Start off by coating the tag in gesso and then once dry apply a coat of paint. 
Stamp over the tag using the Background Grunge stamp set.


Stamp out the owls and sentiment onto card stock and color in.


Repeat the step for each owl you wish to use and then cut them out.


Dye cheese cloth with ink and let dry  before adhering it to the tag.
Cut out the owls and position them onto the tag before sticking them down.


Add a few clusters of glitter and micro beads around the owls and edges of the tag.


Add a few buttons and cabochons and finish off the tag with a sentiment.


Thank you for visiting and feel free to pop in to our fan group over at Facebook


Saturday, May 13, 2017

Embossed Resist Card Background

Hi There!
I love creating unique backgrounds because it is so much fun to emboss and then watch as the image pops out once you apply ink over it. You can easily create beautiful backgrounds by repeatedly stamping a single design and then heat embossing the image. Use a sponge applicator to add 2-3 shades of pigment inks over the embossed design. Go ahead and have a little playtime...you can build up a stash of backgrounds to pull out when you need that last minute card.
Supplies:
  1.  Art Journaling #2 Rubber Set (Sin City Stamps) 
  2.  Inhale Exhale Art Stamp Sheet (Sin City Stamps) 
  3.  Flower on Stem Art Rubber Stamp (Sin City Stamps) 
  4.  Watermark Ink Pad
  5.  White Embossing Powder
  6.  Heat Gun
  7.  Anti-Static Bag- or cloth bag of cornstarch
  8.  Pigment Inks / Sponge Applicator
  9.  White & Pink Cardstock
  10.  Pattern paper scraps
  11.  Water Color Paints / Waterbrush
  12.  Dimensional Foam Pads
  13.  Permanent Black Ink Pad 
  14.  Transparency (vellum)
  15.  Card base (5x7")
Directions:
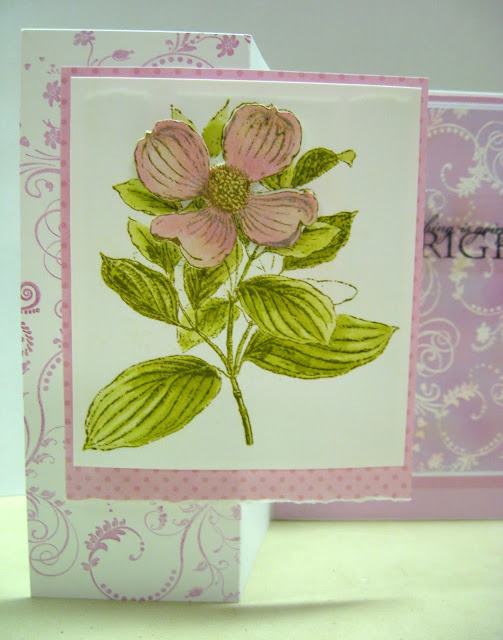
1. Fold the front panel of a white card base in half vertically. (Z-Fold Card)
Stamp the flourish repeatedly on the left half of the card front with pink pigment ink.

2. Adhere pink cardstock to the inside panel leaving a narrow white border.
3. Wipe white cardstock with an Anti-Static Bag (or cloth bag of cornstarch) to prevent static cling attracting stray grains of embossing powder to speckle the paper. Stamp the flourish stamp repeatedly with Perfect Medium. Be sure to overlap the edge of the paper and to rotate the stamp with each new impression to fill the page with a random design. Apply white embossing powder, remove the excess powder, and heat set.

4. Stamp the flower image twice with green pigment ink. Use watercolor paints to shade the leaves on one image. Next, paint the petals of the second image and fussy cut. Assemble the flower with dimensional foam tape and matte with patterned paper.  Tear the lower edge of the matte.
 5. Apply pigment ink over the embossed design with a sponge applicator. Matte with white cardstock.
(TIP: After applying ink over the embossed design, wipe the entire image with a facial tissue to remove any small beads of ink that are clinging to the heat set powder. The slick plastic surface of melted powder will resist absorbing the ink and will remain wet leading to the possibility of transfer to your fingers or smudging and ruining your project.)
6. Adhere the matted flower image by applying adhesive only to the left front half of the panel.

7. Use permanent black ink to stamp a sentiment onto transparency. Apply a small amount of adhesive to discreetly attach it. (TIP: Cut the transparency longer than the image in order to fold the excess, add adhesive to the flaps, and attach it behind the stamped background panel.)


A Closer Look:


Sin City Stamps:

To purchase these stamps, please visit www.sincitystamps.com

For more inspiring paper-craft projects from the Design Team, be sure to visit us at the

Sin City Blog  and follow us on Facebook.
You can also join our Fan Page HERE.

To learn more about our designer Karen, please visit her blog, Art & Soul.
Thanks for visiting!

Saturday, May 6, 2017

Dare To be Different Journal Page

Hello There!
Today I would like to share this Journal page with you.
 It was made using a variety of Sin City Stamps!

This Journal page was so much fun!
 The Sin City Stamps used here are (butterfly) Love of Butterflies Collection and the sentiments are from the Inhale Exhale collection.
Head over to Sin City Stamps to get these and so many others!!

 Art Journaling is a great way to be messy with your Art.
 There are endless possibilities and no right or wrong way to do it!
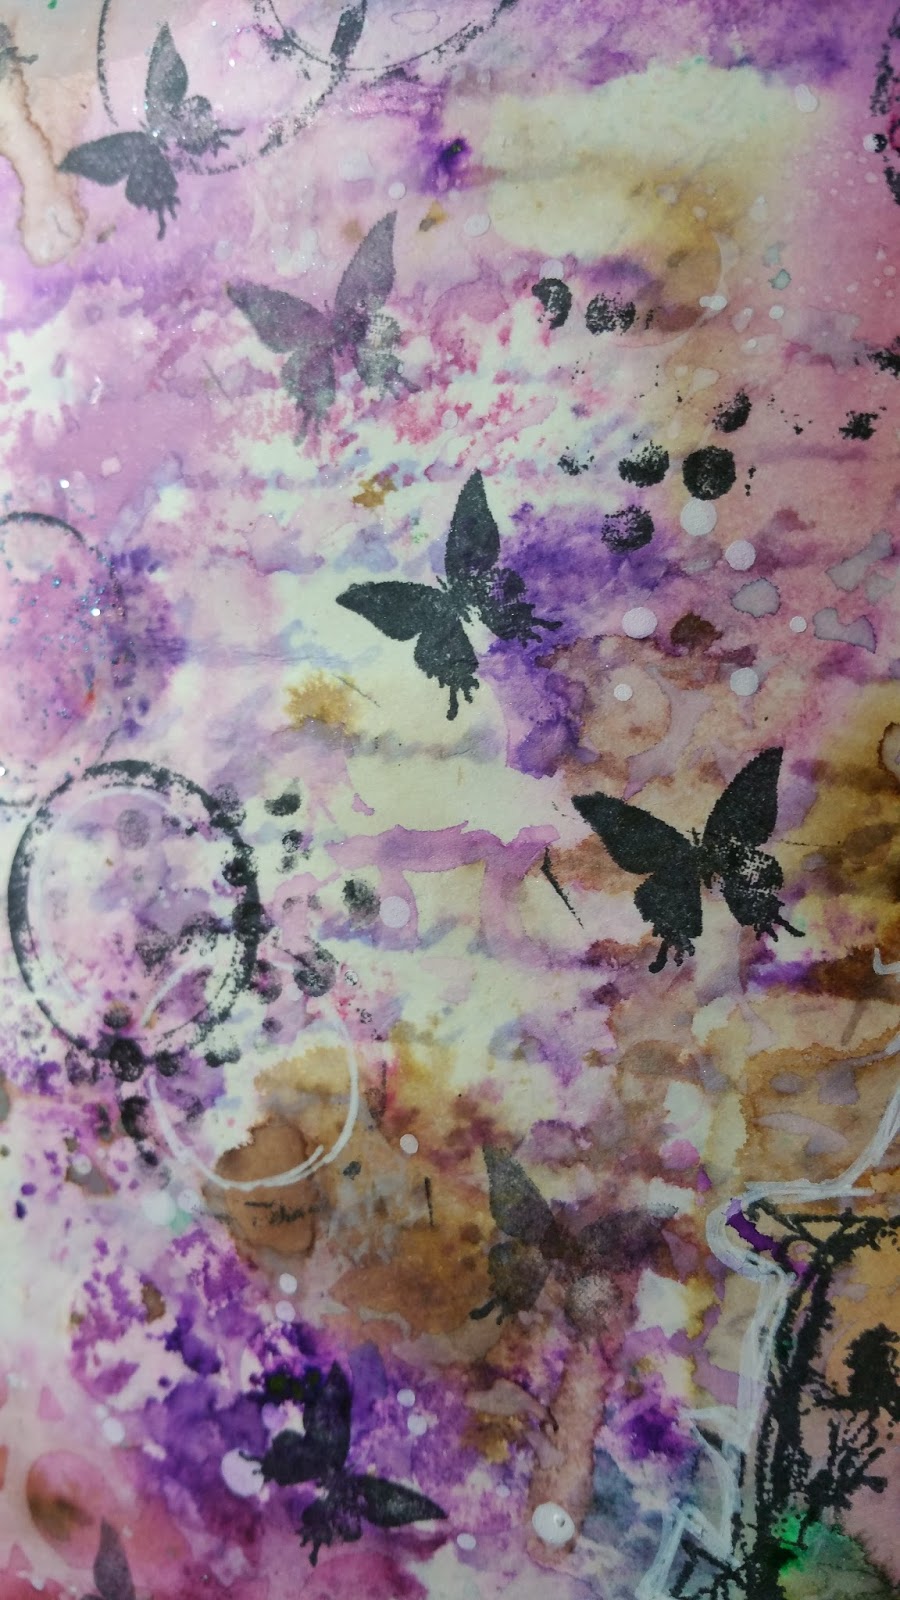
 For this page, a basic background was created by picking up ink from a craft sheet that was sprayed with water lightly.
Random stamping of butterflies was done using black archival ink.
*Tip for stamping...Apply a generous amount of ink to your stamp and continue stamping until it is all used. This will give you that "fade-out" effect you see here.


Apply spray ink in colors of your choice both alone, and through stencils. 
*Tip for background...when using stencils, turn the stencil over to the reverse and lay on your page. Then lightly spray with water and blot dry with towel or paper towel. 
This is another way to get that "shadowed" look as in the white circles above.

Once you have completed stamping and stenciling, go back over some things by outlining with a white gel pen to enhance.
 Splatter a bit of white acrylic paint.
For the outline of this page a journal block was used to create the wavy lines all around the outside of pages.
 A texture stamp was then stamped in black in the empty spaces.
The lines were enhanced using a black watercolor pencil and then a white marker.
I hope you enjoyed this page and it has inspired you to get some stamps, stencils and inks and create!!

Wednesday, February 15, 2017

Love speaks without words - Art journal page


Hello Everyone,
Shilpa here,

It is a great pleasure to share my first creation here at SinCity Stamps blog, today.
I have created this as a journal page, but you can also use this for a tag or greeting card.

Supplies Used:
SinCity Stamps set - Romance
SinCity Stamps set - Inhale-exhale 
Mixed Media Paper
Flower Decoupage napkin
Mod Podge
Washi tapes
Red ink pad
White Gesso
Iridescent water colors
Black Archival ink


Step 1
Adhere flower design decoupage napkin onto the mixed media paper using Mod Podge.


Step 2
Apply thin layer of white Gesso to the whole surface. Let it dry completely.
Next, color the flowers and leaves with your water colors.


Step 3
Stamp the couple image with  black archival ink on watercolor paper and color it with the water colors.


Step 4
Adhere washi tapes in the middle of page to create a base for Couple's image.


 Step 5
Adhere couple's image on washi tape, also add threaded button as an extra embellishment. 
Stamp sentiment "Love speaks without words" with black  ink.


Step 6
Finish your page by using a stencil and your red ink to randomly add a patterns on the surface of the journal page.

Thanks so much for stopping by.
To purchase these stamps please visit http://sincitystamps.com/
Follow us at Facebook page for more inspiration and new announcements!

Copyright Text

Blank Page Muse 2018 Sin City Stamps 2013