I have a little bit of a fascination for postage stamps so I thought I would take a crack at creating my own faux stamps. Nature is a common theme in postage stamps and a quick perusal of my stash produced a hummingbird stamp.
Time to play...
Supplies:
Hummingbird on Branch from the Inhale...Exhale Art Stamp Sheet Set SC87
Watercolor paper
Postage stamp die
Permanent, waterproof black ink- Ranger Archival was used for this project
Pigment inks - ColorBox Blends from Clearsnap were used for this project
Paintbrush
Water
Washi tape
Stamping platform
Pen - permanent black ink, superfine tip
Xyron Sticker Maker
Craft mat
Use a stamp platform to stamp the hummingbird onto a piece of paper with waterproof with permanent black ink.
Replace the die cut stamp in the opening so that it covers up the previously stamped hummingbird.
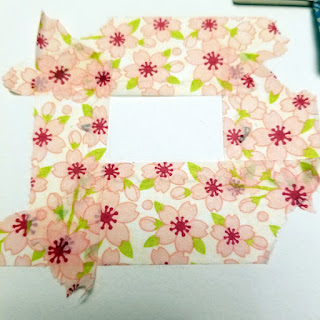
The die cut stamp was also embossed so there was a slightly raised area in the center. I used washi tape to mask off the edges.
Re-ink the stamp with black, waterproof permanent ink and proceed to stamp the hummingbird.
Remove the washi tape to reveal the hummingbird image centered on the postage stamp die cut.
Next, add a rainbow array of inks onto your craft mat. Use this as a palette to custom mix your colors.
Use a permanent black ink pen to add USA and 15 cents.
Finish them off by adding adhesive to the back of each stamp with a sticker maker or double stick tape.
I love the way they turned out! I can see using these as embellishments on cards, ATCs, and mini albums!
Thanks for stopping by and I hope you find some time to play today!
Susie
Looking for more inspiration?
Click the links below!


These are so fun! We really have to try a swap again! Thanks so much Susie!
ReplyDeleteKim
Thank you - I would LOVE to swap!
DeleteLove this, Susie!!! Thanks so much! I really think I can do this one!
ReplyDeleteYou can absolutely do this! I would love to see how yours turn out!
DeleteGreat idea!! love all the colors.
ReplyDeleteThanks Karen - playing with the colors was one of my favorite parts!
Delete