Showing posts with label Distress Markers. Show all posts

Wednesday, April 5, 2023

Mini Stamps Big Impact

Hi Chris here today sharing this cute Easter tag using the mini stamp from the Anime Fairies 2 Stamp set.  


Supplies needed to create this tag:
Manilla Tag
Sin City Stencil Template #20
Tim Holtz Distress Inks -Old Paper, Walnut Ink
Tim Holtz Distress Markers- Spiced Marmalade, Wild Honey, Pickled Raspberry, Shaded Lilac, Stormy Sky
Embossing Folder-Darice
Sizzix Die- bunny
Vellum
Staz-on Ink
Copic Markers - B24, Y15, YR04, R04, V06
Scenic Route Stickers
Ribbon
Liquid Pearls


I started by inking over the Stencil #20 template using the Old Paper Distress ink.


I then embossed the tag with my embossing folder. A little hint, I partially cut along the fold of the embossing folder just enough to allow the tag to slip through the embossing folder.

 Here is the result.

I then stamped some mini flowers on the embossed image using the mini flower stamp from the Anime Fairies 2 collection.  I used the Distress markers to color directly on the stamps .  I stamped the flowers in multiple colors.  I added Liquid Pearls to the center of each flower. 


I then stamped the mini butterfly from this set onto vellum with Staz-on and then colored the back sid of the image with Copic markers. After fussy cutting the butterflies I attached them to the tag. 


I trimmed off the bottom of the tag that was not embossed.  I die cut out the bunny and inked edges of the bunny with Walnut Distress Ink and added the bunny to the bottom of the tag.


I added some ribbon and Baker's twine and matted the tag on card stock to finish off the tag.

 I had so much fun creating this tag I decided to use the same techniques and stamps to create this card.
I sprayed Glimmer Mist all over the tag.  After embossing the tag I "painted" the vines and flowers with distress ink and my water brush.  The butterflies were stamped on cardstock and then punched out with the Martha Stewart butterfly punch.  I  layered the flowers from Petaloo with Fabri-Tac from Beacon Adhesives and added microbeads to the centers of the flowers using Gem Tac from Beacon Adhesives. I hope you are inspired to create some project using mini stamps.

Looking for more Inspiration? Click the links below!
The Blank Page Muse Shop https://blankpagemuse.com/

Sunday, June 2, 2019

Snarky Mad Hatter Postcard Greetings

I love Alice in Wonderland so when Kim brought these Alice in Wonderland stamps by Rick St Dennis to Blank Page Muse stamps into the store then were immediately on my MUST HAVE list! 
 I think  they are perfect for this month's post card challenge. 

Blank Page Muse Supplies 
Other Supplies
Postcard
Distress Markers
Snarky Sentiment stickers


Stamp the Mad Hatter from the  Alice in Wonderland stamps by Rick St Dennis  onto a postcard. 


Stamp Chicken Wire Mesh  over the background.

 Color image and background with Distress Markers and Water brush.
 Add Snarky Sentiment to finish your postcard!


Follow us 

The Blank Page Muse- https://blankpagemuse.com/


Monday, March 18, 2019

Be Fierce

We recently lost my grandma and I had the pleasure of being by her side at the end of her journey.  Towards the end, she was becoming afraid to be alone, mostly that no one would come when she called.  As I was talking to her, I told her to be fierce like a lion or dragon. ROAR so that they would hear her.  We even practiced roaring together!  I reminded her it was OK for her to ask the staff for things when she needed them! She continued her roar until close to the end. This project is my tribute to her.  Reminding me to fight and speak up for those who cannot speak for themselves! 

Blank Page Muse Supplies
Magnificent Clockwork Dragon Steampunk Line Art Rubber Stamp designed by Rick St Dennis 

(Shop now and save! Use code BPMDtChris2019 to save %15 off your total order!)

Other  Supplies
Distress Markers and Water Brush
Distress Inks
Graphic 45 Botanicabella papers
5x7 Canvas
Decoupage Medium
Archival Ink

Ink Graphic 45 paper and adhere onto 5 x 7 canvas. Sand edges.  It is ok if some paper pulls off.  Set aside.


Stamp Magnificent Clockwork Dragon Steampunk Line Art Rubber Stamp designed by Rick St Dennis  with Archival Ink onto water color paper.

Tear paper edges.  Color dragon with Distress markers. 


Ink torn edges.  Mat onto Graphic 45 paper and attach to canvas to finish.


I hope you enjoyed this project. Be sure to Follow us for more inspiration
The Blank Page Muse- https://blankpagemuse.com/


Saturday, March 2, 2019

Keep Room For the Unimaginable

Greetings!  Chris here today and I am sharing this "under the sea" watercolor card.  I just love Mermaids -   the legendary half-human, half marine creatures and the Blank Page Muse Mermaids & Flower Fairy Art Rubber Stamp set designed by Rick St Dennis are so fun!

Blank Page Muse Supplies 
Blank Page Muse Tall Ship with Sails Art Rubber Stamp

(Shop now and save! Use code BPMDtChris2019 to save %15 off your total order!)

Other Supplies
Watercolor paper
Distress inks and markers
Archival Ink
Water Brush
Stickles
Sticker Greetings

Create the background by stamping distress ink onto a non-stick surface and pressing watercolor paper directly into inks. Let Dry.


Stamp Blank Page Muse Tall Ship with Sails Art Rubber Stamp onto dry background with Archival Ink and attach to card base. 


Stamp the Mermaid from Blank Page Muse Mermaids & Flower Fairy Art Rubber Stamp set designed by Rick St Dennis onto watercolor paper and fussy cut image. Color the image with Distress Markers and a Water Brush.  


Add Stickles to the mermaids jewelry.  


Attach mermaid to card and add a sticker greeting to finish!

Be Sure to follow us for more great ideas! 
The Blank Page Muse- https://blankpagemuse.com/


Wednesday, December 26, 2018

The Joy of Christmas card


Hi everyone,
I hope you all had a lovely Christmas.  I wanted to show you one of the Christmas cards I created this year.  Although Christmas is over, you can use this technique year round.
You don't need a ton of stamps to create a beautiful card.  This lovely  card uses just one stamp.
Blank Page Muse Products used:
Holly and Branches Stamp

Other Products Used:
Distress Markers
Distress Ink- Pumice Stone
Emerald Creek Embossing Powder in Charred Gold
Tim Holtz Holiday Words Script Die and Funky Festive
Chipboard Doily Gypsy Soul Laser Cuts
Stamp Platform
Circle Punch
Ribbon
Cardstock
Adhesive

Start by trimming your card to the size you want it to be or use a precut card.
Mount your stamp to your stamp platform.  Color the stamp using various markers.


Don't be afraid to layer your colors.  The leaves will all turn out just a tad different and add a more realistic feel to your card.  If the marker dries as you are coloring just breathe on the stamp and it will rehydrate the ink.

Cover the entire piece of the card.  Once the holly is all stamped cover the entire card with a bit of Pumice Stone Distress Ink to age it.  


Mount the base to the card.  Add a bit of ribbon.  
Punch a circle out and color it using a bit of Pumice Stone Distress Ink.  Use the outer ring of the Gypsy Soul Laser Cuts Doily and emboss it.  Attach the doily to the circle.  Attach the circle to the card. 
Use the Tim Holtz Script to die cut the word "joy" and adhere it to the center of the circle. 
Add some holly cut from the Festive Funky die set to finish off the corner. 


This will be my final monthly post for Blank Page Muse.  I have so enjoyed my time with the team over the past year.  I absolutely love the product, so this will not be the last you see of me!
Have a wonderful New Year,


Friday, October 26, 2018

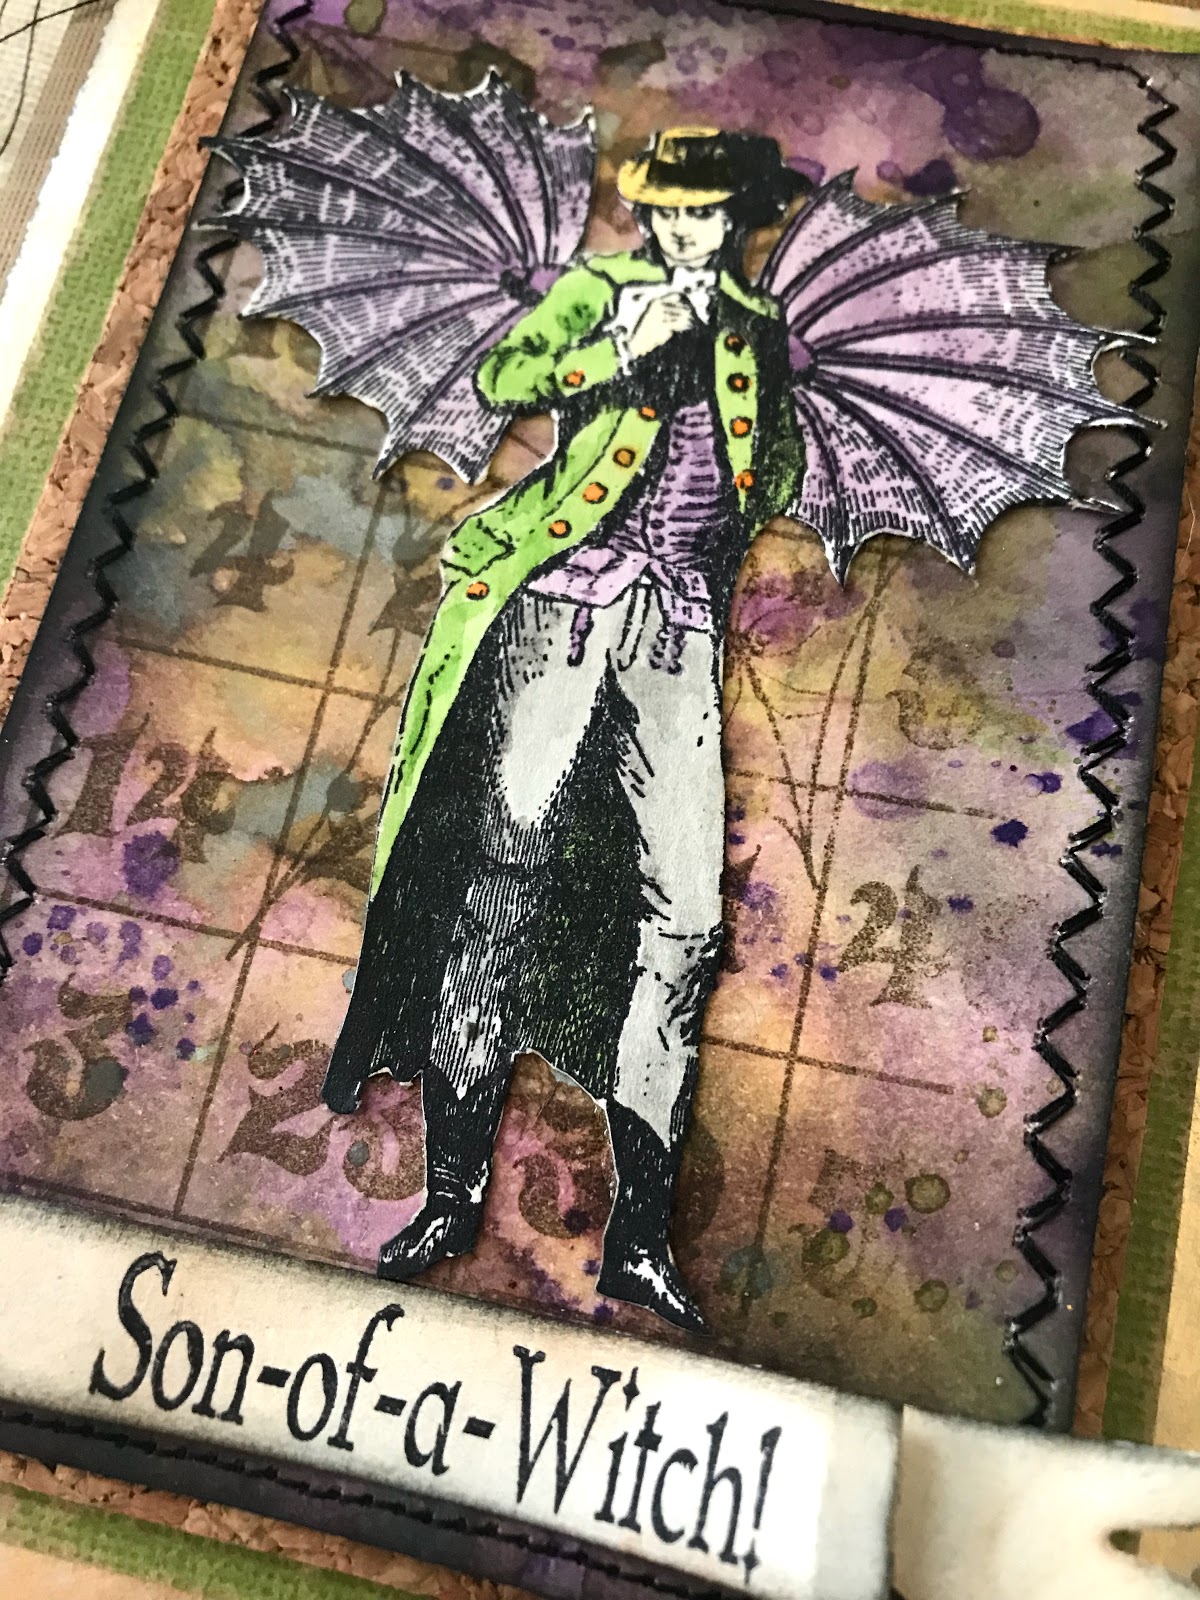
Son of a Witch!

'Tis the season for witches, but let's not forget the Warlocks! This dapper dude just screams Halloween to me.


Blank Page Muse Products Used:
Steampunk Gentleman
Halloween Bingo Board
Oh, Son-of- a-Witch

Other Products Used:
Distress Inks in Seedless Preserves, Wilted Violet, Shaded Lilac, Twisted Citron, Mowed Lawn Crushed Olive, and Black Soot
Distress Oxide Ink in Hickory Smoke
Distress Markers in Mowed Lawn, Dried Marigold, Hickory Smoke, Antique Linen, Dusty Concord, and Mustard Seed
Archival Ink in Jet Black and Coffee
Sizzix Die Tattered Banners
Cardstock
Adhesive
Waterbrush
Sewing Machine

On your craft mat smoosh on the purple shades of ink and run your paper through so the entire surface is covered. Wipe your ink up( wipe ink up between each layer)  Dry the base layer and smoosh more purple on the craft mat to get splats and dots. Dry this layer.

 Smoosh greens on the craft mat and tap the paper into the ink.  Don't rub or you'll get mud.  Dry the greens.

Smoosh on Hickory Smoke Oxide ink and tap the paper into the ink.  Let this layer air dry.  It's important to let the Oxide air dry to get the oxide effect.  Stamp the Halloween Bingo Board on the background using archival ink.  Edge the paper with black soot ink.  Stitch all around the edge of the cardstock.
Cut out the banner and stamp on the Oh, Son-of- a-Witch stamp.  You can alter your stamps by either not inking the word or snipping the saying apart.  For this card the "oh" wasn't used.  Stamp the saying onto the banner.  Adhere the banner to the bottom of the background. 


Stamp the Steampunk Gentleman on heavy watercolor cardstock.  Color in the gentleman using a waterbrush and Distress Markers.  Cut out the gentleman and then ink all the edges with black soot ink.  Glue the Steampunk Gentleman to the background.


The rest of the card is just layered up with various cardstocks.


Thanks for coming by!
Please visit the following for more inspiration!


Copyright Text

Blank Page Muse 2018 Sin City Stamps 2013