Showing posts with label steampunk gentleman. Show all posts

Saturday, May 18, 2019

Steampunk Tag


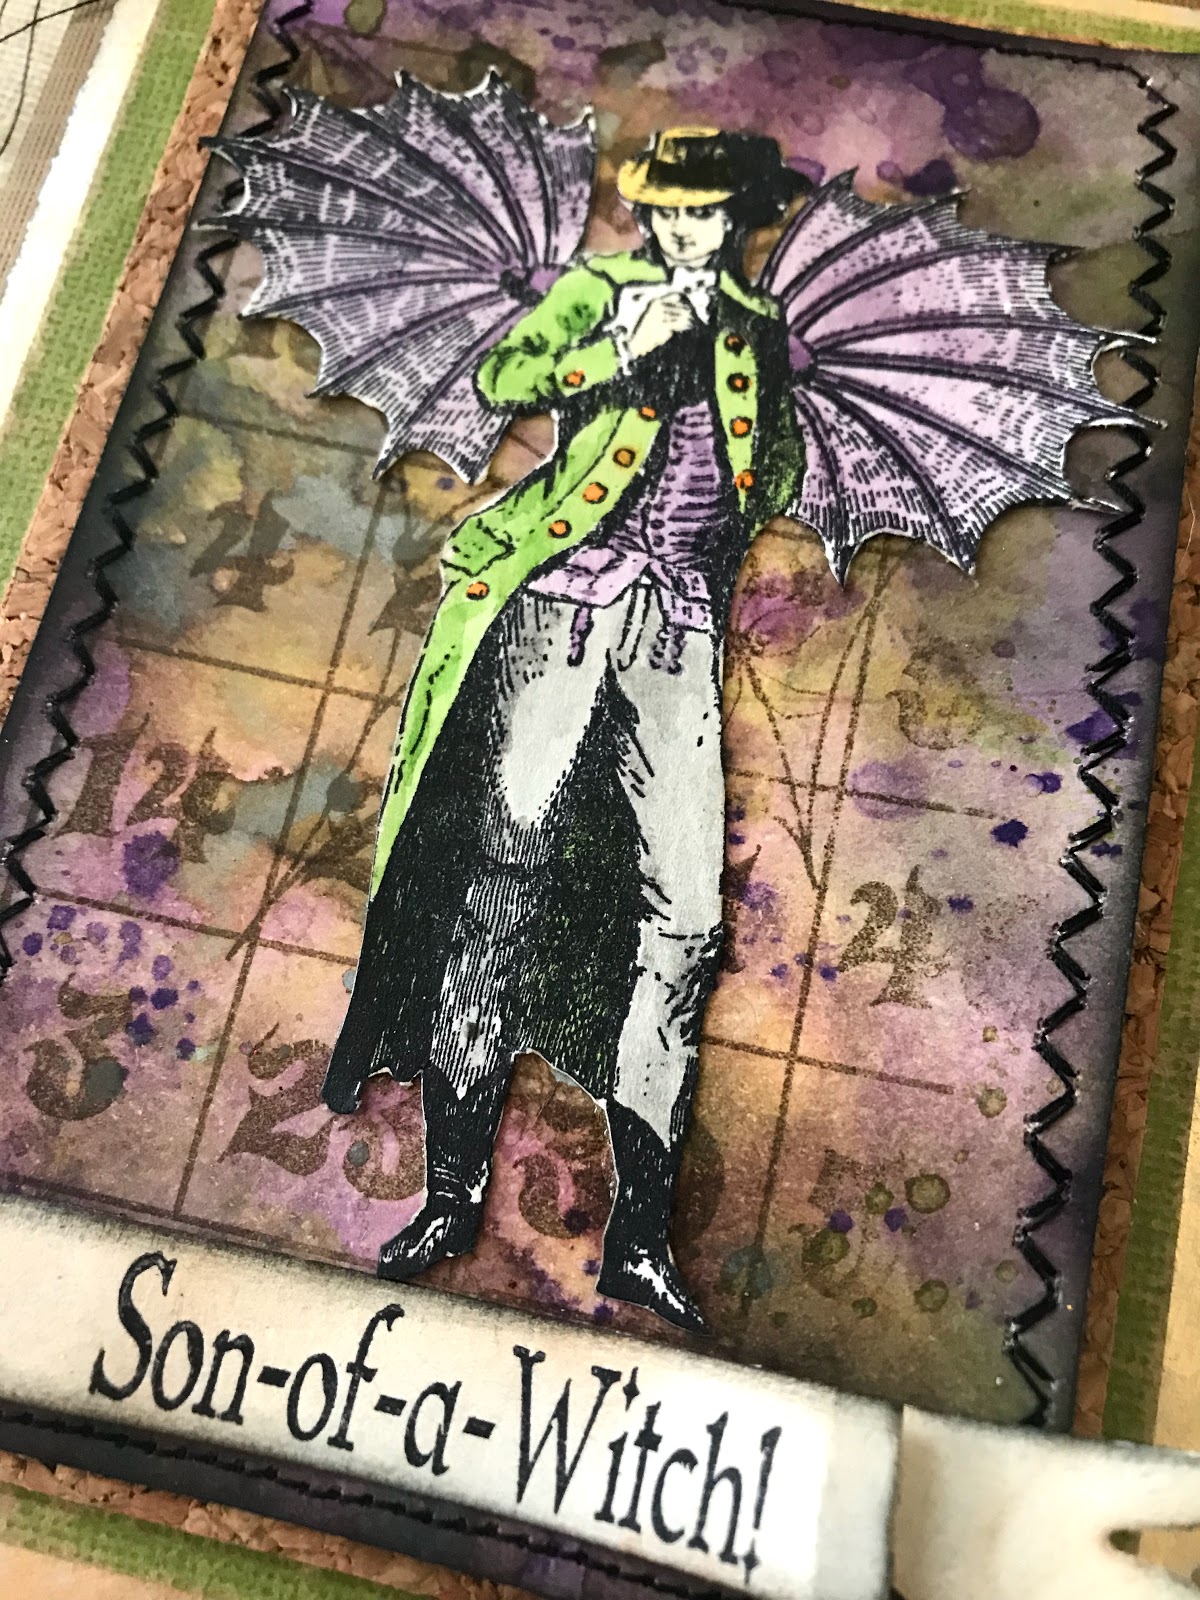
Steampunk Greetings to everyone!  Today I am excited to share this tag I stamped with some of my favorite Blank page Muse Stamps. 

To recreate this tag you will need the following supplies: 
Archival Ink
Distress Inks
Black Card Stock
Embossing Powder
Tag
(Shop now and save! Use code BPMDtChris2019 to save %15 off your total order!)


Stamp Netting with brown Archival ink, overlapping stamp as needed to fill tag.

Ink tag as desired with Distress inks.


Stamp Got Steampunk? Sentiment.

Banner cut sentiment.

Ink to match tag. Mat onto card stock and add to tag.
Finish tag by matting onto black card stock. 

I hope you are inspired to get stamping! 


Be Sure to follow us for more great ideas!
The Blank Page Muse- https://blankpagemuse.com/

Saturday, April 6, 2019

Love Signs

Hey BPM Fans!
Mercy here again with another project that is sure to brighten a room, wall, or shared area.  
Many chain stores as well as online outlets, have a variety of compressed wood pieces that are perfect for decorating.  In my example, the Love sign was found in the holiday section of Dollar Tree. 
 It's smooth porous surface is great for inking, stamping, collage, and general altering. 
Really, the sky's the limit with these forms and stamping with permanent ink really showed up remarkably well.


Steampunk themed stamps were used for this project, however any themed stamps would look really great on them for a variety of rooms, seasons and uses. 

Supplies:
Dylusions Inks: Yellow and Red
Composite Wood Sign
Permanent Archival Black Ink
Vintage Gold Wax by Prima
Post-it Notes
Inexpensive Sponges
Scissors

Instructions:

1. Spray lightly at the top of your composite sign some of your yellow ink.  Use the sponge to rub in ink, and wipe off, pulling the yellow down the letters.  Dab any excess yellow ink to some scrap papers to reuse later.  Once the yellow is dry, spritz the bottom of each letter lightly, blending with the same sponge the ink there, pulling the red up into the yellow.  Intermingle the inks for a rainbow like affect from the top of each letter, down to the bottom.  Allow to dry.


2. Organize each of the stamps to figure out the best layout for each to be added to the letters.  Try to visualize where the best placements are along the letters for each image. In this case, the stamps were flipped over for spacing, arranged by size as well as theme, making sure as much of the image would be shown on the letters.  Once you decide on best placements, move the stamps off the sign so that you know exactly where to stamp each on the project.

3.  Ink up your stamps with the black archival pad, making sure the stamp is completely covered in it.  It's important to make sure all the stamps, before you stamp, are inked evenly since you have one chance to really get this right.  Once confident the stamp is loaded perfectly, carefully stamp directly on the letters.


4. Stamp all the images to the surface, making sure not to overlap.  If you want overlap or layering, use the post-it notes and mask off the images you wish to protect as the top layer image.


5. Once all the inks are dry and surface is completely decorated, use Vintage Gold wax and apply to all the edges.


Check to see that everything is dry to touch before hanging on a door, standing on a table, or wherever you are needing a little love.


Looking for more Inspiration? Click the links below!

More ideas & crafts by Mercy

Want an extra 15% off on your next order? Use this code on your order! Good until June 1, 2019. BPMDtMercy2019

Friday, October 26, 2018

Son of a Witch!

'Tis the season for witches, but let's not forget the Warlocks! This dapper dude just screams Halloween to me.


Blank Page Muse Products Used:
Steampunk Gentleman
Halloween Bingo Board
Oh, Son-of- a-Witch

Other Products Used:
Distress Inks in Seedless Preserves, Wilted Violet, Shaded Lilac, Twisted Citron, Mowed Lawn Crushed Olive, and Black Soot
Distress Oxide Ink in Hickory Smoke
Distress Markers in Mowed Lawn, Dried Marigold, Hickory Smoke, Antique Linen, Dusty Concord, and Mustard Seed
Archival Ink in Jet Black and Coffee
Sizzix Die Tattered Banners
Cardstock
Adhesive
Waterbrush
Sewing Machine

On your craft mat smoosh on the purple shades of ink and run your paper through so the entire surface is covered. Wipe your ink up( wipe ink up between each layer)  Dry the base layer and smoosh more purple on the craft mat to get splats and dots. Dry this layer.

 Smoosh greens on the craft mat and tap the paper into the ink.  Don't rub or you'll get mud.  Dry the greens.

Smoosh on Hickory Smoke Oxide ink and tap the paper into the ink.  Let this layer air dry.  It's important to let the Oxide air dry to get the oxide effect.  Stamp the Halloween Bingo Board on the background using archival ink.  Edge the paper with black soot ink.  Stitch all around the edge of the cardstock.
Cut out the banner and stamp on the Oh, Son-of- a-Witch stamp.  You can alter your stamps by either not inking the word or snipping the saying apart.  For this card the "oh" wasn't used.  Stamp the saying onto the banner.  Adhere the banner to the bottom of the background. 


Stamp the Steampunk Gentleman on heavy watercolor cardstock.  Color in the gentleman using a waterbrush and Distress Markers.  Cut out the gentleman and then ink all the edges with black soot ink.  Glue the Steampunk Gentleman to the background.


The rest of the card is just layered up with various cardstocks.


Thanks for coming by!
Please visit the following for more inspiration!


Copyright Text

Blank Page Muse 2018 Sin City Stamps 2013