Showing posts with label journal. Show all posts

Thursday, June 27, 2019

Dream Journal Page

Hello! I love working in my journal and I wish I would take the time to do it more than I do, there is something about working in a journal that seems to calm me.


I usually seem to work in my journal when I am trying to work out a project or problem to create something larger. This page was more to play with some ideas that are forming in my head!

Supplies
Unknown grungy marks stamp
Journal
Journal card
Black embossing powder
Ranger Archival Ink Jet Black, Plum, Sepia
Versamark ink

Sharpie marker black
Blending tool

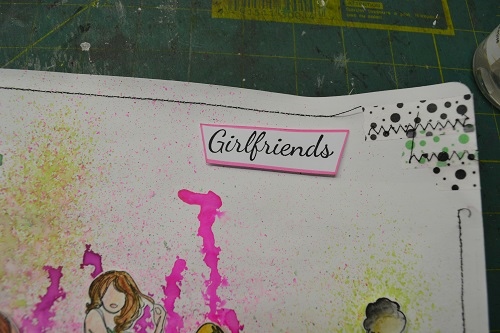
First of all, using the long grungy stamp, stamp with Versamark ink and emboss in black. Then using Blank Page Muse Stamps, the Tread stamp along the edge of the embossed area and then randomly stamped the Script around the page.


Using the plum and sepia archival inks and the blending tool, cover the page with color. Stamp the Bird on Barbed Wire stamp onto the journal card and emboss it. Cut down the card to approximately 2” x 2” then emboss the edges with black. Run the Versamark around the edges to emboss.
Take the Sharpie pen and make some marks along the edge of the page that looks like stitching.


The journal page is finished!

Tips – If you don’t have a grungy stamp to use for the middle of the page, just run the edges of your Versamark ink pad down the middle of your page and heat emboss.

The Blank Page Muse- https://blankpagemuse.com/

Saturday, January 19, 2019

"Friendship"


Hello everyone! I am delighted to be here with you today. I would like to share with you a journal page I created, inspired by friendship and the vintage/retro theme. I realize it's Valentine's Day but, that doesn't mean we forget about our friends. They need love too! Which is exactly what inspired me to create this page, friendship. For this page, the stamps speak for themselves.


Blank Page Muse Stamps:

Other products used:
Shimmer mist inks in orange and green
Ranger archival black ink pad
White marker
Vintage paper doll clip art
Red and green markers


This photograph shows the background before I begin my inky stamping adventure! Background details: I sprayed some yellow and green colors on the paper and distressed the edges with black ink. Love this stamp by Pam, the possibilities are limitless!

I just had to share with you this beautiful image of the stamped circles once they are applied to the sparkly background. Journaling is so much fun! 


More beautiful images of lovely stamps, this time they are by Katie! They may just seem like simple little circles; but, wait until you see what's in store for you next. 


This page is turning out to be fantastic, isn't it!? 
Wow! Wow! Just look at all that stamping gorgeousness! 


Color in the paper dolls with the markers, wipe off excess color then heat set.   


Use the white marker to add some fun detail to the stamps.


Here are some up-close photographs of the finished page. Remember sometimes it's better to just let the stamps do the talking. I hope you enjoyed the tutorial. 


Thank you so much for stopping and looking! I know we all hope to see you here again soon!

Visit and follow us for more inspiration:

Friday, June 9, 2017

Things I Love...

Hi Sin City Fans!

Today I am sharing my instructions for making this journal page that I created for the Blog Hop in May!
 I didn't take pics while making this page as I was playing around and seeing how things turned out so I have used the same process to make some altered index cards and atc's with step by step pics!


Supplies:
  • Sin City Stamp Set: Rosette Hearts
  • Sin City Stamp Set: Art Journaling 2
  • Journal or Index Cards or ATC's
  • Gesso
  • Embossing Ink & Powder
  • Distress ink Refill Bottles: Festive Berries and Scattered Straw used for these creations
  • Water Spritz Bottle
  • Black Archival Ink
  • Collage images - Designs by Etsy Store "Ceremony" used for these creations
  • Embellishments of choice: sticky mesh, muslin cloth, charms
  • General supplies: heat gun, scissors, glue, mounting tape, sewing machine, scrap paper

Instructions:
As always gather your goodies together - you can always add bits & pieces as you are going. LOL I always add as I am going along!

First step is to add a layer of Gesso to your "base" card - whether that be a page in your journal, an index card, atc etc. this is optional - you don't have to add the Gesso but it is good if you are working in your journal and you don't want ink to seep through to the back of the page. Set aside to dry.
Next step is to stamp your background with one of the large designs from either of the stamp sets. For the journal page and index cards use the large lacey design from the Rosette Heart Set and because the ATC's are much smaller you may like to use one of the smaller backgrounds from the Art Journaling Set. Using your embossing ink pad stamp your chosen design onto the background and sprinkle with embossing powder. Use your heat gun to emboss. It's easy to make multiple creations at once with this process - a great way to have backgrounds prepared in advance when you need to make a quickie creation!
When you have finished all of your embossing and made sure you have all the powder safely in the container with the lid on you can add some ink to the backgrounds. Distress ink refill bottles work well for this as you can drip them onto the top of the background, spritz with water and let it run down in droplets and move it around on the page. You can use ink sprays or anything similar for this - personal choice - whatever you have on hand! Allow to dry.


While your backgrounds are drying you can fussy cut your collage images ready to add to the background. You can also stamp, emboss and fussy cut some of the smaller designs from the Rosette Heart Set to use as embellishments on your creation.


Next step is to arrange your elements on the background. To make it easier to sew some of the elements on use a tiny amount of glue to adhere where you want them so they stay in place when sewing. Make sure you allow the glue to dry before sewing or you will have a sticky needle that will not sew properly!!! Guess who has made that mistake before LOL??? I used the sewing machine to secure the hearts, the stamped and embossed heart/key and to add some fancy stitching.


You may like to use mounting tape for the main image to give some height (the gal collage image was not sewn on). You can also add sticky mesh and scraps of muslin cloth under the elements for extra texture along with any little charms you may have that match the theme. To finish choose some of the quotes/wording stamps from the sets and stamp in the bottom corner with black archival ink to finish off.
And here are the finished creations!!!


Hope you feel inspired to have a go at making something yourself! You don't have to use collage images you can use character stamps from Sin City - LOTS to choose from at the store!!! And remember to share your creations at our Facebook Fans Group - we love to see what everyone does with their stamps - it's great to get ideas for using our Sin City Stamps!!

Happy Stamping!

Sharon

Monday, May 8, 2017

Girlfriends.....

Hi Sin City Stamp Fans!!


I've been having fun with the "Just Us Girls" set of unmounted stamps again - I loved creating cards with them in March and couldn't resist stamping all of the girls out and creating this journal page for my first creation this month! And this page is really quite quick to make so no excuses for not having a go!


Supplies:
  • Sin City Stamps - Just Us Girls
  • Black Archival Ink
  • Watercolour paper/card
  • Watercolour pencils and Aquawash pen
  • Scrap of white paper for "Girlfriends" Stamp and Posca Pen
  • Journal (A4 landscape page used for my creation) OR Piece of Card
  • Gesso
  • Ink Sprays
  • 2 Rolls complimentary Washi Tape
  • Sewing Machine (optional) OR Fine Black Pen
  • Mounting Tape
  • General Supplies like glue, scissors, paint brush, spatula etc.

Let's start!

Firstly add a layer of gesso to your journal page using a spatula or paintbrush. I like to use a spatula as it's quick, easy to clean and I actually like the ridges and unevenness it leaves on the page for added texture! Set aside to dry.


Once your gesso is dry it's time to use your ink sprays. Choose 3 or 4 colours which will be complimentary to the colours you will use for your stamped girls. (I used 2 shades of pink and 2 shades of green). Spray sparingly in "blobs" and then spritz with water and let the ink run to the top of the page ie. hold the page upside down. the runs look a bit like "disco lights" in the background! Set aside to dry completely.


Once your background is dry it's time to add a few bits and pieces. Use washi tape to make a "border" near the bottom of the page. Use varying sizes of strips - just tear them off the roll rather than cutting them for a more "casual" look. You can add little strips at the top of the page as well.


Next step is optional. Use your sewing machine to add zig zag stitches over the washi tape for added texture and interest. You can also add a border along each edge. I used a straight stitch for the top and sides. It can be tricky manoeuvring the journal in the machine especially if your journal is very fat!! If you do not have or do not want to use a sewing machine you can use a fine black texta or pen to draw a freehand border around the page which still looks really effective, is quicker and less stressful to do LOL!!


Now that the page background is completed it's time to start on the stamped images. Stamp each of the six girls onto watercolour card. Using watercolour pencils and an aquawash pen colour the images in complimentary colours to your background ink sprays. If you prefer to colour with pencils or copics then use whatever card is your favourite for that colouring medium.


Fussy cut the images and arrange them along the bottom line of washi tape on your page. To add layers and dimension choose some of the girls to "sit behind" and others to "pop forward" and then use mounting tape on the girls in front and glue the others direct to the page.


To finish up use any of the sentiment stamps that are part of the set. I used "Girlfriends". Stamp the wording onto white card, cut out, edge with a texta or a Posca pen in matcing colour and mount to the top corner of the page and your are finished! A great effective looking page!


Thanks for joining me today! Happy stamping!!

Sharon

PS: Here are some important links for you to check out!!
Sin City Stamps Store
Sin City Stamps Facebook Fans Group
and of course you are here at The Blog


Monday, July 28, 2014

My Manifesto

Heeey, it's Robin Redd (a.k.a. RockinReddRobin!)

 This week, I did another art journal page.  
This lesson was taken from Effy Wild's Book of Days class.

The top and bottom border is made with strips of masking tape.  
The masking tape lays underneath a selfie that is printed on simple copy paper.

I used Punchinella to stencil on the sides of my photo, 
then turned the Punchinella over and stamped with it around my art journal page.


I doodled, with a gold metallic pen, little squares to frame the entire layout.
I stamped the swirl from the Art Journaling with Terri Sproul 2 stamp set, and the Believe in Yourself from the Fairies & Blossoms stamp set.
 

And I just love the pointing finger from the Classic Spark stamp set.
I hope I've inspired you to create something today.
Until next time...

Tuesday, July 15, 2014

My Story

Hello!  It's Robin Redd (a.k.a. RockinReddRobin!)
I found this video tutorial online and thought this journal page is perfect for my Sin City Stamps!

I'm, very much, into learning how to draw faces.  This one in particular is a 'whimsical' face.

After sketching out the face, shoulders and hair, I  went to my collage stash.  My collage stash are papers I painted myself at various times via various methods, i.e. Gelli Print, random painting, stencils.

I chose to use this one.  I found it fitting for this wonderful summer season we are in.

I tore up my collage paper into many, many quarter-size pieces.

Then, I collaged them onto the background of my girl.

I still can't get too far out of the box with my 'whimsical' look.  
Although, she's not completely realistic, she's not as whimsical as I'd like.

I used my Art Journaling with Terri Sproul 2 stamps.

After stamping with a coordinating color, I embossed with a sparkly, clear embossing powder.
Because the ink was going onto the paint and gel medium that I laid onto the page, 
first, the ink stayed wet a while.  
I sprinkled, liberally, onto the stamped images and shook the excess off, 
back into the embossing powder container.

I heat set the embossing powder slowly, to keep the collage papers and paint from bubbling up.

Look how pretty this lovely swirl looks after the heat embossing is complete. 

http://www.sincitystamps.com/index.php/art-rubber-stamps-2013-11-27/art-journal-rubber-stamps/art-journaling-with-terri-sproul-2-detail
This is the great set I used for this art journal page.  Perfect!

I hope I have inspired you to create something today.

Until next time...

Copyright Text

Blank Page Muse 2018 Sin City Stamps 2013