Showing posts with label Dylusions Ink Spray. Show all posts

Tuesday, September 10, 2019

Halloween Accordion Book


Hello everyone!! Kelly here today with an accordion book. Are you ready to get your Halloween on? I love Halloween, the ghosts, the goblins, the scary things that go bump in the night, are some of my favorite things! 

To show my love for Halloween, I created an accordion book using lots of Blank Page Muse stamps. 


Blank Page Muse stamps used for this project are - 


Other supplies - 
Printed card stock
Dylusion Spray Inks
Colored pencils
Washi tape
Stickers

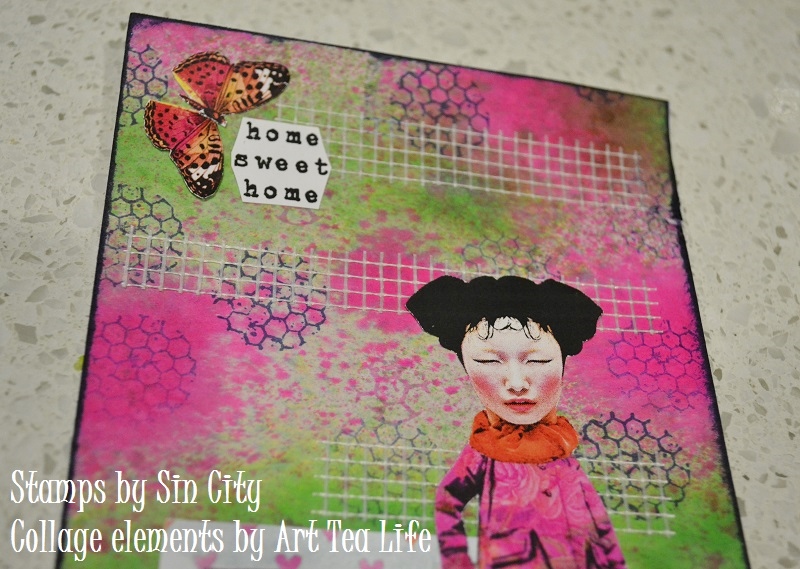
The process for creating this accordion book is simple. Cardstock measured 3" tall by 12" long, fold in the center then fold each side back to get the same size pages. Spray the ink onto the printed cardstock in several Halloween colors, let dry. Stamp, color and fussy cut the images out of drawing paper, set aside. 


While the cardstock is drying, look over your images and start to lay them out in vignettes to see how you want the "story" to look. Because the printed cardstock was dark on one side and light on the other, the spray inks make both sides look different. 

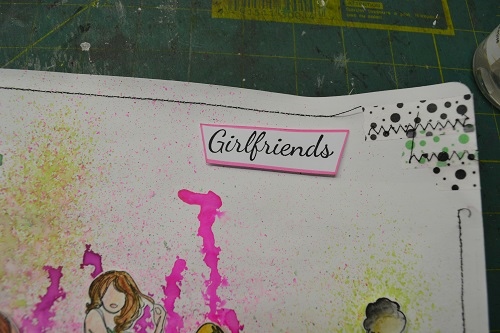
Start gluing your images in place on the pages, then to add a few more pages, use washi tape to tape them together. Remember to use some glue stick or another adhesive under the washi tape to hold it all together. 


Thanks for stopping by, check out these other great links to Blank Page Muse!!

The Blank Page Muse- https://blankpagemuse.com/

Wednesday, July 31, 2019

Colorful Faux Washi Tape

Hello everyone! Here is a quick way to use all of those pesky labels you have left over when you only need to print a few on a sheet.

I used Blank Page Muse script stamp, circles stamp, and sketchy doodle bricks,  the address labels from Staples, Dylusions Spray inks in several colors, Ranger Archival ink in several colors, and some old printers foil I have had forever!


First, spray the labels with the spray ink and let dry, then stamp randomly with stamps in black and other color archival inks to create texture. Then if you have gold foil you can do this technique with that, but I had some printers gold foil and used an Uhu glue stick. To use the glue stick, run it over the stickers along the thin edge to apply a line of glue, then cut a piece of gold foil and lay it on the glue, rub the foil and let sit for about 15 seconds and rub with an old credit card then peel off. That's it! 


Check out the links below for all of your red rubber stamp needs at Blank Page Muse and follow us for lots of very cool projects!

The Blank Page Muse Stamps - https://blankpagemuse.com/

Wednesday, October 10, 2018

Spooky bookmarks

Hi Everyone,
Jess here today with a little something to keep your page when your book gets too scary to read at night!


Blank Page Muse Stamps Used:
Ashes of Ex-Lovers Bottle
Mummy Ribs Bottle
Powdered Cobwebs Pot
Halloween Bingo Set
31

Other Products used:
Staz On ink  Gothic Purple
Archival ink in Jet Black, Potting Soil, and Plum
Distress ink in Wilted Violet, Shaded Lilac, Dusty Concord, Carved Pumpkin, Black Soot, and Pumice Stone
Distress Spray ink in Walnut Stain
Dylusions Spray in Fresh Lime
Sizzix Halloween Sideorder and Halloween Script
Sari Ribbon
Ken Oliver Water-media Bookmarks
Card Stock
Adhesive


Stamp your bookmark with your Ashes of Ex-Lovers BottleMummy Ribs Bottle, and Powdered Cobwebs Pot.  Using your permanent ink, stamp each bottle in a different color and at various angles to create interest.

Once the inks are dry use Distress ink to cover the entire bookmark.

 Layer your bookmark onto various colors of cardstock.
Punch a hole in the top of the bookmark.  Add your die cut skeleton images, words, and your sari ribbon.


For the second bookmark the paper layering will be the same.  Using the permanent ink stamp your Oct. 31 and Spider from the Halloween Bingo Set.  Add in the tiny 31 to fill in the gaps.

  Once your ink is dry create your background.  Cover the entire bookmark using Shaded Lilac Distress Ink.  On your craft mat smoosh on the other two purple shades and spritz with water.  After your have sprayed your water tap your bookmark in the color.  Be sure you only tap it in a couple times.  If you just rub it around you won't get speckles and splats.  Look at your bookmark and see if you like the patterns that are appearing.  If you do, stop and dry your layer.  Once the layer is dry then you can go back and tap into the ink again.  Drying between layers makes a huge difference.

Add on your die cut image. 

Spray your sari ribbon and dry it.  Add the ribbon to the top of the bookmark.
I hope you're inspired to create some on your own.  They are easy and fun to make!
Happy Crafting,
Jess


Thanks for coming by!
Please visit the following for more inspiration!


Saturday, August 12, 2017

Background Grunge Collaged Postcards - Quick Ideas!

 Hi Sin City Fans
Today I am sharing two quick postcards using some of the "extra" ink sprayed and stamped tissue paper I made for my post earlier this month!
I always try to make extra backgrounds when I have everything out so I have a "stash" if I need to create quickly!

For these 6 x 4 cards I used tissue and deli paper stamped with designs from the "Background Grunge" Stamp Set - I love the range of designs in this set!

Easy to decorate - just cover your card with the background paper - trim excess and add some quirky collage elements - I've used collage sheets by Art Tea Life for these cards - plus I added some sticky mesh for a little bit of texture. I've also edged the sides of the cards with the same colour ink I used to stamp the backgrounds.
Happy Stamping with Sin City!!
Sharon

Saturday, May 20, 2017

Feeling Bright & "Chip"per!!!!

Hi Fans!!


Some "re-purposing" for my ATC creations today - Paint Chip Samples!!
 If you are anything like me you love going to the hardware store and searching for alternative items to craft with - and they don't cost anything!!! AND I'm showing you how to use stamps for something other than their intended use ie. I've used the new Mail Art Set by Rick St Dennis to create these ATC's!


Supplies:
Sin City Stamps: Sending Smiles Whimsical Mail Art Set
Paint Chip Samples - go with hubby and raid the hardware store!
Coloured card
Texture Paste/Medium
Stencil - small designs work best
Acrylic Paint
Black Archival Ink
Colour Pencils
White paper/card to stamp on
Posca Pens
Ink Sprays
Embellishments ie. muslin cloth scraps, wording/phrases stickers or make your own computer generated wording
Tools ie. spatula, scissors, tape, glue, wipes for cleaning up!

Instructions:
First step is to raid the hardware/paint store - there are so many variations on how paint chip samples are provided so you can get all different "looks" depending on what you can find!!
They are great for all sorts of creations not just ATC's!


Cut your samples to ATC size 2.5 x 3.5 inches or if you have some pieces from other creations you can cut the samples slightly smaller and mount them on a 2.5 x 3.5 inch piece of co-coordinating colored card.
The samples shown below are 3 of each "method".


Next step is to add a bit of colored texture to the backgrounds.
These ATC's are really quite quick to make - we want the effect of the paint chip background to remain a main feature so the "added" bits are minimal.
Don't you just love a project that can be achieved in a short time??? For this step I have added a small amount of acrylic paint to the texture medium, mix with a spatula and using a small patterned stencil add to the ATC background. The stencil below had half a dozen designs on it and they are a perfect size for an ATC.
Set these aside to dry.


Cut some small pieces of muslin cloth for each ATC and ink spray in co-coordinating colors to your backgrounds and stenciled texture paste.
Set aside to dry - they don't take too long!


Whilst everything is drying you can get stamping and coloring from the "Sending Smiles Whimsical Mail Art Set"!!
Stamp your images onto white card stock with Black Archival Ink and color with your favorite coloring medium - color pencils used here - then cut them out.


Next step is to grab your big Posca Paint Pens, again in co-coordinating colors - and edge the paint chip backgrounds - gives a nice bright finish to these cards. The colored paint border can also be added to you words/phrases in the same matching color to make them stand out on the ATC as well.


Finally it's time to place the wording, stamped images and cloth onto the backgrounds and adhere everything!


I can't wait to use this set on some envelopes too - just love the designs and so excited that Rick St Dennis is designing for Sin City Stamps now!


Thanks for joining me today!! Hope you get inspired to have a play - perhaps pop over to the store and order yourself some of these stamps.........

Happy Stamping!

Sharon

Monday, May 8, 2017

Girlfriends.....

Hi Sin City Stamp Fans!!


I've been having fun with the "Just Us Girls" set of unmounted stamps again - I loved creating cards with them in March and couldn't resist stamping all of the girls out and creating this journal page for my first creation this month! And this page is really quite quick to make so no excuses for not having a go!


Supplies:
  • Sin City Stamps - Just Us Girls
  • Black Archival Ink
  • Watercolour paper/card
  • Watercolour pencils and Aquawash pen
  • Scrap of white paper for "Girlfriends" Stamp and Posca Pen
  • Journal (A4 landscape page used for my creation) OR Piece of Card
  • Gesso
  • Ink Sprays
  • 2 Rolls complimentary Washi Tape
  • Sewing Machine (optional) OR Fine Black Pen
  • Mounting Tape
  • General Supplies like glue, scissors, paint brush, spatula etc.

Let's start!

Firstly add a layer of gesso to your journal page using a spatula or paintbrush. I like to use a spatula as it's quick, easy to clean and I actually like the ridges and unevenness it leaves on the page for added texture! Set aside to dry.


Once your gesso is dry it's time to use your ink sprays. Choose 3 or 4 colours which will be complimentary to the colours you will use for your stamped girls. (I used 2 shades of pink and 2 shades of green). Spray sparingly in "blobs" and then spritz with water and let the ink run to the top of the page ie. hold the page upside down. the runs look a bit like "disco lights" in the background! Set aside to dry completely.


Once your background is dry it's time to add a few bits and pieces. Use washi tape to make a "border" near the bottom of the page. Use varying sizes of strips - just tear them off the roll rather than cutting them for a more "casual" look. You can add little strips at the top of the page as well.


Next step is optional. Use your sewing machine to add zig zag stitches over the washi tape for added texture and interest. You can also add a border along each edge. I used a straight stitch for the top and sides. It can be tricky manoeuvring the journal in the machine especially if your journal is very fat!! If you do not have or do not want to use a sewing machine you can use a fine black texta or pen to draw a freehand border around the page which still looks really effective, is quicker and less stressful to do LOL!!


Now that the page background is completed it's time to start on the stamped images. Stamp each of the six girls onto watercolour card. Using watercolour pencils and an aquawash pen colour the images in complimentary colours to your background ink sprays. If you prefer to colour with pencils or copics then use whatever card is your favourite for that colouring medium.


Fussy cut the images and arrange them along the bottom line of washi tape on your page. To add layers and dimension choose some of the girls to "sit behind" and others to "pop forward" and then use mounting tape on the girls in front and glue the others direct to the page.


To finish up use any of the sentiment stamps that are part of the set. I used "Girlfriends". Stamp the wording onto white card, cut out, edge with a texta or a Posca pen in matcing colour and mount to the top corner of the page and your are finished! A great effective looking page!


Thanks for joining me today! Happy stamping!!

Sharon

PS: Here are some important links for you to check out!!
Sin City Stamps Store
Sin City Stamps Facebook Fans Group
and of course you are here at The Blog


Copyright Text

Blank Page Muse 2018 Sin City Stamps 2013