Showing posts with label Open Weave Fishnet. Show all posts

Wednesday, May 8, 2019

Steampunk Quick Card

Hello! 
 I’m glad you are here today. 
I’d love to share with you a quick tip in using Blank page Muse Steampunk stamps and gelatos 
to provide a easy distressed appearance. 
Come along let’s get to crafting!


Product List:
Spectrum Noir: Watercolor paper
Fiber Castelle: Green gelato
Creative Embellishments: Frame
Creative Expressions: Oval Chipboard Frame
Hampton Art: Rhinestones
Tacky glue
Double-sided tape


1. Distress the edges of your paper using a pair of scissor or tool
2. Take your thin paint brush and run it across the gelato as if you are painting it.


3. Make sure the brush is dense with color.
You want the edges to be the darkest.
4. Begin with running your brush along the edges.
5. Now begin pulling the gelato, using your brush, from the edges of your tag inwards.
This is going to blend the color in the paper. (works just like distress ink)


6.Stamp the fishnet in black ink, tear the edges of the paper when done.
 Use your double-sided tape to adhere the papers together
7. Heat emboss all your chipboard pieces
8. Attach all your altered embellishment to your tag using tacky glue


I do hope you enjoyed the fun quick tip today! Thank you for stopping by today!
We look forward to seeing you next time!

Wednesday, March 27, 2019

Flamingo Card

Hello BPM Fans!!

Today I would like to show you how I created a Flamingo card for the Under the Sea theme this month.  I was a bit out of my element for the projects this month and I am not a big ocean/sea fan. I like to sit in my pool in the summer, fewer animals in my pool and no sand to drag into the house later! I work a lot of hours and I like to have time to create and not spending all my time cleaning house!


Supplies used 
Blank Page Muse Stamps -

(Shop now and save! Use code BPMDtKelly2019 to save %15 off your total order!)

Other supplies used - 
tissue paper
ink in 3 pink colors
black ink
markers
glue stick
stamp platform
foam tape
white embossing powder
Versamark ink
black cardstock
white watercolor paper
white card base

1. Using the different pink inks, stamp them randomly in a line on a piece of white tissue paper with stamps from the Background Grunge sheet and the Hearty Doodles sheet, then using the black ink, stamp the Open Weave Fishnet in a line on white tissue paper. I used the circles from the Background Grunge stamp and repeatedly stamped them over each other. I used the script stamps from the Correspondence Pens sheet and stamped it in a line on the white tissue paper. 

Quick tip - To tear the tissue paper, use a fine line brush with very little water and draw a line down the tissue paper, tear along this line to give you a nice torn edge.

2. Taking one of your stamped tissue pieces, glue it down about 2/3 from the edge of the black cardstock. Repeat with the other two layers. 


3. Using the stamp platform, stamp the Flamingo several times onto watercolor paper then color the flamingo with markers. I used several colors over each other to get the effect I was looking for on the feathers. Then fussy cut the flamingo and glue it over the layered tissue paper. 
4.  Next, using the Dear Beach sentiments the were cut apart, stamp in Versamark ink onto black cardstock and heat emboss with white embossing powder. then trim down to fit across the card front. 


This card could be used for any occasion!  Don’t forget to check out the stamps at Blank Page Muse.

The Blank Page Muse- https://blankpagemuse.com/


Tuesday, March 19, 2019

Steampunk Birthday

Hello there my fellow crafty stamper friends! We here at Blank Page Muse are inspired by the nautical theme this month. So to continue the theme today I would love to share with you today to share a masculine steampunk birthday card! 

Product List:
Blank Page Muse: Octopus Time! Steampunk Art
Blank Page Muse: Open Wave Fishnet

(Shop now and save! Use code BPMDtJessica2019 to save %15 off your total order!)

Spectrum Noir: Watercolor paper
Ranger Ink: Texture paste & Archival Black Ink Pad
Tim Holtz: Distress Ink - Brushed Curdory
Canvas Corp Brands: Tattered Angels Shimmer Mist - Sapphire & Penny
The Paper Studio - Gears 3D sticker embellishments
Hampton Art - Brown rhinestones
Tacky Glue

1. Let's begin by creating our card. Get your paper out and get to cutting it to your desired size and folding it in half. 

2. Once this is done, let's add some texture straight to the paper. 

*Tip* I love this paper because, I can do pretty much any kind of mixed media art on its surface without it wilting and falling a part. 

As you see in this photograph, I make sure to lay down a hefty layer of paste as to capture all the fun elements of my chosen background stamp.
3. While the texture is still soft take out any of your texture background stamps and begin stamping the texture. Once you are happy with the results let it dry.

4. While that's drying, take your stamped octopus image and distress it.

5. After your texture is dry spray your surface with your chosen paint sprays and watch the magic happen! 

That image is just a delight to look at! All that golden shimmer! 

6. Use your heat tool to dry the paint quicker so you can begin adding your elements.

7. Finish off your card by adding all your chosen embellishments using tacky glue.

*Hint* I always use tacky glue on the back of my glue dots and rhinestones to ensure that they won't fall off at a later date.
Voila! Here is the finished card and some close-ups. 
I do hope you enjoyed your time here with me today in making this fun masculine steampunk card! 


Thank you so much for popping in today! I will see you right here next time!

Visit and follow us for more inspiration:

Monday, March 4, 2019

Bubbles Under the Sea Card

Let's create an underwater bubbly paradise. If you are intimidated by creating inky backgrounds, this is the perfect place to start because whatever you create with texture stamps and watercolors or sprays, it will look wonderful. It's great because you can't really mess it up. Let's dive in!

BPM Stamps:
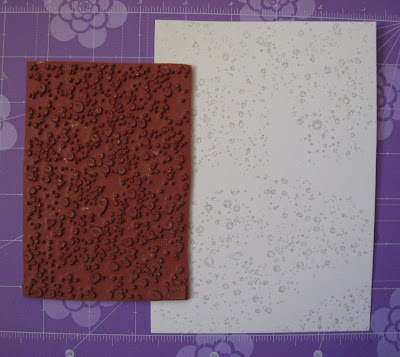
Raindrops Waterdrops Rubber Stamp Sheet Set
3 Assorted Beach Grass Stamps
Open Weave Fishnet Background Stamp

Nautical 2 Stamp Set
Spiral Snail Shell Stamp

(Shop now and save! Use code BPMDtKaren2019 to save %15 off your total order!)

Other Supplies:
water color paper, ink pads (blue, green, pearl, embossing), clear mounting block,
water spray bottle, embossing powder (clear / glitter / blue), seahorse embellishment, heat gun, Glossy Accents Clear Gloss Medium, clear micro beads, card base (5x7")

Directions:
1.  Use embossing ink to stamp the small water droplet image over the background. Apply clear glitter embossing powder, return the excess to the jar, and heat set.


2.  Stamp the medium bubble cluster with pearl ink randomly across the background. Vary the angle of the bubbles and occasionally have some extend off the edge of the paper.  Apply clear gloss medium to a random selection of bubbles. Set aside to thoroughly dry.

3.  Apply numerous shades of blue and green inks directly onto a craft mat. Mist generously with water. Place the watercolor paper face down pressing gently. Continue to press and lift the paper until the desired amount if color is reached. Reapply, ink and water to continue to add more layers of color.
 
(When complete, dab the paper with a tissue to remove
any ink mist that may be clinging to the slick embossed surfaces.)

4. Use an ombre ink pad to add a border of net along the lower edge.


5.  Stamp sea weed grass in the lower corners using blue ink. Mask any bubbles that have clear gloss medium over them in order to protect them from blue ink.


6.  Spray blue mist over the background to add a variety of small splatters. Set aside to dry.

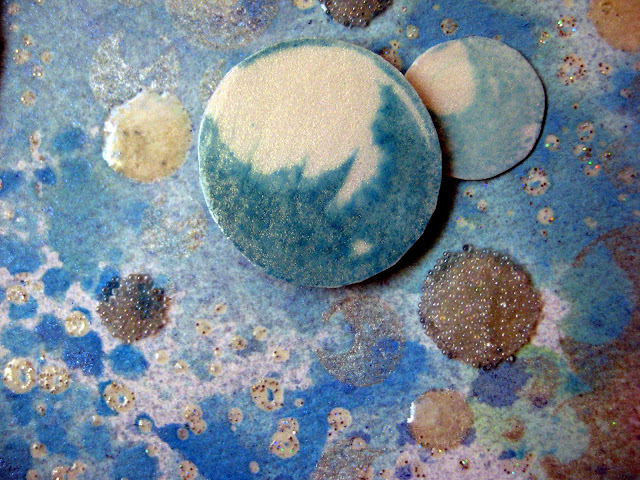
7.  Stamp different size bubbles onto white card stock. Without re-inking, stamp the bubble image again to create a second and third generation impressions. Each new impression will be a lighter shade which will create the appearance of depth within the project. Apply clear gloss medium to each bubble. After thoroughly dry, carefully cut out each bubble.

8.  Adhere the stamped bubbly background to a blue card base leaving a narrow border.

9.  Adhere a chipboard sea horse to the upper left side of the card. Attach the bubbles randomly with foam tape.

10.  Stamp seashells with embossing ink, apply blue embossing powder, and heat set. Cut out the seashells and apply to the lower edge of the card using foam tape.

11.  Apply liquid adhesive randomly to some bubbles and add transparent micro beads to the wet adhesive.


A Closer Look:


The Blank Page Muse- https://blankpagemuse.com/
Facebook Fan Page- https://www.facebook.com/groups/blankpagemuse/
Instagram Shop- https://www.instagram.com/blankpagemuse/
Instagram Blog- https://www.instagram.com/blankpagemuseblog/
Twitter- https://twitter.com/BlankPageMuse
Pinterest- https://www.pinterest.com/blankpagemuse/boards/

To see more projects by our designer Karen, please visit her blog Art & Soul.

Copyright Text

Blank Page Muse 2018 Sin City Stamps 2013