Showing posts with label sea shell. Show all posts

Friday, March 8, 2019

Plenty of fish in the sea - Art Journal

Hello Crafty Friends,

Marie-Christine with you today with an Art Journal Page. The theme this month is "Under water" and the technique is watercolor; so, I used both on this creation.


BPM Rubber Stamps used:

Coral Reef Sponge Small Art Rubber Stamp

(Shop now and save! Use code BPMDtMarieChristine2019 to save %15 off your total order!)

Other Supplies

Small Art Journal
Old Book Page
Distress Inks
Stencil
Watercolor
Vintage image


Adhere an old book page on your Art Journal and color with Distress ink.
Use a waves stencil with green Distress ink at the bottom of the page.


Stamp the shells and fish on a watercolor paper and color them.

To finish, adhere shells, fish, coral, title and vintage image on your page.


Hope you have enjoyed my tutorial!


Thank you for visiting!

Marie-Christine Denis
Inspiration Team Member


Follow us 
The Blank Page Muse- https://blankpagemuse.com/


Monday, March 4, 2019

Bubbles Under the Sea Card

Let's create an underwater bubbly paradise. If you are intimidated by creating inky backgrounds, this is the perfect place to start because whatever you create with texture stamps and watercolors or sprays, it will look wonderful. It's great because you can't really mess it up. Let's dive in!

BPM Stamps:
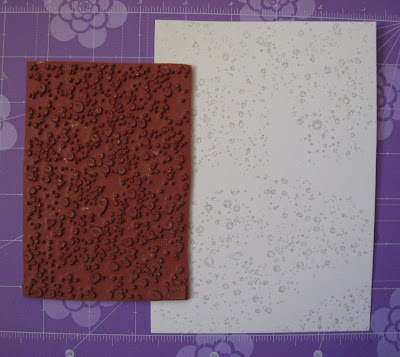
Raindrops Waterdrops Rubber Stamp Sheet Set
3 Assorted Beach Grass Stamps
Open Weave Fishnet Background Stamp

Nautical 2 Stamp Set
Spiral Snail Shell Stamp

(Shop now and save! Use code BPMDtKaren2019 to save %15 off your total order!)

Other Supplies:
water color paper, ink pads (blue, green, pearl, embossing), clear mounting block,
water spray bottle, embossing powder (clear / glitter / blue), seahorse embellishment, heat gun, Glossy Accents Clear Gloss Medium, clear micro beads, card base (5x7")

Directions:
1.  Use embossing ink to stamp the small water droplet image over the background. Apply clear glitter embossing powder, return the excess to the jar, and heat set.


2.  Stamp the medium bubble cluster with pearl ink randomly across the background. Vary the angle of the bubbles and occasionally have some extend off the edge of the paper.  Apply clear gloss medium to a random selection of bubbles. Set aside to thoroughly dry.

3.  Apply numerous shades of blue and green inks directly onto a craft mat. Mist generously with water. Place the watercolor paper face down pressing gently. Continue to press and lift the paper until the desired amount if color is reached. Reapply, ink and water to continue to add more layers of color.
 
(When complete, dab the paper with a tissue to remove
any ink mist that may be clinging to the slick embossed surfaces.)

4. Use an ombre ink pad to add a border of net along the lower edge.


5.  Stamp sea weed grass in the lower corners using blue ink. Mask any bubbles that have clear gloss medium over them in order to protect them from blue ink.


6.  Spray blue mist over the background to add a variety of small splatters. Set aside to dry.

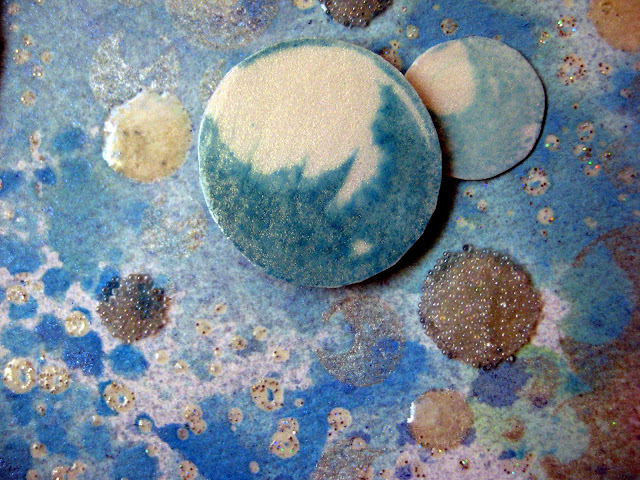
7.  Stamp different size bubbles onto white card stock. Without re-inking, stamp the bubble image again to create a second and third generation impressions. Each new impression will be a lighter shade which will create the appearance of depth within the project. Apply clear gloss medium to each bubble. After thoroughly dry, carefully cut out each bubble.

8.  Adhere the stamped bubbly background to a blue card base leaving a narrow border.

9.  Adhere a chipboard sea horse to the upper left side of the card. Attach the bubbles randomly with foam tape.

10.  Stamp seashells with embossing ink, apply blue embossing powder, and heat set. Cut out the seashells and apply to the lower edge of the card using foam tape.

11.  Apply liquid adhesive randomly to some bubbles and add transparent micro beads to the wet adhesive.


A Closer Look:


The Blank Page Muse- https://blankpagemuse.com/
Facebook Fan Page- https://www.facebook.com/groups/blankpagemuse/
Instagram Shop- https://www.instagram.com/blankpagemuse/
Instagram Blog- https://www.instagram.com/blankpagemuseblog/
Twitter- https://twitter.com/BlankPageMuse
Pinterest- https://www.pinterest.com/blankpagemuse/boards/

To see more projects by our designer Karen, please visit her blog Art & Soul.

Monday, July 6, 2015

A Visit to the Sea Lab


Hi Chris here and today I am sharing this layout featuring my son at the Dauphin Island Sea Lab.  I had so much fun stamping this layout!  This layout uses loads of stamps! Here is my complete supply list:

ColourArte: Radiant Gels-- Indian Copper 
Core'dinations :Cardstock (White Wash Picket Fence), Sanding block and dust buddy
PACON- Multi Media Paper
Inks: Tsukineko Memento (Tuxedo Black and London Fog). Note you may want to substitute Jet Black Archival Ink for the Memento Tuxedo Black as this project does use some watercolor techniques.  I worked fast so my ink did not really bleed.
Distress Inks: Antique Linen, Pumice Stone, Abandoned Coral
Distress Markers: Frayed Burlap, Tea Dye
Graphic 45 Papers
Crop-a-dile hole punch
Paper Studio Banner Punch
Spectrum Noir #EB8
Water Brush
Jute
Eyelets

I started by placing my Sin City Stencil under my Core'dinations Cardstock and sanding in multiple location on my background.  


In the space left over I stamped the Sequence Waste Stamp repeatedly, overlapping the stamped images to mimic a fish net look. I used a torn piece of paper to mask off the parts I didn't want stamped.  This created a subtle texture over my background. 

I then cut a frame from patterned paper and added it over my background page.

I decided that the frame was too plain so I punched holes in the frame and threaded jute through the holes and added a bow at the top of my layout. 


I then stamped the ship on Multi Media paper and added it to the top right corner of my layout.


I added my matted photos and a banner across the upper left corner. 
                                                 
I then stamped lots of sea images onto Multi Media paper.  For the Diving Helmet I painted over the image with the Radiant Gels. The other images except for the shell were painted with Twinkling H2Os.


For the Sea Shells I used my Distress Markers and drew an ink line along the outer edge and then use my water brush to pull the ink toward the center of the shell.

I then fussy cut all the images  and added them as accents throughout the layout.  
                                  
I stamped my title on to my hand made tags and added them to my layout. 

Here is the finished project!


Copyright Text

Blank Page Muse 2018 Sin City Stamps 2013