Showing posts with label Hearts. Show all posts

Friday, February 20, 2026

Be Mine

 Hi everyone, Steph Ackerman here today using some amazing stamps and stencils from Blank Page Muse.


Blank Page Muse Stamps: Kisses Cammy, Be Mine
Blank Page Muse Stencil:  Hearts and Broken Hearts


Stamp and emboss Cammy, coloring her with Copic Markers.


Place the heart stencil over the image and lightly ink with pink ink, avoid inking over Cammy.


Create a card from red cardstock.  
Die cut an oval from black cardstock and place over the image.
Add to the card.

Finish by adding Stickles to the flowers.

Stamp and die cut Be Mine, adding to the card with foam adhesives.

Thanks for stopping by.

Steph

Looking for more Inspiration? Click the links below!
The Blank Page Muse Shop https://blankpagemuse.com/


Friday, February 10, 2023

Valentine's Day Card

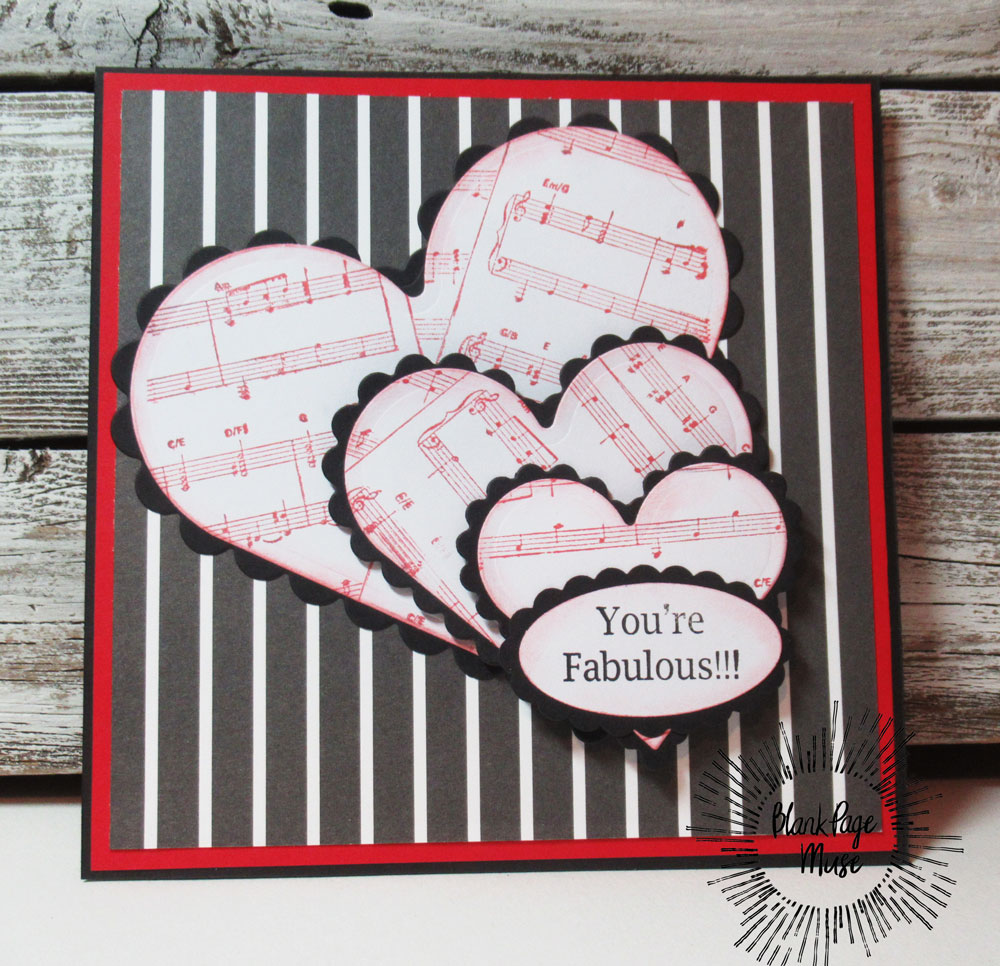
Hi everyone, Steph Ackerman here sharing some amazing stamps from Blank Page Muse and I Brake for Stamps.


I stamped the Music Background and used several heart shaped dies to die cut graduating sized hearts.
Matting each heart with black scalloped cardstock hearts, I arranged them on the card with foam adhesives for dimension.

 The sentiment was stamped, punched out and added to the smallest heart.

The full tutorial can be found on my blog.

Thanks for stopping by.

Looking for more Inspiration? Click the links below!
The Blank Page Muse Shop https://blankpagemuse.com/

Save 15% of your Blank Page Muse orders with discount code:  BPMSteph

Monday, March 28, 2022

Hello - A Sweetheart Bouquet

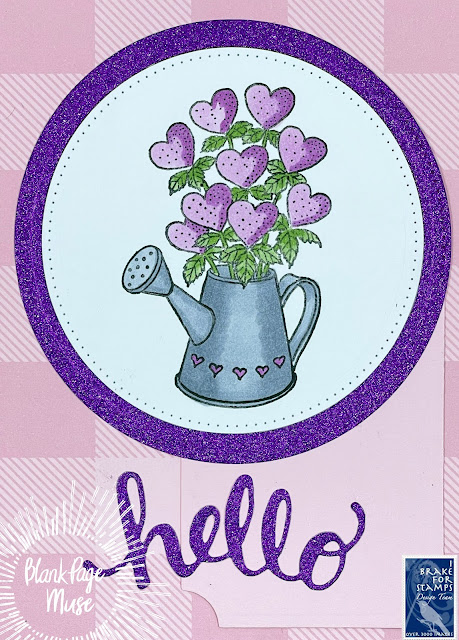
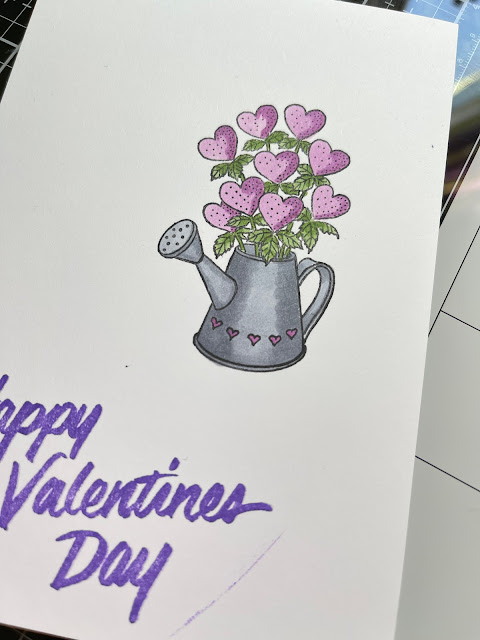
Today I am excited to share this beautiful card I created featuring the Heart Bouquet Stamp  from I Brake for Stamps!


 This stamp looks so pretty and can be custom colored to coordinate for any occasion that you want to send a little extra love! 


I chose  purply-pinks for my hearts! I chose to mat my stamped image onto glitter card stock and die cut my greeting from the same glitter card stock. You could even pair it with the Happy Valentine's day stamp. 

I hope you are inspired to get creative with your Blank Page Muse Stamps.  


Saturday, February 13, 2021

Heart Shrine Shadow Box

Hello everyone, it's Monique here on the blog to share an inspiration idea with you.

It's almost Valentines day, so what better day to make a personal gift for your loved ones.  To me Valentines day is about hearts, the heart is a symbol of love, and that is why I made a heart shrine.

Ofourse it's not just a Valentines project, you can make shines with different objects for any occasion, just use what speaks to you and decorate your heart out.


Supplies used, 

Blank Page Muse rubber stamp sets:

Heart Feather Wings Crackle Background stamps SC 0025

Romance Classic SC 92

a tin (I used an altoid tin, but you can also use a small box)

cardboard (from an old box)

Bookpaper

Distress ink in: Barndoor Red, Mustard Seed, Rusty Hinge, Black Soot

Colored pencils in greys

Black stamp ink

Faber Castell Pit pen in black

Metallic waxes in Copper, and turquoise

Acrylic chalk paint in green and off white

Black Gesso


For detailed instructions, see Video:


Here some more pictures for a closer look at different angles.


Thank you for stopping by and have a great day! 
I'd love to have you follow/subscribe on my YouTube channel

Wednesday, January 27, 2021

Love Greeting Card

Thank you so much for stopping by. My name is Ana and creating cards is a passion of mine. It is with great joy that I present to you this cute Valentine’s Day card. This card uses the "Love" stamp from the Love Faith & Family Vintage Art Rubber Stamp Full Sheet SC88I made it for Valentine's Day but it really can be given to someone special on any given day.  Who doesn't like to hear they are loved right?


Supply list:


Instructions:

Begin by adding the red foil cardstock to the card base. The shininess of the foil will add a nice elegant look to this Valentine's Day card.
 
Next, stamp the image of the word love on to a watercolor paper. This cute and vintage looking “Love” stamp makes the perfect center piece for a card. 

This next step is optional.
Cut out the inside frame of the stamp. This step is suggested so that a piece of red foil cardstock can be placed under the stamp creating a shiny frame around the word love.

Creating a 'frame' or  'border' like this helps to balance the card once all the elements are put together.  

Blending markers such as Copics, are useful in creating a ombre effect in your card making as I did with the Love stamp.


Using some watercolor markers, choose  colors that will coordinate with your card theme. 
After you have finished coloring in the card, run it  through a die cutting machine with the hearts embossing folder.
This will create dimension. 
Cut this piece to a size of 1/4" smaller than the first layer (the red foil layer).


Adhere the Love onto 1" strip of red foil. 

Finish the card by touching up the letters  with some flossy accents so that they would shine just like the red foil cardstock that surrounds the card. 


Simple and quick Valentine's Day Card created with this wonderful Love Stamp. 


I hope this inspires you, I hope you create and be happy. Thank you so much for stopping by.                                                                             ~ Ana


Monday, February 18, 2019

Faith Journaling Canvas

I have often marveled at the beautiful faith journaling pieces I have seen and have wanted to try to create a piece for my self. Since this month's challenge also called for a little masking, I decided to incorporate a masked heart.  
Instead of a Bible verse I choose the theme of a recent sermon. If  that isn't your thing, how about adding a quote from your favorite author? 


Blank Page Muse Supplies

Other Supplies
10x10 Canvas Board
Faber Castell India Ink Pitt Pen
Jute (twine)
Glaze
Archival Ink 
Glimmer Mists 
Scrap paper (for masking)


Start by cutting a heart from scrap paper and use it as a template to draw a heart onto the canvas.

With a pencil, write your bible or sermon quote inside of heart. Erase writing lines. 


Mask heart again for stamping. Begin stamping the BPM Correspondence Pens, Ink & Postage Art Rubber Stamp Sheet by Katy Leitch


This was my canvas after I finished Stamping.

Add Jute around heart border. 

Begin Misting Heart with Glimmer Mist.

Once Dry Add glaze over heart to see color.  This look a little sloppy as I used a water base glaze with the water based mists and the glaze started pulling the mist off a bit. 

Once the Glaze is dry. Mist the rest of canvas as desired to finish.   I included lots of photos so you can see the color depths.


The Blank Page Muse- https://blankpagemuse.com/


Wednesday, February 6, 2019

Hanging Heart


February is the month of hearts, flowers, chocolate and love.  So to go along with the romance, here is an inspirational hanging heart to help keep a little romance in your home.  A wooden heart from Dollar Tree was used, but if you can't find these near you, one can always use chipboard or layered (cut and glued back to back) paper stock instead.

Supplies:
Hot Air Balloon Stamp
Bird Form Hot Air Balloon
Steampubk Propeller Hot Air Balloon
Octopus Time! Octopus Balloon
Airship Bathtub
Heart Stamps
Wooden Hanging Heart base
Black Archival Ink
Distress Oxides: Broken China, Worn Lipstick, Festive Berries, & Wilted Violet
Adhesive
12 X 12 White Card stock Sheet
Scissors
Post It Note/Masking Product
Blender Tool for Oxides
Pearl and Heart gem embellishments

Instructions:

1. Pull out your heart base and remove any ribbons or tags.  Take out your 12 X 12 white sheet and trace out with a pencil around the heart shape.  Once traced out, cut out the paper heart.  Put the wooden heart base aside.


2. Get out all of the balloon stamps, ink and stamp each one at different opposing parts of the cards.  As you stamp, make sure to place the stamps so there is plenty of negative space between and that there is a balloon stamp that takes up each corner to balance off the design.  As you stamp, also stamp out a mask of each image (using your preferred masking tools, in this case post it notes were used) and cut out.  Once all the images are stamped out on the card stock and the masks completed, layer the masks over the correlating stamped images.

Stamped and masked balloons.

3. Pulling out three of the various doodle hearts (the smaller of the hearts), randomly start to stamp in black into the blank negative space. Overlap the sizes, flip, adjust direction.  Have fun!


4. Using a blender, sponge or dry towel, start layer the Distress Oxides within the heart background. I started off with reds, then blue, and lastly purple for shadows.


5. Glue the stamped heart to the base.


6. Remove the masks and hand color with our favorite pens, pencils or whatever you have on hand, the stamped balloons.

7. Ink the edges of the heart with any of the distress oxides that were used on the heart.

8. Add the pearl and heart embellishments throughout the heart to add more interest and sparkle.


9. Punch holes on either end of the top of the heart, punching out in order to balance them evenly while hanging. The wooden heart I had already had where the holes should be punched out.

10. Add your ribbon. Hang on a door knob or wherever you like.

11. Admire how awesome it looks and bask in your crafty magnificence.


Looking for more Inspiration? Click the links below!


More ideas & crafts by Mercy


Copyright Text

Blank Page Muse 2018 Sin City Stamps 2013