Showing posts with label sugar skull. Show all posts

Friday, December 18, 2020

A non traditional Holiday Ornament; Day of the Dead mirror

 Here is another addition to the Holiday ornaments all Blank Page Muse DT members are showing this month. The people who know me a bit, know about my love for the darker side of art, and that is why I decided to make an ornament with a skull theme. To make it less scary, glitter paint and gems were used to color the sugar skull stamp by Blank Page Muse.

The plastic mirror was in my stash for a few years, waiting to be altered. I thought it would be the perfect thing to use to make an ornament from. Not just to decorate a (gothic style) Christmas tree but also to be used as decoration for Halloween or Day of the Dead. The only problem was it was cheap looking and had butterflies for decoration. To adjust the look of the mirror to the gothic look I wanted to achieve, some clay skulls were used for decoration. Next step was to transform the mirror frame from plastic to an antique silver look. In the video below all steps are explained.


List of materials:

Stamp used: Blank Page Muse Day of the Dead Sugar Skulls SC 52, designed by Michelle Frae Cummings

Plastic mirror

Transparent piece of plastic (I used an overhead projector sheet)

Black Gesso

Silver Metallic paint

Glitter paint in Red, Green and Silver

Gem stones in red

Clay ornaments (of course you could also use metal or plastic charms)

Wire

Ribbon in black and grey

Waterproof permanent stamp ink in black

Stamp tool (makes stamping on plastic easier)

Glue dots or double sided tape (don't use glue on a mirror)


All instructions are in the video here:


This is what the back of the mirror looks like after altering it. I love how the metallic silver paint gives the gothic look I aimed for, Imagine it hanging it next to lights in the Christmas tree, it would catch the light perfectly and be all festive and glittery :-)


I had fun creating this mirror, it's always nice to find a use for things you find in your stash, even if it is not the way it was intended to be used. You might want to have a look at the things you have collected in your stash, you never know what you find :-)


Don't forget to check in at this blog again some day soon for more inspiration.


Wednesday, November 7, 2018

Altered Sugar Skull

Hi all

Today you will learn how to turn a plastic Halloween skull into this sugar skull 
using The Blank Page Muse Stamps!


You will need
Plastic skull
gesso
acrylic paint in assorted colours
Permanent ink pad
tissue paper
larger resin flowers.

Cover the skull in two coats of gesso and then white paint.


Next stamp out the flowers on to tissue paper and then paint then with acrylic paint


. Do this on a non stick surface as the paint with go through the tissue a little.


Once flowers have dried, cut them out and adhere to skull using heavy gel medium. 
Add resin flowers for the eyes.


Ta Da!

Be sure to visit us for more inspiration at the following links!

Blog
 https://blankpagemuse.blogspot.com/...
The Blank Page Muse Shop http://blankpagemuse.com/

Tuesday, November 6, 2018

Day of The Dead Art Card

Welcome to day 5 of our Day of the Dead Art - Celebration!

This card was created by one of our guest designers, Adam.


Its called Sugar, Sugar and you can see the full tutorial here.


Please follow us for more Inspiration!

Saturday, November 3, 2018

Paper Mache Sugar Skull

Welcome to day 3 of our Day of the Dead Art - Celebration!

This traditional sugar skull was created by Inspiration Team member Chris Pozzi.


Chris stamped this Flower collection onto tissue paper before adhering to a paper mache skull. She then colored in the images with brightly colored markers and drew in the teeth with a black pen. 


Thanks for coming by!
Please visit the following for more inspiration!

Wednesday, October 31, 2018

Day of The Dead Art Celebration

Welcome to our Day of The Dead Art - Celebration! 
For the next couple of days, we'd like to share with you some mixed media art, 
created by some of our inspiration team members.
Enjoy

Today is day 1.

This "Faux Stained Glass" piece was created by Michelle Frae Cummings who is a mixed media artist based out of California, USA. These are her stamp designs for Blank Page Muse.


This piece I created by stamping  Sugar Skulls onto white tissue paper and coloring in with colored markers. You can see the full tutorial here. 

Thanks for coming by!
Please visit the following for more inspiration!


Saturday, April 15, 2017

Day of the Dead Triptych


Hi all, today I show you how to make this Day of the Dead Triptych.


Supplies:

Sin City stamps Sugar Skull Floral Flourish and Praying kneeling skeleton
flower flourish from the Day of the dead sugar Skull sheet

Die Artfull Dwellings, but these shapes are also easy to handcut
Black ribbon
Paints in  blue, quinacridone gold , red, dark grey, yellow iron oxide.
Antiquing cream in white (or white paint)
Gesso
Matte Varnish
Chipboard (I used the back of a paperpad)
Black waterproof stamp ink
Arylic block
Unmounted rubber stamp  about the same size as the kneeling skeleton stamp
Glue


Instructions:

1)  Cut out house shapes of chipboard ; 4 smaller and 2 larger (or use the Artfull dwellings die) and gesso both sides  (size needs to match the stamps you will be using)


2)  Paint all 6 shapes with the grey paint.
3) Add a layer of antiquing cream over the grey, let it dry and wipe back using a baby wipe to give it a worn look. (This can be done with acrylic white paint too, it's just a bit harder. If you use paint  make sure it has not dried completely before you wipe it off)

Brush the edges with the ink pad to create a distressed look.
4)  Now we will do a technique that is called "Mirror stamping" As you can see on the picture of the Triptych the Praying kneeling skeleton are both facing the middel pannel, so we have to do a little trick to make one of  the skellies face the other way using the same stamp.

Take an unmounted rubber stamp , here the Sugar Skull Floral Flourish that 's on the middle pannel is used, lay it on the work surface face down.
Ink up the Praying kneeling skeleton and make an impression on the back side of the unmounted Skull stamp.
Take the left pannel of the triptych and press it (white side down) onto the impression you just made on the back of the skull stamp. See picture below


 Make sure to press firm and evenly to make a good impression, work fast so the ink will not dry before you can stamp.
 Here is the result, on the left the mirrored image and on the right the image as it is on the stamp.

 5) Make an impression of the Sugar Skull Floral Flourish on the middle panel, and add the flower flourish stamp on the top of each panel.
6)  Because the antiquing cream will keep reacting with water add a layer of matte varnish (be carefull the antiquing cream will react with the varnish too). If you used acrylic paint you will not have this problem so no need to varnish then.
When varnish is dry add  iron oxide yellow paint  thinned with water to the edges
 7) Next add some quinacridon gold, with every layer of paint you want the image and background to shine though. Therefor you need to thin all thepaints used with water.
 8) Use some red an blue to make the Triptych a bit more colorful but make sure you will be able to see the stamps shine through the paint layers. Adding paint over the stamped image will give a more aged look as stamping over the paint. and as you can see- the imperfections of the mirror stamped skeleton are not noticeable anymore.
9) Cut two pieces of ribbon to use as hinges.  Take the 3 panels, line them up with some space between the panels, add a layer of glue and attache the ribbons as shown in the picture above.


10 ) Next put the stamped pannels in their right place.


Thanks for visiting.

Here's our quick links to find even more inspiration and to grab your own Sin City Stamps:
Sin City Stamps Store
Sin City Stamps Facebook Group
And you are here at "The Blog" but make sure you keep checking back - even better "follow" us so you don't miss any of the Inspiration Team posts

Sunday, April 9, 2017

Get Book Marked......

Hi Everyone!


How did you all enjoy the "Sugar Skull" Blog Hop we had in March - lots of fun????? I loved creating with Michelle's Day of the Dead Sugar Skulls Stamp Set so I decided to play around with them some more and I made these colorful bookmarks to share with you today!!


Supplies List:
  • Sin City Stamp Set Day of the Dead Sugar Skulls
  • White paper or cardstock
  • Black Cardstock
  • Ink Sprays in colors of your choice
  • Black Archival ink & Black Stazon ink
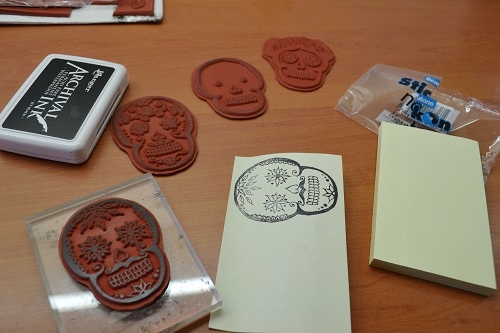
  • Sticky Note Pad (big enough to stamp sugar Skulls) for masking
  • Colored string or raffia
  • Shrink Plastic
  • Colored Pencils
  • Heat gun & heatproof tray
  • General supplies: scissors, ruler, guillotine, double sided tape, glue, hole punch

Instructions:


1. Firstly you need to cut your white paper or card into strips for stamping on (you can leave as a whole sheet - ink spray and then cut to size - totally up to you!) You can cut any size you like - these are cut at 6cm width by 21cm in length which allows for 3 of the "skull" stamps overlapping. An alternative is to make your bookmarks shorter and just use 2 of the skulls!


2. Grab your ink sprays - any colors - remembering that lighter colors work best as they allow your stamped image to show clearly. You can mop up any excess spray with paper towel (the mop up paper towel makes for great backgrounds for other projects!!) Set these aside to dry while you work on the next step!


3. As you can see on the finished bookmarks the stamping of the skulls is overlapped so we need to make up some masks. Stamp skulls onto sticky note pad sheets and cut out - LOL remember to stamp part of your image onto the sticky part of the piece so it actually sticks to your project when masking!!!


4. When your ink sprayed pieces are dry you can start stamping!! Stamp one image in the middle of the strip and cover with the "mask" and then stamp skulls above and then below. I like things running off the page and at different angles for more interest!


5. Cut your black card slightly larger than your inked and stamped strips and adhere with double sided tape or a glue stick and punch a hole in the middle at the top of the book mark.


6. Now you can just add colored raffia or string to the tops of these bookmarks and call them finished but I still wanted to play with the stamps so I made some shrink plastic "additions" to add and what fun it was!!! Use black Stazon to stamp your shrink plastic (I had a small piece of clear plastic and also white - you can use whatever you have on hand - mine is years old but still shrinks perfectly!!)

Color images with colored pencils and cut out - remember to use your hole punch to punch a hole at the top so it can be threaded through after you have "shrunk" it!
Use your heat gun and a heat proof tray to shrink the plastic - shrinks to under half the original size.


7. Thread the colored raffia through the shrink plastic skulls and attached to the tops of the bookmarks, tie bows to finish them all off!
Now you have some bright and sweet sugar skull bookmarks!


Thanks for joining me today!!


And before I go here are some handy links for you!!
Sin City Stamps Store - where you can grab all your fav stamps!!!
Sin City Stamps Fan Group at Facebook - where we all can share our creations!!!
And of course here at The Blog where the DT share all their amazing creations!!!

Happy Stamping!

Sharon


Thursday, March 23, 2017

Day of the Dead Sugar Skull Stamps Blog Hop!


 Hello everyone, 
Welcome to our Sin City Stamps Blog Hop!

*
For this blog hop, we are featuring stamps
 Designed by Michelle Frae Cummings!
This stamp set has a total of 4 skulls and 10 extra stamps for you to create with.


The premise of this blog hop is for you to meet our in house Inspiration team members along with a few guest members, discover more ways to create with these stamps  and possibly win a set for yourself! (We are giving away 3!)


Blog Hop Participants:

  1.  Sin City Stamps (you are here)
  2. Michelle Frae Cummings
  3. Katie Lamb
  4. Chris Pozzi
  5. Irit Shalom
  6. Shilpa Nagaonkar
  7. Sharon Rogers
  8. Jenn Gary DuBell
  9. Monique Van Dijk
  10. Adam
  11. Kim Johnny
  12. Granne
  13. Anne

To qualify to win your own Day of the Dead Sugar Skulls stamp set, we ask that you visit each of the blogs participating, leave a nice comment and then come back here and let us know which blog projects you liked the most and why.

The blog hop will end on March 27th and the 3 winners will be announced here on the Sin City blog and on our FB Fan Group on March 28th.

Have fun hopping and good luck!


.

Copyright Text

Blank Page Muse 2018 Sin City Stamps 2013